
Introduction
Drawing digitally in a realistic style using the Pencil Tool is a creative process in which an artist uses software like Clip Studio Paint to create images that resemble traditional art in digital form. This technique allows artists to create illustrations with incredible detail and realism, mimicking the pencil effects on paper surfaces.
Drawing in a realistic style on digital devices involves utilizing digital tools and techniques to create images that resemble the real world with a high level of detail and precision. This process combines the capabilities of traditional art with the advantages and flexibility of digital technology. This includes tools such as pencils, brushes, and blending tools that can simulate the effects of traditional media.
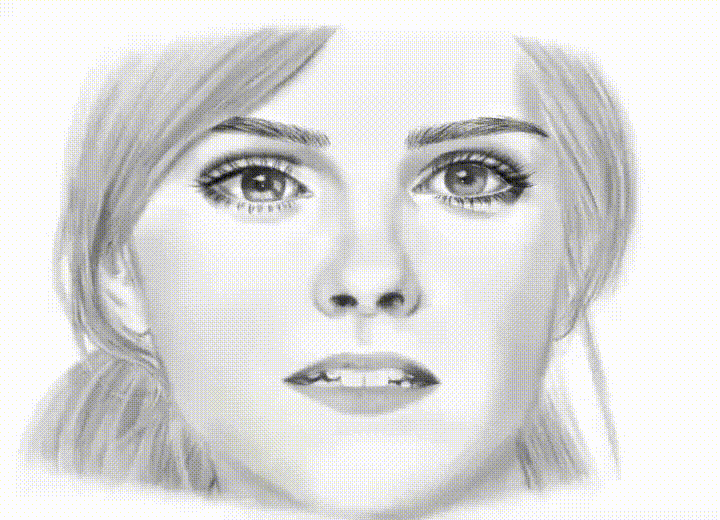
In this article, I will provide the steps I commonly take when drawing digitally in a realistic style. The goal is to impart knowledge to beginners about creating the illusion of real dimensions and generating space and depth in artwork, thus helping convey the feelings and emotions of characters or subjects in the image.
I would like to provide a disclaimer first, the image clips displayed below are captured using the video recording feature in Clip Studio Paint. Due to the limitations of the device I am using, I am unable to record using third-party applications as they would excessively burden the laptop's performance. Consequently, this has led to some of the tools I use not being fully recorded.
Key Tools Used
Pencil Tool
The Pencil Tool can simulate the sensation of a traditional pencil. Additionally, the Pencil Tool can respond to pressure, allowing users to control the darkness of strokes according to the applied pressure. The main advantage of digital drawing tools is the ability to erase and modify without damaging the image. Users can make changes quickly and without leaving traces.
The Pencil Tool comes in several variations, each with distinct features. In this article, I will focus on using a single Pencil Tool to enhance focus and time efficiency. This choice is not because other types of Pencil Tools are unsuitable, but to emphasize that one type of Pencil Tool alone can yield results akin to traditional art. I'm using this setting, you can either follow it or create your own preferred configuration.
Blur Tool and Blend Tool
The Blur Tool and Blend Tool greatly aid in creating the illusion of dimension and space in artwork. These three tools (include Pencil Tool) provide the experience of traditional drawing in digital form. The Blend Tool and Blur Tool are commonly available tools in drawing software such as Clip Studio Paint. These two tools hold distinct roles in the process of creating digital images in a realistic or other artistic style. The purpose of the Blend Tool is to create smoother and more natural transitions, generate depth and dimension in the image, and produce realistic gradations.
On the other hand, the Blur tool is used to soften or blur specific parts of the image. Its utility lies in creating depth effects, distance, or focus on image elements. Both tools are often used in conjunction when digitally drawing to create the illusion of realism and smoothness in the image. Understanding how and when to use the Blend Tool or Blur Tool will greatly aid in achieving desired outcomes in the image; of course, this will be both fascinating and effective when applied directly. In the Blur Tool and Blend Tool, I didn't make any specific adjustments like I did with the Pencil Tool; I simply used the default settings. If you feel it's not quite suitable, you can customize the settings according to your preferences.
Steps for Drawing in a Realistic Style
1. Initial Sketch and Basic Setup
Creating a rough sketch as the foundation of the drawing. Adjusting the size, opacity, and smoothness of the Pencil Tool. Overall, the basic sketch serves as a strong foundation for creating high-quality realistic images. It provides artists with a guide to develop further details and achieve a satisfying final outcome.
2. Adding Initial Detail
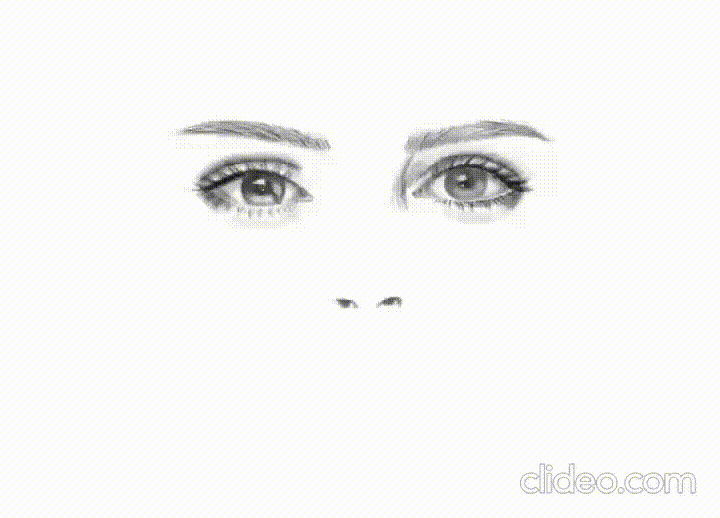
Incorporating detail into the main elements of the drawing. Experimenting with pencil size and pressure for desired effects. Utilizing layers allows you to better organize the elements of your artwork. Each object, background element, or detail can be placed on separate layers. If you want to alter or correct a specific part of the image, you can do so on the relevant layer without affecting other elements. Each layer can have opacity, blending modes, and other customizable effects, providing greater control over the final appearance of the image.
I have a habit of not labeling the layers I've created, so when I want to make corrections or add details, it's difficult for me to find that specific layer. As a result, I end up creating numerous layers. Therefore, I recommend to all of you to always label each new layer you create to streamline your workflow.
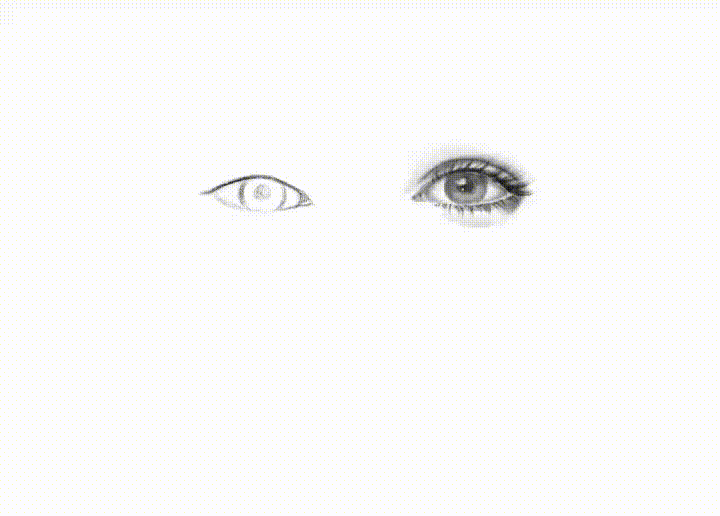
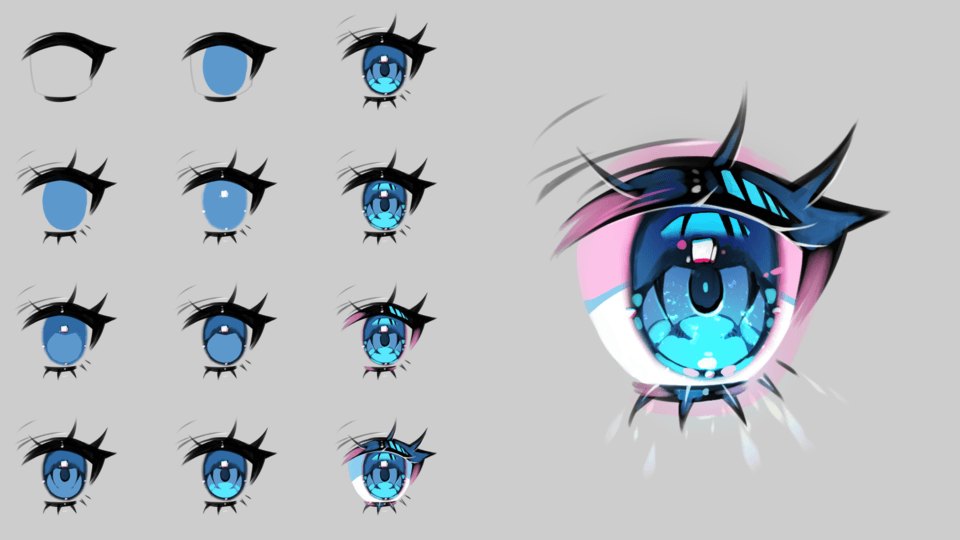
I draw the pupil using the Pencil tool, then I add a subtle effect to its circular line using the Blur Tool. To create the eye's iris, I continue using the Pencil Tool, but I apply a white color to it, as well as the light effect on the eyeball. Then, I create a new layer (multiply) to add shadow effects.
I want to emphasize to all you beginners not to worry about mistakes. If you're afraid of making mistakes, simply create a layer above it, and so on, until you feel confident enough to do it all in one layer. I tend to use a (normal) layer when sketching and usually use a (multiple) layer when blending. You can follow this or explore with your own style.
3. Blurring and Blending Techniques
Make sure to apply blurring to specific lines to achieve a smooth effect and to eliminate unnecessary details. Use this selectively on parts where it's deemed necessary. Furthermore, to avoid disturbing other existing elements, it's advisable to create a new layer when about to perform blending. It's worth noting that I typically create a sketch for blurring on one layer and place the blending elements on a separate layer to prevent mixing.
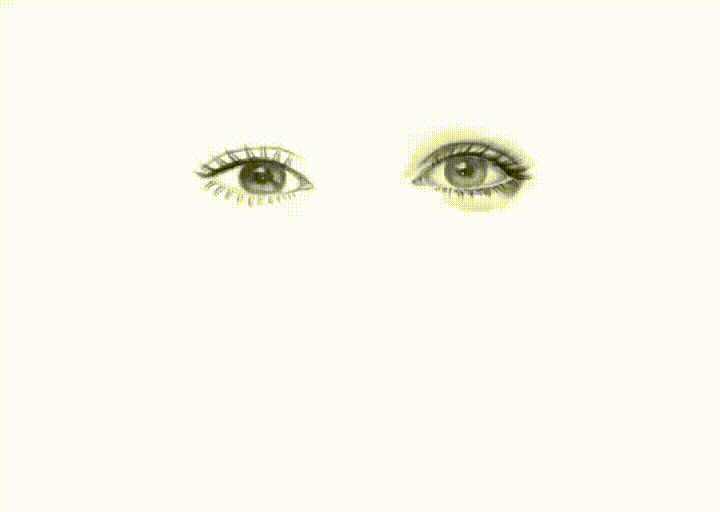
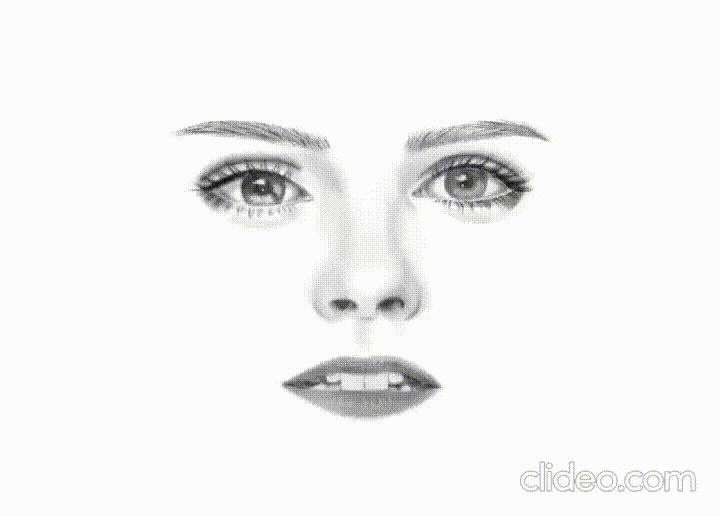
Use the blend tool slowly to create fine details, this will produce a more natural and realistic effect. In the meantime, when using the blur tool, apply this tool to the areas that require a gentle touch. By using the blur tool, you can soften overly sharp details and ensure that the texture appears natural. For example, the lower eyelid lines, circular lines of the pupils, corners of the eyes, lines on the nostrils, and the lines of the lips."
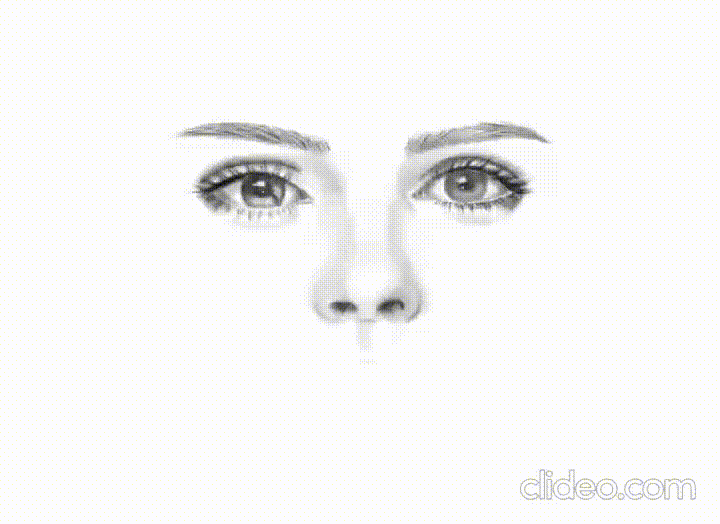
Like I mentioned earlier, use the blur tool on the outline. Meanwhile, use the blend tool to smoothen the inner areas. Add a glossy effect as an additional touch. For example, on the lips section, I employed the white color with the pencil tool. Decrease its opacity in the range of 40-50% to avoid excessive contrast. Similarly, on the teeth section, I also used the pencil tool to refine the shape and adjust its opacity.
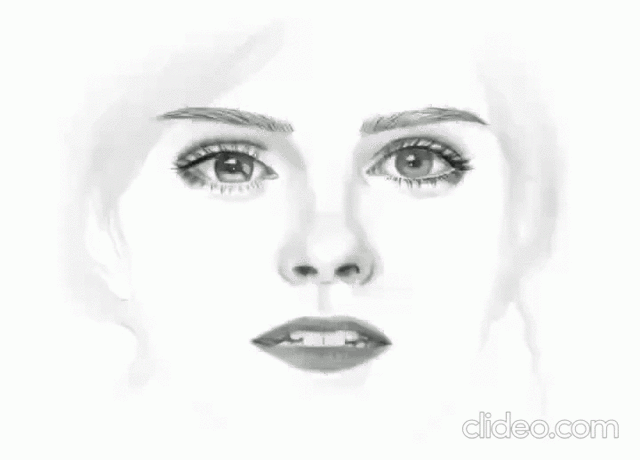
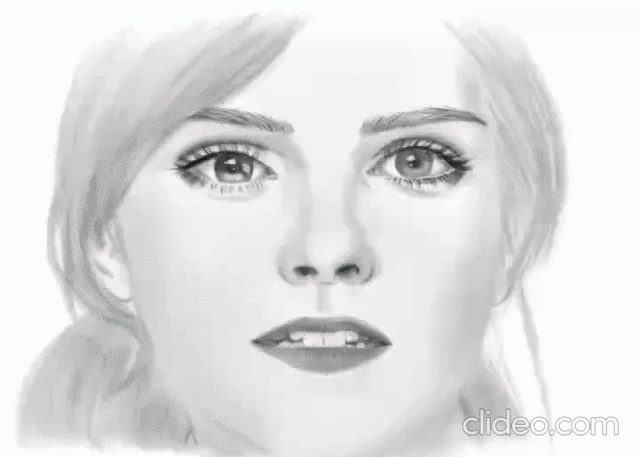
4. Final Details and Highlights
Adding subtle details like textures, highlights, and other effects. Achieving a realistic impression with precise finishing touches.
Conclusion
These are the basic steps I take in drawing realistically. It's quite easy, isn't it? All you need to do is create a rough sketch, blur and blend, and add layers to make the image appear more realistic. Compared to traditional media, using digital tools greatly simplifies the process and saves time. Certainly, for an artist, using digital tools to create artwork with a traditional sensation is an extraordinary experience. Of course, I am still a beginner in this field. I don't yet have a proper and correct way of drawing. That's why I will continue to explore and practice.
From these basic steps, you can continue to develop and create even more remarkable works. I also faced challenges when trying digital tools and eventually returned to using traditional media like pencils and paper. After exploring more about Clip Studio Paint, I eventually found my own style and approach to creating art. I hope these tips can help beginners who are unsure where to start.
Overall, drawing realistically provides a profound and powerful visual experience, imparting authenticity and sincerity to art enthusiasts. These aesthetic advantages make this drawing style an intriguing and valuable choice for many artists and art enthusiasts. That concludes my tutorial and tips; see you in the next article. Thank you.
Users who liked this post


Comment