Creating a loop animation
Let’s make a simple looping animation by moving parts of a finished illustration.
You will learn the basics of Clip Studio Paint’s animation features with by following these steps.
This tutorial is perfect if you’re just getting started at animation.
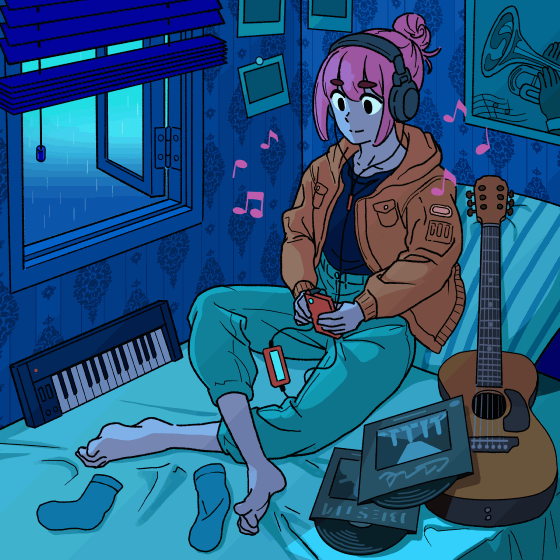
The following illustration is used for explaining this tutorial.
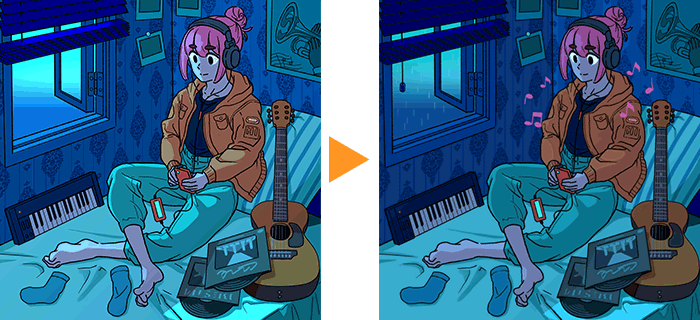
First, decide which parts of the illustration will stand out when animated.
Animated lighting and effects can also effectively bring the artwork to life.
The example illustration is a character relaxing while listening to music in a dark room.
We can animate the character blinking, the light from the window, music notes, rain, and the string on the blinds to convey the passing of time.
You can download both the example illustration and the finished animation in the links below.
Feel free to use them while following along with the tutorial.
Illustration
Animation
Let’s animate the illustration with the following process.
We will animate the blinking as a frame-by-frame cel animation, and animate the light from the window and the blinds as keyframe animations with specific frames.
This tutorial uses the tablet version of Clip Studio Paint, but you can make animations with mostly the same operations on PC and smartphone.
For the basic instructions on how to use Clip Studio Paint on other devices, take a look at the articles below.
Basic Windows/Mac version operation
Tablet version: Learn the basic operations of Clip Studio Paint
Smartphone version: Learn the basic operations of Clip Studio Paint
1. Organizing the layers
First, organize the illustration’s layers to make it easier to animate.
Separate the animated parts from the still parts in the Layer palette.
Illustrations with clearly separated line art and coloring layers will be easier to animate.
If you’re unsure about layer organization, then loosely separate into the character and background.
The example has the following layer structure.
In order to easily draw the different images for frame-by-frame animation, the character and the background layers are separated into “line art” and “colors”.
The “Light from window” layer has opacity set to 50% with the Glow dodge effect. The light changes will be expressed by adjusting the opacity of keyframes.
2. The Blink
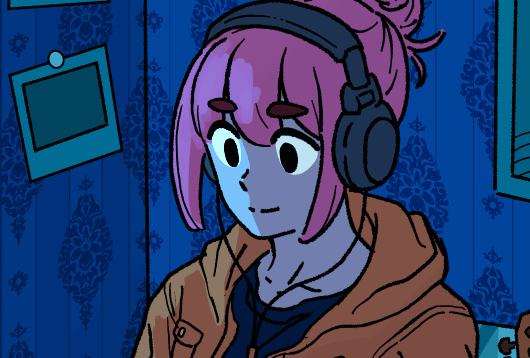
Let’s work on animating the character’s eyes to make them blink.
Clipping parts
First, we will need to separate the eyes from the rest of the face that will not move.
In the Layer palette, select the “Character - lineart” and “Character - colors” layers.
To select multiple layers, use the checkboxes to the left of the thumbnail.
Tap the Selection pen sub tool from the Selection area tool.
Using the Selection pen, select the area as if you were drawing with a pen. You can adjust the brush size as needed.
Create a selection area that covers the shape of both eyes.
Use the Selection eraser sub tool to tidy up the selection made with the Selection pen.
Make sure that both the line art and color layers are in the selection area.
Once both eyes are in the selection, press Cut and paste in the Selection launcher.
Layers are created with the eye shapes cut out of the “Character - lineart” and “Character - colors” layers in the Layer palette.
Once the layers are created, deselect the area.
Put the line art and coloring layers into a layer folder
To use multiple layers as one picture (cel) for a cel animation, all layers need to be in the same folder.
Create a new folder and put both the line art and color layers for the clipped out eyes into it.
Rename the layer folder to “a”, and also change the layer names from “Character - lineart copy” to “Eyes - lineart”, and “Character - colors copy” to “Eye whites”.
Move layer folder “a” one place above the “Character - lineart” layer.
Fill in for the clipped out parts
If the “a” folder is hidden, then there will be a blank area where the eyes have been cut from the “Character - colors” layer.
Fill in the blank space on the “Character - colors” layer so that gaps don’t appear during the blinking animation.
Use the Pick color from layer sub tool under the Eyedropper tool to select the colors from the “Character - colors” layer, then paint the blank space with a brush.
With the parts that move and parts that don’t move separated, we are ready to make the blinking animation.
How to make a cel animation
To make a cel animation, prepare multiple different drawings (cels).
We will add two more drawings to create a blinking animation with three pictures.
Draw and designate each cel with “a” for eyes opened, “b” for mid-blink, and “c” for eyes closed.
You can arrange the cels on the Timeline palette.
Timeline
First, select Timeline from the Window menu to
display the Timeline palette.
Then tap New timeline to create a timeline.
In the following New Timeline dialog, set the Frame rate to “8” and the Play time to “24” frames.
The timeline set up is finished.
Each layer on the Layer palette is treated as a track on the Timeline palette.
Tip:
The frame rate is the number of cels shown per second in an animation.
We set 8 frames per second for the frame rate and the length to be 24 frames, so the animation will be 3 seconds long.
For more information on frame rates, please check the following article.
Animation folder
Next, create an animation folder and place the layers you want to animate in it.
Layers placed in the animation folder are treated as cels on the timeline.
Tap the New animation folder button on the timeline, and an animation folder will be created on the Timeline palette and Layer palette.
Rename the animation folder you just created to “Blink” and move it directly below the “Light from window” layer.
The “a” layer folder is now in the “Blink” animation folder.
The "a" folder in the animation folder will be automatically assigned as a cel at the "1" frame on the timeline.
If the cel is not on the timeline, then turn on Add cel to frame when adding layer in Animation from Preferences.
Assigning cels before Ver. 2.1
If you are using Ver. 2.1 or earlier, after storing the "a" folder in the animation folder, you need to assign the cel by following the steps below.
Assign when cels are displayed by setting frames.
To select a frame on the Timeline palette, tap on the numbers for Number of frames at the top. The selected frame will be displayed in red.
On the Timeline palette, with the “Blink” track and Frame 1 selected, tap Assign cel to frame.
In the Select layer dialog, select “a” and press OK.
The cel will be registered to the frame and a cel thumbnail will appear on the track.
Create a new cel
Then, create cels “b” and “c” and assign them, too.
With the “Blink” track selected, select Frame 1 and tap the New animation cel button twice.
Cels “b” and “c” will be created in Frames 2 and 3 after cel “a”.
If there are layer folders with assigned cels in the animation folder, then new cels will be created according to those layer configurations.
On the Layer palette, you can see that the folders for cels “b” and “c” are configured the same as cel “a”.
Tip:
You can change the width of the thumbnails by using the Zoom in/Zoom out button on the Timeline palette. When it’s difficult to select a frame, widen the thumbnail by zooming in.
Onion skin
Next, check that the Enable onion skin option on the Timeline palette is turned on.
When onion skin is enabled, the cels directly before and after the currently selected cel will be faintly visible to serve as a guide when you draw.
When Frame 2 is selected, the frame before it, cel “a” which is assigned to Frame 1, will be displayed semi-transparently.
You can also change the onion skin settings so that the two frames on both sides of the currently selected cel are displayed.
From the Animation menu, go to Show animation cels and select Onion skin settings.
Change both Previous frame and Next frame to “2” for Number of skins.
So now, when we’re working on cel “c” of Frame 3, cel “a” of Frame 1 will also appear on the canvas with onion skin.
Drawing the different pictures
Draw the closed eye of cel “c” on the “Eyes - lineart” layer while using the onion skin reference of the open eye in cel “a.”
The line art color is black.
Next, draw the mid-blink in cel “b” with cels “a” and “c” as a reference.
So that the half-closed eyelids follow the shape of the character’s eyeball, we will draw a curved eye line on the “Eyes - lineart” layer and color in the eye whites in the “Eye whites” layer.
Use the Pick color from layer sub tool to select the the eye whites color in the “Eye whites” layer in cel “a”.
The three cels for the animation are now complete!
Adjusting blink timing
Let’s adjust the timing for the blink animation in the Timeline palette.
Assign the cels in the following order on the “Blink” track.
Frame 1: Cel “a”
Frame 2: Cel “c”
Frame 3: Cel “b”
Frame 4: Cel “a”
You can also change the cel order by dragging the thumbnails.
Insert the mid-blink when opening the eyes rather than when closing the eyes.
By making the eyes close quicker like this, you get a more natural blinking motion.
Tap Play/Stop on the Timeline palette to check how it looks.
The blinking animation is now complete!
3. Light from the window
The light from the window will be a keyframe animation by varying the opacity.
Enable keyframes
While selecting the “Light from window” track on the Timeline palette, and turn on Enable keyframes on this layer.
Add keyframes
Keyframes can be handled with the Object sub tool.
Select Frame 1 on the Timeline palette, and check the box to the right of the Layer opacity in the Tool property palette to add a keyframe to the selected frame.
To check the opacity keyframes in the Timeline palette, tap the + button to the left of the track name to expand the selection.
A diamond icon will appear on the track to indicate a keyframe.
Keyframe set up
We’ll animate the light from the window by varying the opacity for each keyframe.
Set the Layer opacity to 35 for Frame 1, 15 for Frame 5, and 35 for Frame 8.
Duplicate keyframes
Set it so that the brightening and dimming effect repeats every three seconds.
Drag all the keyframes on the “Light from window” track on the Timeline palette to select them.
The selected keyframes will be outlined in red.
Long press on a selected keyframe and choose Copy.
On PC, right clicking will display the context menu, or you can go to the Animation menu, select Edit track, and then Copy.
Long press on Frame 9 on the “Light from window” track and select Paste.
As before, on PC, go to the Animation menu, select Edit track, and then Paste.
Similarly, select Frame 17 and Paste again.
The same animation will repeat three times until Frame 24.
Tap Play/Stop on the Timeline palette to check how it looks.
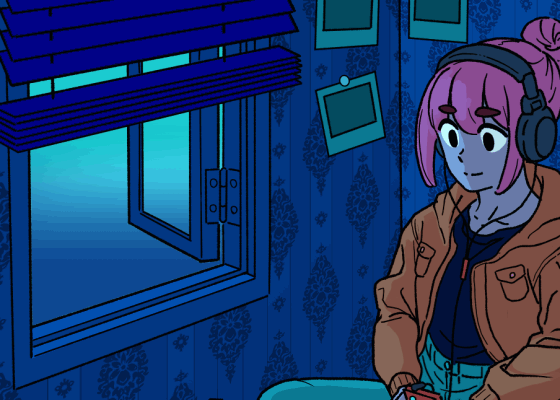
The animation for the light is now complete!
4. Animating other parts of the background
Moving the other parts will be done in the same way for cel animation and keyframe animation.
Music notes
Next, let’s add an effect to the musical notes around the character to enhance the atmosphere of the piece with her music.
Create a new animation folder and move it to the top of the Layer palette.
We’ll name the animation folder “Music notes”.
Select Frame 1 on the “Music notes” track, and tap New animation cel.
Rename the new cel to “a” on the Layer palette.
We used a decoration brush to draw the music notes.
Download the “Handdrawn note♪” brush from Clip Studio ASSETS.
Select cel “a” and a magenta color, and draw music notes around the girl’s face.
Next, select Frame 7 and tap New animation cel.
Cel “b” will be created after cel “a”.
Draw some more musical notes in cel “b.”
Copy the cels so that they repeat twice in three seconds.
Select Cels “a” and “b” of Frames 1 and 7 by dragging, Copy them, and then Paste them in Frame 13.
Tap Play/Stop on the Timeline palette to check the music note animation.

Rain
Like the music notes, we added more drawings outside the window for a cel animation.
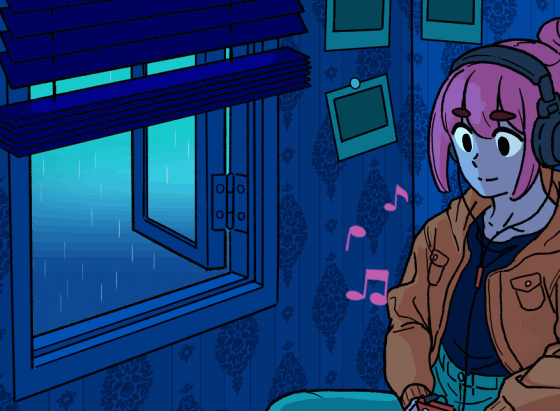
Two cels are placed every four frames and the animation is repeated three times.
Blind string
We also added movement to the blind strings and had them sway from left to right with a keyframe animation.
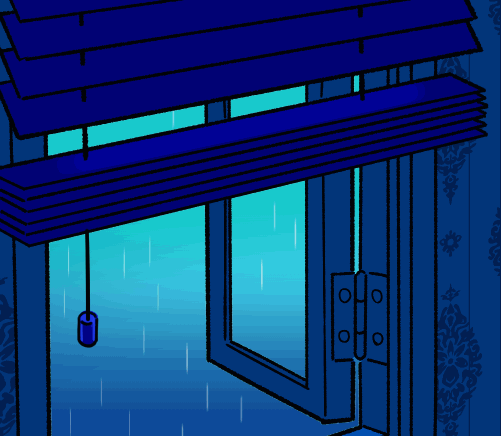
Add a rotation keyframe animation.
When the Object sub tool is selected, the center of rotation of the keyframe animation is indicated by a crosshair.
Drag the crosshair to change the rotation center position.
With the center of rotation at the swinging point of the blinds, set the keyframe Rotation angle on the Tool property palette.
With that, all the animations are now complete!
5. Export
Export the finished animation as a video file.
Since animated gifs can only reproduce up to 256 colors, to properly capture all the levels of light and dark in your animation, it’s best to export it as a movie file.
Select File from the menu, and then Export animation, and then Movie.
For the file format, let’s go with an mp4 file, so it’s easy to post on social media.
In the Movie export settings dialog, set the frame rate to 8fps.
Tip:
By matching the movie export frame rate to the one used in your timeline, you can make sure that the movements in the final movie will be the same as those you previewed when you were animating.
This will make a smooth loop animation for sharing on social media.


Comment