
Introduction
Hello! You are about to embark on an exciting journey into the world of creating animated emotes in Clip Studio Paint. Animated emotes can convey emotions, expressions, and personality in your online conversations, whether in your Twitch streams, Discord chats, or social media messages. In this tutorial, I'll guide you step by step through the essential tools to create your own animated emotes.
Whether you're an experienced artist or an enthusiastic beginner, this tutorial is designed to help you turn your concepts into animated emotes.
So get ready to immerse yourself in the world of digital creativity and take your online conversations to a whole new level. Let's start bringing your ideas to life!
Videotutorial
In this video tutorial I will show you the working interface, you will also be able to see a time-lapse of the animation
Preparing our workspace
Before starting, it is essential to prepare our workspace. In this crucial step, I'll show you how to set up Clip Studio Paint for animation, including layer organization, and explaining essential tools.
A new animation file
We go to File > New and a window will open:
1- We select the animation option
2- We modify the Height and Width of our canvas, in my case I leave it at 2000x2000
3- We select 24 frames per second (this means that there will be 24 images in 1 second) The more frames per second we have, the more fluid the animation will be, but the standard is 24fps.
In the Duration section, we leave it as it is, since we will modify it later, if necessary. You can edit any of these options as you prefer.
Layers and Folders
This is very important to facilitate our work flow. Don't forget to do this step before starting any animation
As you will see, in the layers window you will have one already created (1), this layer represents your first frame, but we will not be able to put layers above it to make the lineart or below it to paint our drawing. In other words, each frame we create can only have one drawing layer.
But let's change that, and make each frame able to have multiple layers. This will help us have a much more organized workspace.
1- We create a new folder
2- We move our Layer (1) to the previously created folder
3- We change the name of the Folder to the same name as the Layer, that is, 1
Now every time you create a new frame, you will have a new folder where you can add all the layers you want
Navigating the tools
In this section I will teach you the basic tools to animate
1- You can move these markers to modify the duration of your animation
2- You can also modify the size of this box, this determines how far you want your animation to be visible.
1- With this option you will create your frames.
2- By clicking on this icon you can activate the onion skin.
3- With these options you can play your animation (>), go to the beginning (I<), to the end (>I), move a previous frame (<I), or move to the next frame (I>).
1- You can zoom in or out of your timeline to see the frames better.
2- Activate this function so that your animation plays in a loop.
3- This option is to create new animation folders, so you can make a new animation independent of the one you have already created.
Onion paper
The onion skin is to display the previous and subsequent frames, we are going to configure this function to our liking
To configure the onion skin we go to “Animation” > “Show animation cels” > “Onion skin settings”
The following window will open:
1- You can modify how many previous or subsequent frames you want to see.
2- Modify the color of the previous or subsequent frames.
3- Modify the opacity of the onion skin
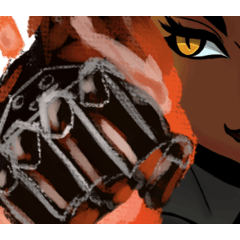
And now? Let's cheer!
With all the most important functions of the animation workspace explained, we can start making our animated emote
1- First I started making the keyframes, before launching the heart and when it was launched.
2- I added a anticipation pose to make the transition from one image to another a little more fluid.
3- Lastly, I drew two reaction poses, making the hair and the jacket move a little due to the movement of the body.
In the end this is the duration of each image, 1=6 frames; 2= 2 frames; 3= 3 frames; 4= 2 frames; 5= 2 frames

Export animation
Here I will show you how to export your animation as an animated GIF or as an image sequence.
Export as animated GIF
We will go to “File” > “Export animation” > “Animated GIF”
After selecting the folder where you want to save your file, this window will appear:
-In Width and Height, modify it so that it is the same size as your canvas (2000x2000).
-In the export range, leave it as it is, it will be the same as the duration of the animation.
-Frame rate, leave it at 24 (or the same fps you set at the beginning)
They accept it and wait.
Export as image sequence without background
The sequence of images will allow us to have our animated gif without a background. For this to work, you must first deactivate the “paper” layer by pressing the little eye on the side of the layer.
We will go to “File” > “Export animation” > “Image sequence”
The following window will open:
1- We select the folder where our images will be saved.
2- We change the name that each of these images will have.
3- For the image to have no background, the file type must be PNG.
4- We leave it in full Canvas.
5- We leave this section as is, it determines how long the animation will last and the frames per second it will have.
We press Accept, wait and that's it.
You can import this sequence of images into Photoshop or another program that allows you to export an animated GIF without a background. Unfortunately Clip Studio doesn't have this feature yet, let's hope they add it in the next updates.
Thank you for reading!
And that concludes the tutorial! I hope you found it informative and understood everything clearly, I also hope you feel inspired to take your creative ideas to new horizons.
Now that you have gained knowledge of the essential tools and processes, I encourage you to continue exploring and honing your skills in the world of digital animation. Return to this tutorial whenever you need it for reference.
Do not hesitate to leave a comment, you can give your suggestions and opinions, I would love to read you.
Thank you for joining me on this journey of learning and creativity! I look forward to seeing your own animated emotes! Until next time!
Users who liked this post


Comment