Beginner's Guide to Easier Line Art Using Vector Layers
Line art takes me forever, but I do love the look of clean lines. So inevitably I find myself drawing line art. Thankfully, Clip Studio Paint has a bunch of features to make line art much easier for me. So for beginners unfamiliar with drawing line art in Clip Studio Paint, here are some ways I like to use things like vector layers, border effects and more to speed up and improve my line art drawing process.
Vector vs Raster layers
So let's begin with what is the difference between vector and raster layers in Clip Studio Paint? Firstly, vector layers are made up of connecting points, lines and polygons, and they can be infinitely scaling and use vector only tools within Clip Studio Paint. And this is better for line art in an illustration process. Meanwhile, raster layers are made up of colored grids, and scaling results in pixelated looks due to the grid system.
Firstly, there are a lot of points here when making a random stroke, as you can see. To reduce the number of control points on a vector line, all you need to do is go to simplify vector line and use this pen tool to draw where you want there to be less control points. This will simplify the amount of control points.
Now, when doing vector lines, you can see these points are connected in a somewhat squiggly shape. If you'd like the shape to be straight instead of curved, you can go under tool property > control point and then Switch Corner to switch between this being a curved or straight edge.
Now the connecting lines between these two points are straight instead of curved. You can switch it back just by clicking on it again.
Now I've quickly drawn a head shot to demonstrate some more features in Clip Studio Paint’s vector modes. One of the features I use most often in drawing line art in Clip Studio Paint is the thicken and narrow features under *Correct Line > Correct Line Width. You can choose either thicken or narrow the width of the line and make it thinner and thicker and adjust the amount of thickness or thinness.
One of my favorite parts about drawing lines in vector is being able to use the vector eraser. You can try things like erase up to intersection, erase whole line, or erase touching. Make sure the “Vector Eraser” box is checked and you are on a vector layer to access these tools.
When you aren't using the vector eraser, then erasing with the brush actually creates a new line which is transparent, instead of removing the vector points beneath it.
Vector layers might be better for line art, however, they're much less suitable for painting and coloring. For example on a vector layer, you do have a lot of control over lines and being able to erase up to intersection however you please, but if you wanted to blend two colors together, it won't be possible due to how vectors use points and polygons.
Raster layers do not have the same erasing or line correction tools, but can blend colors and use color mixing or color stretch. You can also lock transparent pixels.
Converting Border to Line art
You can also use the border effect to line organic or complex shapes, such as long hair, and add black lines on top of the white blocks of color for more detail.
If you use a white pen and black border color, to turn it into line art, first rasterize the layer you are on. Make sure the border effect is now not visible as an active layer property effect.
Then, go to Edit > Convert brightness to opacity.
Now it’s converted into black and transparent line art.
Changing Brush Shapes
If you are using vector mode to line your drawing, and want to change the brush shape after finishing, first click on the pen or brush you want to use. Then, click the wrench icon under Tool Property to “Show [Sub Tool Detail Palette]”.
Go to brush shape > Current brush shape and click “Add to presets”.
Go to object > select area by dragging, then select all line art points on the vector layer.
Click the wrench icon / sub tool detail under the Tool Property: Object panel.
Select brush shape from preset. You can use the brush you added earlier, or a default brush shape.
So using these methods, you can see that I got three different results using three different brushes by just using the select object tool and changing the brush tip. I did not need to redraw the line art, since I used vector layers.
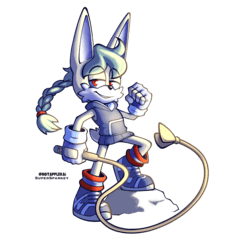
After adding some shade and color, here was the final demonstration image.
I explained more in depth on my YouTube video, so if you’d like, please check it out.
I hope this was helpful!


Comment