
Hello guys! my name’s Syl, in this article I will show you how to animate your character in Clip Studio Paint EX. The article includes setting up the software, breaking down some of my animation works as examples, and finally, following along with me to create an animation. I will provide guidance as simply and as detailed as possible, hoping that even beginners can understand.
Note: The tutorial has the video format and text format (this article)
1. Setting up
In this step we will prepare required knowledge and setting up before starting animating. If you already have basic skills and have animated before, you are free to skip this step!
a. Animation programs: Clip Studio paint EX
Remember there are two versions of Clip Studio paint: PRO and EX, you need to buy EX version to do animation.
b. Canvas setting
*To create new canvas, Select [File] menu > [New]
In the project section, click animation (video icon)
I recommend you to set the default setting option 1920x1080.
*Also there are some setting you may want to understand:
- Blank space: This is the area outside our export area (final animation), you can use this space for note, camera movement.
- Frame rate: it is the number of frames in a second, the standard will be 24fps, but many independent animators use 12 fps (like me).
- Playback time: the length (frames) of animation. If you set 300, there are 300 frames in the animation, you can adjust it later.
You can see there are more setting sections, but you don’t need to understand all of them to actually start animating, I don’t want you to be overwhelmed! And to be honest, I only understood the size setting part when I first animating :D.
c. Setting up workspace
This is my workspace when doing animation. You don’t need to set it the same with me, but I think for beginners it’s better to have your workspace accurate to mine, so that you can follow my steps easily.
You can download and import my workspace from Clip Studio, search by this ID: 2076802
*To import it, go to [window] menu -> [material] -> [Material: download] If you don’t have material window on your workspace.
Then, drag my workspace material into the canvas -> Ok
*Or go to [windows] and open all the same windows like this.
d. Understand some basic animation features
After setting everything up, we will have the needed workspace. I know how you're feeling now because I used to be stressed out just by looking at the timeline window for the first time.
But don’t worry, I won’t force you to understand every tool on this complex black screen. Instead, we will preview some basic features and start animating to maintain your motivation.
Also, if you don’t understand any of the things I’m about to explain, it’s fine! I think it will be easier to learn and practice at the same time. You won’t be overwhelmed by the new knowledge and will remember the features better.
* The timeline window:
- The sequence number you see is the order of the frame, the number above them is the length in seconds.
- In the timeline menu -> thumbnail size -> none If you want the timeline to look exactly like me, true to its name, it shows the thumbnail of that frame, but i think it’s too space-consuming.
- Create new animation cel/ frame: click on the time in timeline, click the icon “new animation cel”
- Some animation terms: keyframes - the main frames of an action (e.g blink: close eyes frame and open eyes frame), inbetweens: the frames between keyframes
I think those are enough! If there are anything that I missed, I will mention them in further steps. Now let’s go to step 2!
2. My animation breakdown
In this step I will break down some of my animation works by showing you the step-by-step process like sketch, lineart, coloring, shading, final (effects added), and random tips. This step will help you to get used to the structure of an animation first. However, you can go to step 3 ‘Make animation’ and then back to this step If you prefer that order.
a. Simple loop animation
Layers
-> For simple loop animation, I will create a still main folder first, including still parts like the head, the body, and jewelry. Then I’ll create some new folders to animate the hair, move jewelry, blinking eyes, and try to arrange them so that they can create a loop.
Sketch
Lineart
Coloring

Multiple folder (shading)
Final (Effects)

High-quality link:
*To create and adjust filter layer like me, go to [Layer] menu -> [New Correction layer] -> Try anything you want
b. Normal animation
Let’s choose this short animation.

The beginning scene where the character is jumping, I have to record myself jumping to take the keyframes lol. That’s a tip you can use when animate complicated movements, record yourself doing that, and animate based on that.
Note: Try determine and draw keyframes first, then inbetweens. Don’t recommend tracing all the sequence frames, I tried and gave up halfway.
Layers
This time I only have a lineart animation folder and a color animation, since I don’t separate still and moving parts. Also I used 2d camera movement a lot in this animation
Random tip/ tut: To adjust camera, [Timeline] menu -> [New animation layer] -> [2d camera folder] -> Group all your existed layers into the 2d camera folder
Then choose any time in the timeline -> Create [Keyframe] -> [Operation] -> Adjust the camera (starting) -> Chose other time -> Create new [Keyframe] -> Adjust the camera (ending). And you’ll have the camera movement
Video tutorial:
Sketch
Lineart
Coloring

Shading
Final (Effects)
Link:
3. Make the character animation
Yay the final stage, in this step I will show my step by step process to make a short animation of my original characters, while explaining them and providing random tips. You will know how I make a simple animation, and have the motivation to start your own (hope so).
Tip: Although my upcoming animation is not too hard, I suggest beginners start animating simple things first (blink, hair movement), starting with a too complicated idea will make you want to give up. You can practice based on my keyframes, I share a lot of keyframes on my instagram.
\
Also this is a video sharing my blink animation, in order you need it:
a. Idea
Yes! You will need a broad animation idea in your brain first. The idea roles as a guide, the outline, and also the motivation for us. Thinking about converting what you imagine into animation work, it’s super cool (that says I know I’m cool lol :D).
For long animation, we will need to draw the storyboard first, and we don’t need it in this short animation tutorial.
I usually find my ideas through music, especially Jpop.
Tut: to import mp3, you just need to drag the song in mp3 format into the canvas
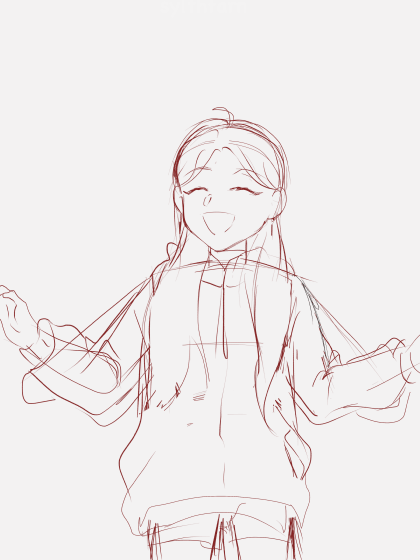
b. Sketch
We will have to sketch the idea first, it helps us to shape our character and stick with the original idea.
I have guided these features in previous steps. If you are still not sure how to do these, I recommend you to also watch the embed video.
+ \-CtrlSaveor\[File\]->\[Save\]tosaveyourfile,andremembertodoitevery10minutes!!
- Rename the default animation folder to ‘sketch’ (optional)
- Start sketching in frame 1, create new frames by moving to the new time and click the icon. Or to draw frame 2 from frame 1, copy paste frame 1, then middle click in the timeline, a board will appear, and you just need to choose frame named [2].
- Play to see if it fits the song/ the time you want.
- Redo, draw, play until you are satisfied.
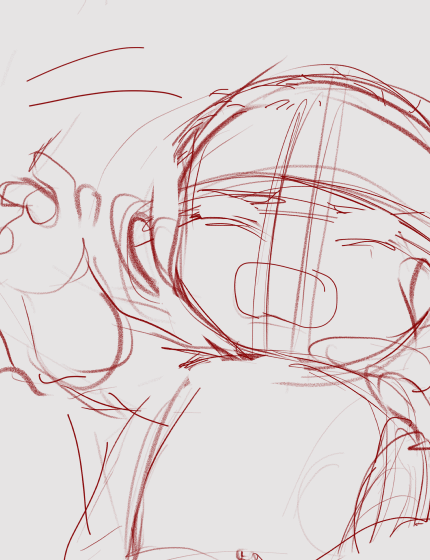
Tip: People usually only sketch keyframes, sketching everything including in-betweens is not required.
Tip: As a beginner, thorough sketching is recommended. Although my sketches are not great because I hate spending time on them, a clean sketch can help prevent giving up halfway.
Tip: I do someslow motion scenes in this animation, to animate slow motion, you only need to draw more frames between keyframes. (for example you normally draw 3 frames between keyframe 1 and keyframe 2, to make it become slow motion, try drawing 10 frames between them)
This animation will be 40 seconds long. Unfortunately, I can't record and finish my entire animation process in this article. My old laptop struggles with recording and animating at the same time (poor people problem), and I also get distracted when recording. I'll still show every step from sketch to final product, but only for the first scene (of my oc Maris).
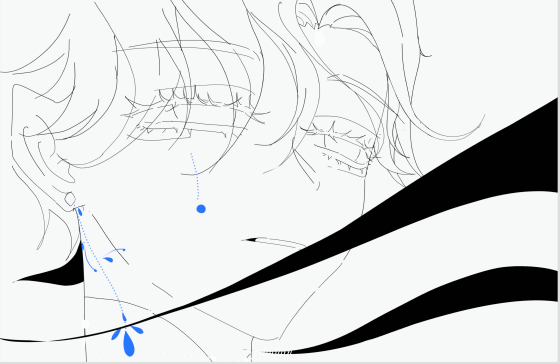
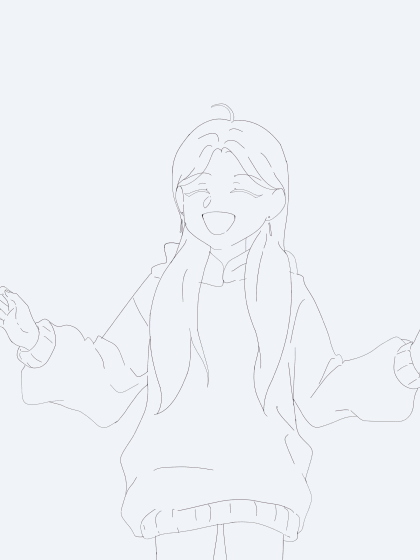
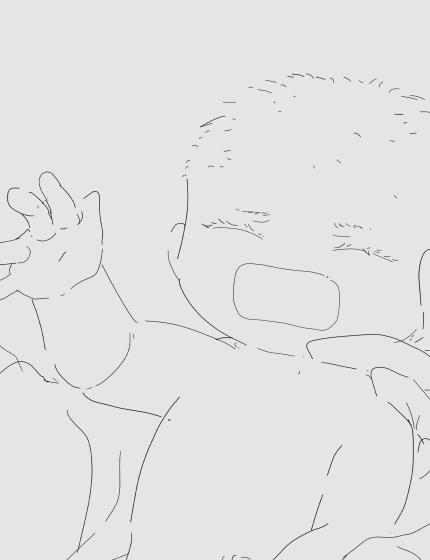
c. Lineart
The next step is to line those sketches.
My lineart style looks really sketchy lol! Most people draw lineart clean and continuous, which helps with inbetweens and coloring. For beginners, I'd suggest trying that approach. However, I've fallen in love with this sketchy style lately.
- Create new animation folder, rename to lineart
- Reduce sketch opacity to 10-20, so that you can trace them easier
- Create new animation cel, start tracing keyframes
- After done keyframes, draw inbetweens
- Hide sketch folder
Tool: Turn on 'onion skin. when doing inbetweens. The green lines represent next frames, purple lines represent previous frames. Your mission: draw between them (the brown line is my sketches)
Tip: I usually draw different parts in separate layers, like the head, clothes, and especially hair.
Tip: To determine the ratio of his head, I mark the eyes, nose, mouth, and chin, then copy paste on the next frame and draw based on that.
Tip: When drawing in-betweens for a hair strand, the start of it should be close to the next frame, while the end should be close to the previous frame. (the principle of follow through application)
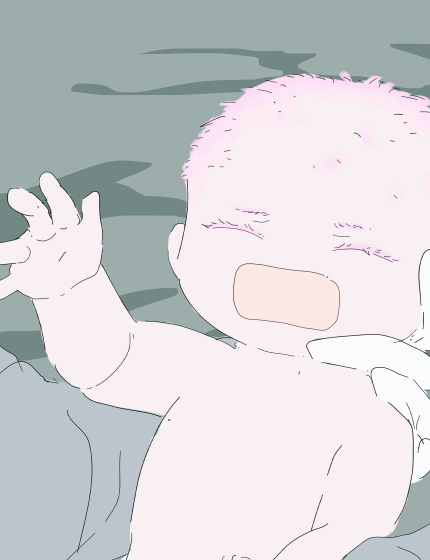
d. Coloring
I use my coloring technique the same as when I color my illustration. First color base, add shadows, and finally add effects (e. effects). In the animation industry they will clarify the color palette first, then divide different color sections. You can choose any method you like.
- Create new animation folder, rename to color, drag it below lineart folder
- Create new animation cel and start coloring
- Create new animation folder above color animation folder, choose [Clip to layer below], then change blending mode to [multiply]
- Create new animation cel and start adding shading
People usually use the [Fill] tool to color animation, but with this lineart, it’s better to use a lasso tool. You can find lasso tool in [Figure] -> [Lasso fill]
This is the stage where I work with shadows. I draw colored lines to separate various sections of the shadows, using different colors to represent shadows, light shadows, and reflected light. This helps ensure that I don't mistakenly color the wrong section.
However I only do this for keyframes (important frames), not on all frames
And the result:
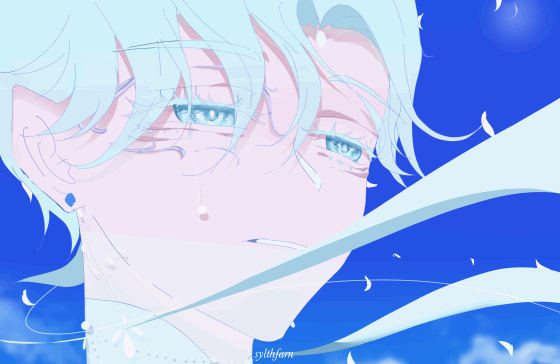
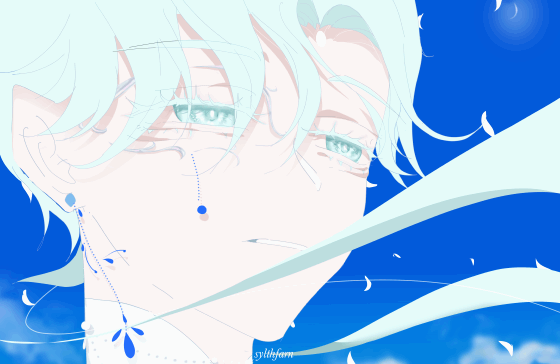
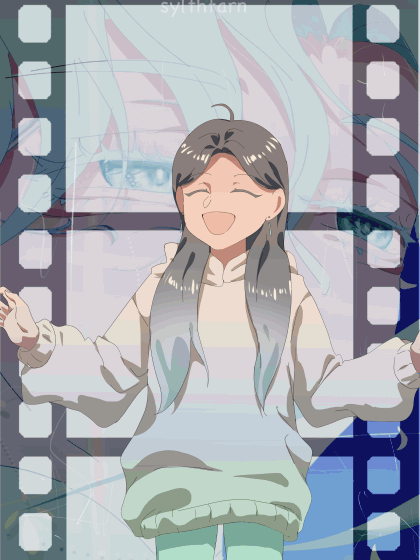
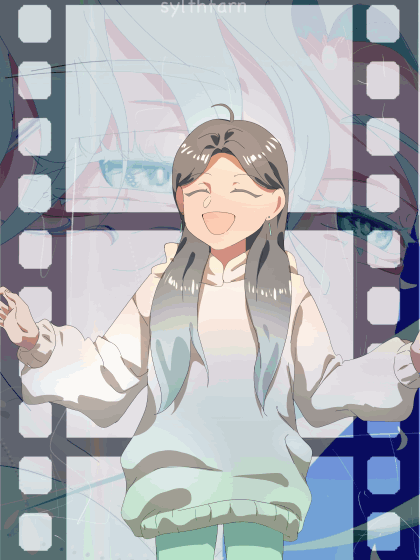
e. Effects (Final)
Yayyy we nearly completed this super long tutorial! The final step is to add effects into our animation to make it look more appealing! First let’s list some of the effects we can add and how to add it, then I'll show the effects I added to this animation.
*Listing effects
Glow dodge: I use this blending mode to add light.
Multiply layer: Besides adding shadows, I use this blending mode to set a tone for the illust/ animation.
For example for warm tone, I will apply dull orange and reduce the opacity.
Filter features (New correction Layer): I have guided you this in simple loop animation breakdown, they are used to adjust color balance, shading,...
(Here I adjust Color balance and Brightness/ Contrast)
*The final animation I got: (This is exported in GIF format, so the quality may not be optimal)

So I use 3 glow dodge animation folders for overall light (for each scenes), the eyes light, and highlight (for specific frames)
I use 1 multiply layer for overall tone, drag it above all existed layers, and 1 multiply animation folder for each scenes of my animation (baby -> window scene -> Close face)
I have 2 color balance correction layers for the last scene (close face). The first half is a warm tone when the character is hopeful and excited, then changes to a cool tone when the character goes back to reality that he can’t go out playing.
Tool: To create smooth gradient like that, I use this tool [Gradient]
4. Conclusion
Thank you for reading till the end, I can feel your passion for animation XD I really hope you can start making animation and be able convert your idea into work!
Also there is some information I can't convert to text, it’s better to read and watch both the article and the embed video.
If you find my tutorial useful, consider leaving a like or any advice, so that I can create more and better tip :D
The last thing I want to say is that this is my own process to do animation in my style. I’ve never attended an academic animation school, so I hope you can kindly leave any advice If you find any mistakes! Thank you!
Users who liked this post


Comment