
Intro
Hello again! 😀 I'm LibertyFreedom, a concept artist and manga artist who has been using Clip Studio Paint as my primary digital art tool for the past 7 years.
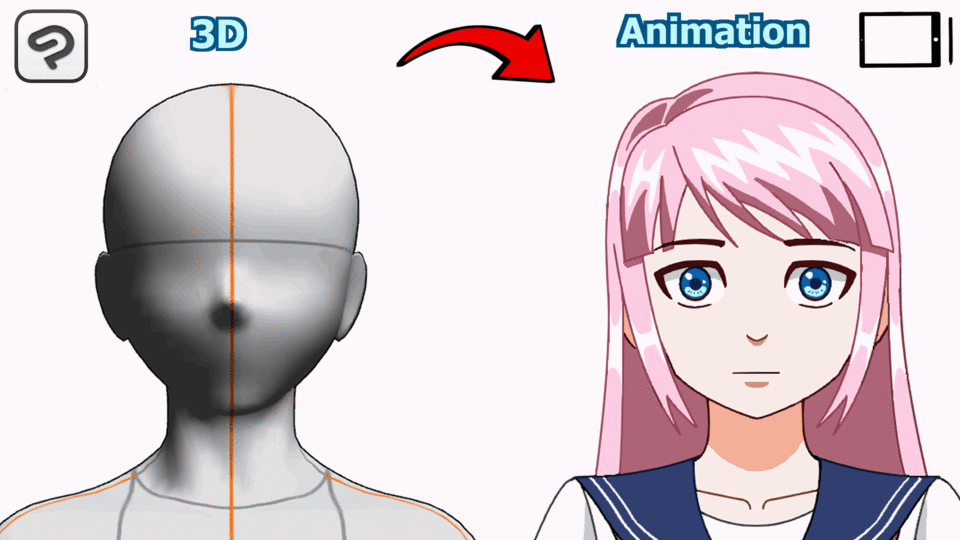
I used to believe that the only way to improve my animation skill was to continuously search for references and practice drawing. However, with the remarkable 3D features available in Clip Studio Paint, beginners can now enhance their animation skills more efficiently, and that's the focus of this tutorial
—Using 3D figure as a solid reference to make drawing 2D animation easier
In this step-by-step animation guide, we'll not only walk through the Full Animation Workflow but also address the common challenges beginners face.
While the tutorial showcases the tablet version, rest assured it's equally applicable to the PC version. Although the interface differs slightly, the functions and icons remain the same for both tablet and PC version.
So, whether you're just starting out or looking to level up your skills, this tutorial has you covered from start to finish. Let's dive in and unleash your creativity!😃
Step 1: Setting Up the Canvas Workspace
Now, look at these two diagrams simultaneously to gain a better understanding of the animation canvas workspace.
The settings from B to E are necessary for professional animators because they are working on a long animation project together as a team in a studio everyday. You can adjust the workspace setting to your own liking. But for this tutorial , I would like to keep the workspace clean and simple so that beginners can see and follow easily.
This is my settings for my new animation canvas workspace.
For this tutorial, I want to keep it simple so that beginners can follow along easily. lets create a simple GIF animation around 1 second with 10fram rate in this tutorial.
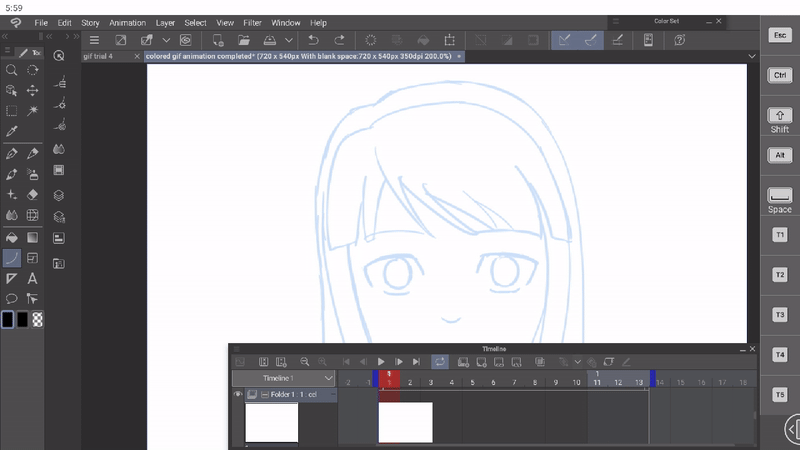
Once you are done with setting and click ok, You should have a [Timeline] panel. If the panel is missing, go to [Windows] from menu command and bring out the panel.
We don’t need the [animation cells] panel so close that panel.
Step 2: Setting up the important shortcut keys for animation.
Before that, I have a helpful suggestion if you are a left-hander.
Drawing animation requires a lot of checking the frames back and forth in order to keep the drawing consistent. I highly recommend setting up shortcut keys for these functions to streamline the process. (You will know later)
If you are using a keyboard with tablet(or pc), set a shortcut key for the keyboard.
If you are using only tablet, Bring out the edge keyboard and assign the functions to the special keys. I am using only tablet and stylus in this tutorial.
We will need to use this function a lot later on for coloring, so let's set a shortcut key for it.
Remember to use both hands for drawing and tapping the shortcut key, that's what the Edge keyboard is for.
Step 3: Using 3D Figure to create keyframes
Instead of sketching key frames, beginners can utilize 3D figures for posing. This provides a strong reference point, particularly for those unfamiliar with drawing natural sequential poses
The 3D workflow might seem complicated for beginners to operate at first, but trust me, once you know the trick, it is actually simple. 😎
You can simply use the downloaded pose for the last key frame or modify the pose as needed. I modify the pose in this case.
You might initially find it challenging to adjust the 3D model pose, but trust me, with practice, you'll quickly become adept at posing the figure. The key is to rotate the 3D figure from different angles to achieve the desired pose, rather than sticking to just one angle.
I am familiar with 3D posing, so it only took me around 1 minute to finish modifying the pose. 😎 You can do it too! 😁
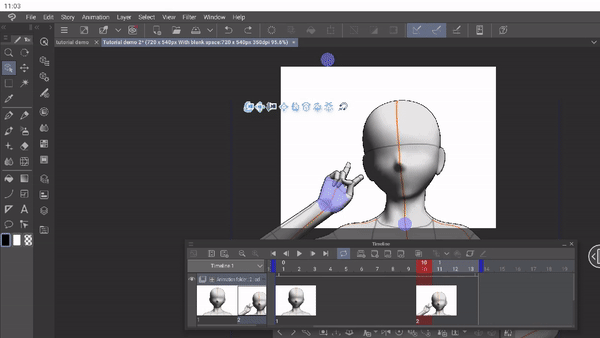
Pose the 3D figure first before adjusting the camera so that you can see the difference between key frames.(Turn on Onion skin )
This technique is known as "Halves Method".
We start by the first frame and last frame of an action sequence first, then keep halving the in between frames.
This approach is highly recommended for beginners to start with because it ensures you to end up at the correct point first. If you draw an action sequence in a linear manner (frame by frame in sequence),there is a higher chance you might end up something you don’t want in the end.
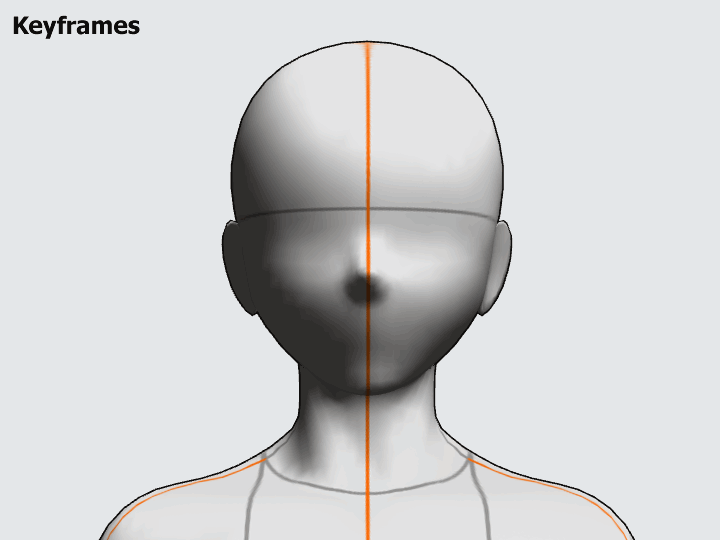
You would need to restart all over again if the ending frame pose is not what you want because all the in-between frames are meant to build up the last frame. That is why the first frame, middle frame and the last frame are the most important frames, which are referred to as keyframes.
Remember, these three keyframes are the cornerstone of your animation, much like the foundation of a building. If they're not handled well from the start, all the in-between frames won't matter much.
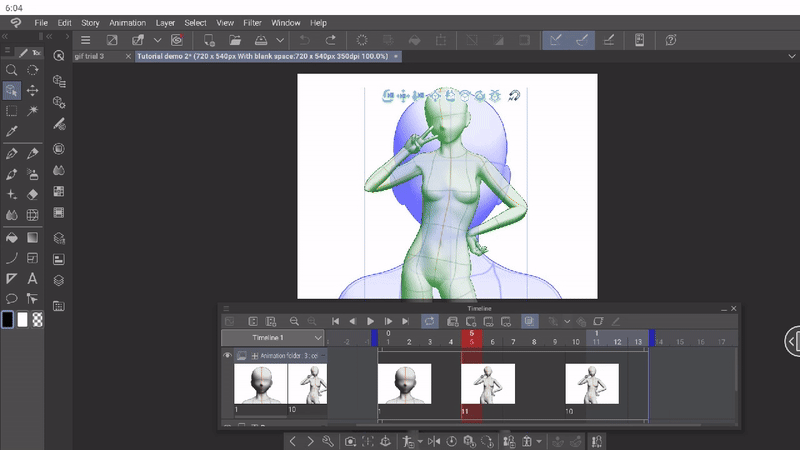
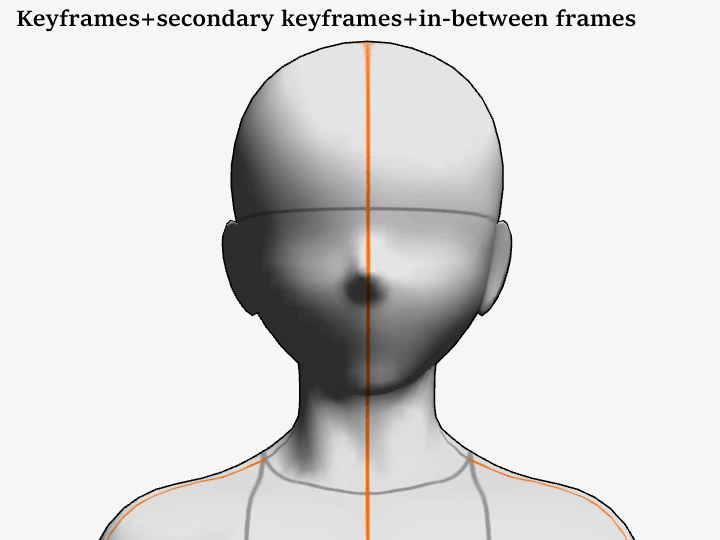
Step 4: Using 3D figure to create secondary keyframes and in-between frames.
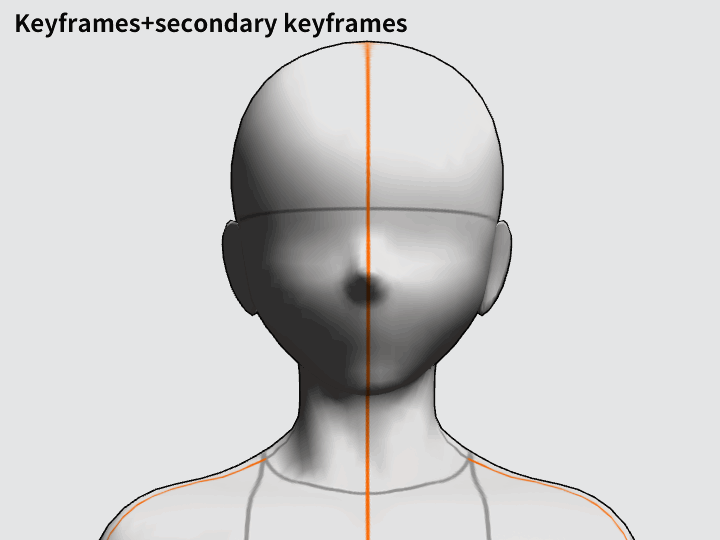
When you are done with the secondary frame, repeat the same steps for the in-between frames.
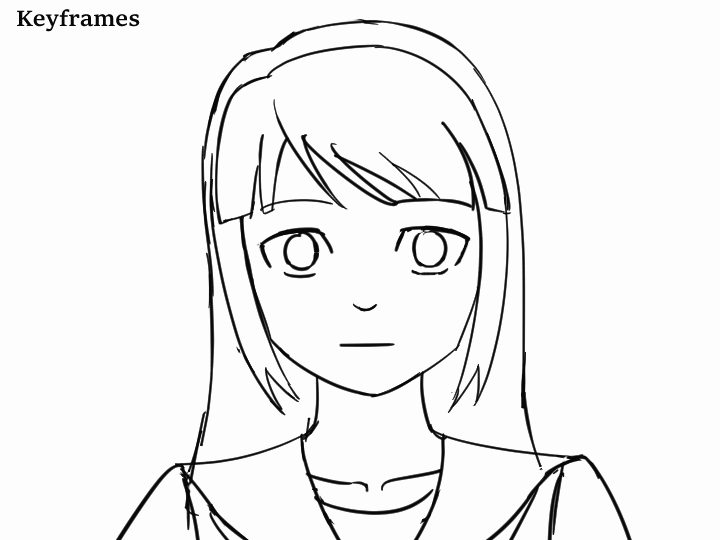
Step 5: Sketch by referencing the 3Dfigures
Just like how we use 3D figures in animation previously(Stage4). Begin by sketching the keyframes first.
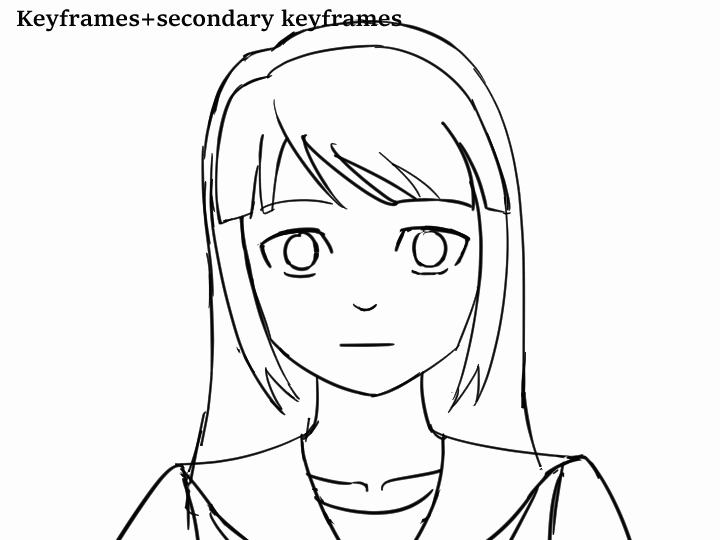
Run the playback to check the [keyframes] sequence. If there is something off, go back to fix the keyframes. Once you are satisfied with the [keyframe] sequence, proceed to sketch the secondary keyframes.
Run the playback to check the[ keyframes+secondary frames] sequence. Once you are satisfied with the [keyframe+secondary keyframes] sequence, proceed to sketch the in-between keyframes.
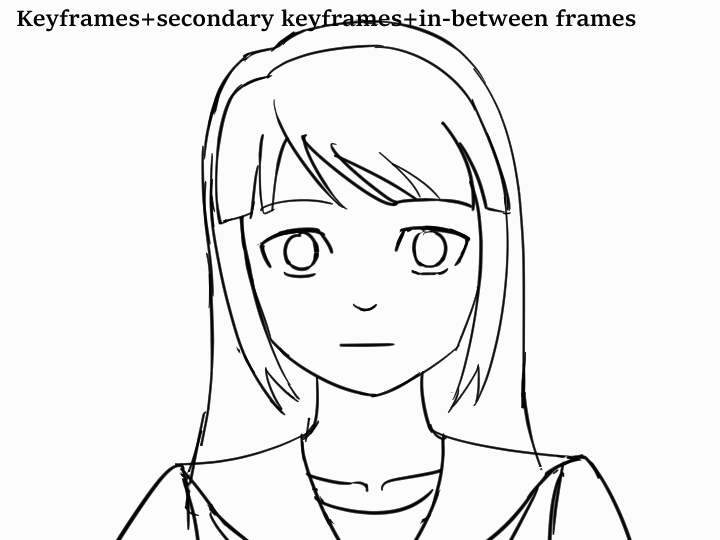
Run the playback to check the [keyframes+secondary frames+in-between] frames sequence. Once you are satisfied with the [keyframe+secondary keyframes+in-between frames] sequence, proceed to the next stage 😄
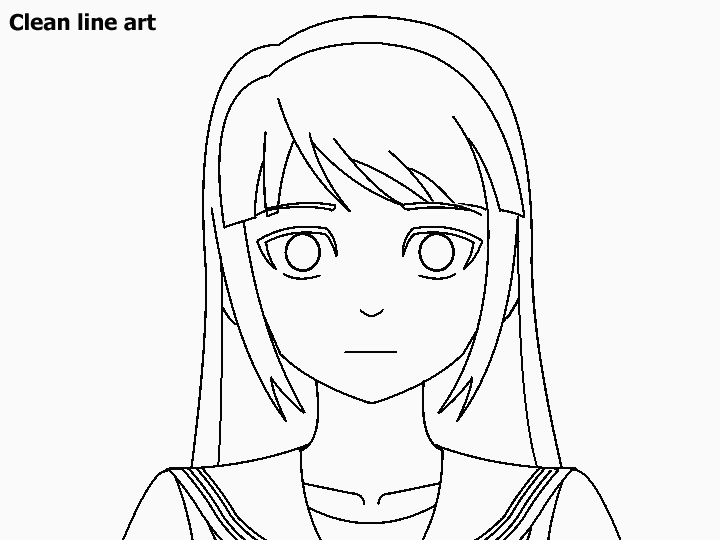
Step 6: Cleanup sketch (Clean line art)
Please ensure that Anti-aliasing is set to none. This is crucial.
We need to use alias lines (pixelated, hard-edged lines) for the line art in animation so that we can easily color the pixelated lines. Don't worry, I will show you how to revert these alias lines back to anti-alias lines (soft-edged lines) after we finish coloring, which is the last stage.
To draw perfect symmetry for the first frame , follow these steps.
Toggle the symmetrical ruler on and off when you are drawing the front view in frame 1 ,2 and 3.
Use all the techniques I mentioned above to ink all the sketches from frame 1 to frame 10.
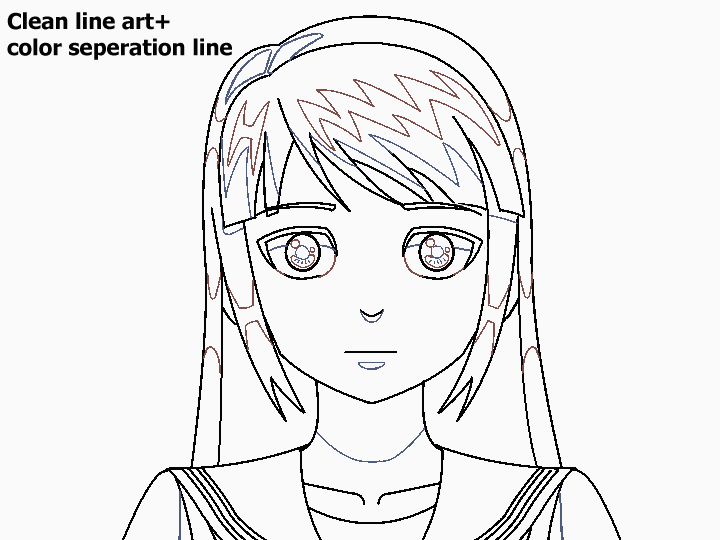
Step 7: Color separation line
What is the point of drawing color separation line?
Just like we draw pose to pose to animate the character movements, we also have to draw the color separation line to animate the color movement.
When I mention "color," I'm referring to the shapes of shadow tone and light tone.
These tones are not static; they change as the character moves or as the light source shifts. We don't need to animate the local/mid tone though since it sticks to the line art all the time.
For beginners, you might be not familiar using blue and red lines to indicate the region of shadow and light tone. To overcome this, you can start by coloring the line art first. Then, trace on top of the shadow tone and light tone to understand how color separation lines work in animation.
Repeat the same steps to color/draw all the light tone.
Similar to what we did in (Step 5), there are two methods for referencing the previous frame when drawing the color separation line.
Once you have finished drawing the color separation line for each frame, DO NOT FILL IN COLOR right away(except for frame 1 if you are a beginner). I start by coloring the the first frame is just to help beginners to get a better understanding of how color separation line works in animation.
It is best to complete all the color separation lines for all frames first. This allows us to playback and review the animation of color separation lines for spotting any errors before proceeding to the coloring stage.
Step 8: Coloring
We painted Frame 1 to understand the color separation line in the previous stage. Now, let's proceed to color the rest of the frames, starting from Frame 2.
Apply all the techniques I demonstrated above to finish coloring all the frames.
Step 9: Smoothing the animation
We used alias lines (pixelated lines) to draw all the lines so that we could easily color the gaps. Now that we have finished coloring, let's revert the alias lines back to anti-alias lines (soft edged line).
Step 10: Exporting the animation
Make sure the export settings match the one we set originally, as they may sometimes differ
Click ok and there we go. We finish the animation! 🥰🥰😍
Conclusion
That wraps up our comprehensive step-by-step workflow for integrating 3D figures into a finished 2D animation GIF.
Here's the final summary picture of this tutorial when I put everything into the Timeline panel.
Once you've mastered the fundamentals covered in this tutorial, you can level up your skills by experimenting with higher frame rates and longer playback durations. You can even explore a more complex scene with multiple characters and different camera angles. Keep exploring, keep creating, and enjoy the art journey ahead! 😎👍
Addressing a Common Concern
Do I actually have to use 3D figures for every single frame?
Answer: Yes and No. It depends on your skill level and comfort. Beginners often benefit from using 3D figure for each frame as a reference when drawing pose sequences. However, as you gain experience, you can reduce reliance on them.
As you become more familiar with animation, you can try skipping using 3D figures for in-between frames and maybe one day try skipping both secondary key frames and in-between frames. With more and more practice, one day you may find you don't even need 3D figure at all.
Just treat 3D figure as a helpful reference, like using online images for your own reference. You don’t need to scour the entire internet or use countless images for your reference.
You only need what's "enough" for you.
Thanks for tuning in! I hope the tips I shared are helpful in your art journey.
See you in the next tip! 😀
Users who liked this post


Comment