
I want to draw a picture, but I can't think of a pose or composition.
It's hard to balance the face. It's hard to draw hands.
I can't draw small objects or backgrounds.
3D can solve these problems!
We've also prepared a video, so if you understand Japanese, please take a look.
Pose and composition
Can't think of a pose or composition?
In that case, try looking for pose materials.
When you click the "Pose" button in CLIP STUDIO ASSETS,
a lot of 3D pose materials will appear.
Look through the search results and find a pose you'd like to draw.
After seeing this "Girl Carrying Poses 1",
I wanted to try drawing an illustration of
"Girl carrying food at an American diner".
Download this pose material.
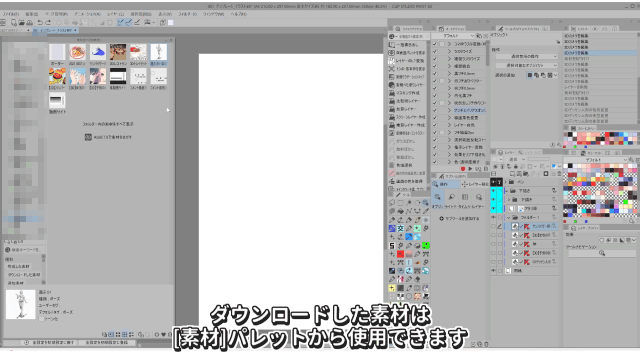
The downloaded materials can be used from the [Material] palette.
When you drag and drop the pose material onto the canvas,
a posed male 3D drawing figure will be displayed.
With the Object tool selected,
you can change the gender, height, build, etc. of the drawing figure from the [Subtool Details] palette.
The body type and gender of the added drawing figure can be set in the [Preferences] dialog under '3D'.
It is useful to set it to the gender of the characters you often draw.
Quoted from the CLIP STUDIO PAINT User Guide
"Adding a pose to a 3D drawing figure or 3D character material"
If you're having trouble setting up a 3D drawing figure yourself,
or you're not sure what to do, try searching for materials.
Click the Details button to the right of the search field in CLIP STUDIO ASSETS,
and click the "Body Shapes" button in the window that appears.
There are materials for a variety of body shapes, so download the one you like.
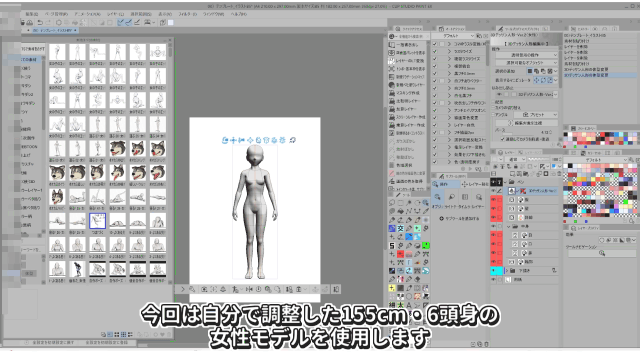
This time I'll use a 155cm, 6-head-tall female model that I adjusted myself.
You can also load a pose by dragging and dropping a pose material onto this 3D material.
The pose is now of a girl carrying a tray.
Face and hands
It can be difficult to balance the face... In times like these, you can rely on 3D materials.
Search for "face" and "3D" in CLIP STUDIO ASSETS to find a face model.
This time, we will borrow this model.
It's a paid GOLD material, but it's high quality and highly recommended!
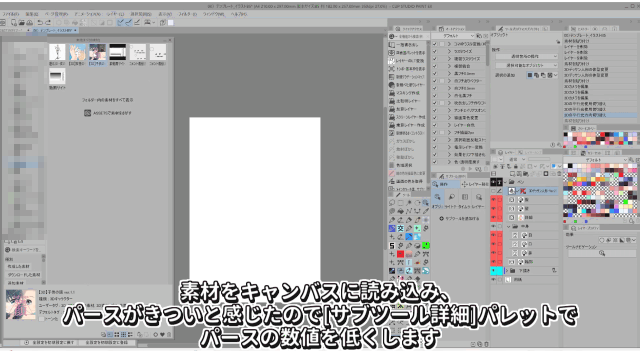
I loaded the material onto the canvas,
and felt that the perspective was too harsh,
so I lowered the perspective value in the [Sub Tool Detail] palette.
The face is cute from any angle.
You can also change the eyes on this model.
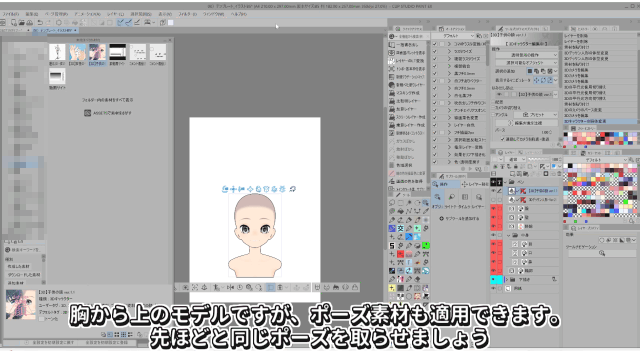
This is a model from the chest up, and you can also apply the pose material.
Let's put it in the same pose as before.
The eyes of this model can also be moved, so
use the object tool to move them so that they look towards us.
Let's use these models to sketch and ink the outline.
This is the finished product.
Why aren't there any hands or food drawn?
This will also be created using a 3D model.
There are also many 3D hand models available.
Search for "hand" and "3D" and download the one you like.
Here are the materials we will be using today.
These adorable hands are perfect for 2D girls!
This hand model is compatible with pose materials,
so just drag and drop the pose material onto the model as before
and it will pose.
I've matched the orientation and size to the 3D drawing figure.
Let's just inscribe this hand as it is.
Here is the inked character.
Next we'll draw the food.
Small items
Find 3D food models
What would you find in a diner?
Hamburgers? Donuts? Cute drinks?
I decided to draw a hamburger this time.
I'll also be using the donut plate and tray set, so download them.
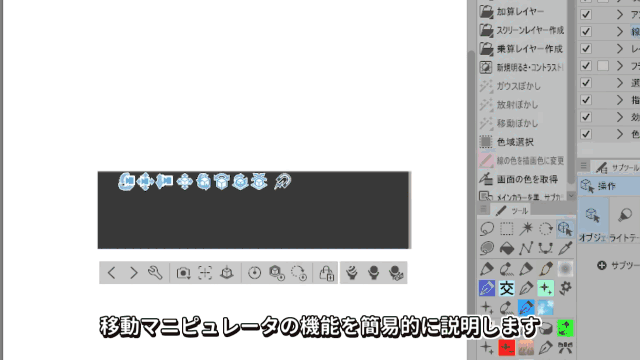
Placing and editing 3D materials
The movement manipulator and root manipulator are useful for intuitively placing 3D materials.
This is a simple introduction. If you want to know more, please see the manual.
① The thing surrounded by a red frame is the movement manipulator
② The thing surrounded by a blue frame is the root manipulator
These can be operated with the object tool.
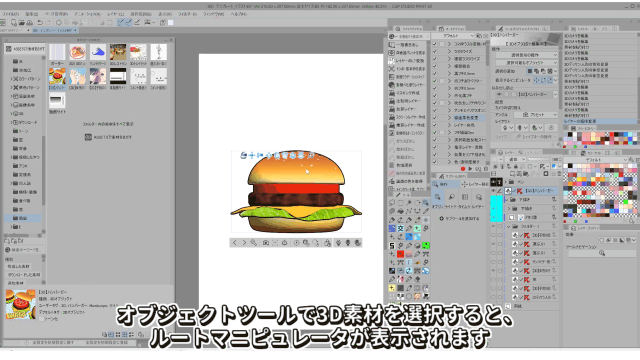
When you select a 3D material with the Object tool,
the root manipulator will be displayed.
Drag the green arrow to move up and down, the red arrow to move left and right,
and drag the blue arrow to move forward and backward.
Drag the outer grey circle
to change the size of the 3D material.
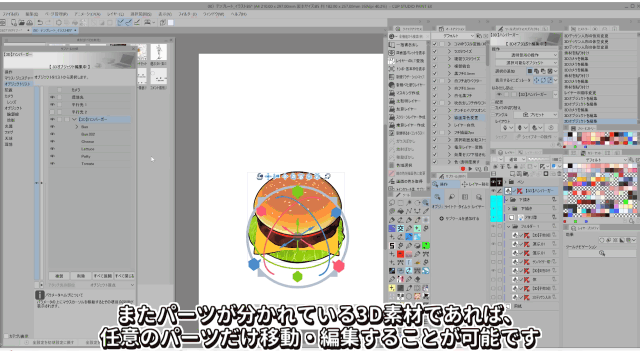
Also, if the 3D material has separate parts,
you can move and edit just the parts you want.
This material has separate parts such as the buns, cheese, and tomato.
Dragging the red ring on the root manipulator will rotate it back and forth,
dragging the green ring will rotate it sideways,
dragging the blue ring will rotate it left and right.
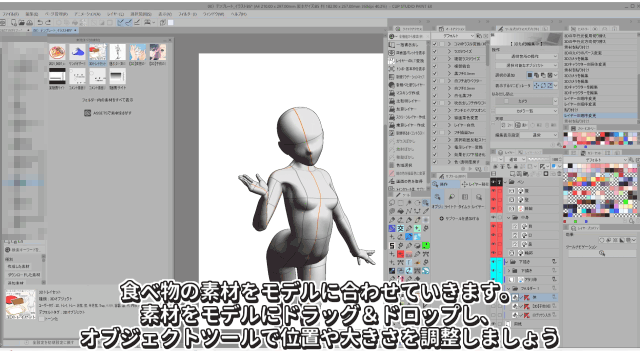
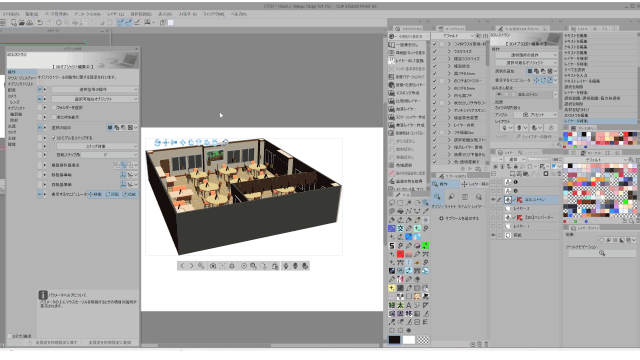
Fit the food materials to the model.
Drag and drop the materials onto the model,
and use the object tool to adjust their position and size.
The four-sided view window is useful when you want to see the 3D from various angles.
You can display it from the [Window] menu → [Four-sided view].
Look at this while placing the materials.
3D materials are created by many different people,
and the sizes of the materials often don't match,
so you often need to adjust the size here.
Here is the completed tray/plate/burger arrangement.
Here's what it looks like with the buns shifted and unnecessary elements hidden as much as possible.
Let's use this as a reference point to create our illustration.
This is the finished product.
If I just turn the food into line art using LT Conversion,
it ends up looking stiff, so I inked it myself
and drew the lettuce myself using reference materials.
Even so, I can almost skip the rough sketch process
and there are also cases where I can rasterize 3D materials and use them in my drawings,
so I'm very grateful for the materials.
In this case, I used the tomatoes as they are.
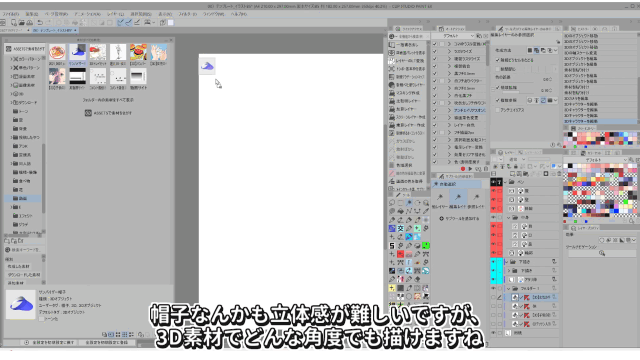
Hats are also difficult to create a three-dimensional look, but using 3D materials you can draw them from any angle.
background
Characters alone look lonely, so I want to draw a background, but I can't...
In times like these, I turn to 3D.
Let's use this 3D restaurant
to create an American diner-style background.
How to use the movement manipulator
Here's a simple explanation of the movement manipulator's functions:
Drag the leftmost icon to rotate the camera,
Drag the second icon from the left to translate the camera,
Drag the third icon from the left to move the camera forward or backward.
Also, if you don't need shadows, you can uncheck "Affected by light source" in the [Shadow] of the [Sub Tool Detail] palette,
and the light and dark of the 3D model will disappear.
Match the 3D background to your character

Drag and drop the material onto the canvas and adjust it to fit the picture.
Hide any unnecessary walls with the object tool,
and move the camera with the movement manipulator.
The texture of the material will be too strong in this state, so we'll process it.
Material processing
American diners have the image of bordered walls,
so let's apply a border material.
You can draw it yourself using the 3D perspective ruler,
This time we'll rely on 3D materials.
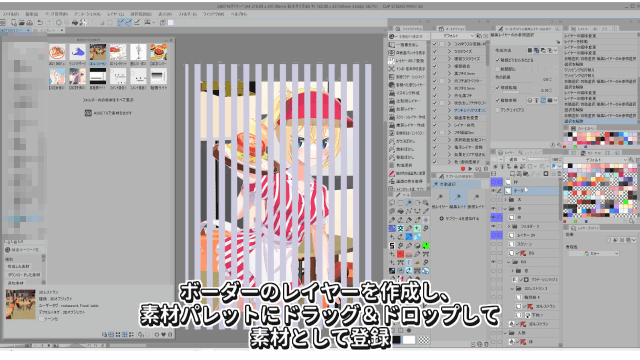
Create a border layer,
and drag and drop it onto the material palette to register it as a material.
With the 3D restaurant layer selected,
drag and drop this border image material onto the canvas,
and it will display in the same space as the 3D restaurant.
You can move and rotate this image material within 3D space.
We'll use this image as the wall pattern.
Here is the combination.
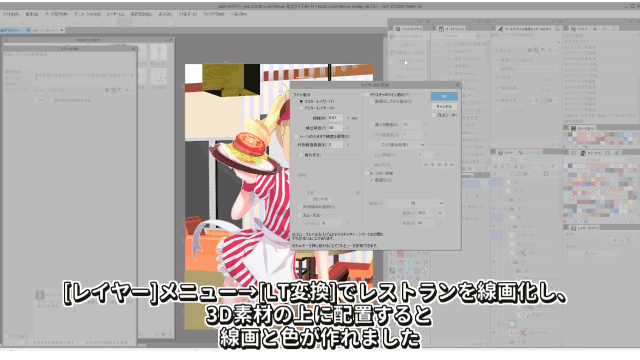
By using the [Layer] menu → [LT Conversion] to turn the restaurant into a line drawing and placing it on top of the 3D material, we were able to create line drawing and color.
The colors won't blend in like this, so
Create a gradient map layer from the [Layer] menu → [New Tonal Correction Layer].
I changed the base color to pink.
A gradient map makes it easy to change the overall impression.
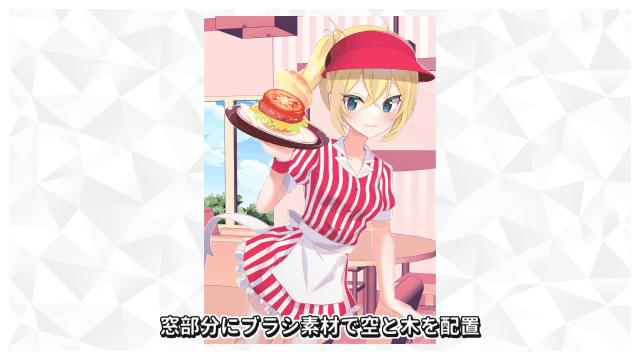
I used brush material to place sky and trees in the window area,
and selected Gaussian Blur from the Filter menu → Blur.
I added a little light to the screen layer with an airbrush,
and added white frames at the top and bottom to finish!
I didn't draw it myself, but I managed to create a picture that looks like it.
summary
More and more professional sites are introducing 3D, regardless of whether it's for character backgrounds or not.
It can be used as is, as in this case, or for a wide range of purposes such as rough sketches and drafts.
From an amateur's perspective, I feel that 3D is a tool that allows you to "first reduce the number of zeros."
You can use it to suit your purpose, such as aiming for 60 points from here, or using the time saved from not having to draw backgrounds and accessories to work on the characters and steadily improve the quality of the characters.
"I can't draw, but I want to" - this is a tool that can make the impossible possible.
I hope to use the materials as a step-up and gradually increase the parts I can draw myself.
Please add 3D materials to your "options."
It may help you when you are in trouble, such as when you have to draw something you can't draw, or when you don't have time.
Users who liked this post


Comment