
Intro - Sharing Your Work
Have you ever wanted to show how you create your projects? Do you feel like sharing your work, but don't know the best way to go about it? Maybe people have asked how you make your art or what your process is like.
Posting your finished work on social media or your personal website can get a good amount of attention but seeing the process behind how you made it is an invaluable learning tool that can help other artists and inspire them to make comics, illustrations and animations of their own.
It can be difficult to know where to start, but with these handy tips, you too can share your work and help people learn how your art is made - and in turn - inspire them create and share their work too!
Tip 1 - Screenshots
One of the easiest ways to show the process of your art is taking screenshots. There are several ways to do this.
For Windows - Open 'Snipping Tool'. Select 'New' and drag your cursor around the area you want to screenshot.
For Mac - Press Shift + Command + 4 and drag your cursor around the area you want to screenshot.
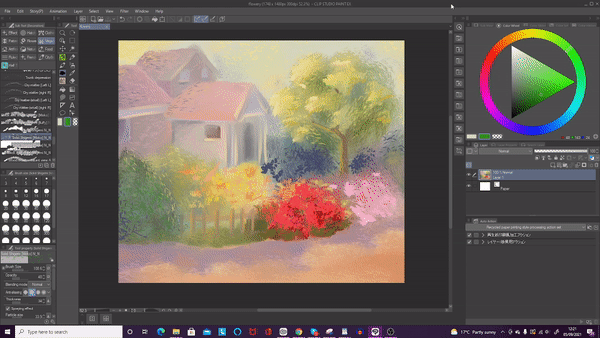
I recommend taking close-ups of areas of interest or with a lot of detail.
You can also make an animated gif of your process using Clip Studio Paint's animation feature. When creating a new file, check the 'Create moving illustration' button when making an Illustration file and select how many frames of animation you want your gif to have. I chose five frames for this example.
The animation folder will look like this when you first open it.
Copy and paste the files you want into the frames by right clicking on the frame and selecting 'paste'.
When all your frames are copy pasted in order, it'll look something like this.
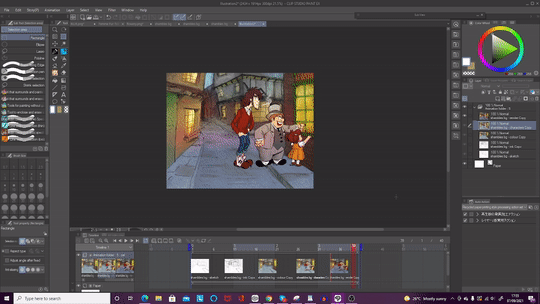
To export your gif, go to File > Export Animation > Animated Gif. A dialouge box will come up which gives you an option to change the settings of the Gif. I kept mine at 8 frames per second and I always make sure that the loop count is set to unlimited.
Your exported gif will look something like this.
Gifs are a great way to show your process without needing any video editing skills. But if you want to do something a bit more complex, there are always other options, like....
Tip 2 - Timelapse video
Clip Studio Paint has a timelapse feature built into the program. When you make a new illustration, comic or animation and you want to record the process, make sure that the 'Record timelapse' option is turned on by clicking this button. You can also go to File > Timelapse > Record Timelapse in the top right-hand menu.
As you're working, CSP will automatically be making a timelapse of your work. If you want to close CSP before you've finished your piece, don't worry about the recording being stopped as it will continue when you next open it. If you do want to stop the recording, Go to File > Timelapse > Export Timelapse. This will bring up a window with a video showing the sped up process of your work.
Click the OK button to save the video.
If you want to record your process in real time rather than a sped up video, there are several other options. If you use Windows, press the Windows key + G at the same time to bring up the Xbox Game Bar. Click on the Start Recording button (or Win + Alt + R) to begin capturing video.
You can also use OBS Studio which is a video recording program that's free to download. Which brings me onto the next tip -
Tip 3 - Video capture and Livestreaming
The most interactive way to share your work with your audience is to livestream. This may seem like a daunting and complex process if you've never done it before but it's easier than it sounds.
There are many streaming sites to choose from, like Twitch, YouTube, and Facebook. I personally use Picarto.tv as it's specifically built for artists but you can use any site you feel the most familiar/comfortable with!
Here is the interface for OBS (Open Broadcaster Software) Studio. The highlighted areas are the only parts you need to know about for a beginner. From left to right -
Sources
Video Capture Device - Displays your face if you have a webcam set up.
Display Capture - Displays your desktop background - Very important if you want to show your work!
Mic/Aux - Records your voice
Audio Mixer
Desktop Audio - Records the sound coming from your computer
Mic/Aux - Records the sound coming from your environment
Controls
Start/Stop streaming - Streams from your desktop to your streaming service
Start/Stop recording - Records your stream into a seperate video. You can also record your desktop without streaming which is how I got some footage for this tutorial, so you don't need this program specifically for streaming if that isn't your thing!
Recording footage may take up a lot of space on your computer so I usually leave this off whilst streaming, but if you think your computer can handle it then you may have this switched on if you wish.
Tip 4 - Monetising your art
This part is optional but you can choose to monetise your work. Putting up your process and teaching others how to make it is a good way to earn passive income if you have a big enough reach through social media. You can do this through Patreon, Ko-Fi, private commissions or through YouTube if you make videos.
You can make the process more in-depth and comprehensive for people who fund your work, or give them extra features like commentaries or one-on-one tutorials. You can send physical items as rewards or do special 'Thank-You' sketches for people who donate. Be sure to check out other people's art too to spread the love of creativity!
Thank you for reading! If you liked this tutorial or found it helpful, check out my work in the links below!

この投稿を「いいね!」したユーザー


コメント