Did you optimize your Workspace?
Introduction
Carefully optimized workspace and cleverly set shortcuts can be a lifesaver for everybody who uses the same program every day. Different people with different set of minds organize their workspaces (virtual and physical) differently. Somebody likes chaos and feel like a king ruling over it, others like cleanliness and order. It’s perfectly subjective, so you should organize your workspace just like you feel it.
I’m gonna show you how my workspace in CLIP STUDIO PAINT is organized and maybe it could help you with organizing yours. I’ll also include tips and hints for making your experience with this program more enjoyable.
Windows
This is how my physical workspace looks like. Pretty messy, huh? But I used to work like this.
I have two monitors. The biggest one is for drawing, the small one for other stuff like references, music player etc.
You probably noticed that I have the same image on both monitors. Why? The right image is called [Navigator] and you can find it in the Window menu. It helps to visualize the whole picture without scaling the original. It’s crucial when, for example, you work on small details and constantly have to scale the image back and forth to see how everything blends together.
Besides, it has the magic button which is extremely useful. It’s in the right bottom corner:
It’s called “Flip horizontal”.
When your eyes are sore, use this button to flip the original image and you’ll see it with new eyes. But the real advantage of this button is that the [Navigator] window’s image doesn’t flip. So basically, you have one image that is flipped and another that is not at the same time. It really helps to keep my eyes focused.
The rest of the buttons are basically mirroring the navigating process. Scale up and down, fit to the window, rotate, etc.
On the main monitor I have five windows opened. The full description and functionality of them you can find in the official CLIP STUDIO PAINT documentation, I will mention only crucial and interesting parts which help me during the drawing process.
I put the real name in the brackets [] so you can easily find them in the “Window” menu:
1 – Brushes and tools [Sub Tool];
Brushes and tools from the menu on the left. More about it further down.
2 – Properties [Tool property];
Brushes and tools properties depending on the chosen Sub Tool (scale, density, etc.).
3 – Reference pictures window [Sub View];
Reference pictures. You can upload as many as you like and switch between them.
Use "FOLDER" to upload the images,
and < to switch between them,
"TRASH CAN" to delete the image from the “Sub View” window.
Note: when you navigate to the image the cursor automatically changes to eyedropper. If you don’t want to sample color automatically from the reference image press the eyedropper button right above the trash can button.
4 – Color wheel [Color Wheel];
Color to choose.
5 – Layers window [Layer];
Switch between layers.
Note 1: I recommend to leave as much space as possible for layers. I always find it annoying to scroll back and forth just to pick one particular layer. It’s fine with a mouse where you have scroll button, but pens don’t have scroll button. You either need to program it to use scrolling for this one particular reason or leave more space like me. So, keep it in mind.
Note 2: I love to keep my layers organized and named. Use folders and subfolders to keep everything in order and name your layers so you can quickly find what you looking for. You don’t have to be precise, just use what you think fits.
I also have several pop-up windows which I don’t use very often:
6 – Color Set [Color set],
If you often need to switch between different colors, you can combine them into sets.
Just open the [Color Set] window, right click on the box and choose the option (add new, replace, delete or change color name).
I recommend to change names of your colors too, it’s useful when there’s a lot of them and you start to forget what was the color of the body, and what was the color of the tongue. Besides you don’t have to search and eyedrop the colors anymore!
To edit your Color Sets click the wrench button.
Press “Add new settings” to create new Color Set. After that you can choose the new clean color set in the drop-down menu and add new colors there.
7 – Timeline [Timeline];
For animation. It’s typical to keep your animation cels on the bottom of the screen. I don’t use animation often so I use [Timeline] window in the drawing Workspace, but if you use it often it’s better to create separate workspace for animation rather than mix it with drawing Workspace like me.
8 – Quick buttons [Quick Access],
Create different sets of buttons you often use and for some reason don’t want to create shortcuts for. Drag and drop anything there: brushes, tools, colors (use right click - add drawing color), etc.
9 – Materials view [Material],
Just the materials I use from time to time: textures, brushes, 3d models, etc.
You also can change the button (tool) icon and color to make some of them look more noticeable:
1. Press little lines button and choose “Settings of sub tool”;
2. Change the name, icon and color
3. Press OK
Shortcuts
To speed-up your performance you also can use shortcuts.
Note: Use shortcuts close to your hand position rather than spread them all over the keyboard. Don’t forget that your tablet perhaps has buttons too, so you can connect them to CSP shortcuts. Check out your tablet settings to find how to set up its buttons. Mine has four and I set them up like this:
To open Shortcuts settings go to:
File – Shortcut settings.
Choose the area like Tools, Options, Auto-action, etc.
Use double click to change or add new shortcut.
You can add shortcut to the existing or custom-made tools, just find it in the menu:
For faster approach I made custom [Sub Tool] with three brushes which I use often and applied shortcuts [1], [2], [3] for them.
Shortcut [4] is reserved for gouache brush in Gouache [Sub Tool]:
But for this brush I added another feature: when I press and hold CTRL, the brush temporarily switches to Blend Tool.

To achieve that follow these steps:
1. Right click on the brush itself and choose “Modifier Key Settings”;
2. Find the option which controls behavior of the brush when you press CTRL and change it as you like. In my case I chose “change tool temporarily”, “Blend”.
Check out other options yourself, they are pretty straightforward.
With this you can have different behavior for every brush, if you want.
To expand or shrink the brush I use default method:
CTRL+ALT and drag.
This behavior also can be changed from “Modifier Key Settings” menu, just find CTRL+ALT in the list and change it as you like.

I also use X and Z keys to shrink and expand the selection to 1px. It’s useful when, for example, you select the empty space inside letters of some fancy font to fill it with color. To cover the gap on the borders you just need to expand the selection slightly more.

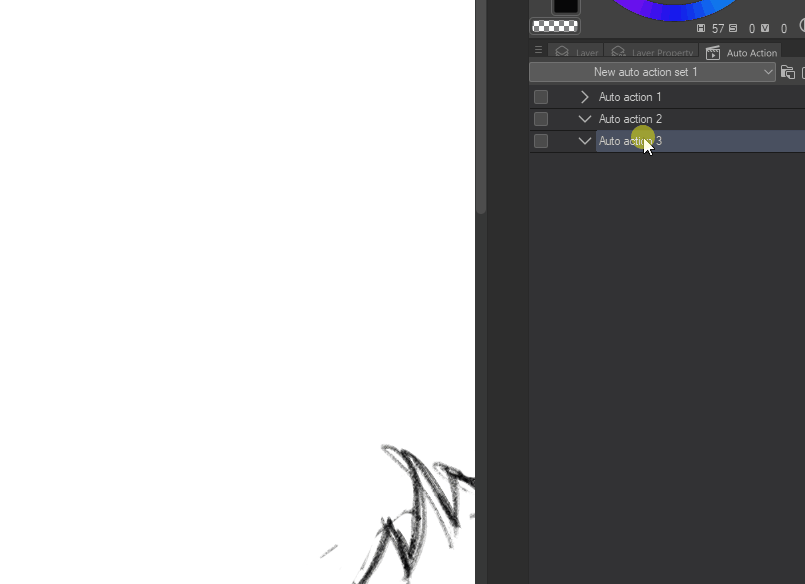
It is possible thanks to [Auto Action] feature. It allows you to record what you have done and repeat your actions with only one button.
This is how it looks:
To create new set of actions:
1. Open the [Auto Action] window from the Window menu;
2. Right click and choose “Create new set”;
3. Name your new set and press OK;
4. Right click and choose “Add auto action”;
5. Right click on the action and choose “Start to record auto action”;
6. Perform necessary actions and click “Start to record auto action” again to stop the recording.

Note 1: you can always switch on/off the actions in the existing auto action by ticking and unticking them.
Note 2: to delete the command:
1. Choose the command (the one with information under it);
2. Right click and choose “delete command”
To add shortcut to “Auto Action” you made follow these steps:
1. Open “Shortcut Settings” (ctrl+shift+alt+K)
2. Choose “Auto Action” in the area field
3. Choose your shortcut
4. Press OK
To save your new optimal Workspace press:
Window – Workspace – Register workspace:
Give it a proper name and there it is, your new personal Workspace:
Note: You can save as many workspaces as you like and switch between them right from the Workspace menu. One workspace can be for drawing, another for comics, third one for animation, etc.
I hope this article was useful for you and maybe even help with organizing your workspace.


留言