
Hey guys , In this tutorial I’m gonna talk about how we can use blur filters and tools in clip studio paint to enhance your comic or even illustrations . I’ll explain each filter and will provide examples using some of my comic panels .
------------------WATCH THE VIDEO FOR BETTER VISUAL EXPLANATION ----------------------
--------------------------------------------------------------------------------------------
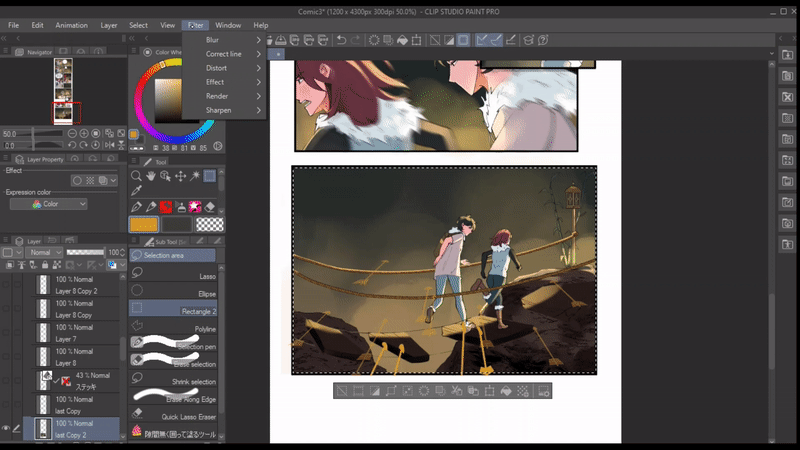
First I’ll be talking about the filters . All the filters I'm gonna mention is available under
[MENU ] FILTER > BLUR >
[NOTE]
- while using a blur filter make sure you’re on a drawn layer where you want to apply the blur filter because you cannot apply the filter to a blank canvas
+If you want to apply blur filter on a particular area then use lasso selection tool to select the area and then apply the filter .
BLUR / BLUR ( STRONG )
We can use blur and blur (strong) to smooth the finished piece or to smooth a line art , the option are limited here because We are not provided with the option to control the strength of the blur so we might have to use the filter multiple times to see a difference but this is the perfect amount of blur you wanted then go for it
----------------------------------------------------------------------------------------------------------------
GAUSSIAN BLUR
Unlike Blur/ strong blur , Gaussian blur allows us to adjust the strength of the blur . Which gives us much more control over the blur .
Now if we see in the panel 1, the girl is talking and in the panel 2 , the boy is talking . we can use gaussian blur here to direct more attention towards the character who is talking by blurring out the surrounding .
So in panel 1 I want to blur the background and the boy character . To do that we're gonna select the area using a lasso selection tool and click on ‘copy and paste ‘ in case we make a mistake and go to [menu] filter > blur > gaussian blur . A gaussian blur dialogue box will appear where we can adjust the strength of the blur and then click on okay .
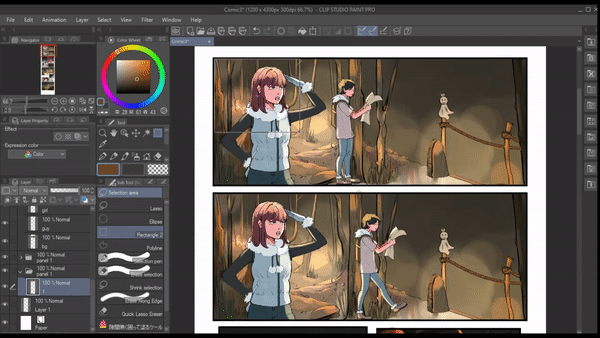
I'm gonna do the same process in panel 2 but instead of the background I’ll blur the girl .
RESULT :
Now we have much more clear imagine on which character is talking
----------------------------------------------------------Another way we can use gaussian blur is to create depth of field. If we look at the panel , the main character is surrounded by a crowd of people and it looks like they are standing very close to each other or even in the same line which make the whole panel too crowded and takes away the attention towards the main character . In that case we can use gaussian blur and create depth of field in between the characters.
Here I already have different people in the crowd in different layers . Now I'm gonna select a person from the crowd using a lasso tool and then go to [menu] filter > blur > gaussian blur and set the blur strength up to 44 . Now I'm gonna do the same for the rest of the people . I will apply higher strength of blur to the people far from the main character and people who are closer to the main character will have lesser strength of blur .
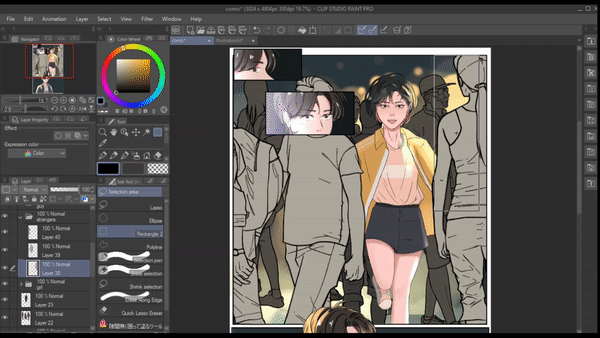
RESULT :
----------------------------------------------------------
We can even create photo-like bokeh effects using gaussian blur . To do that we can use any round brush and create a circle on the places we want the bokeh effect to be . Now we'll select the area using lasso and go to [menu]filter > blur > gaussian blur and strengthen it up to 27 then click on ok . Now on the same layer we're gonna draw some more circle and then convert the layer mode to “add glow” and duplicate the layer by “ copy and paste” .
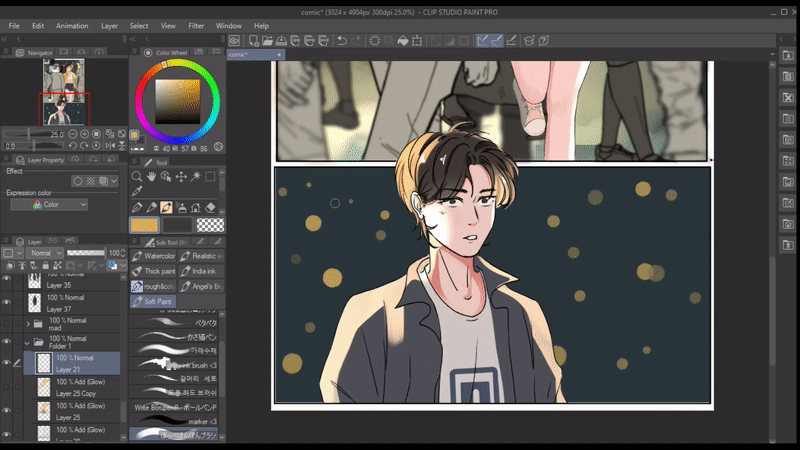
RESULT:
------------------------------------------------------------------------
MOTION BLUR
Motion blur is when you purposefully streak or blur an object in motion . We can use motion blur on anything where we want to create an action .
When we apply a motion blur filter , a motion blur dialogue box opens where under ” direction” we have the three options , that is ' forward , backward , both directions ' . I'll first explain in what kind of situation we can use these.
--------------------------
Forward motion blur can be applied to any object moving forward in a single direction
Backward motion blur can be applied to any object moving backward in a single direction
As for both directions , Imagine you're shaking a bottle of water obviously our hand movement will go both up and down , In such cases we can use both directions .
Now I’ll give some examples on how we can use motion blur in comics .
Here I want to create a snow blizzard , for that first we will draw snow using any brush. Once we are done , go to [menu]filter > blur > motion blur .
A motion blur dialogue box will appear .
Using the strength , we are able to adjust the strength of the blur .
Using angle , we can change the angle of the motion .
And I’m gonna set the direction as forward .
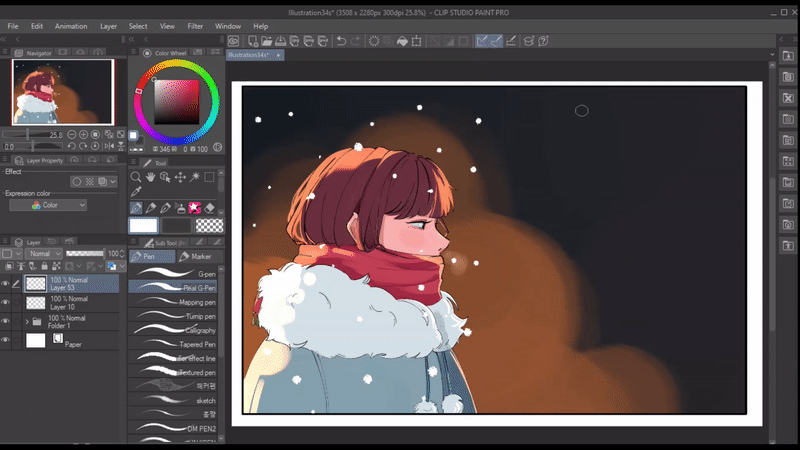
RESULT :
----------------------------------------------------------To give one more example on motion blur filter , Let's say we want to show our characters in running motion but we don't want the blur filter to blur out their face .So in that case we will first select the panel using a lasso tool then copy paste the layer. Now apply the motion filter and adjust it according to your desire.
Now we can just take a soft eraser brush and erase the areas we don’t want the filter .

RESULT :
----------------------------------------------------------------------------------------------------------------
RADIAL BLUR
Radical blurs is similar to motion blur , but radial blur blurs out everything surrounding the target point .
When we apply a radial blur filter , a radial blur dialogue box will show up . In which under the “direction” we have “inward , outward , both “ .
Radial blur also provides us a which is a target point
I'll first explain how the directions work
Inward blurs everything towards the target point ()
Outward blurs away from the target point +
Both direction blurs out in both inward and outward direction
As for an example In this panel the arrows are in action towards the character .To give this panel much more motion of the arrow moving towards the character and to make this action much for impactful we can use radial blur . First I will select the panel using a lasso tool , copy paste the layer .Then go to [menu]filter> blur> radial blur .
I have selected ‘inward’ as direction .[note: We can move the target point anywhere just by dragging and the blur direction will act according to it ]after setting the strength click on ok . Finally I’ll erase the places where I don’t want the filter to be .
RESULT :
-----------------------------------------------------------------------------------------------------------
MOSAIC
mosaic does not come under “blur filter” so consider this as a bonus tip . Mosaic is available under [menu] Filter >effect >mosaic . This effect blurs anything to a low resolution pixel image .
If you have anonymous character whose face you don't want to reveal or If you want to censor any word this is the perfect blur effect for that . Mosaic effect in csp also allows us to adjust the tile size .
-----------------------------------------------------------------------------------------------------------
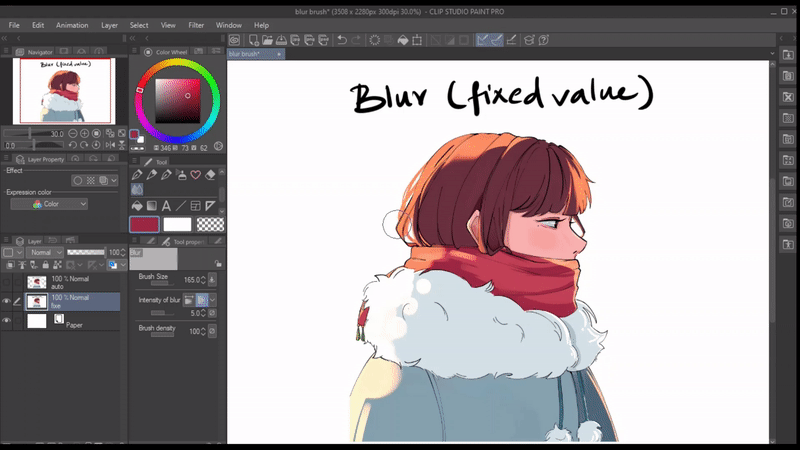
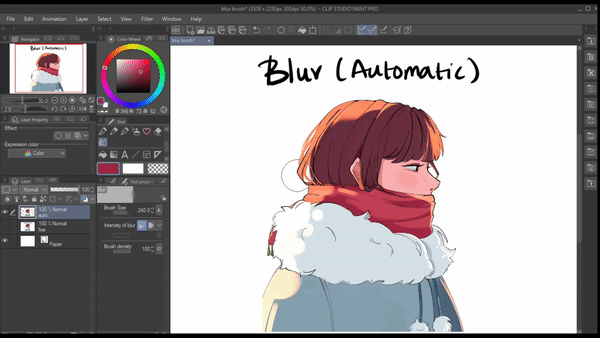
BLUR BRUSH
Blur brush is available under the toolbar menu . If we click on the tool properties of blur brush under the” intensity of blur “we have two options that are ‘automatic’ and ‘fixed values’ .
FIXED VALUE :
This is literally a gaussian blur filter but in a brush format . I usually use this as a quick blur We can even change the density of the brush as well as intensity of the brush
AUTOMATIC :
We can use automatic to create a foggy blur effect but i prefer to use automatic blur brush to blend colors.
----------------------------------------------------------
And that is all the blur filter and blur tool available in clip studio paint , hope this tips will help you improve your comic and that's it for the tutorial . Thank you for reading .
對此投稿按「讚!」的用戶


留言