How to use gradient maps? Super easy and quick.
Introduction
Hi guys! I’m Rebeca and In today’s tutorial, I’m going to explain to you how to use gradient maps? Easy and quick. I will be showing you how you can create several versions of one illustration and how you can color with gradient maps,
If reading it's not your cup of tea, here is the video version if you are interested in watching it, and if so thank you!!!!! :D
I'm going to start with this illustration
and with the help of gradient maps, I will create two other versions in half the time.
Orange Sunset/Moon Night Scene
Then I will color this illustration starting with a black and white illustration.
Original full-color/Color with gradient maps
What are gradient maps?
Gradient maps come in handy once you already have an illustration done. The key to using gradient maps is to have your values well defined. What I mean by that is that, is that your illustration needs to have enough shadows and light so the gradient maps work.

You can use gradient maps to change the mood of your illustration scenario, for example, you could have drawn a girl watching outside the window and for instance, the light is natural because the outside is sunny and then with gradient maps, you could transform that scene into night easily and that would save a tone of time. Gradient maps are useful and that’s just one example but, you could experiment and discover the greatness of this tool.

So basically the darkest areas of your gradient replaces the shadows.

The middle replaces your general exposure.

And the end replaces your highlights.

Here are the tools and brushes that I used in this turorial
1. Transparent watercolor brush.
2. Transparent color and fill tool.
3. Sof spray.
4. Blend tool.
5. Fill tool (exact location)
6. Soft eraser.
Finding Gradient Maps (3 ways)
So let’s start.
I already drew this illustration. And what I have here are two layers with the same illustration. I will hide one and I will work on the other.
So there are three ways to find Gradient maps.
First way
The first one is by right-clicking on your illustration and going to NEW CORRECTION LAYER and then choosing GRADIENT MAPS.
The GRADIENT MAPS box will appear and It automatically goes to white and black color.
Note, that when I click ok a new layer appears on top of my illustration.
Second way
So the second one is by going to the left part of your screen and clicking on this icon.
You will find all these options
so let’s choose this one to change the color just click on the second box
and it will appear in the edit gradient maps box.
If you want to move it just click on it and move it wherever you want.
So let’s choose these turquoise colors and click ok.
And you see that the color doesn’t automatically apply like the previous one, therefore there’s no new layer either.
So that’s the difference, for this gradient to appear you will have to click where you want the gradient map to start you will see that a line appears, hold it until you get to the side where you want it to end. Before drawing the line make sure to create a new layer to put the gradient map on it.
And I just lower the opacity and if you want you can even change the blending mode. Try them all and find the one that fits you the most.
Third way
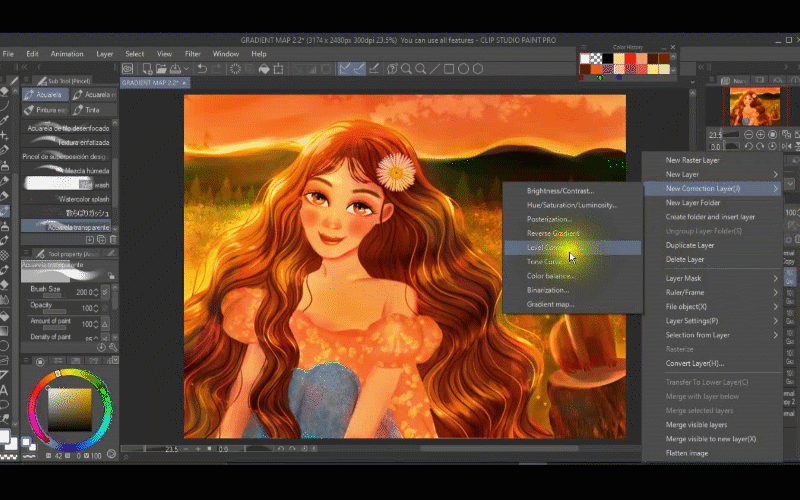
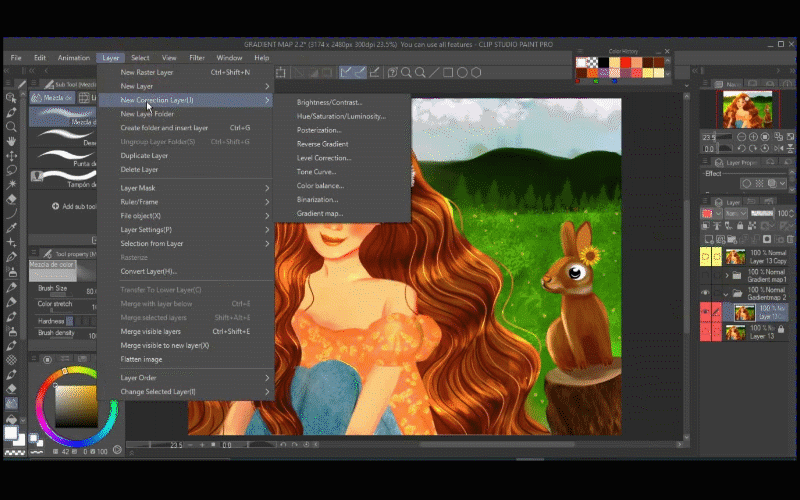
The third way to find GRADIENT MAPS is to go up on the toolbar and click on LAYER – NEW CORRECTION LAYER
and here it is GRADIENT MAPS
Applying Gradient Maps: Orange Sunset
First, I’m going to fix the colors of this illustration so I will go to TONE CURVE. As you can see, all the options of TONAL CORRECTION are here too.
Now I will activate the gradient maps layer and with that, I’m going to change the values from TONE CURVE so this white and black gradient helps me to find out if the values are ok.
Here’s the comparison between the one without a tone curve and the one with a tone curve.
Can you spot the difference? The colors look better.
So I will merge the new layer where I fix the color with my illustration. I will select the two layers and hold SHIFT then, right-clicking on either of them - MERGE LAYERS.
So let's start to use the Gradient Maps
Right clicking-new correction layer-GRADIENT MAPS.
Click on the Gradient set and I will choose the sunset gradient
and I'm going to change the color by moving those little rows to the right and you can see how the orange color becomes stronger here you could move any of these rows and change the tones
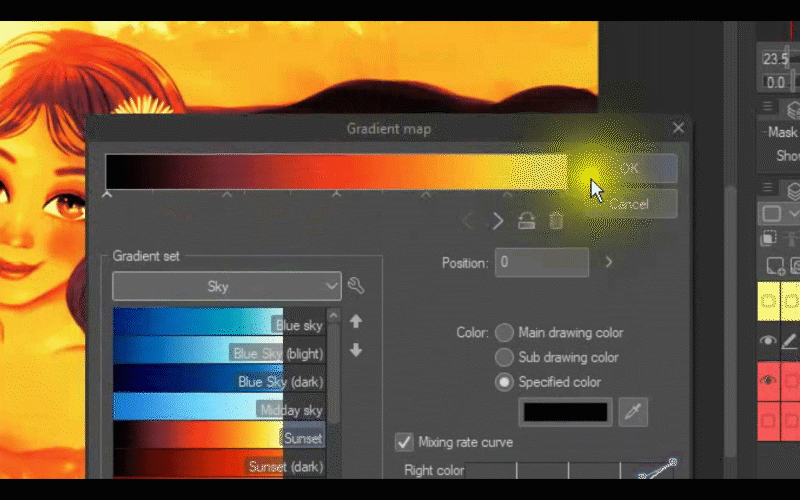
You can even select the eyedrop tool and select any color even outside the box also you can change the colors by just clicking on this box and choosing a color you would like to add and click ok.
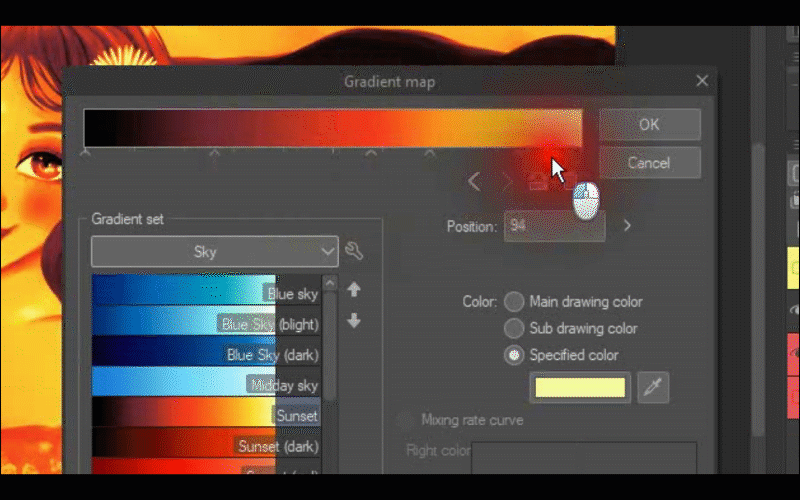
Now, I'm going to choose the fill tool and select a transparent color
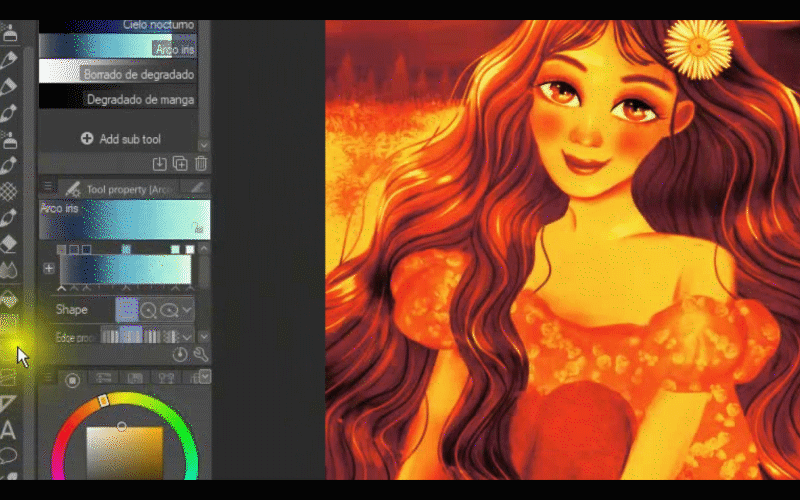
And then click on the illustration. So with this, I change the layer to black as you can see it was previously white and this will allow me to paint the orange gradient map wherever I want not necessary in the entire illustration.
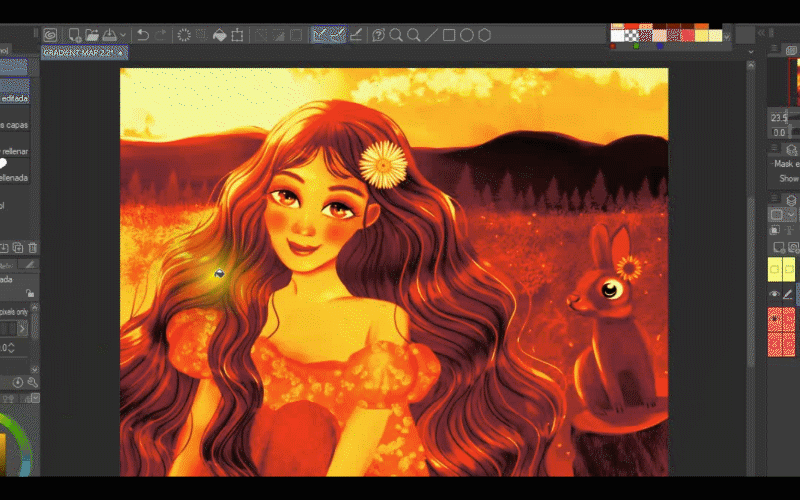
So to reveal the gradient you can choose any brush you like. I'm going to choose the transparent watercolor brush and I will paint lightly so the color is not that strong.
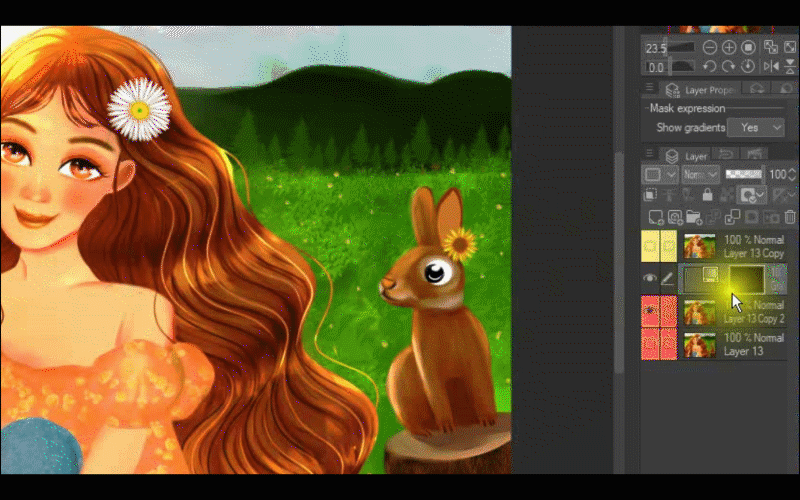
Then I will add another gradient maps
Right click-new correction layer-gradient maps
This time I will choose the sunset dark.
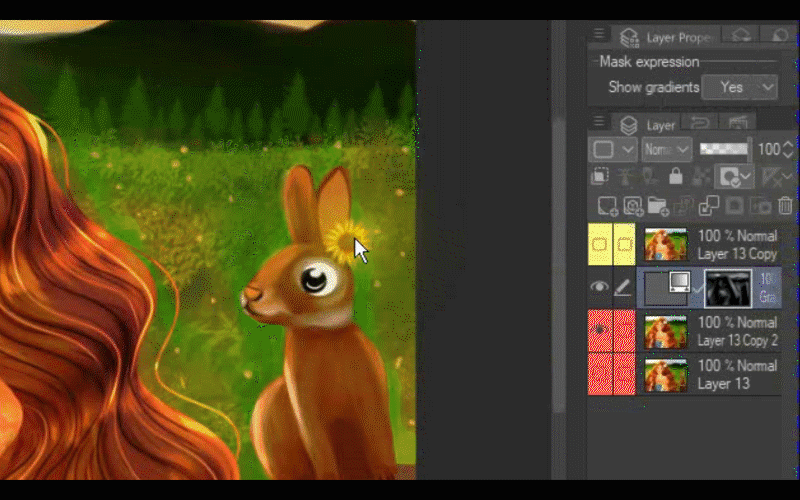
and I will do the same with the fill tool I'm going to use a transparent color then click on my illustration
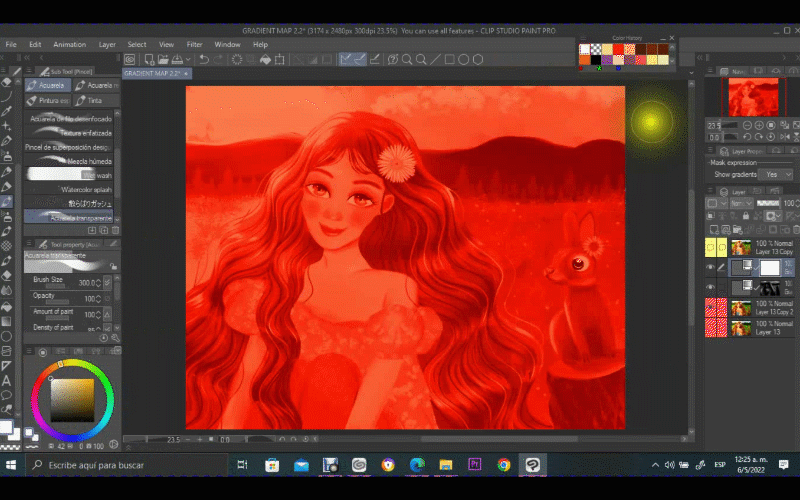
and with the watercolor brush let's add the gradient map.
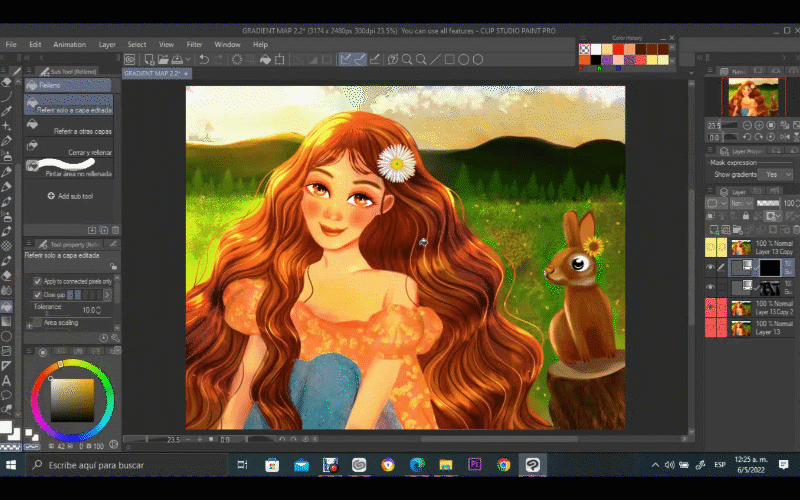
How to create your gradient maps?
I'll add another gradient map
Right click-new correction layer-gradient maps
By the way, you can create your new gradient by clicking here, you can duplicate the selected gradient, load it to the gradient bar, and replace a saved gradient.
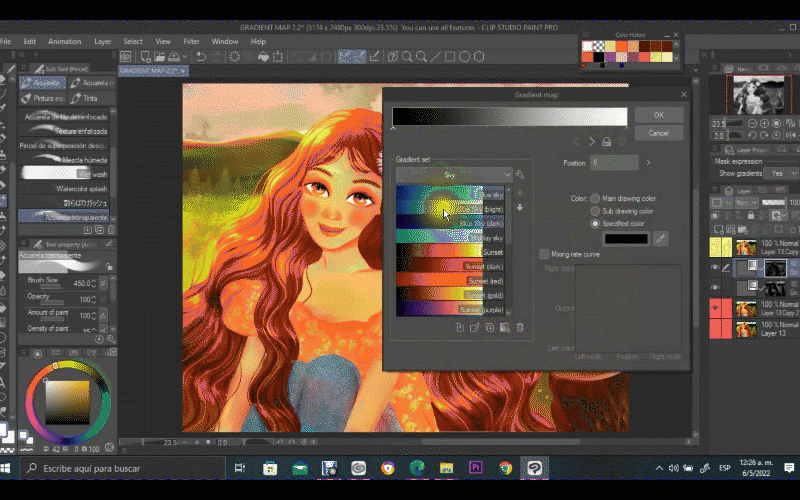
And so to create your gradient map let's click on here and let's change the name to NEW N3 click ok and as you can see here is our new gradient map
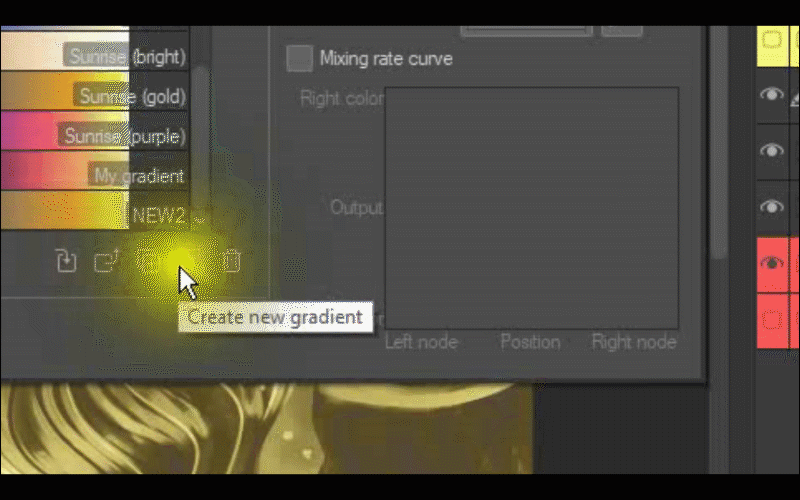
And so I can change all the colors let's add this orange and change the arrows a bit and click ok.
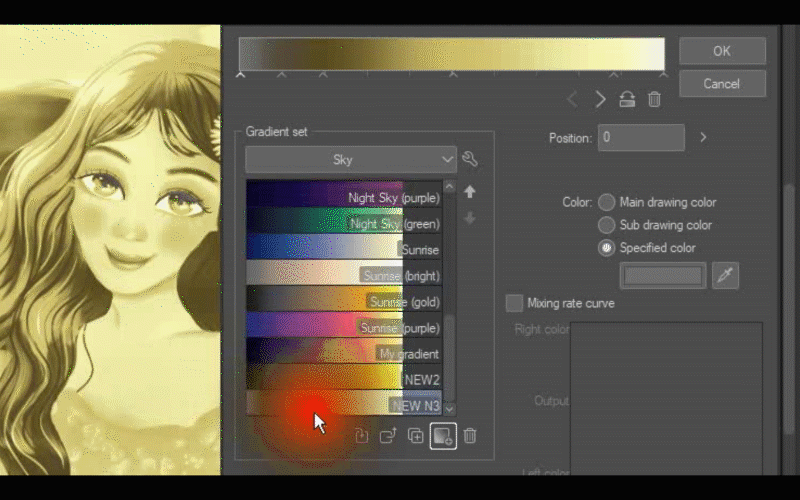
I will do the same that I have previously done, I choose a transparent color, and with the fill tool click on it
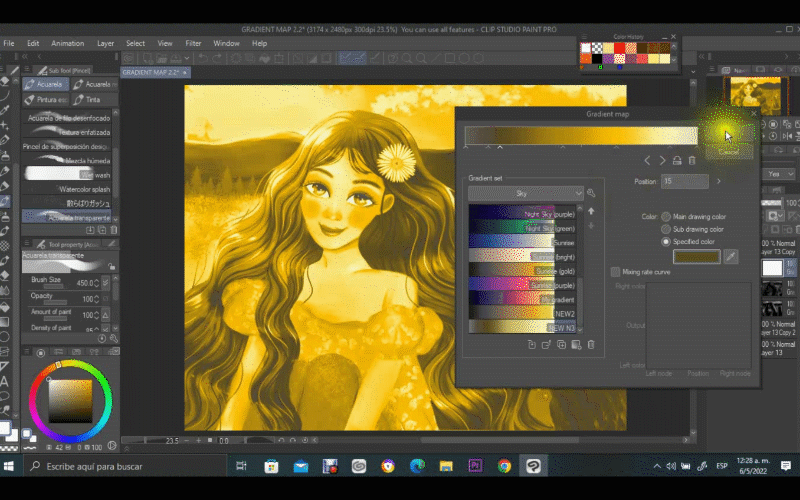
then let's choose a white color, and this time I'm going to choose the soft spray to paint.
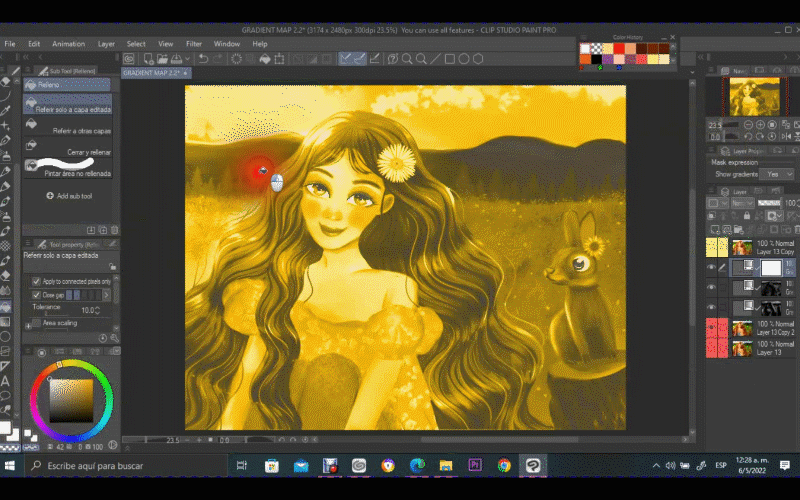
Now let's add another gradient Right click-new correction layer-gradient maps
I want to choose the sunset (dark) this time.
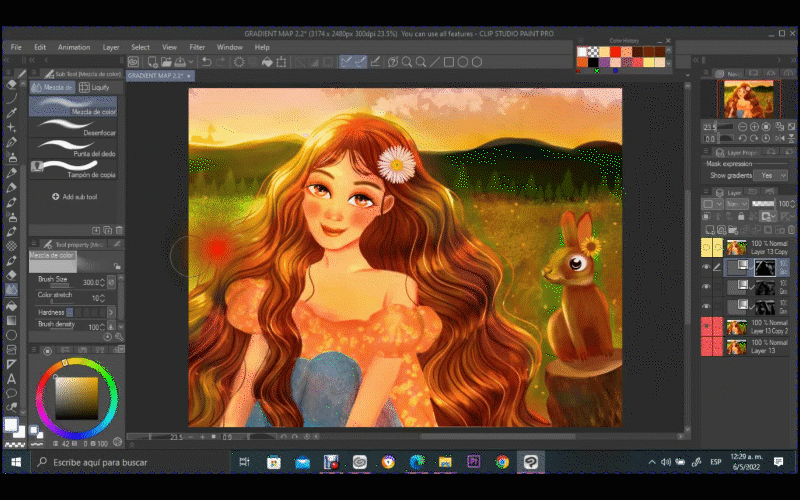
So now I will be erasing all that redness with the soft eraser. I'm going to lower the opacity.
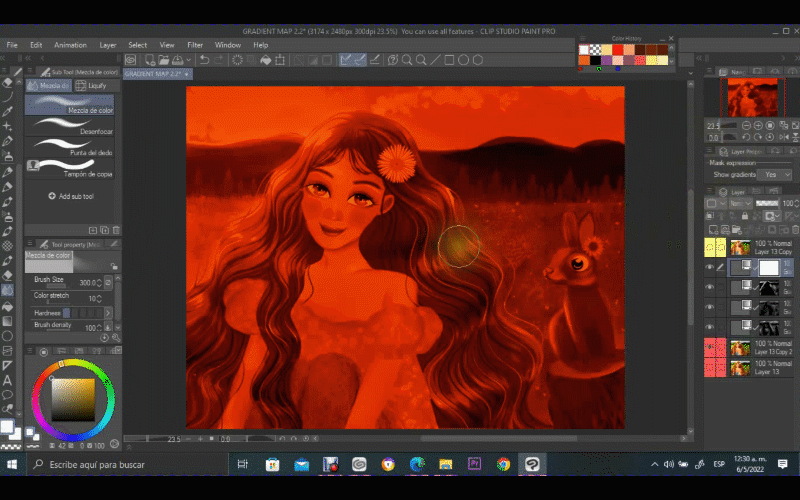
Then I will paint again with the transparent watercolor brush where I think I may need red.
I will be constantly lowering and increasing the opacity because I'm always changing my mind.
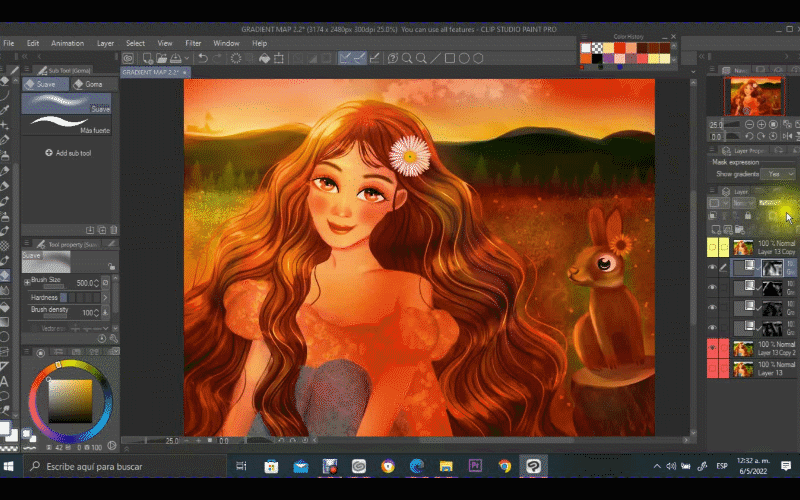
So then I'm going to change the blending mode to GLOW DODGE
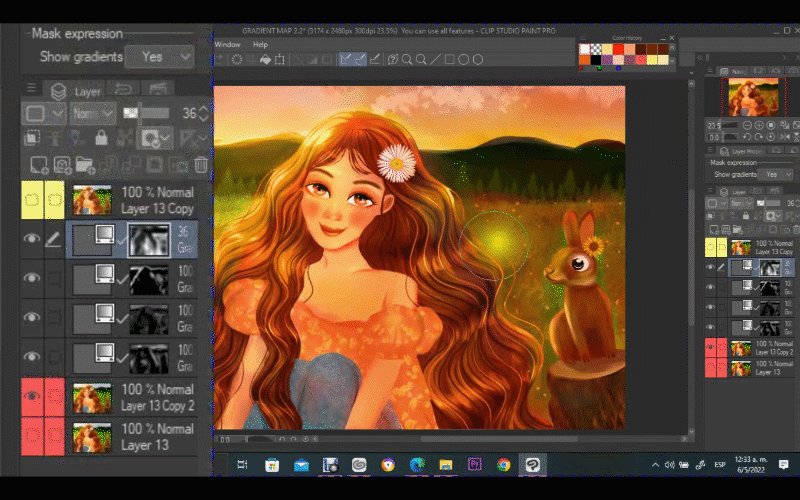
And again I'm going to lower the opacity and with the soft eraser I will take out the excess, mainly I want this color on the grass.
Now I will add a bit more color with the transparent watercolor and remember with white color this will make that the gradient map appears where we want it, not in the entire illustration.
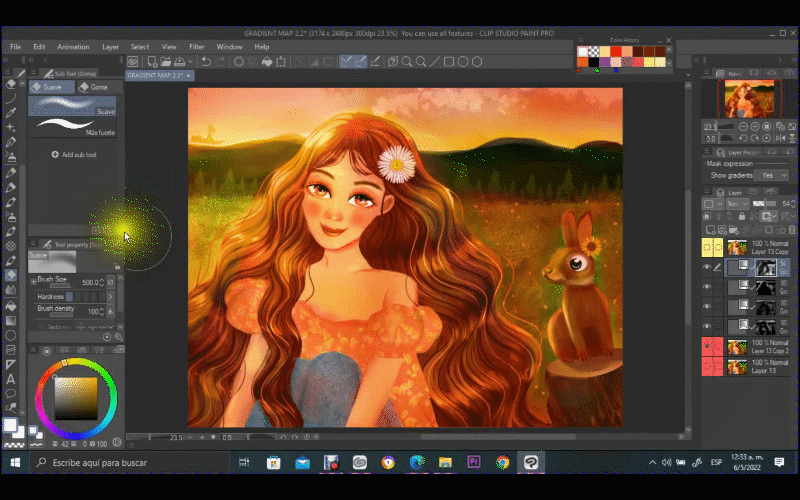
I will add another gradient map and I will choose Sunset red
and I choose the transparent color and with the fill tool click on it.
Then with the transparent watercolor and white color
I paint over the sky a bit stronger this time.
I'll add another gradient map layer and I will go with Sunset (gold) again let's paint with a fill tool and transparent color
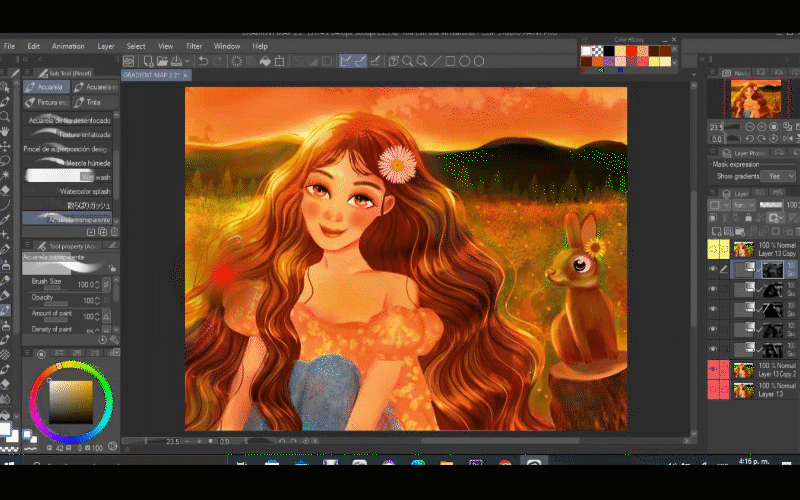
and then I will paint on the grass with the gradient using the transparent watercolor brush.
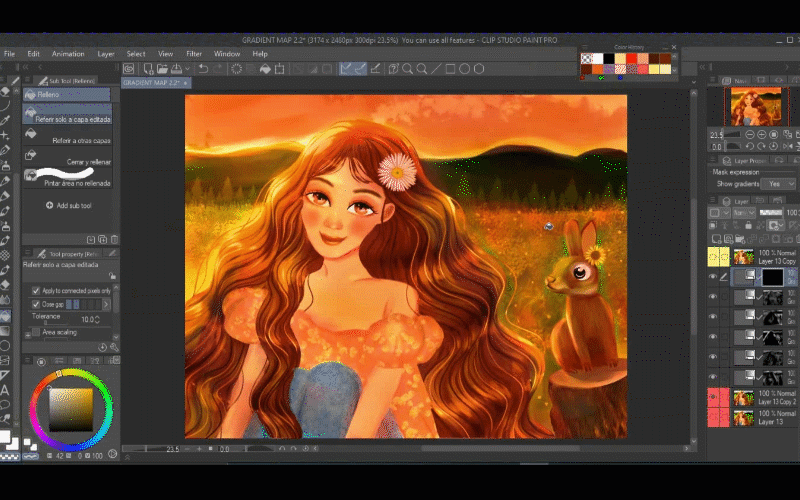
Next, I'm going to fix the colors with the tone curve, hue/saturation/ luminosity,
Lastly, I will place all the layers in one folder. So I just select the illustration while holding SHIFT then I go to the top then you see the layers change of color kind of highlight so that means they are selected and I just drag them up and just like that they are in one folder.
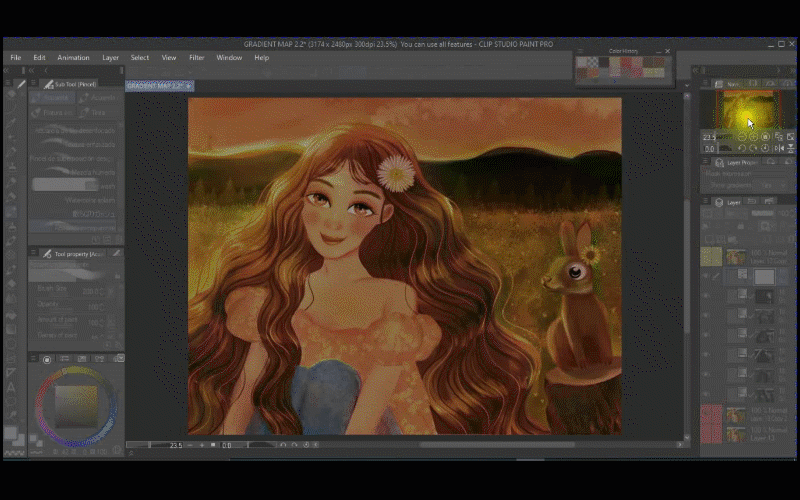
So I end up with 6 layers of gradient maps for this illustration. You can use less or more it depends on you but you can definitely create great combinations with gradient maps.
Applying Gradient Maps: Moon Night Scene
So let's go to the edit-new correction layer. And I'm going to pick this Blue Sky (dark) gradient. Immediately, I will lower the opacity.
Then I will change the blending mode to a Darker color and I will use the fill tool and the transparent color to hide the gradient map
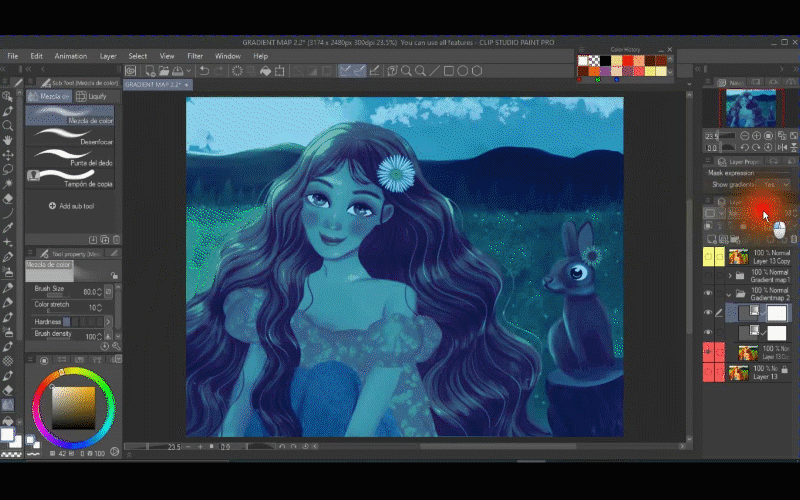
Then I will add another gradient map layer and this time I will choose Blue Sky and I will increase the light and the shadows as well so just move the arrows and click ok.
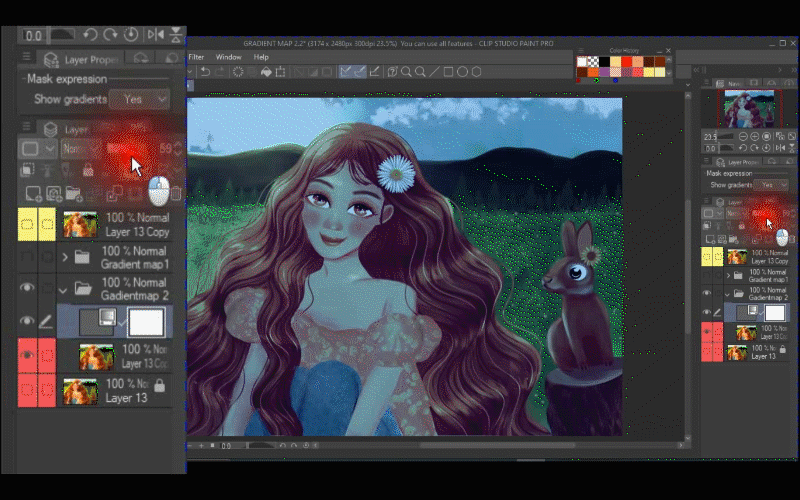
then with the transparent watercolor brush, I will paint with the gradient map where I think the light from the moon will come.
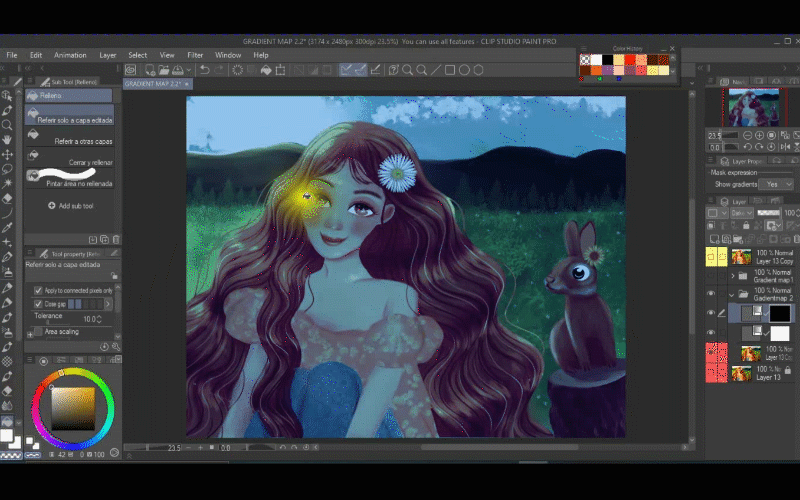
I will add another gradient map and in this case, I'm going to choose the Sunset (gold) and I will increase the light and click ok.
Now let's use the fill tool and the transparent color to hide the gradient
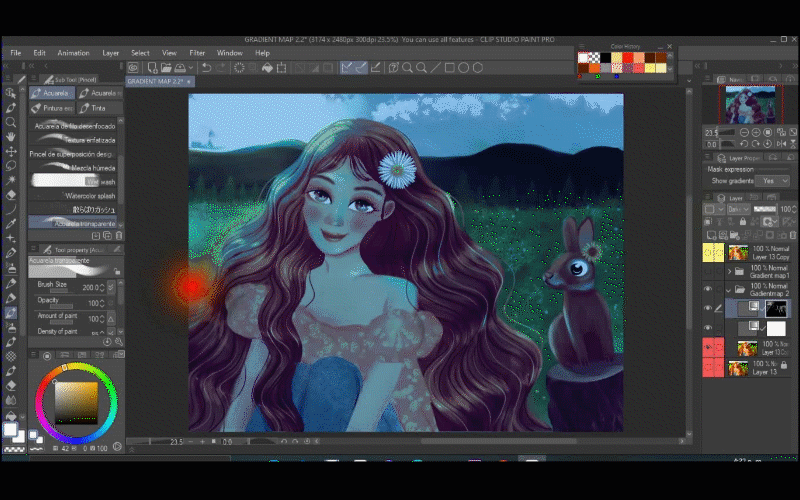
and I'm going to paint with the transparent watercolor brush around her hair I will create the moon on the left side also I will paint on the grass and in her eyes and lips.
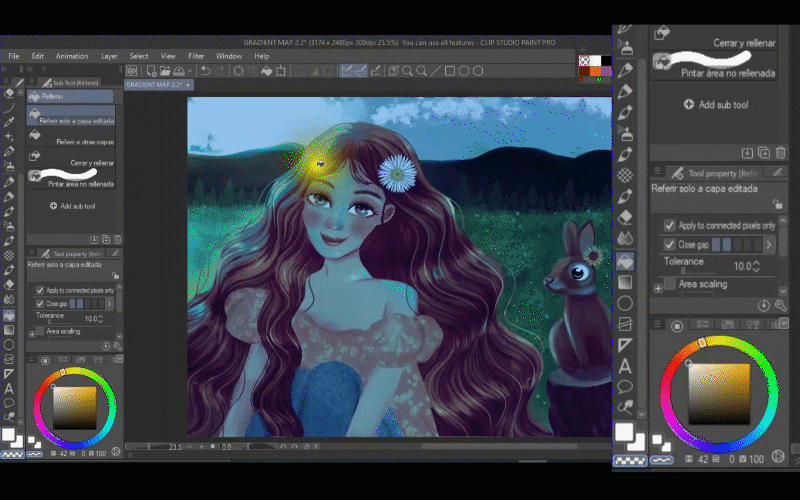
With the blend tool, I'm going to soften those strokes.
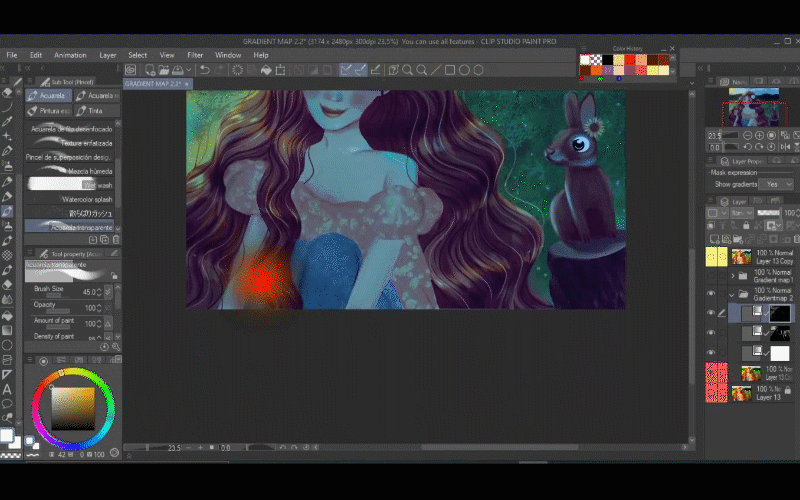
After that, I will add another gradient map and I will choose the Night Sky (dark) and I will lower the opacity.
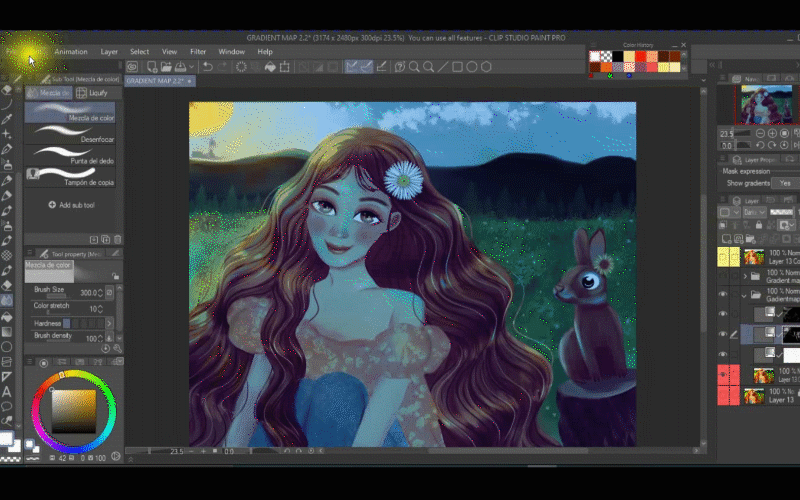
Note that the dark gradient is below the gradient where I paint the moon.
Ok, so I will use a blending mode for this night sky dark gradient.
I will choose overlay
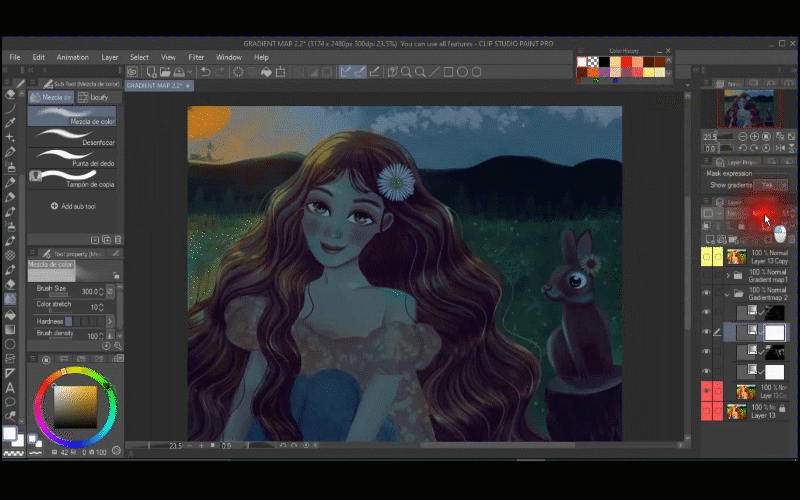
I will lower the opacity,
Now I will change the position of the layers. I will put first the two layers where I just lower the opacity and I didn't do any other change besides that. You can see the difference because they have remained white and the other two are black.
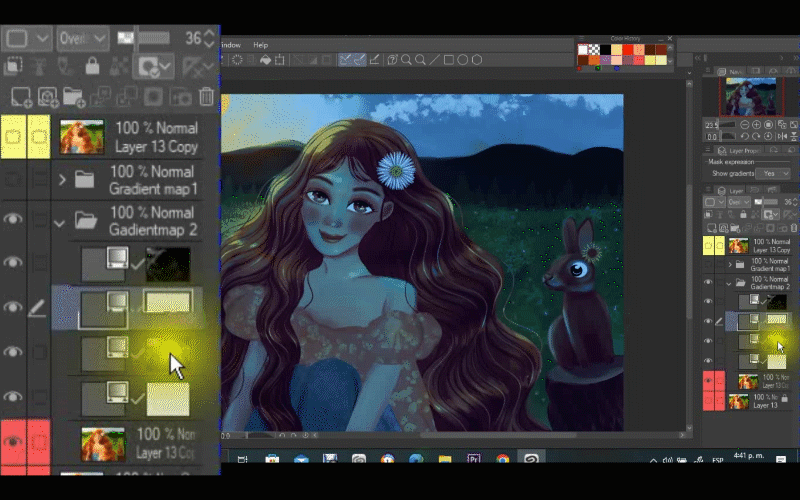
Let's add another gradient. I will choose the blue sky (dark) and I will increase the shadows.
Now I will select the fill tool the transparent color so I can hide the gradient,
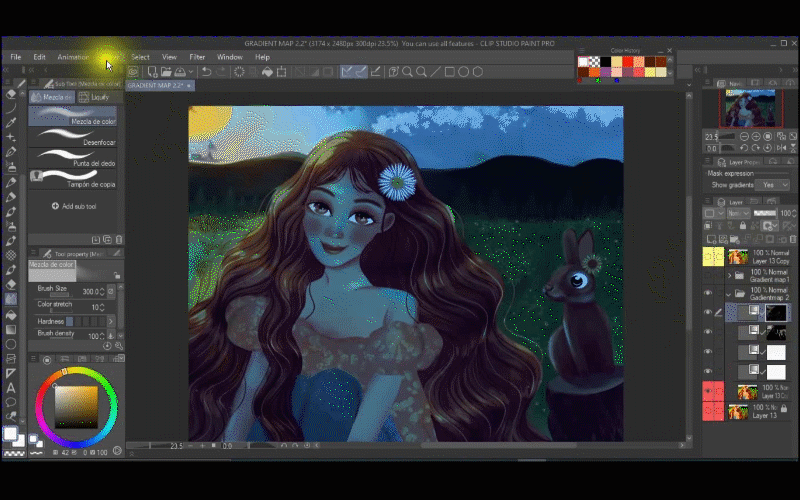
Now, I will use the transparent watercolor brush, and don't forget to choose the white color so the gradient can be revealed when you're painting.
I will start by painting the sky and so on.
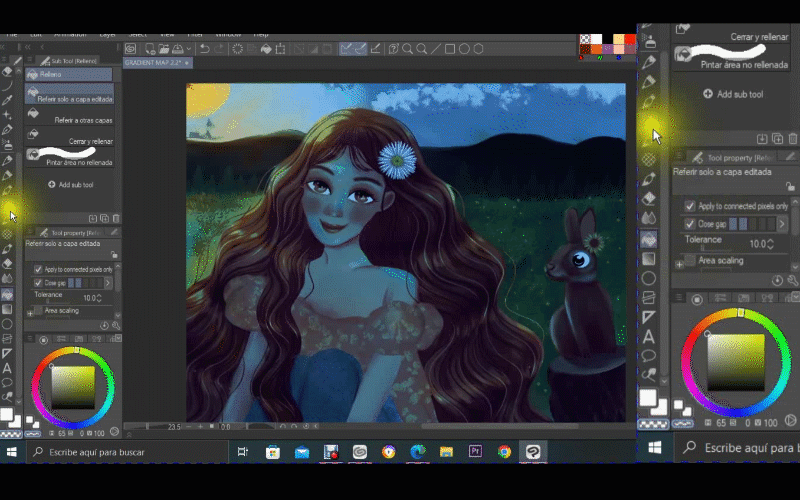
Next, I will add another gradient and I'm going to choose Somber shade (red)
I will decrease the shadows and increase the light.
I'm going to use the fill tool yet again and the transparent color then
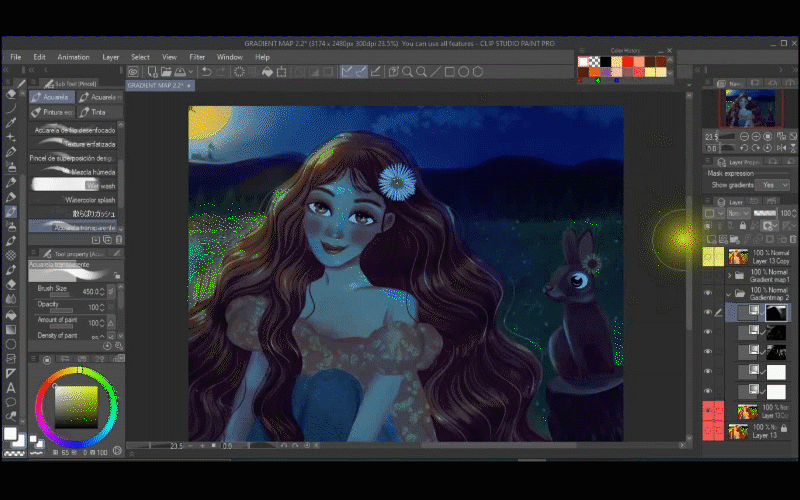
then I will paint with this gradient on her skin.
Don't forget to choose the white color so the gradient is visible.
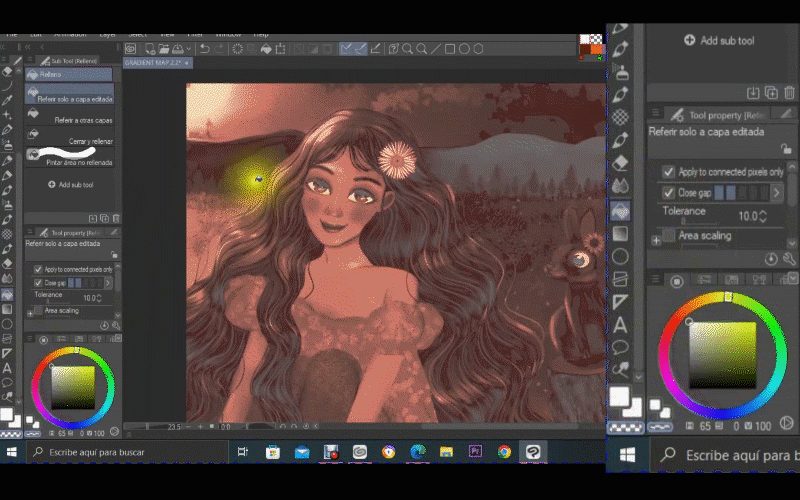
Now, I will add another gradient map.
This time I will select Daytime Sky and I will lower the opacity.
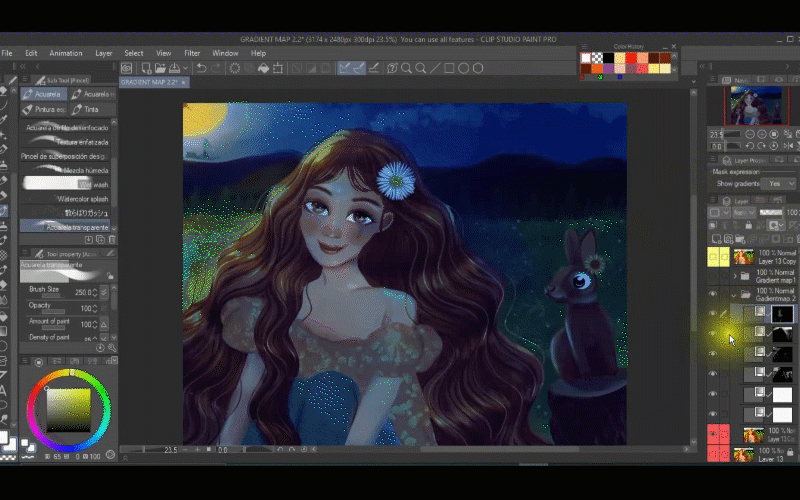
I will move this layer down.
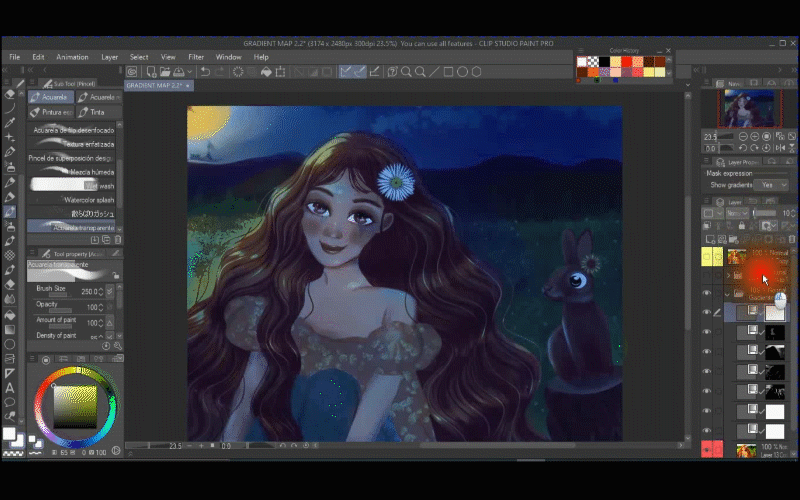
I want to add some glow to the sky so I create a new layer on top of the others and I will choose the Glow A and Glow B also I will use the blending mode ADD GLOW.
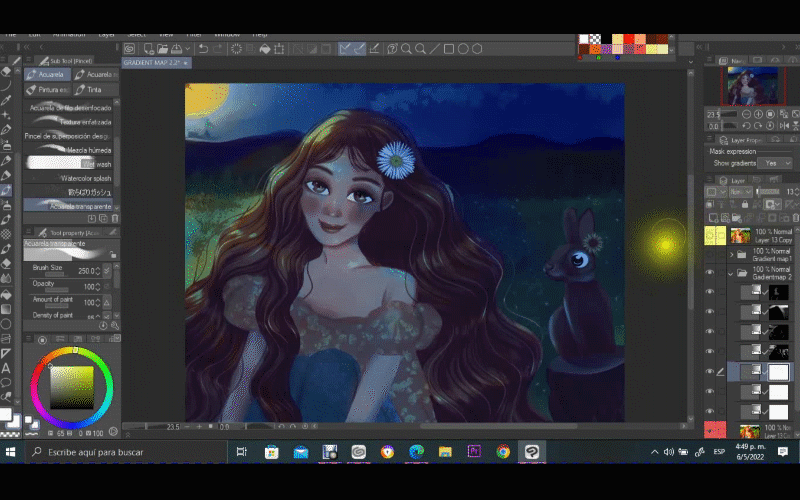
Next, I will add another gradient map and I will choose the Sunset (gold)
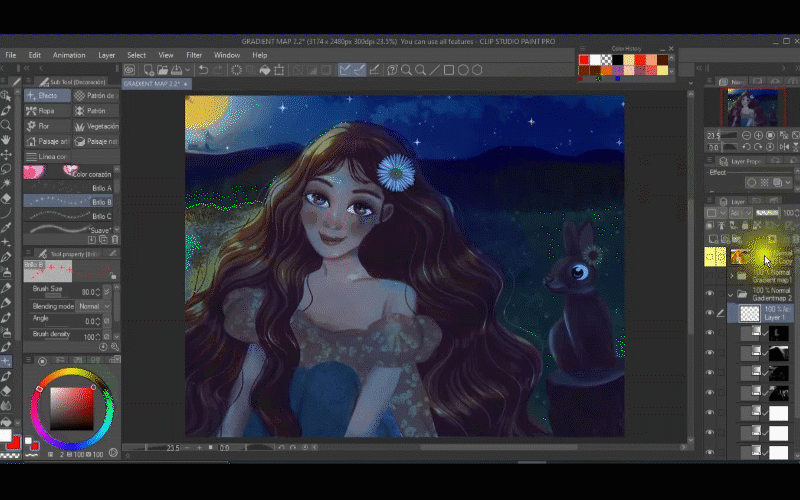
Before I forget I'm going to look for the layer where I did the moonlight and I will paint over the rabbit so it can be seen a bit more.
Now I will go back to the last gradient I just created and paint over the rabbit again.
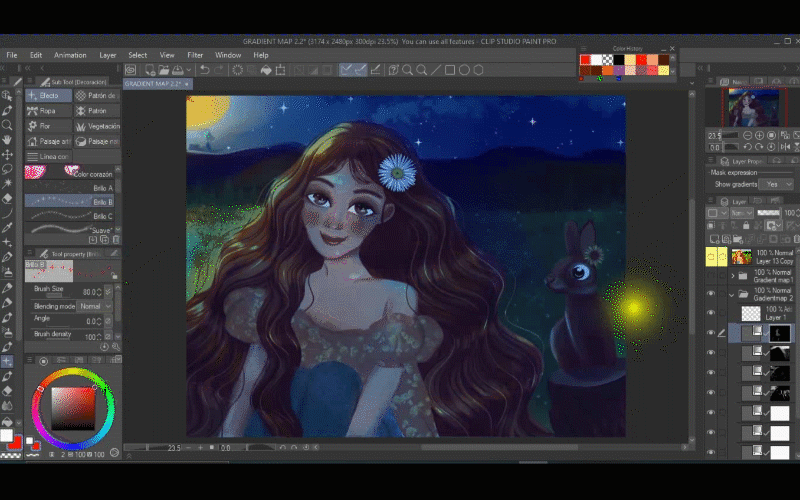
Lastly, I will fix the colors with a tone curve.
So let's go to Layer-New correction layer-Tone curve.
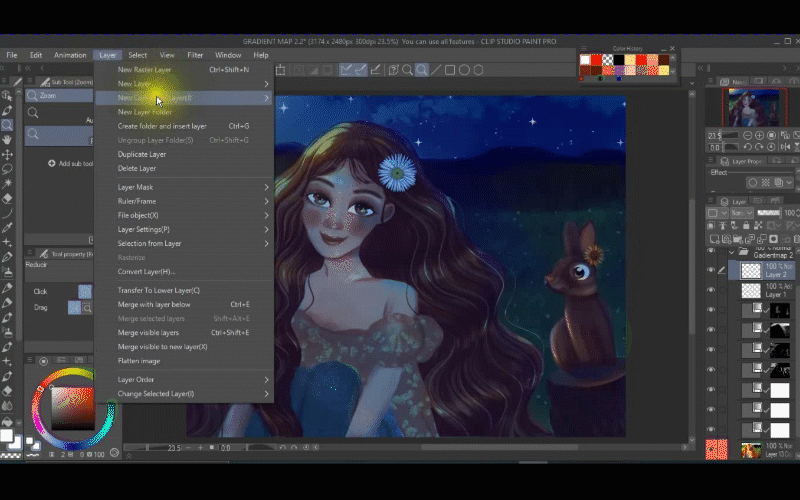
I end up with 7 layers of gradient maps.
Here are other examples of gradient maps, you could do endless combinations if you want. Try them all and see what you like.
Coloring with Gradient Maps
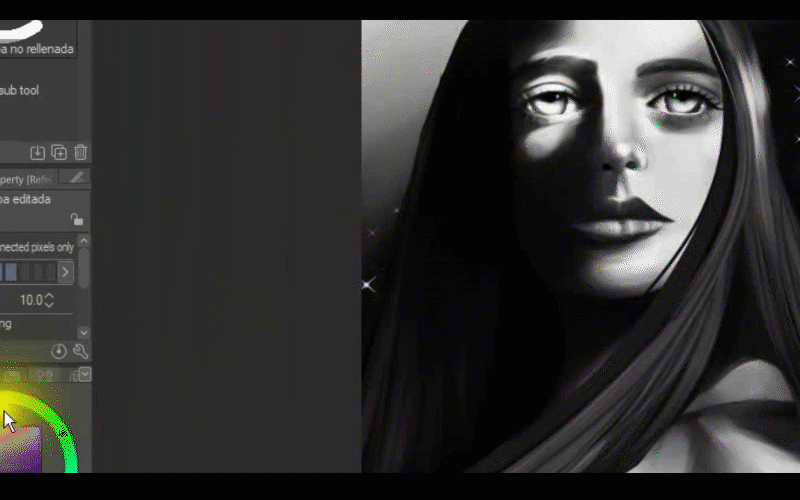
As you can see, this illustration is in black and white. I will be coloring it with the help of gradient maps.
So I'm going to create a gradient map
right-new correction layer- gradient map.
I have previously modified as you can see it says copy of sunset.
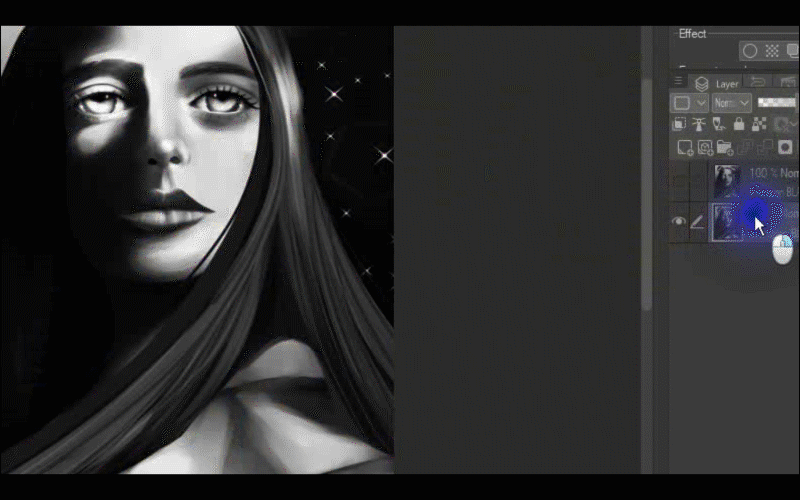
And I will increase the shadows and then I will click on one of the arrows that represent the dark color and change it to a purplish tone then I'm going to increase the brightness and I will change the yellow for a pinkish color and I will increase the brightness one more time. I will change again the mid shadows to blue color and I will adjust it a bit more. Then I will increase the shadows and finally, I will change the bright color that was previously yellow for pink color and click ok.
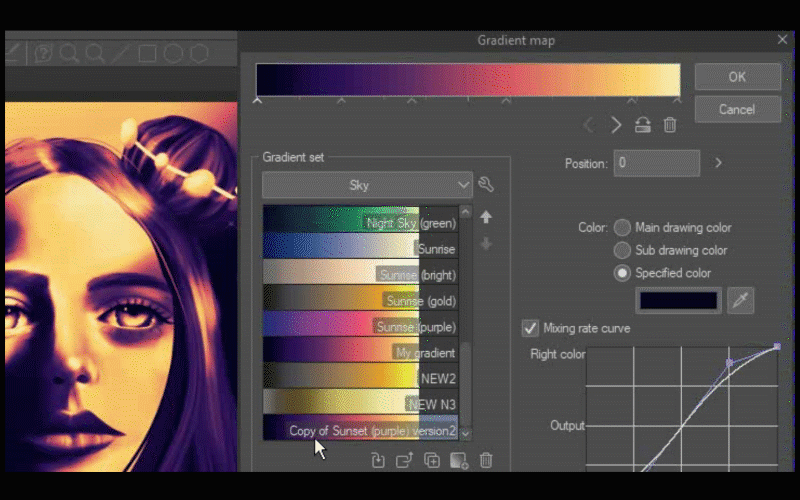
Now, I'm going to use a blending mode called Darker Color.
I will use the fill tool and the transparent color to hide the gradient.
So I click on the illustration.
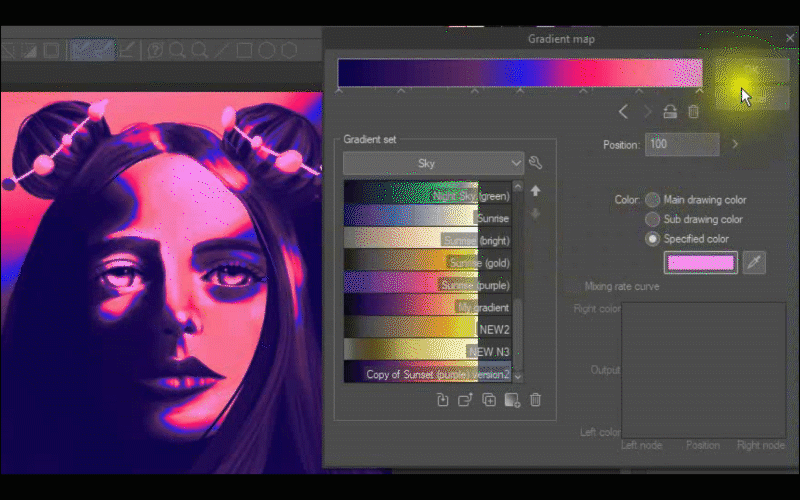
I start to paint with the transparent watercolor brush and remember the white color so the gradient is visible.
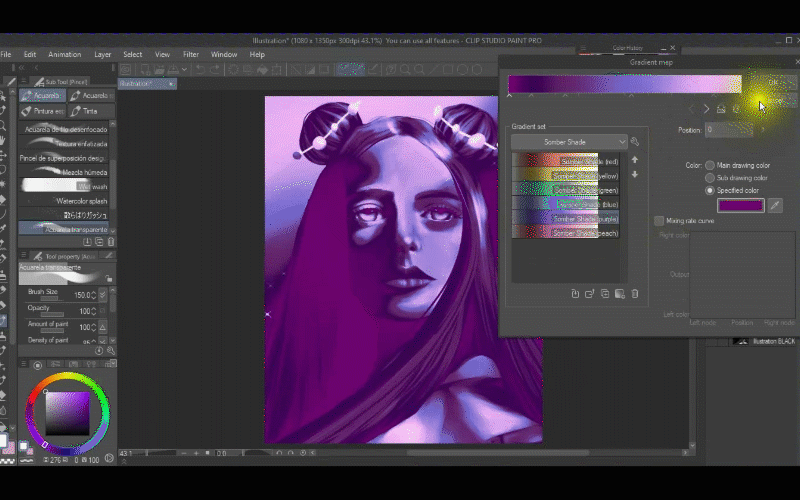
I will add a second gradient map and I will choose Somber Shade (purple) and I will adjust the colors-
Also, I will replace all the shadows with a darker purple color and click ok.
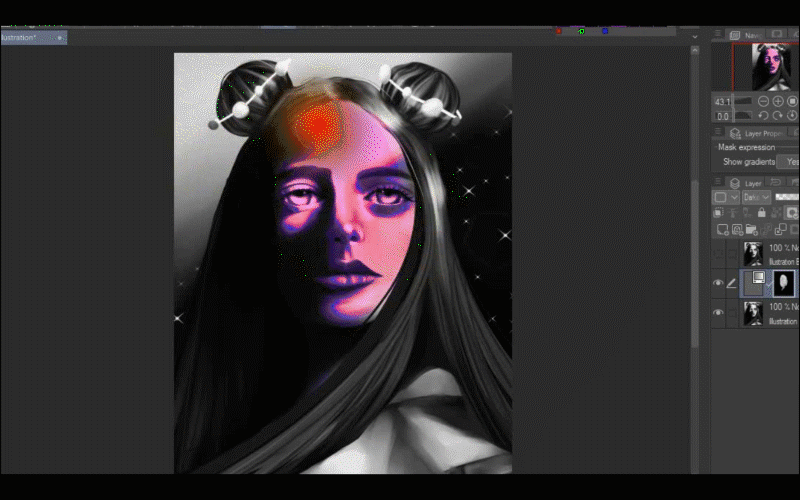
After that, I will use the fill tool and the transparent color and I will click on the illustration and with the transparent watercolor brush, I will paint the gradient in her face mostly in the shadows.
I'm going to add a third gradient map and this time I will create a new one so click on create a new gradient and I will just write 4 and I'm going to adjust the brightness, also I will change the color for a pink tone. I will change this other yellow for an orangy tone. And let's increase the pink tone
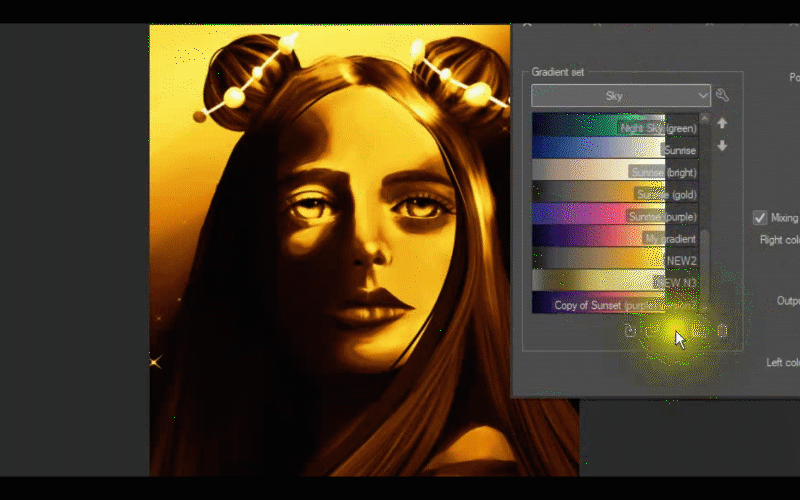
and I will use the fill tool, the transparent color and I will start to paint with the brush and remember the white color.
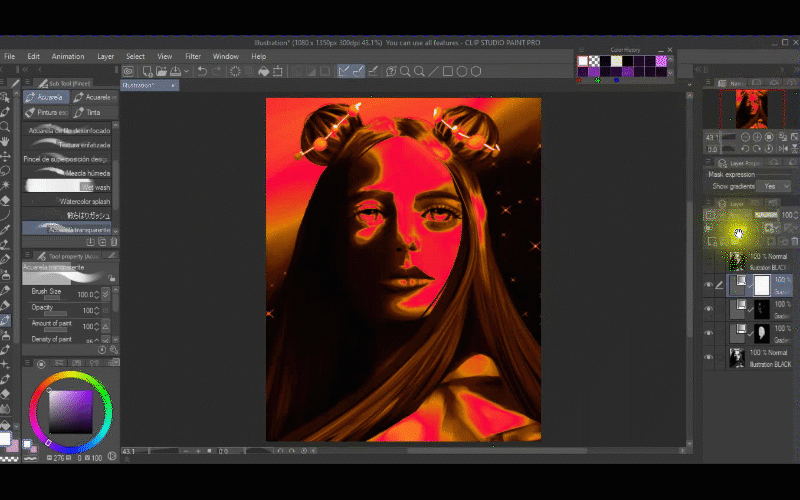
Right now, I'm painting the lights with this gradient and I will use the blending mode HARD LIGHT.
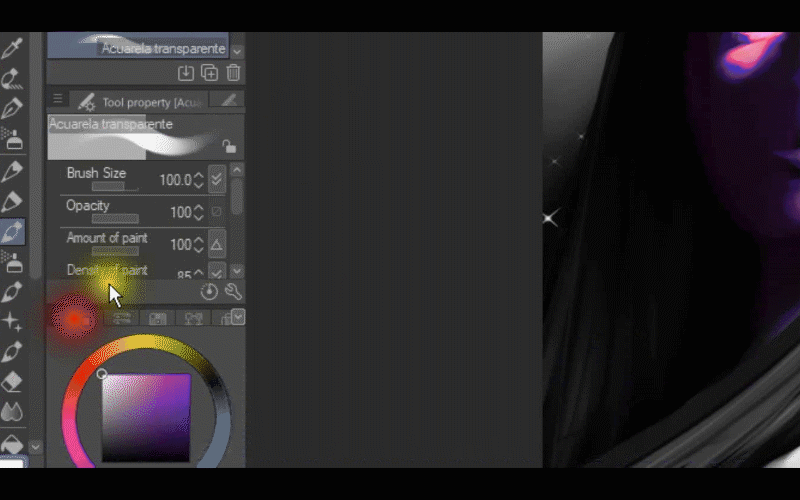
Ok, let's add another gradient map I will choose Midday sky and I will change the color of the shadows I will choose a blue tone
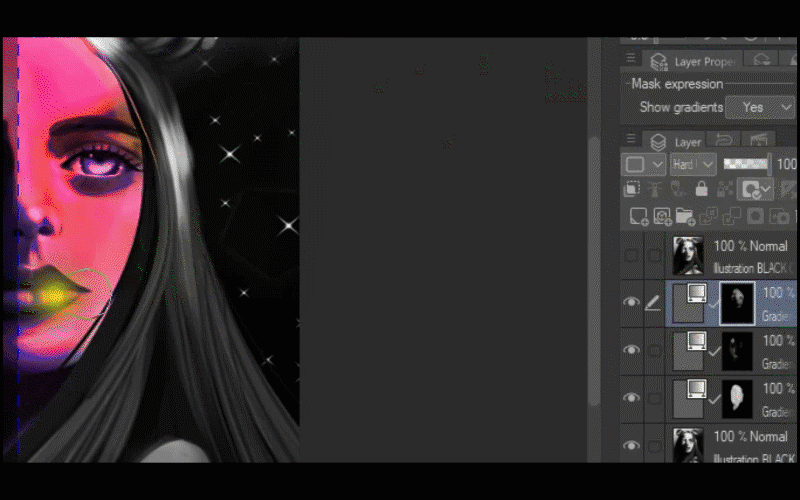
I will use the fill tool, transparent color, and I will paint with the same brush and remember white color so the gradient is visible. I'm painting the shadows with this gradient.
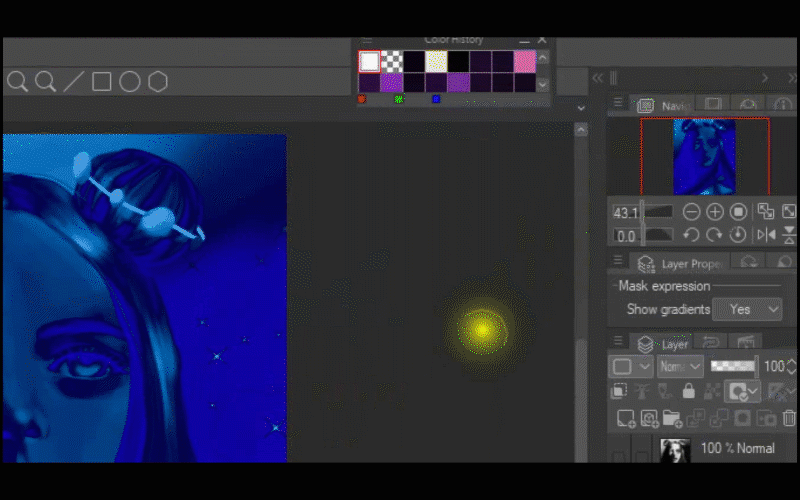
I will add a new gradient map and this time I will choose Sunset dark.
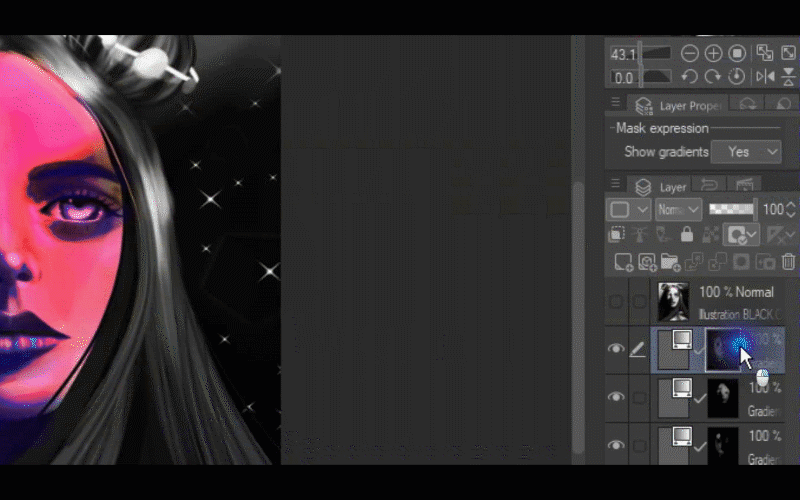
I'm going to use the fill tool once again, I will paint my layer with transparent color then I will use the transparent watercolor to paint and I will use this gradient mainly in her hair.
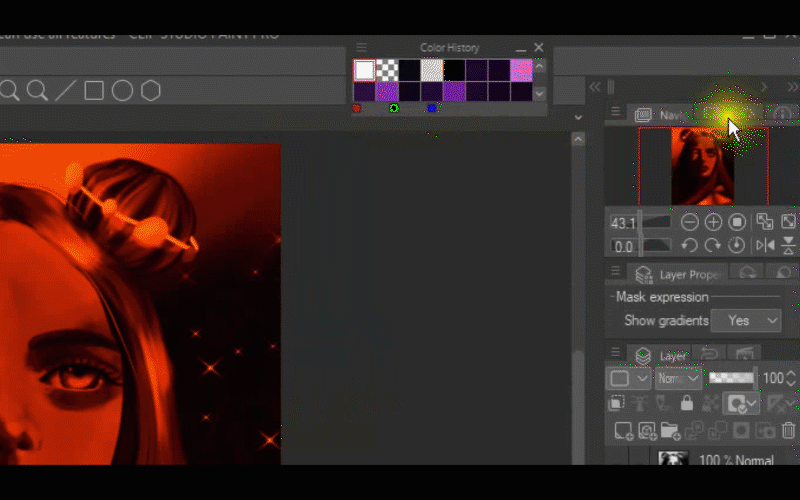
I'm going to add a new gradient map and this time I will choose Night Sky (green).
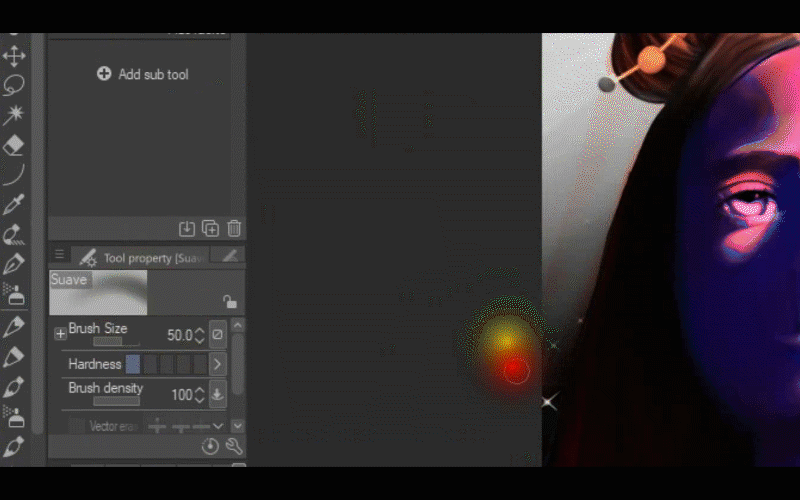
I'm going to use the fill tool, again, I will paint this layer with transparent color then I will use the transparent watercolor to paint and I will use this gradient in her clothes, eyes
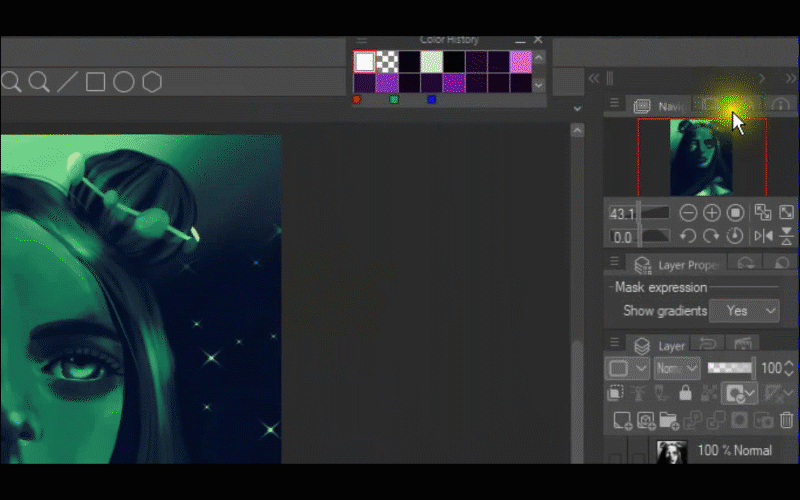
and background.
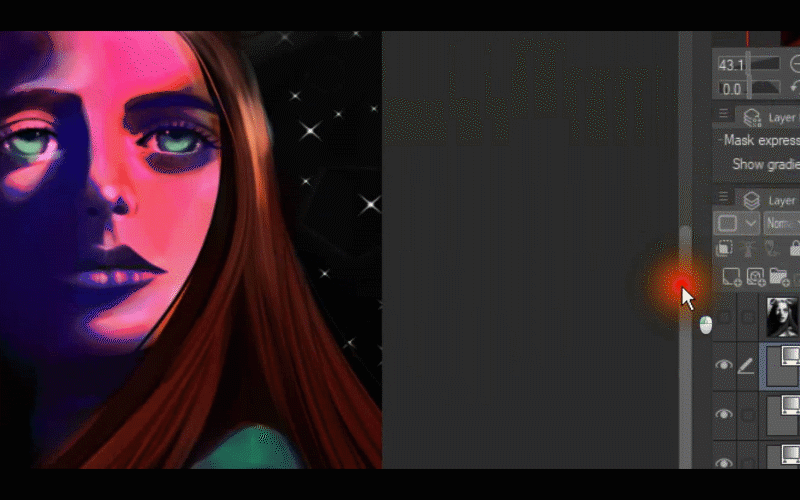
I'm going to add a new gradient map. This will be the 7th gradient map and this time I will choose the white and dark gradient.
I'm going to use the fill tool, again, I will paint this layer with transparent color
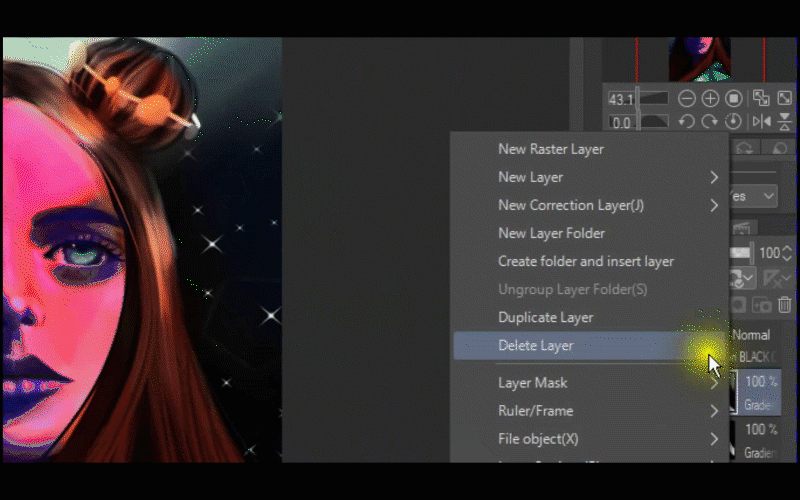
then I will use the transparent watercolor to paint and I will use this gradient to darken the shadows and I will use the blend tool to soften the strokes.
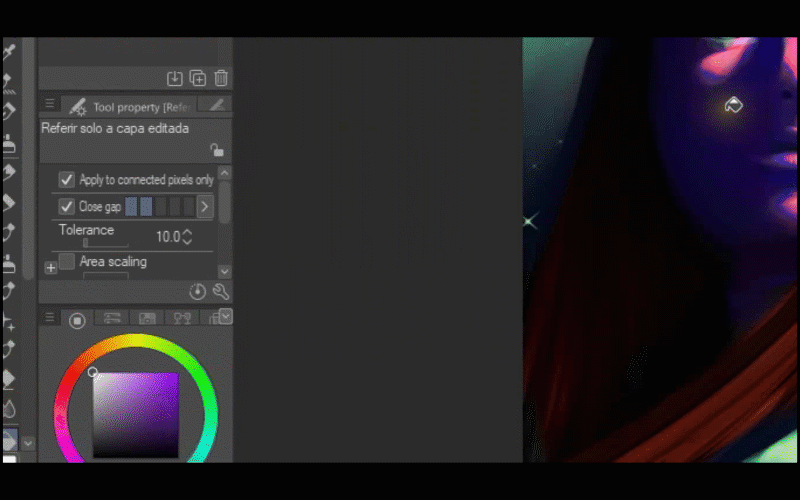
I'm going to add a new gradient map and this time I will choose Somber shade (red) and I will adjust the colors, what I'm looking for is a brighter color.
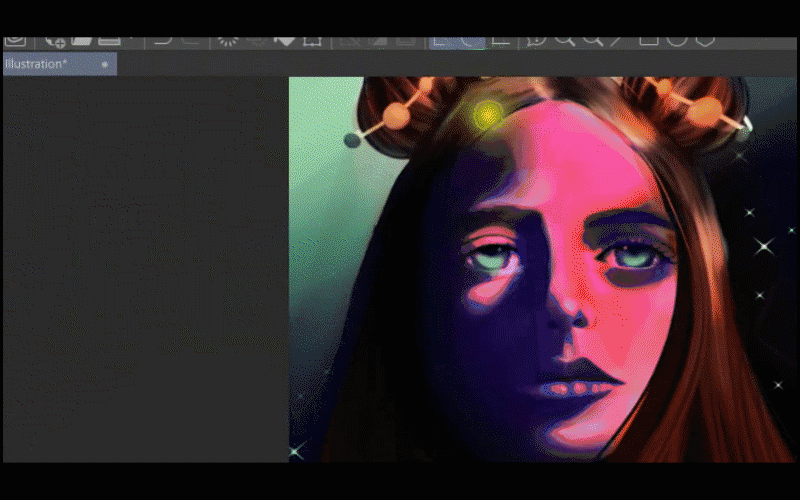
I'm going to use the fill tool, again, I will paint this layer with transparent color then I will use the transparent watercolor to paint, this gradient is to add light to her face and clothes.
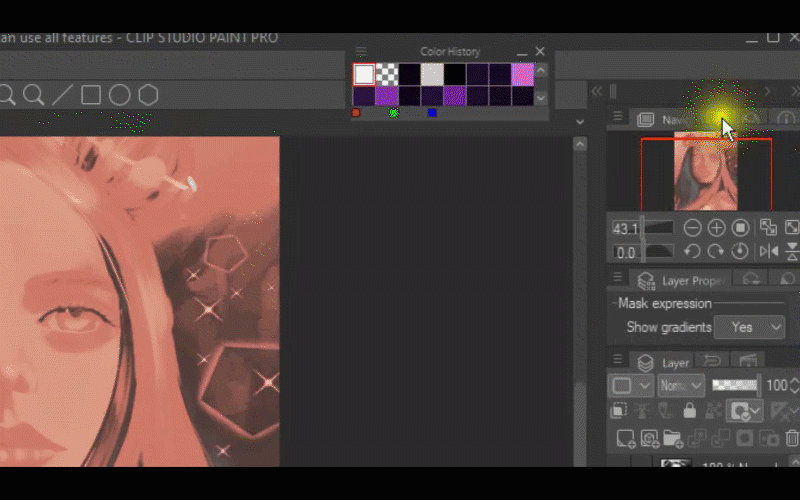
I'm going to add a new gradient map and this time I will choose a gradient that I have previously made.
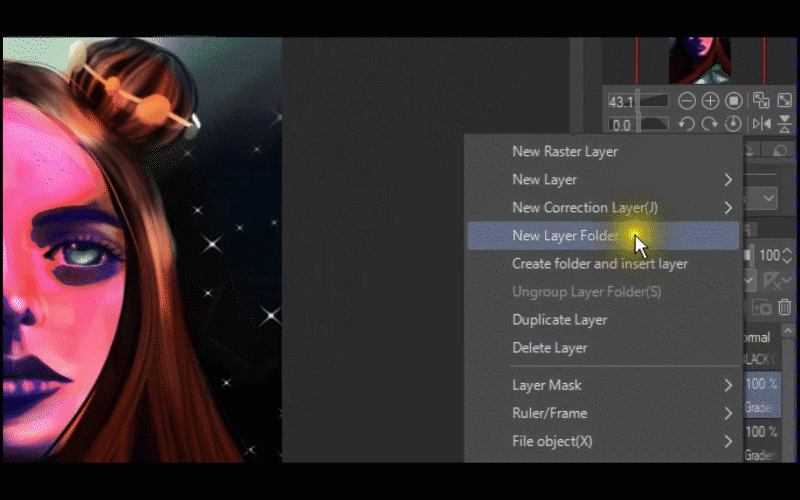
I'm going to use the fill tool, again, I will paint this layer with transparent color then I will use the transparent watercolor to paint.
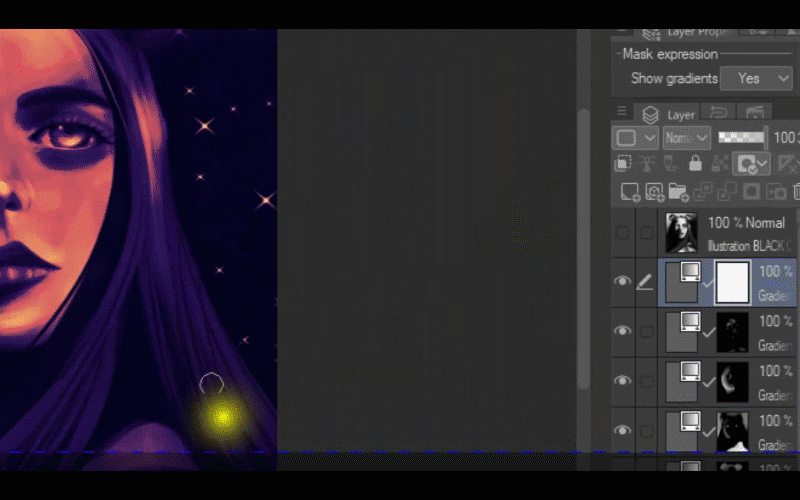
I'm going to add a new gradient map and this time I will choose Blue Sky bright and I'm going to use the blending mode Multiply.
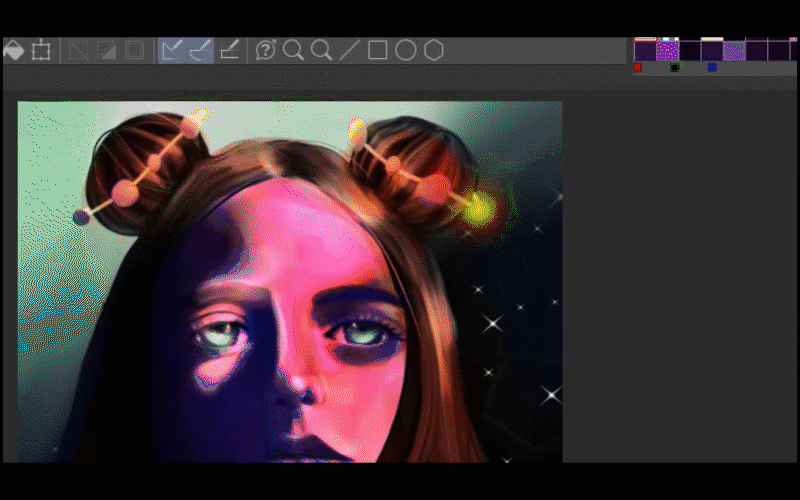
I'm going to use the fill tool, again, I will paint this layer with transparent color then I will use the transparent watercolor
I will paint the right side of her face and I will lower the opacity.
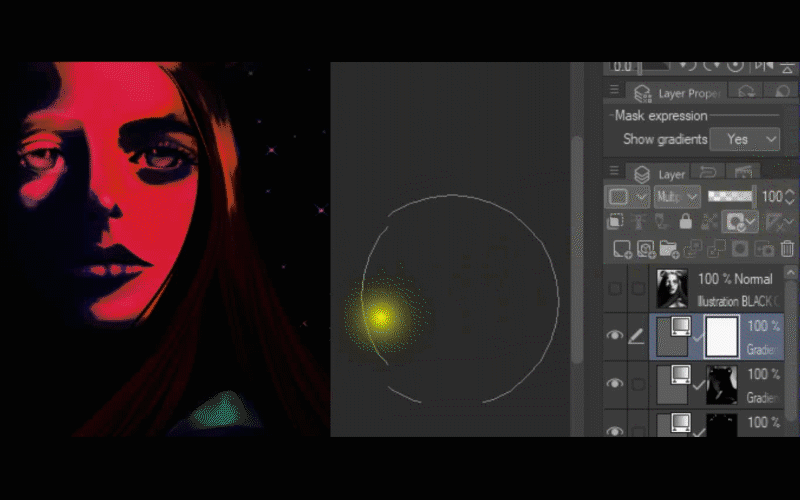
Let's create another gradient map this time I will choose Thermography and I will adjust the colors until I get red and blue colors.
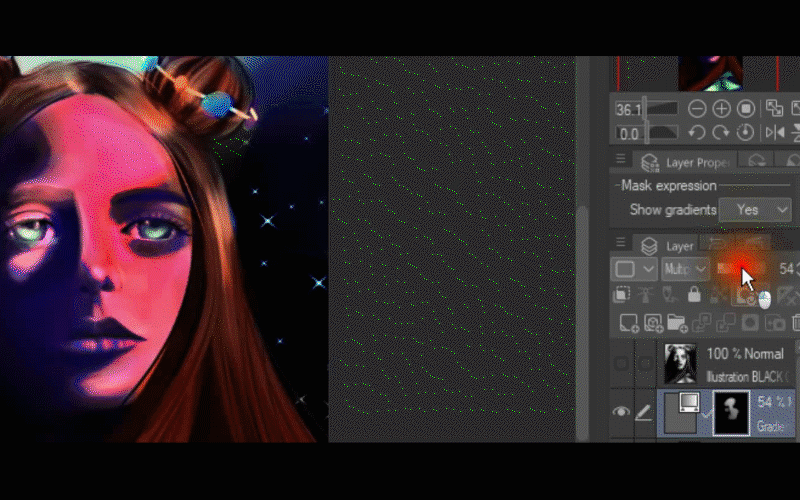
I will use the blending mode add glow. I'm going to use the fill tool, again, I will paint this layer with transparent color then I will use the transparent watercolor
I will paint her hair, some parts of her face, and lips.
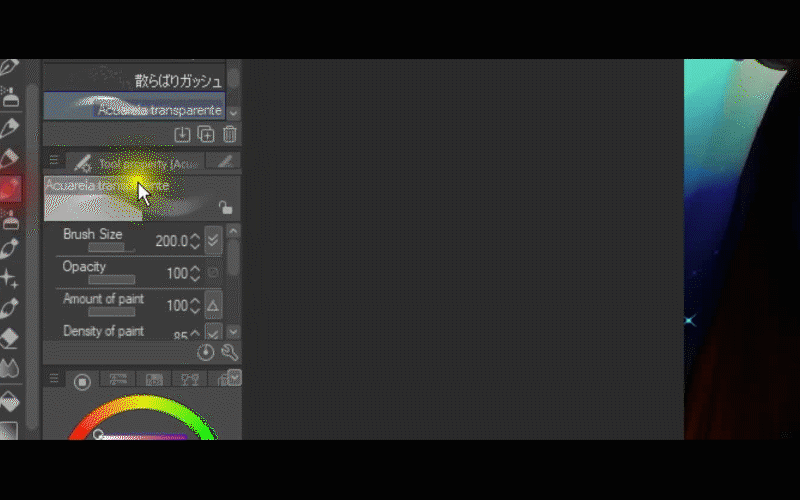
I'll add a new gradient map and I'm going to use Spectrum,
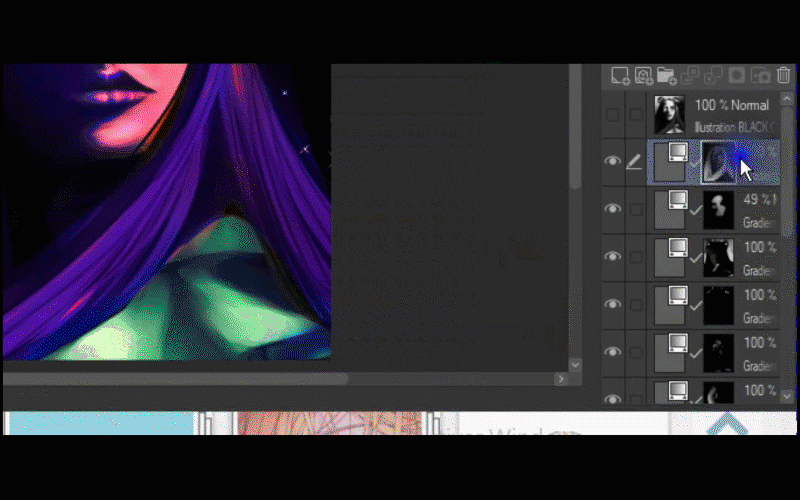
I will use the blending mode called DIFFERENCE
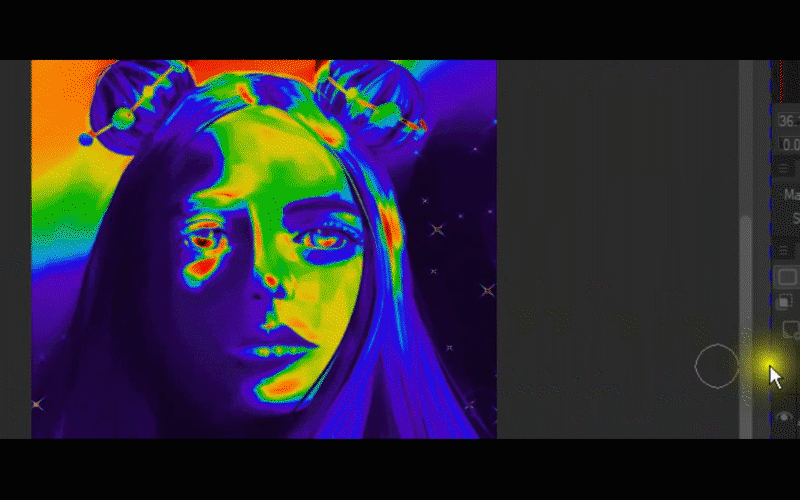
I'm going to use the fill tool, again, I will paint this layer with transparent color then I will use the transparent watercolor to paint.
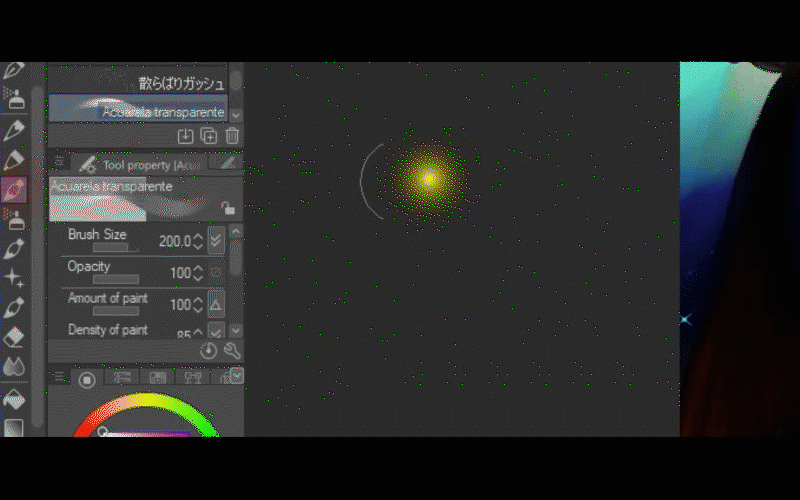
I will add another gradient map and I'm going to use Night Sky
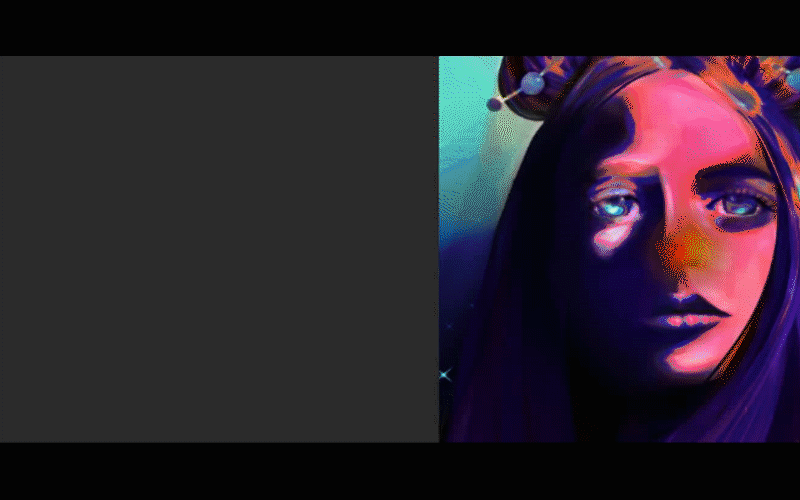
I'm going to use the fill tool, again, I will paint this layer with transparent color then I will use the transparent watercolor
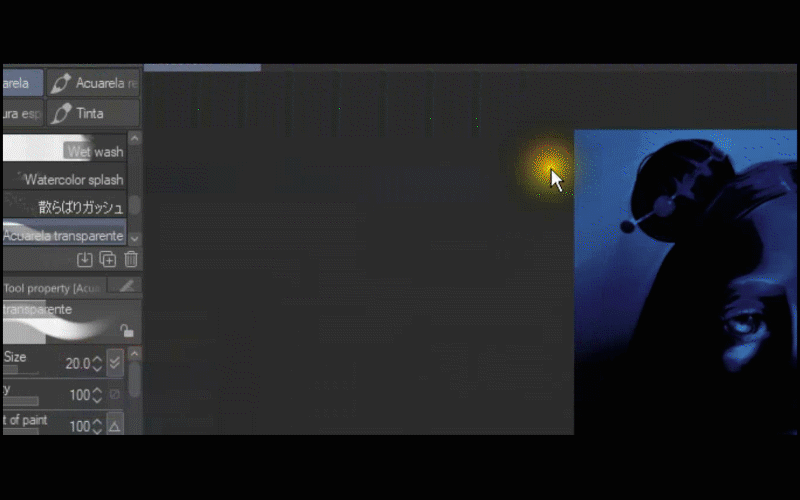
to paint on the edges of the side and I will paint some strokes on her hair.
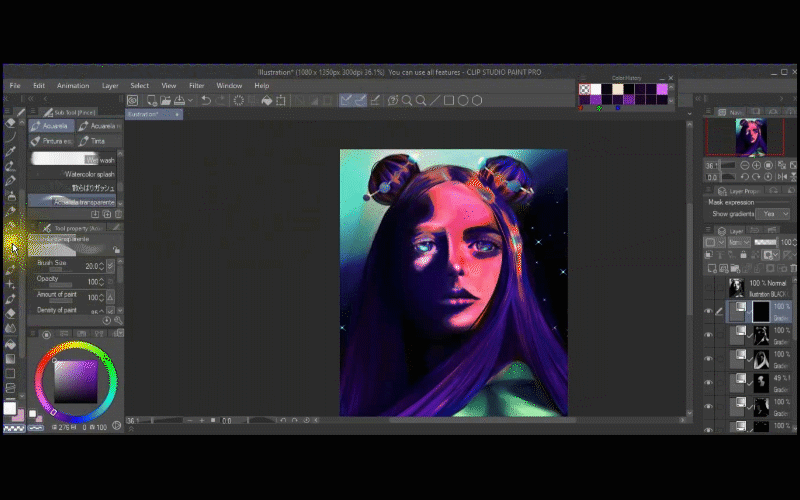
Also in her eyes and I will use the blend tool to soften the colors.
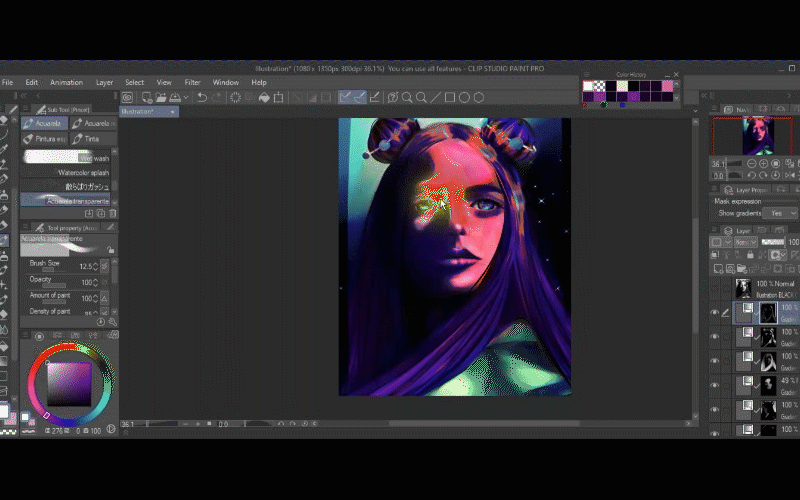
Let's create a new gradient map and I'm going to use Sunset.
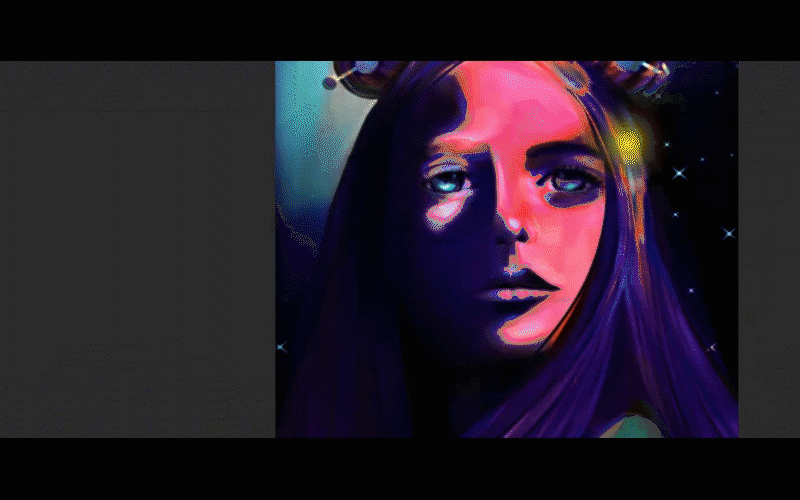
I'm going to use the fill tool, again, I will paint this layer with transparent color then I will use the transparent watercolor to paint on her eyes, background, hair, and face.
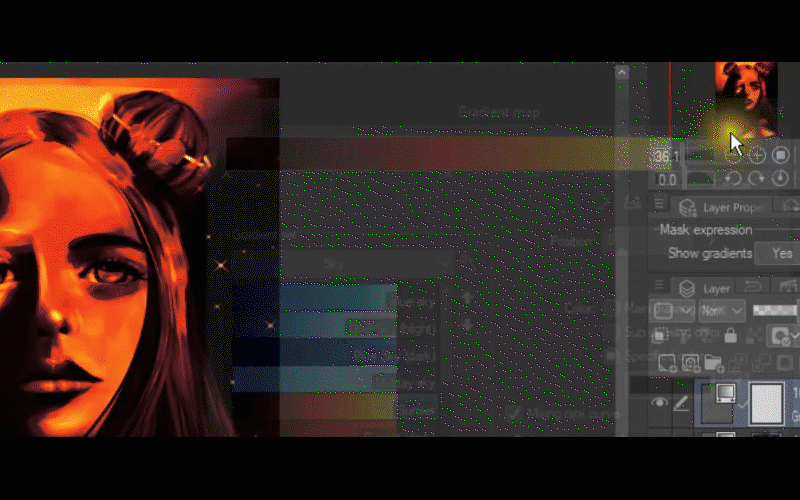
I'll add a new gradient map and I'm going to use Spectrum,
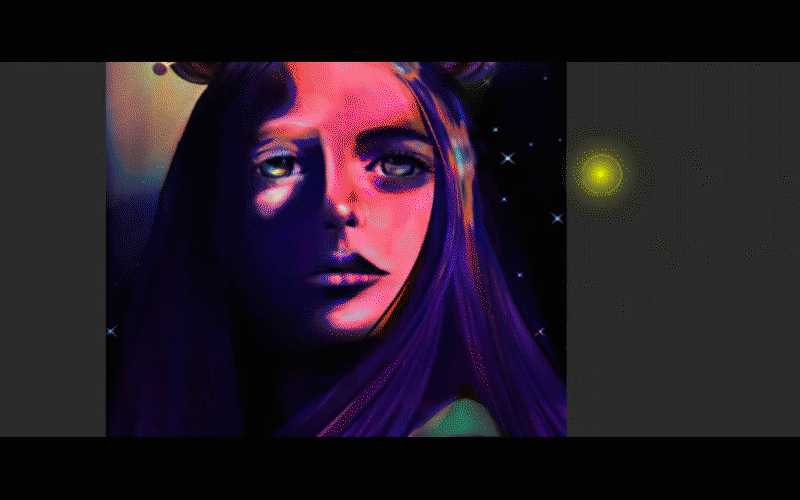
I'm going to use the fill tool, again, I will paint this layer with transparent color then I will use the transparent watercolor to paint the shadows.
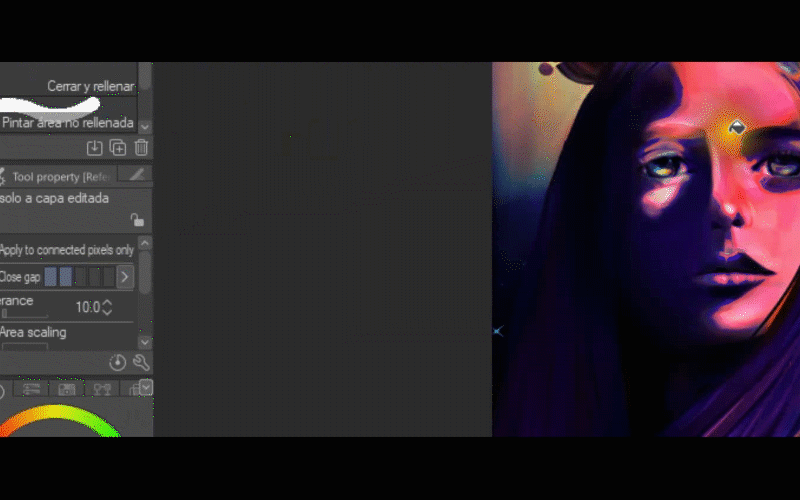
I'm going to add a new gradient map and I'm going to use Somber Shade (red) I will adjust the values and then I'm going to duplicate that selected gradient.
Now I will change the mid-center color to an orange pinkish tone. I will increase the shadows and brightness just a bit. And I will change another value to a dark brown color. And I will change another value to a pink color and I will adjust the values again. I will change another color for a bright yellowish color.
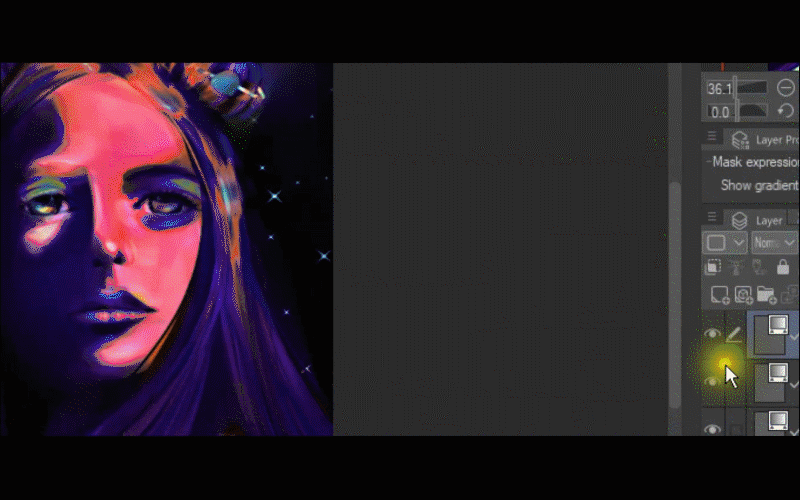
I'm going to use the fill tool and I will paint this layer with transparent color. Then, I will use transparent watercolor to paint the right side of her face. I will lower the opacity and I'm going to use the blending mode GLOW DODGE.
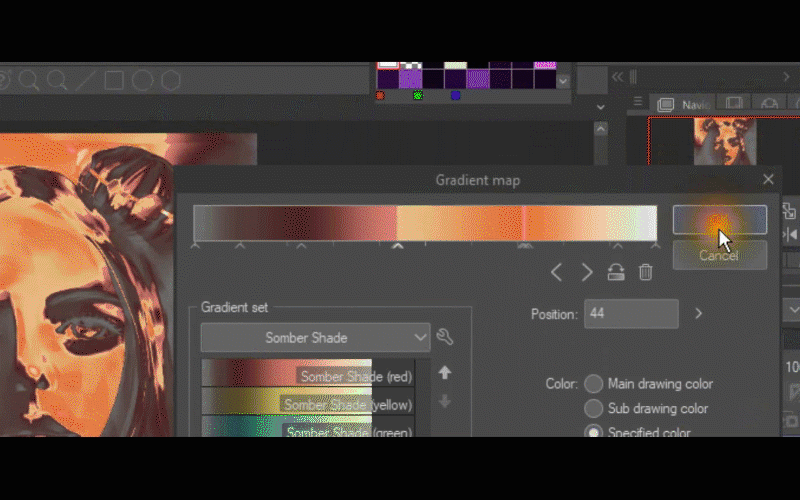
I'll add a new gradient map and I'm going to use Blue Sky (bright) I'm going to use the fill tool, I will paint this layer with transparent color then I will use the transparent watercolor.
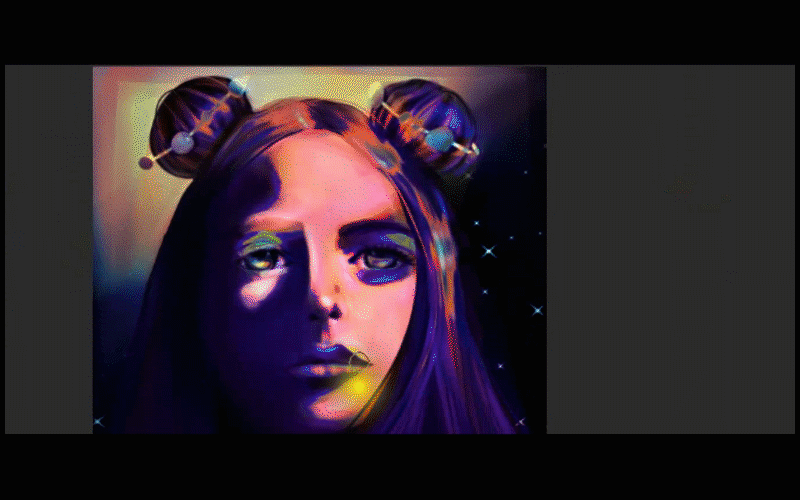
I will paint her hair accessories, face, eyes, and hair.
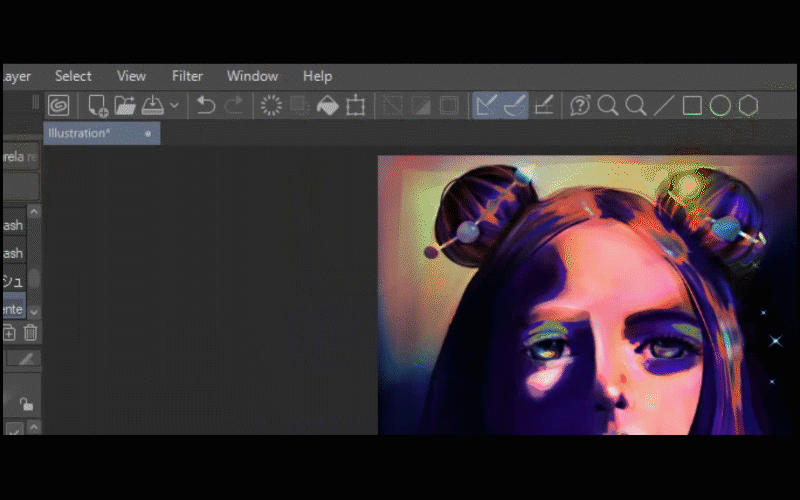
Now, I will add a new layer with a blending mode, and add glow. I will use the same brush and I'm going to start to paint the light on her eyes and lips.
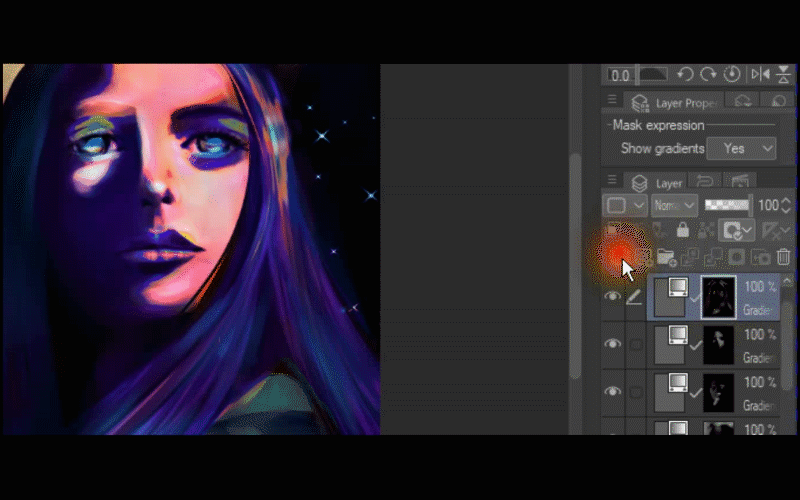
Also, I will add another layer to paint her hair accessories with purple color.
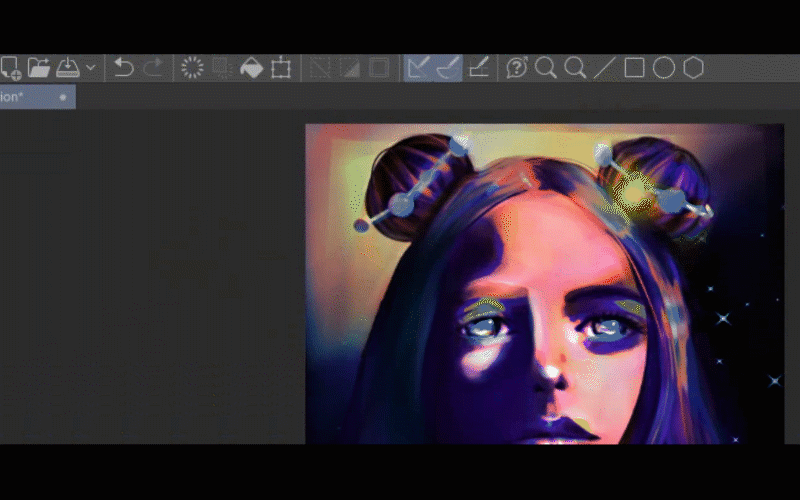
I will add a third layer with add glow mode to add more light to her face. I will be using bright orange color.
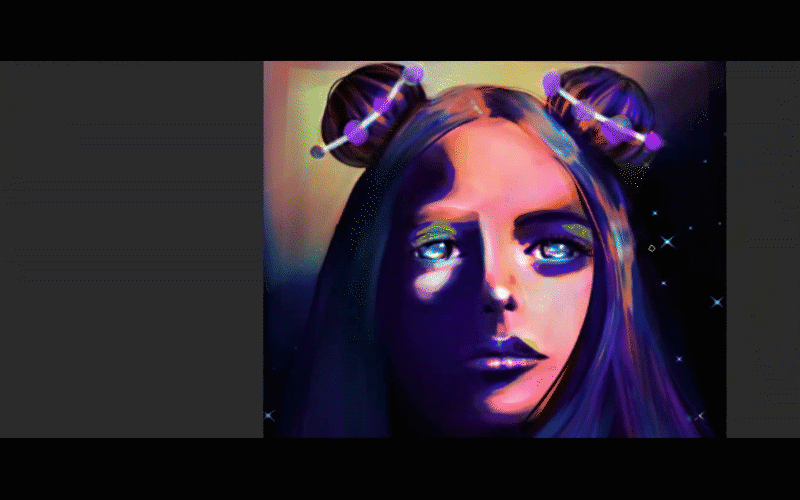
I'm going to go back to my last gradient map layer and on top of that, I will create a new gradient map. This time I will choose the Night Sky gradient.
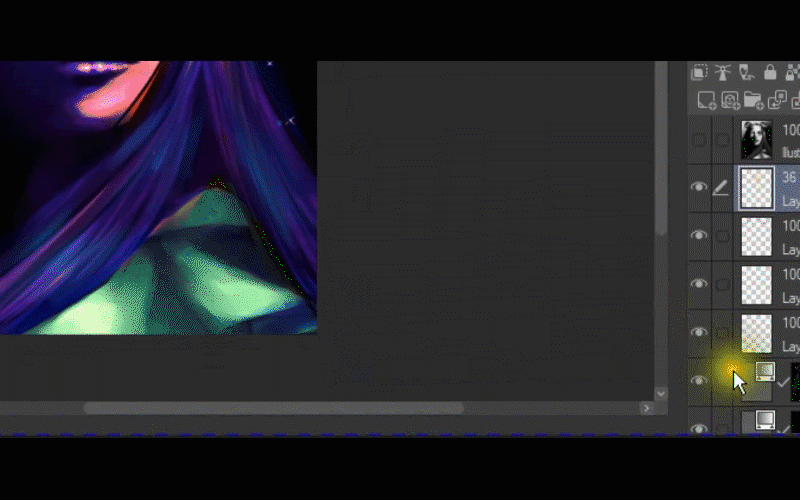
Now, I'm going to use the soft eraser and I will erase the gradient on her face and in part of her hair.
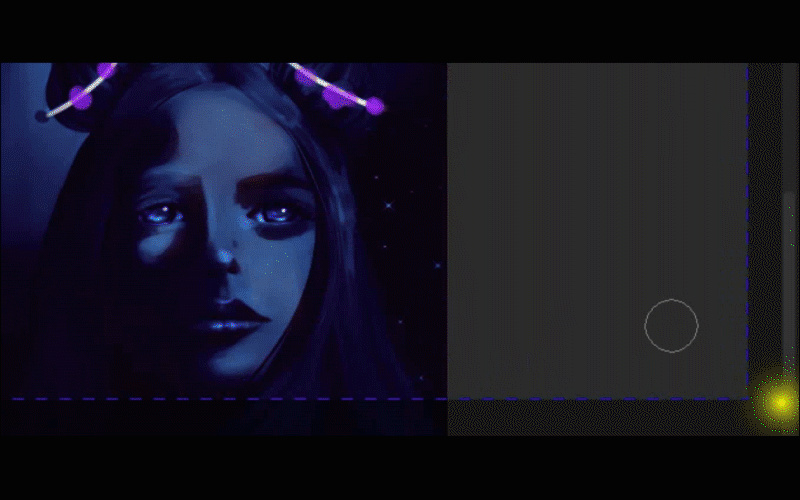
Ok, so I will add a new gradient map called Sunset (dark).
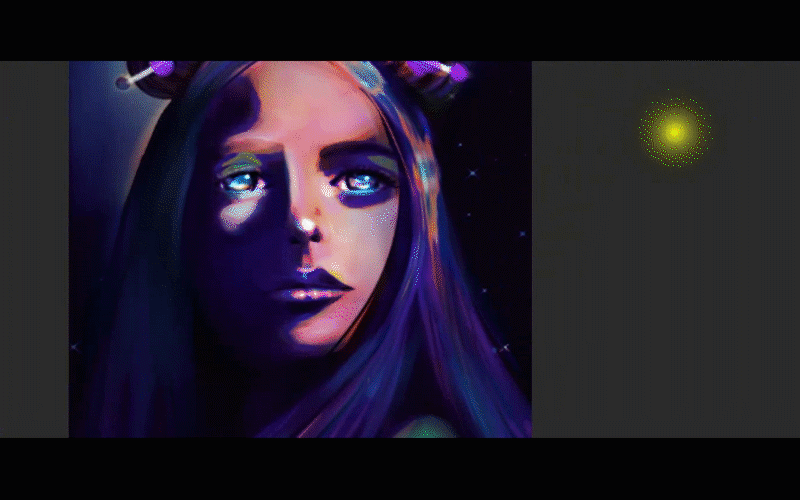
I'm going to use the fill tool, I will paint this layer with transparent color then I will use the transparent watercolor to paint her lips.
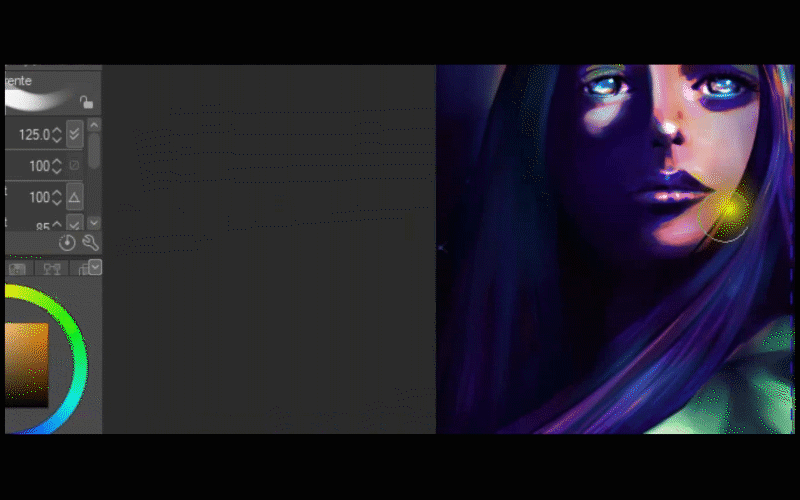
I will go back to 2 gradient maps layers and I will create a new gradient. I will choose once again the Blue Sky gradient and I will use the multiply blending mode, I will select add glow.
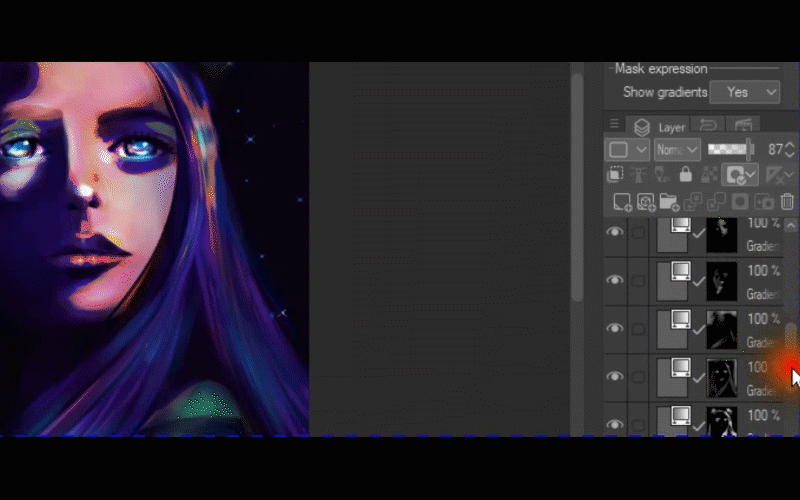
In the end, I'm going to add a new layer on top of the others and I will use the Tone curve to fix the colors.
I will add a new layer and I will use add glow mode.
I will use Glow B and Glow A and I will paint those stars o the background.
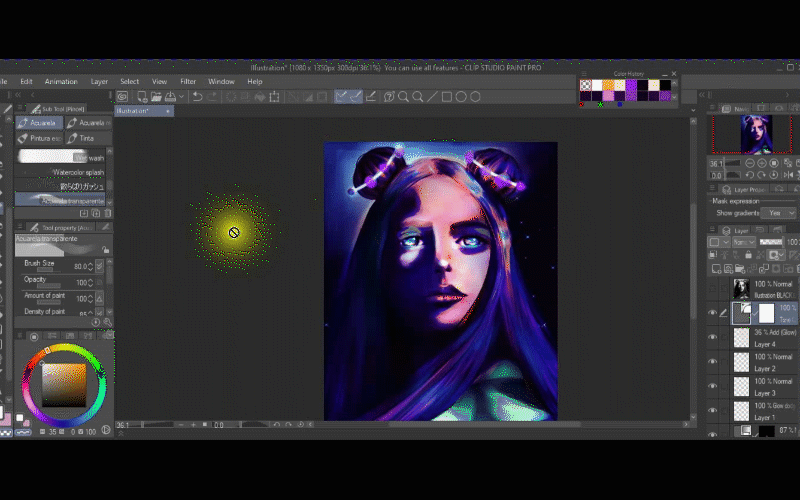
For this one, I used 21 layers of gradient maps.
Beautiful Gradient Maps from CLIP STUDIO ASSETS (FREE)
Good news!
If you don't have so much time to create your gradients and spent an hour or so painting your illustration you can always go to CLIP STUDIO ASSETS.
I downloaded these ones.
To add them to your gradient set just click there
Then, select ADD GRADIENT SET
Here, you are going to find all the gradient sets that you have previously downloaded so just choose any of them. Then select (ADD).
And that's how you add your gradient maps from CLIP STUDIO ASSETS
I will leave you the gradient maps that I downloaded on CLIP STUDIO ASSETS
I hope you have enjoyed this tutorial as much as I did, thank you so very much for reading until the end. It means a lot to me.
Bye guys!!! :D

https://www.instagram.com/becca_ken/
TikTok
https://www.tiktok.com/@becca_ken
My Shop
http://www.redbubble.com/people/beccakendesigns
You could support me on KOFI


留言