
Welcome!
In this tutorial, I'm going to show you how to take advantage of using 3D models to create your own background. Here is the drawing that I will be using as a demonstration.
(This was done for my comic, but this tutorial can also be done for illustrations and concepts)
1. First off, you will drag and drop a 3D model from the material library on your canvas. It can be any model. Once you have placed it, you can move it around and place it based on what perspective you have in mind.
*If you want to use the 3D asset I'm using for the tutorial, here's the link: https://assets.clip-studio.com/en-us/detail?id=1557575
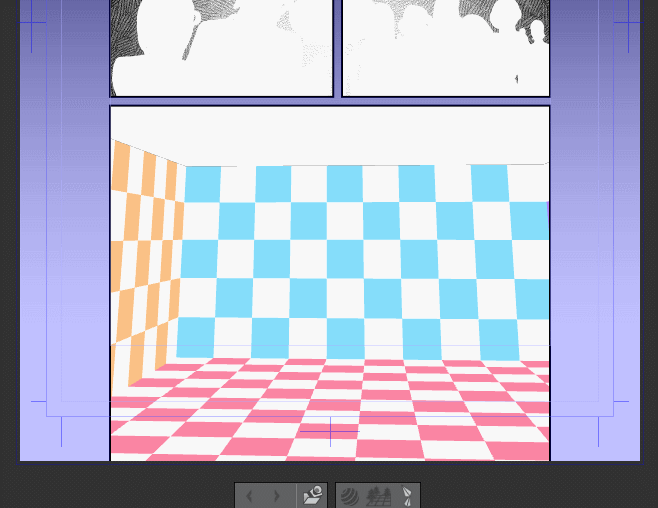
2. Now that the 3D asset is in place, the next step is to turn on the ruler of the 3D layer. It's very simple. Just click on the ruler icon on the 3D layer and it will be on. After that, you'll be able to see the rulers that represent the perspective of the 3D asset. For comfort, I lower the opacity of the 3D layer so that it's more visually easy to draw on it.
3. Before we start drawing we need to activate the "Snap to Special Ruler" button. It's basically what it says. Every line you make will follow the ruler.
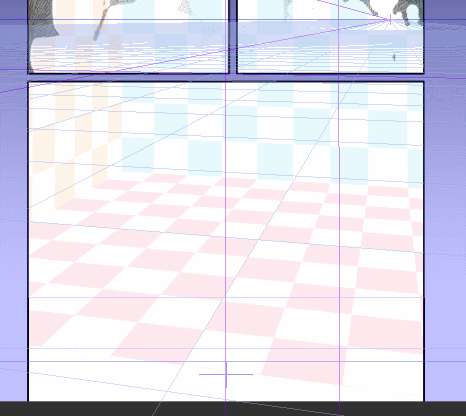
Here is the final sketch.
4. Now that the sketch is final, we can start doing the lineart. I usually lower the opacity of the sketch to make it easier for me to draw.
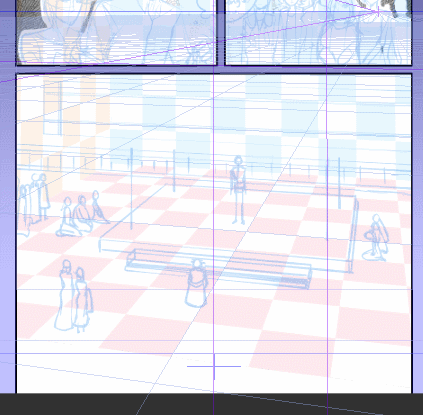
And here we have the finished lineart.
So here we have it! I hope this has helped you a lot as it has for me to create backgrounds. I will admit, I do use some 3D models and do the LT conversion, but when there isn't a 3D asset that you are looking for, you can make your own backgrounds like this.
Thank you for checking out this tutorial! If you have any questions, leave a comment and I'll do my best to answer.
Have a wonderful day!
Users who liked this post


Comment