
INTRODUCTION
Hi everyone, today I will share with you a way to Emoji in Clip Studio Paint, we will see how to make simple face emojis, full body emojis and make animated emojis with simple basic shapes and without use of advanced techniques. I am not focusing into create HD appealing illustrations, what is important is for you to learn how to make your emojis.
The Video
In this video I tried to show the proccess in the simpliest way I can, however is a little hard to explain how to animate in Clip Studio, but I hope you learn something useful watching this video.
Simple head emojis
When we are texting normally we use the big variety of already existence emojis, from a smiling face to a freezing one, android and IOS already created for us great emojis, but we see the same things again and again, and are some we use more often, then what about customize them and show our creativity and individuality through them, why not? We use them pretty often.
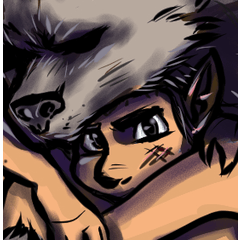
Then for this tutorial I used one of my favorite type of characters, the NEKOMIMIS, and we can see how simple the structure is, in this image you guys can see how to draw a nekomimi with very simple shapes and using the curve line tool, you can do it without need to have a drawing tablet or a pen display, then lets check it up.
The main idea is very simple, we use:
One layer with the references at the bottom
One VECTOR LAYER at the top with the art lines we created
and two RASTER LAYERS, one for the base colors and one for the shadowing, lights and effects.
In this step we will use mostly this tools:
TIP: To improve our image quality we will use the next settings:
To make it easier by copy and paste I just create a full sheet of base faces reference to can make one by one the emojis I want. Keeping the same structure of my layers.
After make your emojis create a new illustration and set the cavas size at 200 pixels by 200 pixels with a 72 dpi resolution.
Delete the paper and reference layers.
Merge your layers or be sure to have selected all of them and copy and paste one of your emojis in the new illustration, and save it as a png file. repeat the process for each one.
CONGRATULATIONS you created your first emoji ;3
Full Body Emojis
We use for it the same basic idea, but we will make a different layer structure, because in this way we can modify the emojis in an easier way with out the need to redraw them for each case, you also can use the heads you made in the first step, now you just need to add to them a body, we will use again very simple shapes to do it.
For this step we will separate by parts our emoji and put the parts in different layes with the purpouse to can modify them more fast and easier.
Now we can duplicate the parts we want to modify and use the transform and rotate tools, when you get satisfied you use made the same, create a new illustration file and copy and paste, I recommend to do not go to big in canvas size, remember you want to use them in your phone then the 200x200 pixels 72 dpi is still a good size.
Animating our emojis
I recommend you to watch the YouTube video for a more easy understanding of this step.
OK here things get a little more complicated, as you know you can't save or export GIF files with out create a new animation in clip studio paint, then I will try to explain to you the basics about animation in clip studio paint now to can give our emojis mobility.
First using the previous step create an image with your reference, now create a new animation and import your reference image into it.
You get confused because you don't see the reference image, but don't get in panic, you didn't make any mistake, just go to the layers panel and you will notice the image is inside a folder, take it out of the folder and you will be able to see it now. Place the reference at the bottom to put it out of the way.
Animation in clip studio paint is based in TIMELINES and ANIMATION FOLDERS, our frames are in the TIME LINE and our images are in the animation folders, as you can see right now you can't draw in your layer, that's because we didn't set yet what we will show in our time line, then now go to the timeline, you will see at the left side you have the ANIMATION FOLDERS, then in the same line of your animation folder right click in the first frame in your time line that will allow you to set which layer you want to display in that specific frame (you can't show more than one layer in a frame) now you can draw your art line in that frame
As you see I only draw there the head body and legs, that is because I decided which parts I want to animate and which ones will remain the same, then I will not animate this time the parts you see in the image.
We need to duplicate or draw the parts we want to change to give the feeeling of movement.
When we are done animating, we only need to export our animation as GIF file.
And we will get an image like this one:

I hope this short tutorial gave you an idea of how to make your own emojis with Clip Studio Paint and you found it helpful somehow ;3
Users who liked this post


Comment