
Hello everyone. In this tutorial I will be sharing how you can create a beautiful night sky. It will have shiny stars and even aurora. I will try to make this as short and easy to understand as possible.
Let's get started.
Note: To get the color at a specific RGB coordinate, go to the Color Slider palette and move the sliders to the numbers in the RGB coordinate. For example, the color at the RGB coordinates(0,11,243) is shown below. You can use the same colors used in this tutorial or similar colors if you desire.
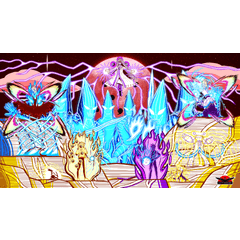
Starry Night Sky
Create a new illustration file in Clip Studio Paint. Now, the first thing to paint is the dark blue background color of the night sky. On a new layer, use the bucket tool to fill the layer with a dark blue of RGB coordinates of (1,27,59). Then use the airbrush to apply a darker blue to the top of the canvas. You may use a blue with RGB coordinates of (1,0,29). Afterwards, add lighter greenish blue with the RGB coordinates of (0,98,98) at the bottom of the canvas. Apply colors so that they transition into each other smoothly. You should end up with something similar below.
Time to add the many distant stars to the sky. On a new layer, with the airbrush tool selected, choose the 'Spray' airbrush sub tool and ensure the brush density is 100 or close and the particle size is small. With a light blue of RGB coordinates (0,11,243) evenly spray the color to the canvas. Then blur everything a bit by going to Filter > Blur > Gaussian Blur and slightly blur everything with a the strength set to or close to 6.
Create a new layer and repeat the previous step but with an even lighter color with RGB coordinates (63,205,255) and with the particle size slightly bigger. Also, blur it out a bit using the Gaussian Blur of strength 3 or less then the previous strength used. See step below.
Again, repeat this step on a new layer but with the particle size slightly bigger and an even lighter blue of RGB coordinates (46,133,255). Spray on the color so that the particles are more spaced out. See step below.
You may merge the layers with the stars into one as they are not needed separately. To do this, go to Layer > Merge with layer below or press Ctrl + E on the keyboard.
Then create a new folder and and new raster layer inside it. Select the Pastel brush and choose the 'Chalk' pastel sub tool. Make the brush density low to about 26 and the brush size large enough. Select the color blue with RGB coordinate of (0,50,255) and subtly add color forming a diagonal line on the canvas.
Create a new layer within the folder and set the blending mode to Add(Glow). Then, select the 'Pastel' sub tool and set the brush density to about 50. Adjust brush to a reasonable size. Select the blue with RGB coordinates of (0,186,255) and apply this blue in foggy patches inside the previously painted diagonal area mainly in it's lower area. Then select a darker blue at RGB coordinates (0,68,255) and apply color mainly within the top area. After that, apply an even lighter blue within the center area with RGB coordinates of (18,165,209). You should have an image looking like the one below.
Using the same brush, you can add on some other colors at this point but they should be really subtle. I added purple and green as shown in the image below.
Create another new layer and set the blending mode to Add(Glow).
Select the 'Crayon' pastel sub tool and set the brush density to about 70 and make the brush size small enough to paint inside of our cloud or colors. Choose really light color, near white, and make little specs of colors along the center of the cloud.
Then duplicate this layer with the near white colors and merge them. They should appear brighter. Then choose the Eraser and select the 'Kneaded eraser' sub tool and gently erase along the edges to smooth them out. This step is shown below.
Then click on the folder layer and go to Layer > Layer Mask > Mask selection. You will not see any changes on the canvas but your folder should look like the image below.
Select the kneaded eraser and set the texture density to 100. Choose a small brush size and decrease the opacity to about 15. Gently apply a mask along the center of the cloud using this eraser. Then bring back some parts by using the 'Pastel' pastel sub tool. Repeat this process over and over with different brush sizes and brush density until you feel satisfied. See image below for reference.
If for some reason the software won't allow you to make edits ensure that you click the mask icon which is that white box on the folder layer above.
Then create new layer above the folder layer and set the blending mode to Add(Glow). Use the 'Noise' pastel sub tool with the brush size large and the color at RGB coordinates (100,255,222) selected to add some glows near the center of the cloud using one click.
After that, select the Airbrush and choose the 'Tone Scrapping' sub tool. Set the size large enough and the particle size small enough to make some more stars. Use a light blue color.
Then create a new layer with the blending mode set to Add(Glow) Select the Decoration tool and select the 'Effect' heading and choose the 'Bloodstain' sub tool. Select a really bright blue color and adjust the particle size to apply bigger and brighter stars than the ones made before. But not too big though. Then duplicate this layer and Gaussian Blur it with a strength of about 3. You can merge the copy with the original now.
Finally, go to the layer with the background color and select the airbrush and choose the 'Running color spray' sub tool. Choose the color black and set the brush density to about 10 and the particle size small enough. Add small faint patches of dark clouds to the background layer. And that's it. You may go in and fix things like maybe erase some parts of the clouds or add bigger stars using the decoration tool. It is all up to you.
Aurora
Time to add the aurora to this painting. You might know them as Northern Lights, Southern Lights or even Polar lights. If you don't have enough space at the bottum of your canvas you might want to resize the canvas for this.
Lighten the bottom of the canvas s bit with a light shade of blue or blue green.
Create a new layer and use the airbrush to make faint lines where you want your streaks of light to be.
On a new layer, use the 'G-pen' pen sub tool to create a really zigzag line that is similar to the one below. Use a bright color for this.
Then select the Blend tool and choose the 'Finger tip' sub tool. Make the brush size large enough to cover your zigzag line and smudge the line upwards in a way where you don't smudge bottom area of the zigzag line.
Then select the eraser tool and choose the 'Soft' eraser sub tool. Use it to erase the top and bottom of the line.
Then go to Edit > Transform > Mesh Transformation. Select the number of vertical and horizontal lines you want in the mesh in the tool property window. Don't put a lot. I recommend 4 for the horizontal and 3 for the vertical. Rotate and drag the handles until it matches one of the lines previously drawn with the airbrush. Press 'OK' to apply the transformation.
Use the soft eraser to erase some parts in a way that some edges are high and some are low. You may also apply another mesh transformation if you need to adjust the shape some more. Also, use the finger tip brush to smudge the top more upwards.
Create a new layer and set the blending mode to 'Color' and clip it to the layer below, the one with the smudged out zigzag line. Use the airbrush and add some other colors if you want. Then merge it with the layer below.
On a new layer, set the blending mode to Add( Glow). Select the air brush and add glows by running over the area with a color lighter than the color in that area.
Now repeat the previous steps to add the other streaks of lights.
You may use the 'For effect line' pen sub tool to add some smaller defined streaks on a new layer with blending mode set to Add (Glow) then duplicate and Gaussian blur the copy.
Finally, you can add other elements to your piece. I recommend making them a dark color, like silhouettes to contrast with all the bright colors.
I hope you found this tutorial helpful.
This is my Instagram account:
But I am more active on Deviant art. I am still improving my art skills and trying to find my art style though.
Users who liked this post


Comment