How To Draw Hair Using One Default Brush
Introduction
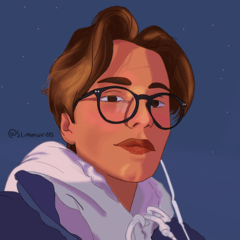
Hello! I made a simple tutorial on how I draw nice soft-looking stylized hair (straight and curly) with only one default brush, so any of you can easily follow if you want! Although, you can use any brush you'd like. I hope you will find this useful!
In this tutorial I will be using only the Real pencil brush.
How to draw hair step by step
Step 1: Sketch. First of all, we need to draw the sketch. Remember to draw just the general shapes and forms, not diving into little details.
Step 2: Line Art. A little tip - try to draw the line art with a brush about the same size as the one you were drawing the sketch with. This will prevent the line art looking bad comparing to the sketch.
Step 3: Filling in the base colour.
Step 4: Shading. Pick a darker colour (don't forget to also change the hue a little bit). With fast thin strokes go through hair length. A lock of hair should START and END with a DARK part.
Shading curly hair might be a little tricky, but just follow the movement of waves and shade where the curl caves INWARDS.
Step 5: Lighting. Now pick a lighter colour (the hue changes in the opposite direction from the one we used for the shadows) and do the same between the dark parts.
Step 6: Extra Lighting. To make hair look super nice and shiny, pick an even lighter colour and with smaller strokes (vary the length of the strokes to give it more dimension) go over the previous colour.
Step 7: Colouring the Line Art and Adding Details. Colour your line art and add some strands and stray hairs to give it a more natural and realistic look. I do it with the most dark and the most light colours I have used.
And that's it, we're done!
Thank you for your attention, I really hope this will be helpful for someone!


Comment