
In this tutorial we will use the animation tools in Clip Studio PAINT PRO or Clip Studio PAINT EX to create simple animated backgrounds (BG) with a classic, traditional style, quite different from the common digital look.
For beginners in illustration and animation, it is recommended to start with exercises in black and white so as not to worry about color at the moment, so the animation will be in this style.

To animate this type of background it is not necessary to know all the principles of animation in depth, a minimum knowledge of drawing and the interface is enough to optimize the workflow, even if you already have experience animating, this tutorial can help you to improve your workflow with Clip Studio PAINT and achieve an original look for your animations.
You can see the video tutorial in Spanish.
Create the project
Click on file - new and the last option on the right “animation”
Here we configure the animation options as:
Preset 1920x1080 (192pp) and speed 24 (recommended animation standard). The duration can be up to 1 second if you have the Clip Studio PAINT PRO version. If you have the Clip Studio PAINT EX version you can increase the duration as much as you want.
Planning
First, we will plan the animation, you can make a sketch before starting to animate, this will allow us to organize ourselves better and make the whole process more efficient.
This will come in handy later on with more complicated animations, remember Background(BG) at the far end, Midground (MD) in the middle and Foreground (FG) at the front. In this case we will animate a sheet of paper moved by the wind so we will define its trajectory.
Timeline
To start the animation we open the timeline, click on window -timeline
In the timeline, clip studio paint uses animation folders (red) inside these are the animation cels (green) these cels in turn can be raster layers, vector layers or groups that contain both, so the possibilities are endless. They can also be viewed in the layers tab on the left.
Use groups as cels
To use a group as a cel in an animation folder, first delete the layers that are in the folder and then create a group in the layers panel, you can add raster and vector layers to the group.

then go to the timeline “specify cel” button and assign the group to a cel basically it is now a frame of our animation so we can draw on the layers and when we add a new cel it will keep this format for the next ones frames.

This makes it easier for us to be able to work on the drawing on one layer and be able to shade or color it on the lower layer in the same animation cel.
Onion paper
In the timeline panel you will find the onion skin button, when activated you will be able to visualize the cel - frame, previous (red) and later (green)
In this exercise we will simply make the second cel slightly different from the first, remember that we can use all the tools and brushes in clip studio to achieve very original results. for this classic pencil-on-paper look, use the real pencil and charcoal tools
Animation Cycles - Important Tip
To achieve this classic look we are going to repeat the cycle of 2 cels throughout the sequence, this is something very simple but I recommend learning to do it automatically so as not to copy a cycle over and over again since in longer animations it would be time consuming. so pay attention and this tip will improve your workflow to make animations with repetitions.
go to the animation window - edit track and click specify cels per batch

we mark the second box and select the first and last cel of our cycle,
we also adjust the number of frames if we animate it to 1, 2 or 3 frames I recommend leaving it at 2 so it is as if we were animating in 12fps,
finally we establish the number of repetitions that we want or we can simply repeat it until the end.

now we accept and our entire sequence has repeated the cycle automatically, this technique is very useful for me to make this type of animations because it avoids us copying and pasting repeatedly, clip studio does it automatically for you.

now we continue doing the other parts of the animation of the middleground and the foreground, this is not a drawing tutorial as such so you can help yourself from other clip studio paint tutorials to use the drawing and painting tools in more detail.
animation principles
to animate the movement of the sheet of paper we simply use the trajectory guide that we planned and animate “straight ahead” this means that we will only use the first frame as a key and the rest we will adjust as we continue animating, a detail to keep in mind Considered for this are the principles of animation:

Arcs: This principle tells us that all fluid movements should follow a curved path to be more dynamic.

Acceleration-deceleration: this principle tells us that while we make more separated drawings we will have a faster speed of movement and if we increase the number of closer frames then the speed will be lower.
Finish and export
Once we finish with the animation and place the parts in order, we only have to export the animation.
Clip Studio Paint provides us with this option in several ways, such as animated gif, video or sequence of png images.
since we are working on backgrounds, the ideal will be the png image sequence option because we may use this background for another character or scene.
If this is not the case, we simply choose any of the other options and export it. It is really easy, so it is not necessary to investigate too much.
Conclusions
Clip Studio Paint is a very powerful tool to make animations of all kinds, I hope this tutorial has helped you to see new possibilities for your animations and remember to help yourself with the community with other tutorials to improve your drawing and painting skills, they are essential to achieve a simple but quality animation.


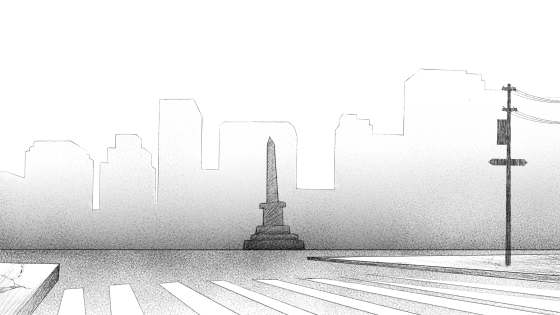
Here I show other backgrounds using the same tools so you can use the tips for multiple situations, the important thing is to have the creativity to make the most of the tools.
Users who liked this post


Comment