How to Use Motion Blur or Smearing in Animation
Introduction
Have you ever felt like your animation when trying to show fast movement were not smooth enough, or that they were too slow?
Well if you have... Well you're in luck because this tutorial will be talking about how to use motion blur, some of the 12 principles of animation and some tips and tricks in Clip Studio Paint to help you create some smoother and faster animations.
In the first half i'll explain what the use of motion blur and stuff like slow in and out is, and in the second half i will show you my process while sharing some tips and tricks about animating in Clip Studio Paint, because in case you didnt know CSP is a great tool to make animations.
The video is better explained with more detail so I would suggest you watch it.
Also, before we begin i just want to specify that in this tip the information for the image is on above the image.
1. What is Motion Blur
Motion Blur or Smearing is a technique used by animators to make an animation faster by reducing the number of frames, but all while keeping it smooth by giving the impression that they added in betweens that would normally slow it down or to give the impression of movement.
Because as you probably know artists and animators base their art off of the real world, and motion blur is a real thing.
Here's an example.
If we were to take a pencil,
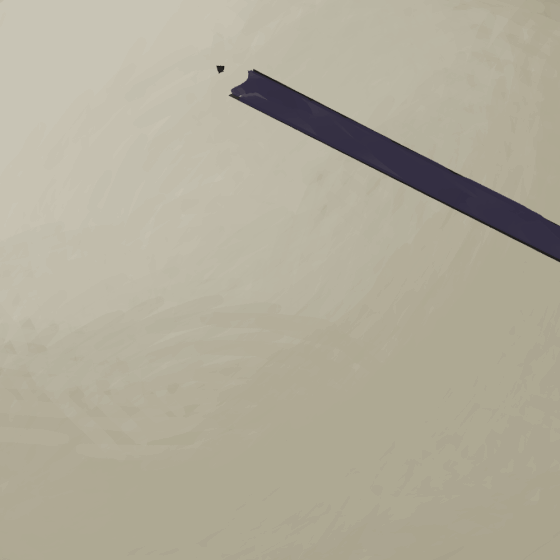
This is Spencer he's going to be our pencil for the day.
Then move it very quickly in front of your face, you can see a trail or multiples of the object caused by motion blur.

So to animate it you would need to illustrate that trail, that duplicate or whatever gives the impression that something passed there.
Anyways, before getting back to that we need to talk about one of the 12 principles of animation why are pretty much the base of animation.
2. Slow in and Slow out
Slow in and out is the principles about momentum and how an object that moves always starts out slow then accelerates and eases out at the end.
Think of starting up a car and stopping it, it starts slowly gains momentum and speeds up, but when it comes to breaking and stopping the car it doesnt just stop in place, it begins to slow down until it stops.
In animation, it would be kind of the same except that you're applying said momentum to the object you're making move.
Therefore it would speed up depending on the speed of the object, and start to slow down as the object loses speed.
This may seem pointless and obvious but i promise that keeping this in mind will be very helpful for smearing.
3. Basics of Motion Blur.
There arent really any rules to motion blur since you're just trying to fill in spaces but there are some basics.
The point of these special frames is just to create an illusion of fast movement like in real life.
So to make a smear frame as i said earlier all you have to do is illustrate the trail while following the motion path of the object
I'll explain this by using Spencer, our pencil.
If we take a look at a frame of the animation up above, we can notice a path of motion and the trail behind it
And if we wanted to animate the pencil ourselves we would start from a point A and go all the way to a point B.
Depending on the complexity of the animation you wouldnt need to animate the keyframes* but in this tutorial ill start by illustrating the point A and B and adding the in between to make it more understandable.
*Keyframes are the important or key frames of the animation, they're the ones you base yourself off of and add the inbetweens afterwards.

As you probably already noticed after we added the in between and ran the animation that although it has some speed to it, it isnt very fluid and doesnt look quite as good as the original video.
Now, if i was to replace the In Between frame with a smear frame by drawing the motion blur and leaving a bit of space in between the B or and A point and the smear frame because of acceleration and decceleration like this.
Of course, the space between the A or B and the smear will differ depending on the speed of the movement, you could say that motion blur only appears very close to top speed.
As you can see it looks a bit better and smoother its getting closer to the original video of Spencer.
But, I still think it could be better.

So, keeping slow in and slow out in mind we could add a second smear frame to ease out* the animation and increase it to a standard 24 fps (the industry default).
*Easing Out is a movement starting fast and slowing down and Easing In is a movement that starts slow and accelerates.
Finally it looks very fast and smooth.

4. Different Ways To Stylize Motion Blur.
Like everything in art there isn't only one way to stylize your animation smear frames, you don't need to limit yourself to only a line it could really be anything so im gonna go over a few that i think are pretty cool.
I'll be demonstrating all of those basing myself off of this animation of a ball moving and it's path of motion.
Also, using the knowledge you learned earlier try to guess what the path of motion is, it should be pretty simple.

4.1 Drawing The Trail
So, the first method is the same as the one you saw earlier in the pencil animation.
Of course there's the classic simple trail where all you do is draw the trail with no detail in the smear and acceleration frames.
In the case of the moving ball it would look like this.
If we fuse those three frames with the starting and ending frames we get this, which looks better than before.

Or you could also simply replace the trail in the three motion blur frames with a mass of messy shapes or parts of the object basically just by substracting parts of the object and making the fall behind like this.
Putting all of it together it looks as fast and smooth as the other one but has style.
So any of them work well, but they're just stylizing methods to make it look more appealing.
As i said earlier though you can do whatever you want.

4.2 Hatching
The hatching technique in this case consists of drawing multiple parallel lines on the sides of the object to give the illusion of movement.
It's really STRAIGHT FORWARD and easy to understand. . . Sorry that was a bad joke.
Anyways, all you need to do is replace the edges in the direction you want to go with hatched lines.
So, if we started with this smear frame going in an horizontal direction like this.
We would need to replace the edges on the back and the front with horizontal lines longer on the back than the front like this.
Doing this on all the smear frames and joining them together should give you something like this.

You could also hatch the top lines but it would be pretty much the same.
4.3 Blurring the Object
Blurring the object to give the impression of motion blur is pretty cool because Clip Studio Paint has a filter to apply motion blur in any direction you want.
To do this you can click on [Filter] menu > [Blur] > [Motion Blur].
You can move the Strength slider to change how much the object will be moved or stretched by the filter

The Angle slider is used to change the rotation of the object.
The Direction slider changes the direction in which they add the blur

And the last slider is used to change the way the motion blur is illustrated, it's a bit complicated to illustrate so i'll let you play around with it and what works for your animation.
Anyways making an animation using this is pretty straight forward because all you need to do is apply to your in-between frames in the direction you want.
You do need to apply the motion blur at different strengths and depending on the state of the animation if you use simple objects with no motion blur, in this case i use 0.93 for the accelerating and decelerating frames and 2.98 for the frame at full speed.
Which would give something like this in this case.

I do prefer drawing the smear frames first and then using the Motion Blur filter over just using it because you dont need to change the strength and it just looks better in my opinion.

Remember that you dont need to 100% follow these techniques, you can do what you want and these are not a rule.
5. How To Animate in Clip Studio Paint
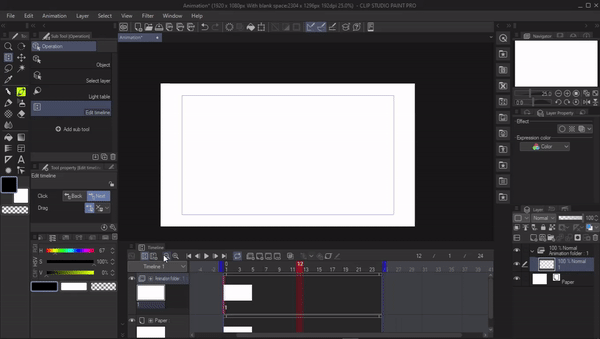
To start an animation in Clip Studio Paint you want to click File, then New or [Ctrl] + [N] to open the [New] window.
After opening this window you can click on the film icon on the furthest right called [Animation] to be able to create an animation right off the bat.
In the animation window the important information is
1. The [File Name] which allows you to name your piece.
2. The [Preset] which allows you to import or choose a resolution and size.
3. The [Size of Output frame] is to choose the size and resolution of the frames or cels of the animation, I would recommend 1920 by 1080 because its the average size of a screen.
4. The [Blank Space] is an empty space around the frames that isn't featured in the animation once you import it, you can change the size of each side individually.
5. The [Timeline name] is the name of the timeline as you can use multiple ones at once.
6. The [Frame Rate] is pretty simple its how many frames per second are playing on screen or the speed of the animation, and we're not going to animate 24 frames it's simply the speed of the animation.
7. The [Playback Time] is the amount of frames we'll be starting with to animate. In the Pro version you can only use 24 which at 24 fps equals to 1 second, so if you're planning on drawing longer animations without having to worry about anything us the EX version.
After you press on OK, it should show the timeline the bar on which you're going to be editing the placement of the frames and for how long they play out.
If you dont see it you can click on [View] and then press on the [Timeline] button or [X] on the keyboard to toggle it.
On the bottom left corner of the screen in the [Layer] category, you can see that it has an Animation folder the [New Animation Folder] on the timeline.
Those folders contain the layers that will be used in the animation, and it can cointain any type of layer wether its raster layer or a vector layer.
With that in mind we can move on to the [Timeline].
With [New Timeline] Button you can create new timelines, and you can move between them by clicking on the big button below it.

With the [Zoom In] and [Zoom Out] Buttons you can. . . well zoom in and zoom out.
With the {New animation cell] Button you can create a new animation cell which are the different layers that can last multiple frames, they're basically what the animation is made of.
And the [Specify layer] Button allows you to add an already existing specific frame from the folder to the timeline on the place the red cursor is.
The [Delete Specified cel] Button allows you to delete a cel of animation on the timeline where your red cursor is on it, but keeps it in the folder and to completely delete it you need to delete it inn the folder.
The [Enable Onion Skin] Button toggles onion skin a feature that let's the past layer bleed in the current one in a blue colour and the next frame in the current one with a green colour.
One thing that's really cool about Clip Studio Paint is that if you create multiple frames it will start to pick up a pattern and just continue with it, so if you started with a frame every two frames it'll continue that way.

The [Play/Stop] Button stop the animation or makes it play at the desired framerate.

To change the framerate of the animation go to [Animation] menu > [Timeline] > {change Frame Rate]

To shorten or lengthen the length of the video you can just move the blue bar at the two extremities

And that's about all you need to make a basic animation so now let's animate something.
6. My animation Process.
For the reference i chose Spencer the pencil

6.1 Draw the background
After i created the file, I start by making the background.
The background in this image is pretty simple because it's almost just a gradient.
I started with a base color and added white with very light opacity.
6.2 Draw the sketch
Next I normally draw the sketch of the drawing i kinda skip keyframes and just draw them keeping it as simple as possible.
I then added the motion blur effect to all the in betweens and it gave me this.

4.3 Coloring the animation
I mostly used the pencil tool to fill in the drawing because i felt like it but it would've been better to use a bucket.
Then, i also added motion blur and at the end i had this.

It isn't great but my point was to get the point across of how simple and quickly you can draw a simply animation using Clip Studio Paint's features.
I haven't used a lot of apps in the past but so far Clip Studio Paint is my favorite.
Heck they even give a 6 month free trial with no gimmicks, like who does that.
Conclusion
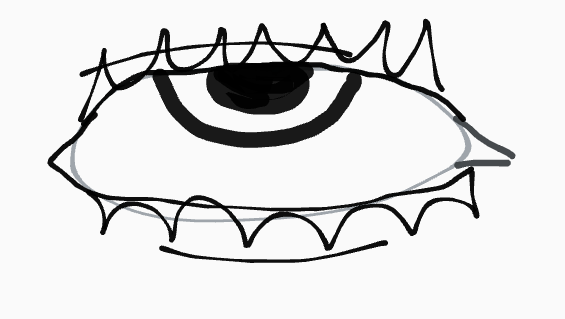
Anyways that's it i hope you liked it I would really recommend that you go online and search up a bunch of smear frames, it's really interesting how all of them have their special traits, they could look very bad or amazing, sometimes they even turn into noodles, but they always look butter smooth and give the animation an overall better visual flair.
I think smear frames gives a lot of animations life and i hope that i made you understand something new today.


Comment