Draw cute flowers
1. PRESENTATION
Hello everyone, I present to you my little tutorial on how to draw adorable flowers, very colorful, in a super easy way and with very few brushes.
They can be used to make very pretty stickers and give color and life to everything around you, or simple illustrations to fill your networks with adorable and huggable plants.
2. ASSETS
2.1. pencil for sketch and line drawing
2.2 Nice backgrounds to give it a very colorful final touch.
2.3 The rest of the brushes and tools are the predefined ones of CLIP STUDIO PAINT
3. PLANT SKETCH
3.1 You can look for references on the internet of the plants you want to draw, I am going to teach you how to make a very simple one with which you can practice, this quick technique that you can use for many other drawings and other types of plants.
3.2 We will start by rolling a "Symmetrical Ruler" to make the pot.
3.3 Once we have the shape of the vessel to our liking, we are going to put very nice decorations on it
These are going to be my decorations, simple, but once they are colored they will be very pretty.
3.4 Now we will draw the plant, with its leaves.
I have opted for a plant similar to the "Zamioculca" that is very simple, but precious and beautiful.
You just have to draw a line from inside the vase upwards, that will be the trunk of the plant, and along its entire surface (on both sides of the line), make leaves in pairs, these are shaped like drops of water, they are super simple. Finish off the tip with a loose leaf that gives it charm, but it's okay if you don't put it.
(Remember not all the leaves are the same, so they do not have to be all symmetrical, if they look like a drop of water, it will be enough)
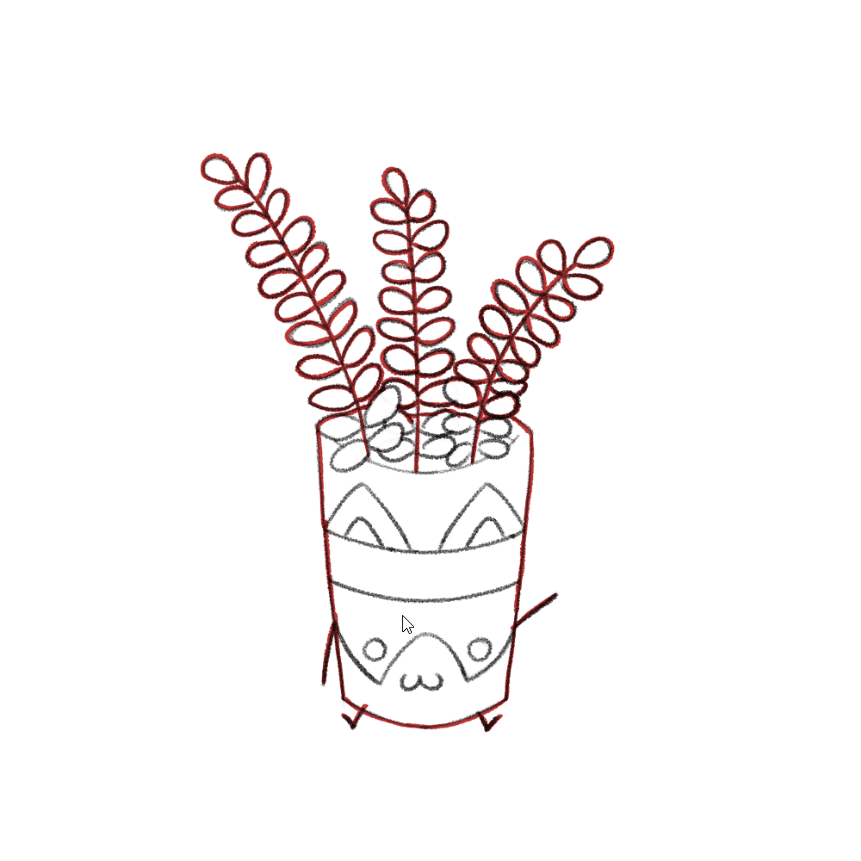
3.5 I wanted to give it a more adorable touch by adding eyes, a mouth, arms and feet to the pot.
It looks like a sitting kitten, greeting you "HELLO"
3.6 The plant would already be finished, I like the style of the brush that looks like a pencil, so I'll leave it to you, you can outline it.
Remember to leave the drawing very clean and erase any visible part of the pot or the leaves. I had to clean that area.
4. CREATE COLORING MASK
4.1 I am going to teach you a very simple technique to color any drawing, and that is very fast and looks great.
I want to give it a touch like a little paint coming out of the pencil line.
With the "Textured Pen" of the CSP I am going to outline the drawing, not being very faithful to the line already made. (I used a color that I am not going to use in the drawing)
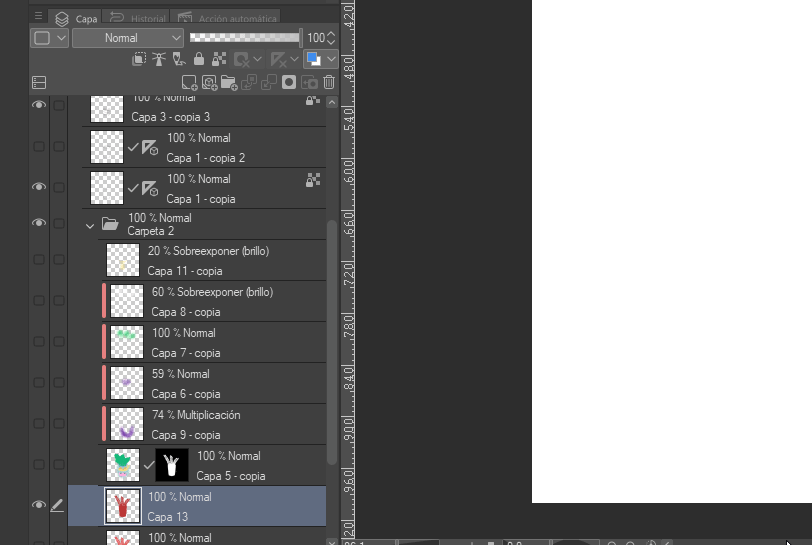
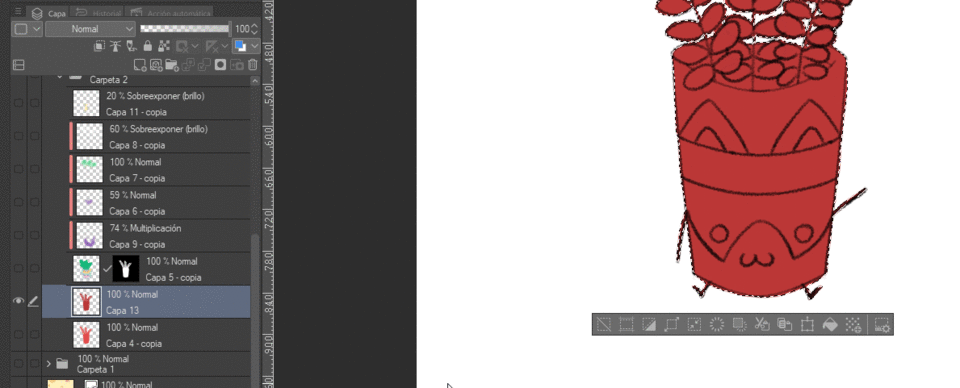
4.2 Once we have it with the "Fill" > "Refer to other layers" cube with the configuration that I show you in the photo.
We are going to fill the whole drawing.

4.3 Now I am going to teach you how to make a layer mask that you can modify as you wish, to make the ink effect that goes out of the line.
We "right click" on the layer we just created > "Selection from layer" > "Create selected area"
This is going to select the color that we painted before, so make sure you leave it well polished.

Once the layer is selected, we "right click" on the same layer > "Layer mask" > "Mask external part of the selected area"

I have had some failure in the mask, but as I already told you, it can be modified.
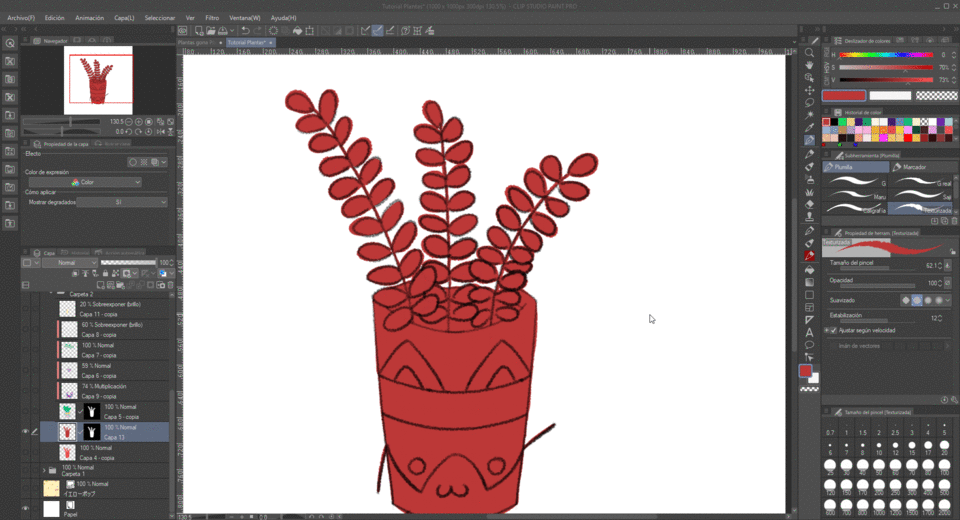
Click on the mask that we have created (1 in the image) and with a black brush (2 in the image) and transparent (3 in the image) you modify it.
With the black you add more work area in the mask and with the transparent one you erase.
Here I show you how I correct my mask.
Leave yours well polished, if you have had any errors.

5. COLOR
5.1 In the mask that we just created, we are going to paint the areas of our plant.
Nothing more is needed than the same "Textured Pen" brush that we used before, to put the base colors.
These are mine, look how much color it already has.
5.2 We are going to give it some shadows with the "Soft Airbrush" on the base.
For this create a new layer above, I put it in "Clip to layer below" in layer mode I put it in "Multiply". And paint the base with a purple color, making a V shape and lower the opacity a little, at 74% it will be fine.
Now in the same way as before, we create a layer to shade the inside of the pot and the lower part of the plant.
This time the layer is in "Normal" mode but I lowered the opacity to 59% and used an all blue darker than my pot.
Now we will give some highlights to the top of the leaves.
Create a new layer in "Dodge (glow)" mode at 60% opacity.
This time use a very white yellow.
Now the last point of light that we have left is that of the vessel.
We create a new layer in "Dodge (brightness)" mode at 20% opacity.
This time I used a banana yellow, which will match my purple eyeshadow.
5.3 Last details
We are going to put some white glitter on the eyes (I used the same pencil brush as for the sketch and everything has the same texture)
And color the sketch lines with colors that will go well with the rest. To do this you go to the sketch or lines layer and check the "Lock transparent pixels" box with this you can paint over it without leaving the lines.
6. USE ASSETS FOR THE BACKGROUND
6.1 We add one of the funds that I have told you to download in the ASSETS section and with this we finish our beautiful plant.
7. FAREWELL
Thank you all so much for making it to the end!
I hope it has been helpful and you make many beautiful plants, I hope to see them.
Until next time!
Mi Twitter:
Instagram me:


Comment