
1. PRESENTATION
Hello everyone! today I bring you a tutorial, to learn how to use the "Fill" tool like a professional.
In this way, you will be able to put the base color and the lights and shadows with just a few clicks and very quickly and easily.
2. ASSETS
1. Funds used for the final illustration.
3. INTRODUCTION TO THE TOOL
3.1 Tool Properties
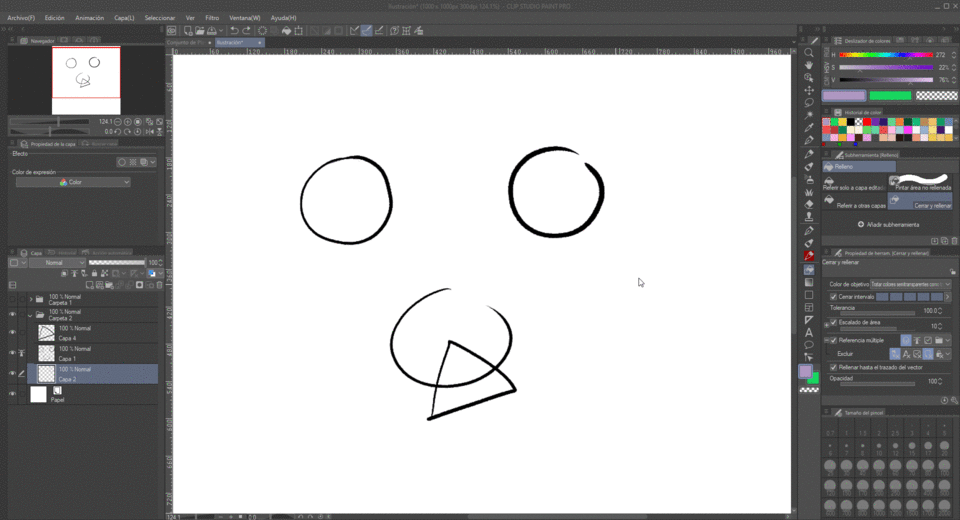
Of all the properties it has 3 essential ones, which are necessary for you to know how they are used. I mark them with numbers in the image below.
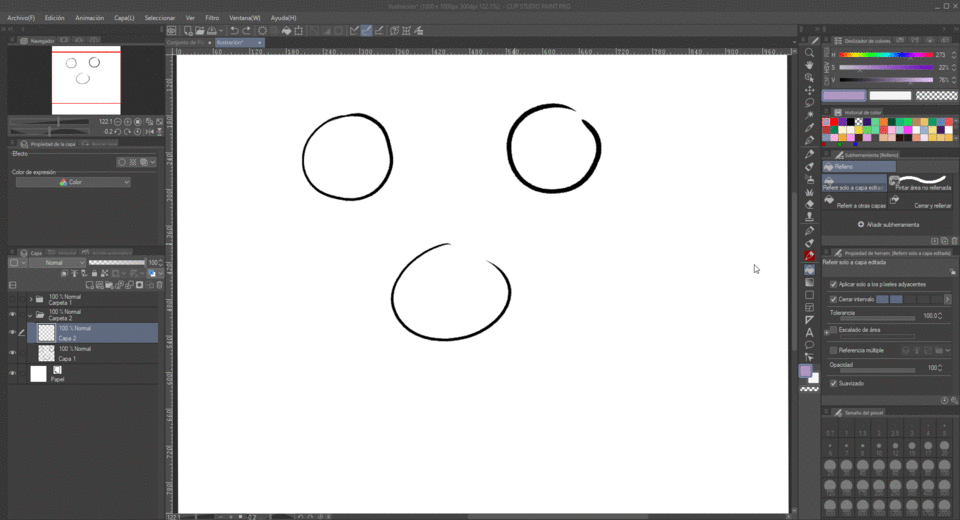
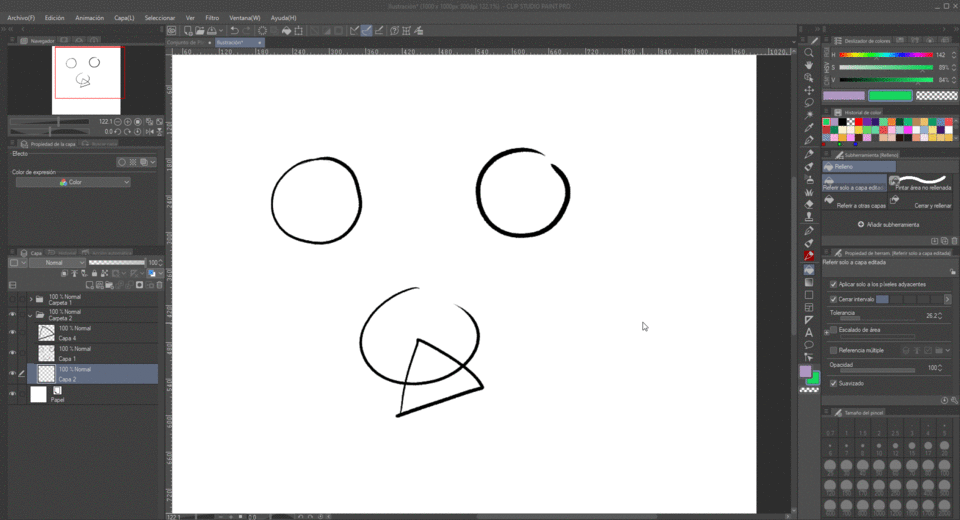
I will be using 3 different circles, 2 of them without being completely closed, like the ones in the image.
3.2 Close Interval (1 in the introduction image)
This property is used so that the CSP itself fills in areas where you may have left the line art without closing a bit.
The less squares are activated, the more the line has to be closed and the more squares you activate, the more open the line can be.
Keep in mind that it does not do magic and has a limit of opening that it can process, also the more open the line is, the more it is possible that it will fill it in a worse way.
Here I show you how it is only able to fill one of the circles, since it only has 2 activated squares.
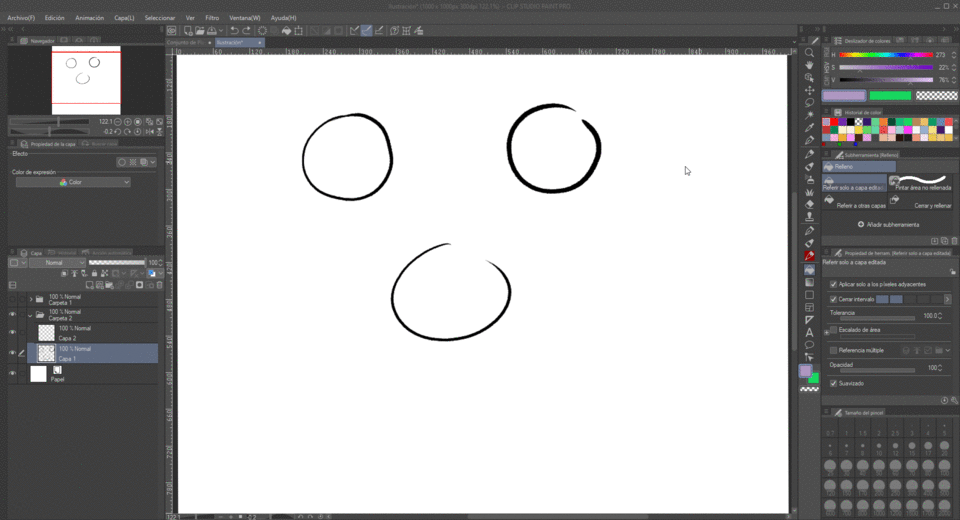
And here we have activated all the squares, so it is able to fill 2 of the circles, since the third one is too open.
The second circle fills it badly, but later I will teach you tricks to be able to fill it well (although depending on the line, having fewer squares activated may fill it well for you)
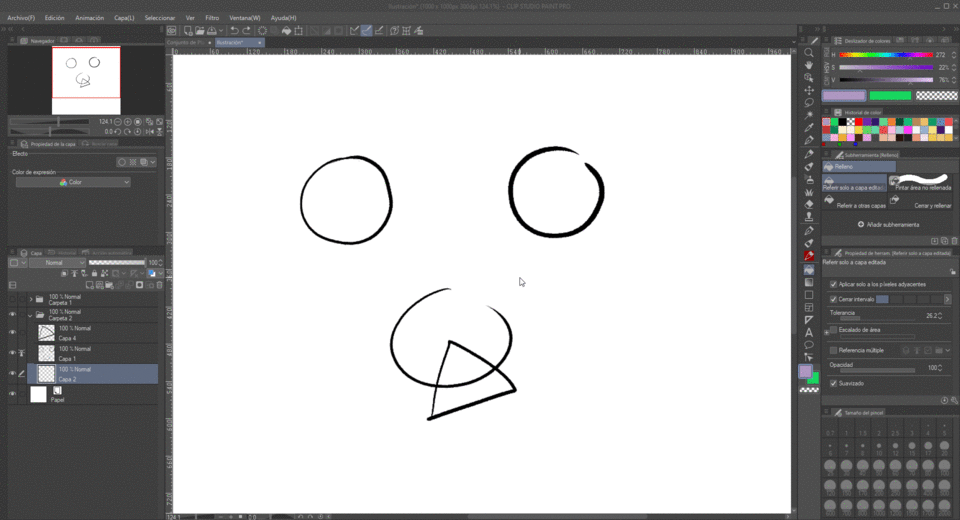
3.2 Tolerance (2 in the introduction image)
This property is responsible for filling, according to the opacity of the pixels. If we use translucent brushes or with a lot of pencil-style texture, it is possible that it does not fill well and white gaps remain or it goes out of the line art.
The higher the tolerance, the more opaque the pixels have to be for it to fill well, and the lower the tolerance, the more translucent the line art can be.
You see testing the tolerance that suits your line art.
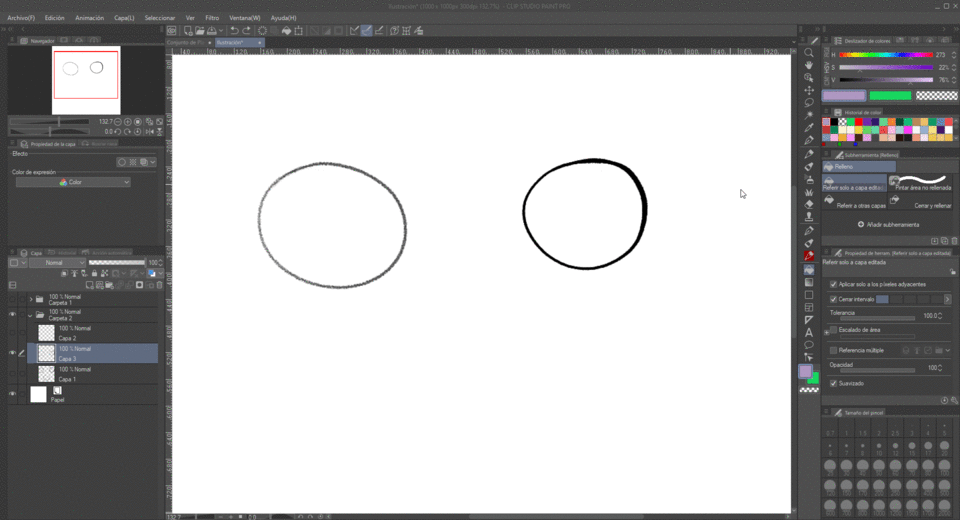
This time I'm going to use two circles, one with the CSP's default "Pen" tool and one with the CSP's default "G" tool.
"Pencil" is more translucent and textured, "G" is completely opaque and smooth.
Here I show you how you can fill the two circles, just by lowering the tolerance
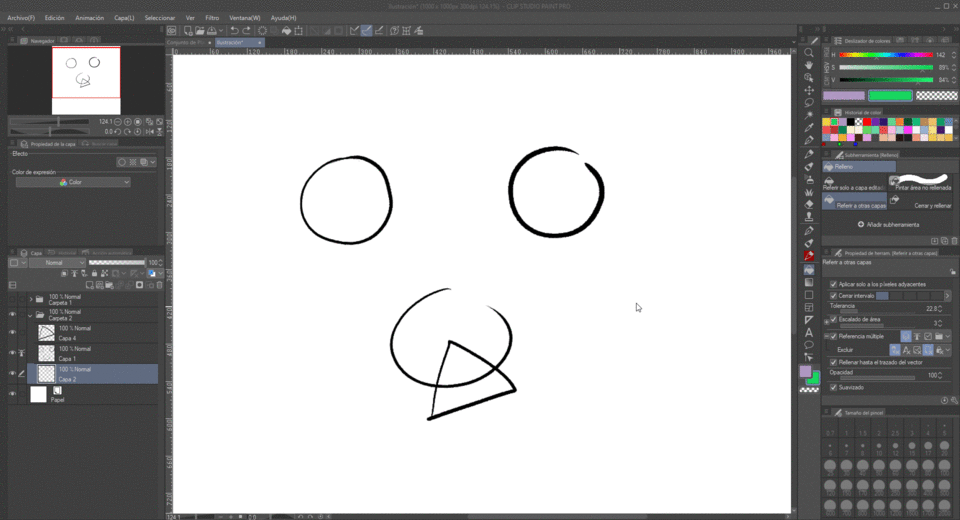
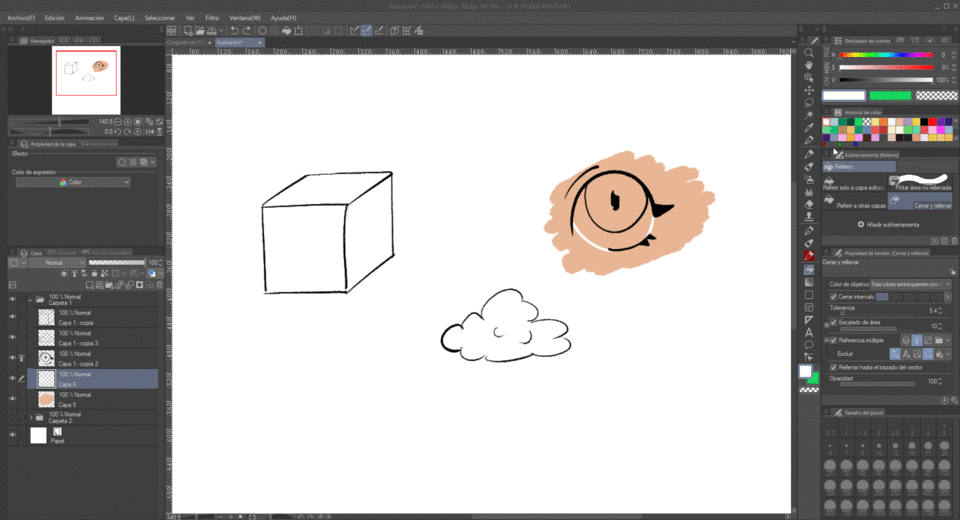
3.3 Multiple reference (3 in the introduction image)
This is the most complex, but one of the most useful. This is capable of filling according to the content or textures of the other layers (that are active or that you mark them as reference)
All the examples that I am going to give you to explain have been done with the "Refer to only the edited layer" tool.
3.3.1 All layers
When you activate this option, it fills according to the textures or lines and other colors that you have in the rest of the layers that are active, if they are deactivated it does not count them.
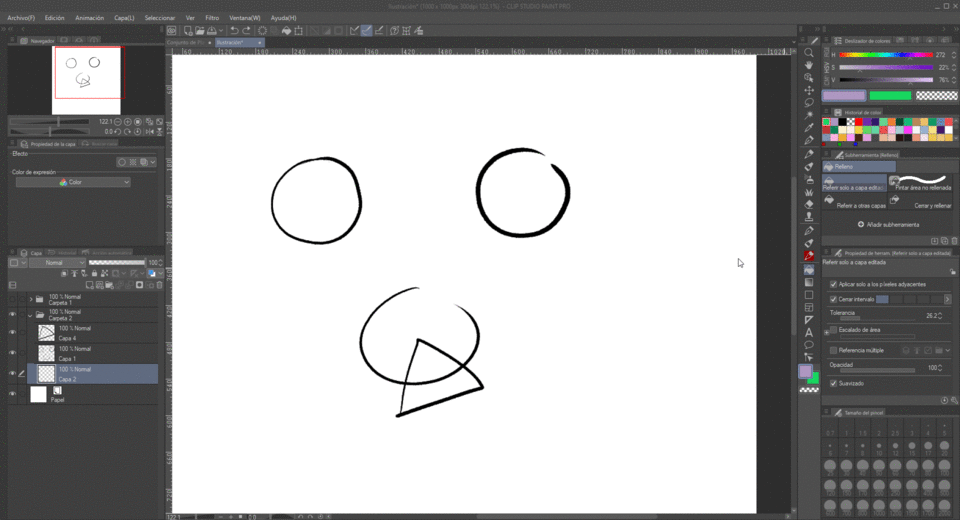
As you will see I put a triangle crossing one of the circles on another layer different from them, and you will see how it paints around the triangle and inside the circles in the same way as before, no matter what layer you are on.
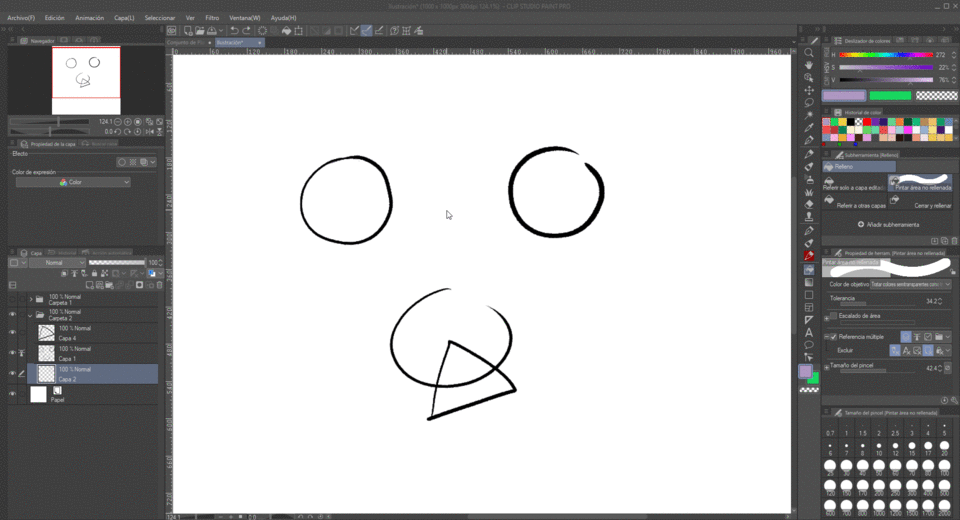
3.3.2 Reference Layer
When you activate this option it will do nothing but mark one of the layers as a reference (usually the line art layer). Once activated if you fill in another layer, it will fill using the shapes of the layer you marked as reference.
As you will see, I only activated the layer where the circles are as a reference, so it will not take into account the triangle.
4. FILLING SUB TOOLS
4.1 "Refer to editable each" sub tool
This sub tool, affects the active layer in which it is, if the layer is empty, it will fill it completely, but if it has any line art it will adapt to it.
4.2 "Refer to other layers" sub tool
This sub tool fills according to what is on all active layers, it fills depending on whether they have texture or line art.
4.3 "Prime unfilled area" sub-tool
This sub tool behaves like a brush that fills around a tightly closed line art.
4.4 Sub tool "Close and fill"
This sub tool behaves like a selection lasso that fills around a tightly closed line art.
4.5 Use all the sub tools
You don't have to focus on just one tool, use them all depending on which one suits what you want to fill.
Several examples:
5. SPEED PAINT USING THE FILL TOOL

6 FAREWELL
Thank you all so much for making it to the end!
I hope it has been helpful and that you color like a professional with the "Fill" tool
Until next time!
Mi Twitter:
Instagram me:
Users who liked this post


Comment