How to draw flowers? 2 very easy ways.
Introduction
Hello everyone.
This day I am going to explain how to draw flowers? 2 very easy ways.
Before starting I want to give you some recommendations to manage your time well
Recommendations to speed up your work:
Edit the Shortcut Settings.
You can assign commands to the tools you use most often, tools like: zoom, G pen, large size, small size.
It can be combinations of commands or simply with a letter, this will allow you to speed up your work and thus you will no longer have to search in the toolbar and lose some valuable seconds.
For example, here I leave you how I have my commands configured and although it may not seem like it, this speeds up the work.
Remember to check that the stabilization of the brush you use is set to 100% that will help you make your lines straighter.
Tools, brushes or commands that we will use very often in this tutorial:
G pen.
Circle shape.
Tool: Scale/Rotate or the command CTRL + T
Right Click - Duplicate or the commands:
CTRL + C = COPY
CTRL + V = PASTE
SHIFT + ALT + E = Merge the selected layers.
Right click + selection from layer + create selection.
Upper tool panel: EDIT – TRANSFORM – FLIP HORIZONTALLY.
Flowers with line art:
We create a new project by choosing the illustration box. And I advise you to use a size large enough in case you want to print it. The bigger the better, but remember that it also depends on the capacity of your computer. I almost always use the size of 3174 x 2480 px and 300 DPI.
flower 1
We start by creating a new folder to keep things in order and not get confused. Now I use the G PEN to draw the flowers and the color black.
We create a new layer and draw the circle with the help of the circle shape tool.
Create another layer and draw a petal, the lines may not be perfect at first but you keep trying until you are happy with your lines, practice is everything. I tried several times.
By the way, it doesn't matter how many lines reach the circle, since we'll clean it up at the end.
             Now duplicate the layer right click - duplicate layer or copy and paste the layer with the commands

            CTRL + C

            CTRL + V
Use the Scale/Rotate tool or CTRL+T commands to move the petals

Repeat eight more times
Remember to place the petals well, make sure they make sense.
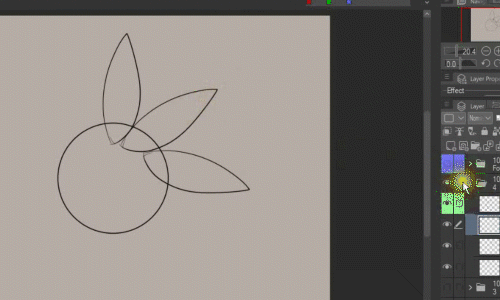
Now create a new folder and name it PETALS.
Move all the petals inside that folder.
To move all those layers quickly just go to the first layer of the petals, then hold down the SHIFT command and don't release it until you get to the bottom to find the last layer, you will see that all the layers are blue, that means they are selected.
Then you must locate yourself in the first layer and move it up and all the petals are already in your folder all together.

Now create a new folder and go back to the petals folder.
Copy a layer with CTRL + C, go back to the new folder.
Paste that layer with CTRL + V, then you copy and paste that layer several times so that you fill in those empty spaces that were left. Lower the opacity of the PETALOS folder. I speak of the original, this in order to make it easier for you to locate the new petals
I add a new folder and do what we did above. Copy and paste the petals, then I place a petal in the middle that will come out a little from the ones in front.
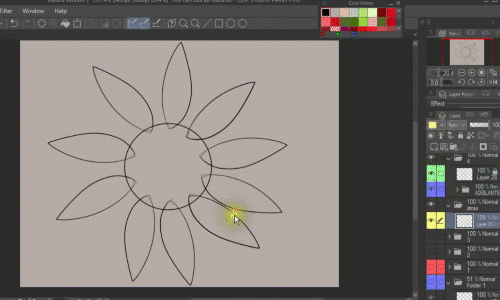
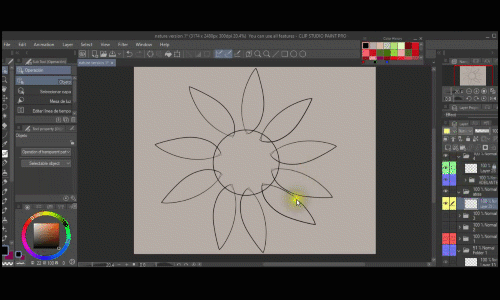
I add a new folder and do what we did above. Copy and paste the petals, then I place a petal in the middle that will come out a little from the ones in front.
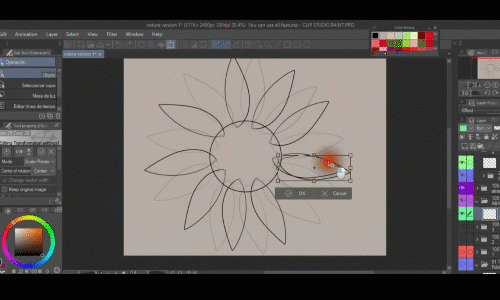
Ok, so as not to get confused, in summary there are three folders with petals. The main one, the secondary one, which I put to fill in the empty spaces and the last one. which are the petals that come out and that are located with a petal in between.
To avoid any mess I like to copy and paste the important folders. So I'm gonna double up or you know
CTRL + V
CTRL + C
all three layers. I will block the pixels to remember that I am not going to edit them for any reason.
I also remove the visibility, this option is located on the left side of each face, the icon is that of an open eye. As you have noticed, I like to assign various colors to each layer or folder. I do this so as not to confuse myself.
Now that we have duplicated the three folders we have 6 folders, so the ones we duplicated we are going to join. I do this in order to make it easier to clean the lines that have come out.
They are now located in the folder
RIGHT CLICK – MIX SELECTED LAYERS or you can use the SHIFT + ALT + E commands.
By joining them we will only be left with a single layer and that way it is easier to clean. Then they repeat the same thing with the other two folders.
Then I go to my first layer and start erasing those lines that don't work for me and repeat the same thing with the other two layers. . A tip that I can give you here is to place yourself on the line you want to erase and the layer where that line is located will automatically appear and thus erase those lines that are out.
Then I begin to separate the main petals from the secondary ones, erasing the lines that should not be seen and thus repeating the same in each layer.
Remember to lower the opacity when necessary
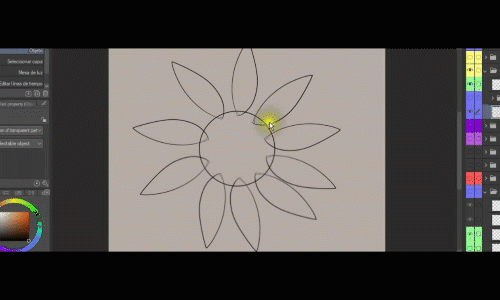
Now that I'm done cleaning I put everything I just did in a new folder and duplicate it just in case
Next, I create a new folder, and start drawing the stem like this;
you draw a point where you want your line to begin, then you press the SHIFT command and a line will appear and you release it. You repeat the same thing and just don't forget to close it.
Next, I create a new layer and draw a leaf.
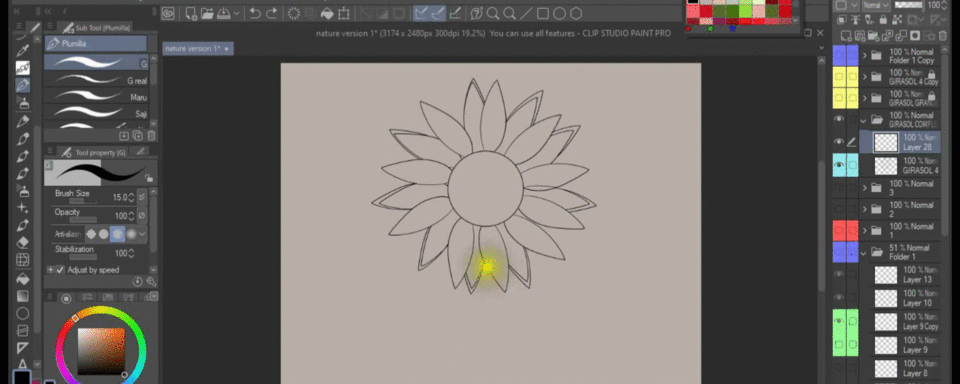
And so I stay.
flower 2
Create a new folder and a new layer. Use the circle shape tool.
Create a secondary folder inside the folder you just created and here we will draw the petals that will be in front, I do that so as not to get confused.
Create a new layer and draw a petal.
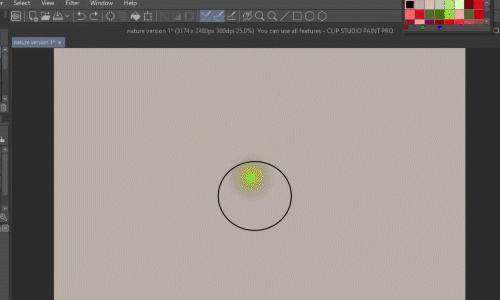
Duplicate that petal two more times remember you can use the commands
CTRL + V
CTRL + C
So now we have 3 petals and what we will do next is select those three layers with SHIFT, we are going to copy and paste them or you already know the commands
CTRL + V
CTRL + C
Now we will change them to the horizontal side we are going to EDIT TRANSFORM – TRANSFORM – ROTATE HORIZONTALLY
Then we use the Scale/Rotate tool to move the petals
Now I copy and paste two more and place them well
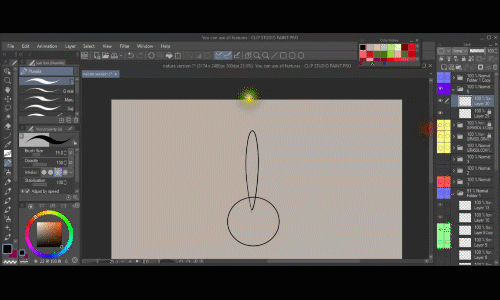
Now I copy and paste two more and place them well.
To group the layers where I draw the petals, I go to the first layer and hold SHIFT and go to the last layer and then move it up and group those layers into a folder.
Since I have the petals ready in a single folder, I duplicate that folder and lower the opacity of the original petals folder.
Now, I go to the other folder and with the Scale/Rotate tool
I rotate it so that it is different from the petals in front.
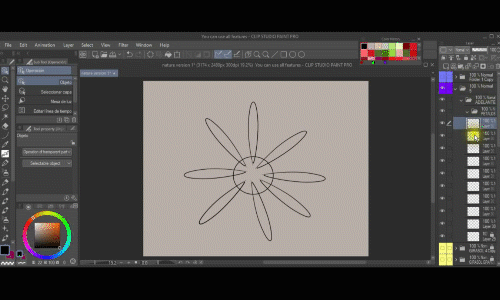
I repeat the same two more times.
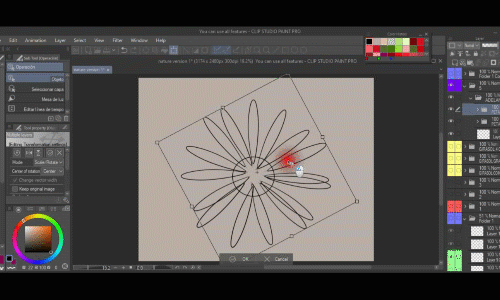
I repeat the same two more times.
In summary, I have 4 folders of petals and finally I use the lasso tool to locate some petals that seem to me to be wrong.
I make sure to lock the other petal folders so I don't have a problem going to the wrong layers.
Now I duplicate the entire folder of this flower.
And I lock the original folder.
Don't forget to take out the circle that we created at the beginning because the only thing we want to join are the petals to be able to clean everything faster.
I go to the petals folder and keep repositioning them and filling in any blanks
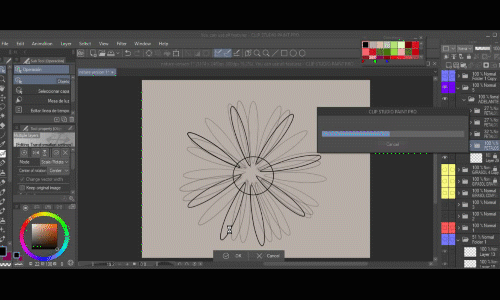
Now if it's time to duplicate the already clean folder from the petals on the sides. I duplicate it so many times because I want to show you step by step in photos on the CLIP STUDIO TIPS forum
You don't need to duplicate as many times just once is enough.
Ok now I'm going to unite one of the petal layers and start cleaning up all the strokes that made it to the circle.
Later I continue adding more petals in the spaces that I missed until I am happy with the result.
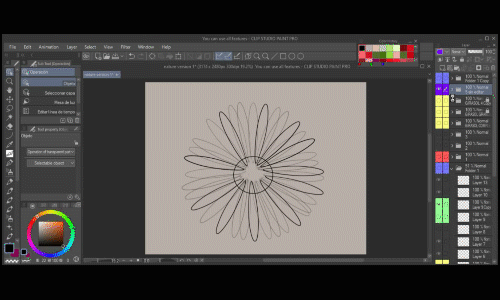
And in the end I duplicate the entire layer and lock one, the other one and I change the size a little
So, I draw the stem and the leaves with the method that I explained before, you draw a point where you want your line to start, then you press the SHIFT command and you will see that a line appears and you release it. Now what I did was I copied and pasted that layer, then I put them together a little bit.
Create another layer and draw a little leaf, then duplicate and flip it to the horizontal side and you're done.
Remember that with this method the LINE ART IS very important since we will leave it until the end so you have to make sure it is clean.
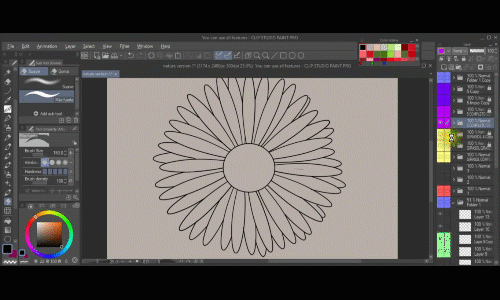
And this is the result.
flower 3
I create a new folder and a new layer.
I start by drawing the outline of the outside of the top flower.
I add a new layer and continue drawing the outline of the flower at the bottom

I add a third layer and continue drawing the outlines of the petals
I add a fourth layer and continue drawing the petals below.
I add a fifth layer and draw the petals in the middle, select it with the lasso and reposition it with Scale/Rotate.
And so I keep adding layers for a certain number of petals because I want to be able to erase and intertwine some strokes at the end.
That's why I need them to be separate.
In the end I got 8 layers of petals.

Once I'm done I use the zoom tool and start to clean up those lines that I don't like and redraw the ones that were wrong.
By having everything separate I can remove the visibility of several layers and clean one by one without the others interfering.
So I locate myself in each layer and I clean them.
Then I lower the opacity of some of them so I can locate where I should erase strokes or simply redraw them.
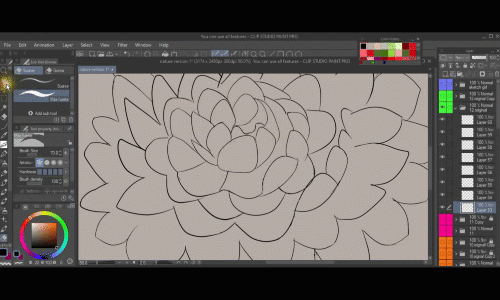
When I finish drawing the flower, I duplicate that folder and I change the size of the copy with Scale/Rotate
I create a new folder and a new layer below the flower and start drawing the stem. Always drawing a line and then duplicating that layer and making sure to close the strokes.
Then I draw a sheet and duplicate it.
I select the option EDIT- TRANSFORM- FLIP HORIZONTALLY
Lastly, I clean those lines that are wrong.
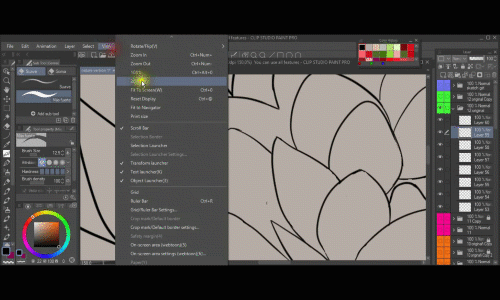
Colors
flower 1
To color, I go to the line art layer and select the circle with the auto selection tool.
I create a new folder under the line art layer and give it a circle color with the G pen.
And I repeat the same thing, but now I select the main petals with the automatic selection tool.
Now I go back to the colors folder and create a new layer below the circle and paint the petals yellow.
I create another layer and go to the line art I use the automatic selection tool and go back to the layer I just created.
I use the G pen to color the secondary petals a slightly darker yellow.
I add a layer and this time on top of the main petals layer. Then I activate the clipping mask and start to color with the watercolor brush around the circle and blur it with the same watercolor brush.
I create another layer always with the clipping mask and I color the outline of one side of the petals with a dark color to simulate the shadow a bit. Then I lower the opacity.
I add another layer and turn on the clipping mask and start adding lines with the same color I used on the previous layer.
I make those lines by drawing a point and then holding SHIFT until I draw the line down. And so I create the lines in each of the petals.
Then I hover on top of the secondary petals layer and create a new layer, turn on the layer mask and start adding the same lines.
Then I create another layer and start adding more shadows to the outline of the secondary petals.
Lastly, I paint the layer of the petals that come out of the secondary ones only with yellow.
Now I'm going to detail the circle.
I create a new layer on top of the circle and activate the layer mask and what I will do is draw horizontal and vertical lines with the yellow color and the G pen until I fill the entire circle. Then lower the opacity.
I add another layer and start adding some small lines around the circle.
Then on top of everything in a new layer I draw an unfilled orange circle and lower the opacity.
Finally I give color to the stem.
I go back to the line art and use the auto select tool and select the stem and the leaf.
I create a new folder and a new layer and color them green with the G pen and outline the leaf and stem with light green lines.
In the end I decide to change the color of the line art so I go to that layer Right click – selection from layer – create selection
I create a new layer and I already change the color of everything.
I use colors similar to the ones I already used, but a little darker.
I'm going to show you the Clip Studio timelapse because it doesn't seem to record my screen when I paint this flower.
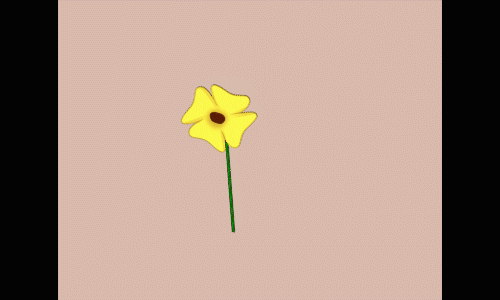
flower 2
Now, there is a much easier way to color.
Go to your line art layer and activate the reference layer option.
Create a new layer and start coloring with the fill tool the main petals with white.
. Go to the settings under sub tools, which appears on the left side of your screen and select Refer to other layers.
And you can now fill in without any problem, this way is much faster so it is the one I recommend the most.
So that you do not get so complicated you can color everything in a single layer. It depends on you.
Then in another layer I color the secondaries in a slightly darker tone.
Then I go back to the main petals layer and create a new layer above it and turn on the clipping mask. I proceed to add the shadows to the outline and then lower the opacity.
On another layer I color the circle with yellow and then on another layer with clipping mask on I draw light yellow dots.
I then go on to color the stem with a light green color and then add another layer with the clipping mask to color in the shadows.
I add another layer and turn on the add glow blending mode and use a light green to color the leaves.
Finally, I return to the line art layer and change its color.
Right click – selection from layer – create selection layer
And I give them similar colors to the ones they already have, but darker so that the difference can be noticed a little.
And I decide to add more shadows to the circle with brown and use Gaussian blur to blur the color.
Here I leave the CLiP timelapse.
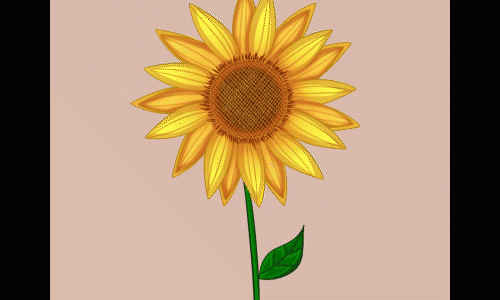
flower 3
On the line art layer I use the automatic selection tool. I select the bottom petals first.
I create a new folder and a new layer below the line art and paint it light pink
I add another layer and paint the top petals light red.
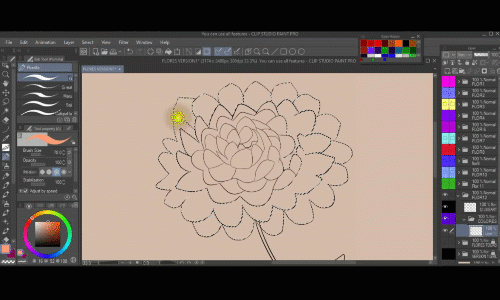
Then I add another layer and turn on the layer mask and start adding the shadows and blur them with the blend tool and lower the opacity.
Then I go to the layer of the petals that are in the pink background and add a new layer and activate the layer mask and start adding shadows with the brown color
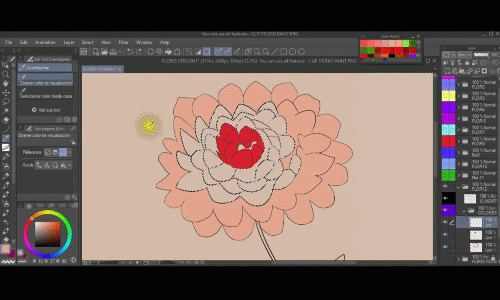
I am now using the watercolor brush. And so I continue adding shadows and outlines to the petals.

I create a new layer and add light to the layer that I had painted red, I also activate the layer mask.
I add a new layer and lighten the colors of the petals below. And then I add more shadows and use the gaussian blur filter, sometimes I lower the opacity as well.
Now, I go back to the line art layer and use the auto select tool and select the stem and leaves and on a new layer I color them.
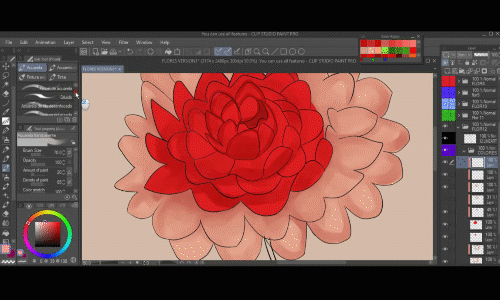
I drew more flowers and did exactly the same as I explained and that's how they stayed.
and here are the flowers with line art applied in an Illustration.
Semi-realistic flowers with watercolor
flower 1
Personally, this method is my favorite since I immediately start coloring.
Ok so I create a new folder and a new layer.
And I start to draw a petal with the transparent watercolor brush and a purple color.
I make the outline and then fill it with the same transparent watercolor brush
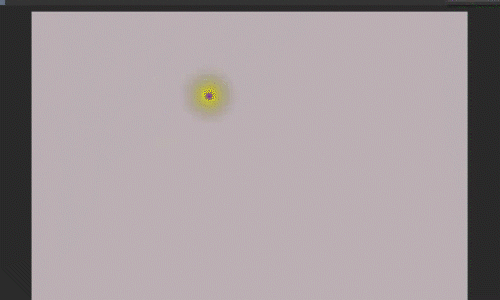
Then I duplicate that layer and rotate it horizontally and position it with the Scale/Rotate tool.
And I repeat the same 3 more times.
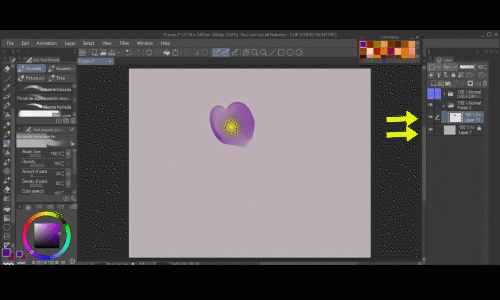
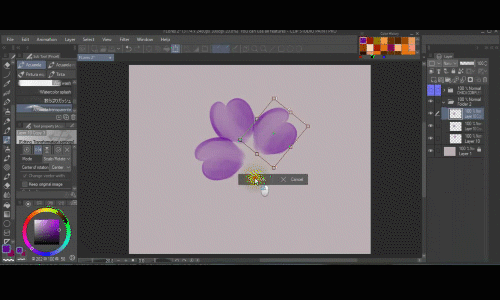
So in the end I got 5 flower petals and I now relocate them.
I select all the layers holding SHIFT and merge them all. With the commands SHIFT + ALT + E
As you can see there is a space left in the center so I paint it with the transparent watercolor brush.
Now, I create a new layer and paint the center of the flower with a brown color. Then I create a new layer and activate the layer mask and fill the outline of the circle with white color and blur it with the same transparent watercolor brush.
I create another layer and add the yellow color and blur it.
This time I create another layer and choose the dark brown color and fly to color the center.

I then go back to the flower layer and start painting with the transparent watercolor brush and a darker purple to create the shadows.
I paint the outline of the circle and blur the color with the same brush.
Now I create another layer and use a light purple color and give the petals a bit of light. I blur the color with the same brush and then lower the opacity
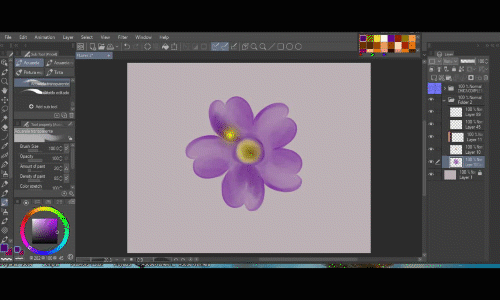
Before continuing I duplicate the flower layer.
I continue to create another layer and activate the blending mode add brightness.
And with a light purple color I paint the lights on the petals and with the same brush I blur the color. On the same layer I draw some light lines around the petals. Then I lower the opacity.
I create a new layer and turn on the Color Dodge blending mode and use the watercolor brush to give each of the petals texture, and also lower the opacity.
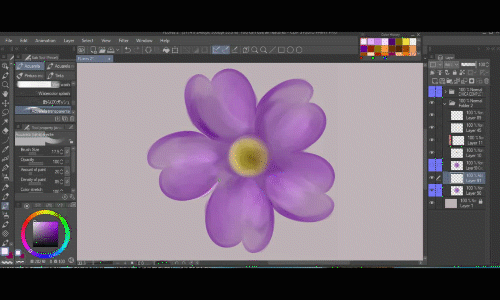
Finally I duplicate the folder. I remove visibility from the original and keep the visible copy.
I create another folder and a new layer and start drawing the stem and a leaf.
Then I create another layer and with a lighter green color I draw another leaf.
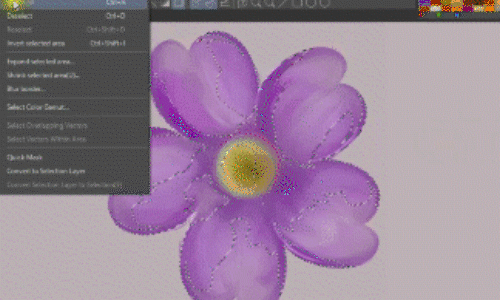
and so I stay.
Well now from the same flower I will make another version with a larger stem.
So I'll create another folder and a new layer and draw a stem with leaves and detail it with shadows.
Remember that you can move your canvas horizontally or vertically, the important thing is that you find the way that makes it easier for you to draw.
After I finish detailing a particular leaf I start duplicating it several times to fill the stem with leaves
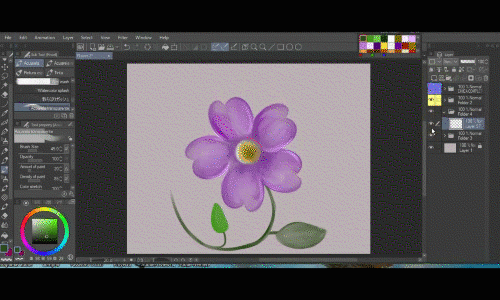
Now I will go back to the folder where I have the flower. I duplicate it and merge the folder I just copied. Using the commands
SHIFT + ALT + E Mix the layers
Now I duplicate that layer again and leave only one visible.
With the Scale/Rotate tool I make the flower smaller and place it on the stem.
As you can see there wasn't much space so I go to the folder where I drew the stem and use the Scale/Rotate tool again to be able to move everything without having to mix the layers. So I relocate everything. And back to the original view.
And the stem that surpassed the flower I erase.
I felt that more stems were missing so I kept drawing more.
Then duplicate the layer twice and reposition the flowers on each stem.
Duplicate two more flowers, but make these smaller.
Remember that the actions of moving, rotating and resizing are all done with the Scale/Rotate tool or the CTRL + T commands
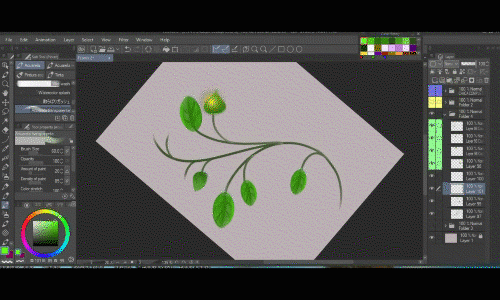
Since I had a mess of layers everywhere, I put them in order and created a new layer with the name of Flower 2.
I move all the layers that I had messed up inside the folder.
Finally I change its position with the Scale/Rotate tool or the commands
CTRL + T
And well, I reorder all my folders, change their names and put different colors on them so I don't get confused.
And if you're wondering why I duplicate folders so many times it's because I always like to keep the original paths in case I have to go back or document my process later with pictures.
I recommend this to you since it has already happened to me that I have made a fairly large change and when I wanted to go back, not even the history of CLIP actions or the command
CTRL + Z have saved me.
And so I stay.
I decide to create the third version of this flower now with many more flowers.
And I duplicate the flowers that I just finished. I try to position them and find a way to make them work, then I keep duplicating the flower layers until I'm happy with the result.
At the end I create the new folder and order all my layers inside the folder.
To take all those layers I go to the first layer and hold SHIFT and then I go to the last layer and you see that the layers turn blue, this means that they are selected. Then you go back to the first layer above and move it up in the direction of the folder and voila, you have your layers grouped in a folder.
Before finishing the flower, I forgot to draw a stem to the original flower. I had left it alone so I quickly draw the stem and kidnap one of the leaves that I had already drawn.
I just give it CTRL + C to copy and once I get to the other layer CTRL + V to paste.
I duplicate it one more time and flip it horizontally you find it in
EDIT – TRANSFORM – FLIP HORIZONTALLY
And I relocate it on the stem.
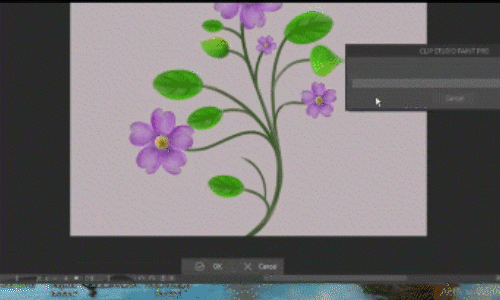
And this is the result
flower 2
I will draw the same flower that I drew previously with the line art version.
So I create a new folder and a new layer. And I draw more or less the guide lines of the flower.
On a new layer I draw the silhouette of the flower at the bottom.
I create a third layer and continue drawing the petals.
In a fourth layer I continue drawing the silhouettes of the flower.

Then I move on to the second layer and start coloring.
Then I go to the third layer and start coloring by pressing the pencil harder to make the color stronger.
Then I draw a dot in the middle with a darker color.
I continue creating another layer and draw the silhouette with a darker color and with the same color I blur it.
And so I keep adding more layers and painting more shadows.
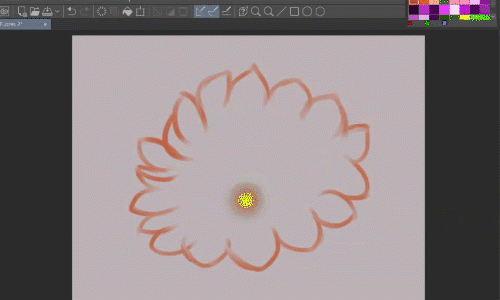
Then I select all the layers with SHIFT and merge the layers.
Now I duplicate that folder and leave only one visible, so I keep working on that folder.
Now I add a new layer and with light pink tone I color all the petals.
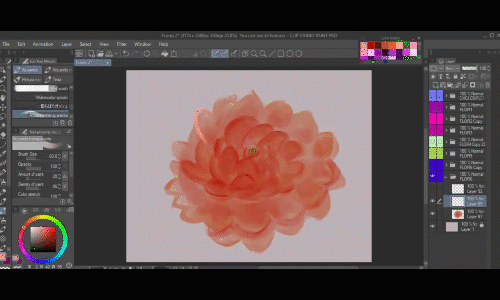
I go back to the first layer and give another little color to the flower since it looked too transparent.
And then I go back to the second layer and continue painting, but this time in red to add the shadows.
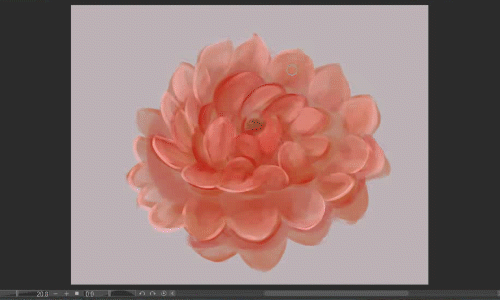
I create a new layer, then add more light with a pink tint.
I create another layer and immediately start adding more shadows.
Now I select all the layers and blend them. I create a copy, then start working on the copy.
I start to blur the colors
I create a new layer and add more shadows with a dark reddish tone.
Now I combine those two layers.
And I add a new layer and draw the silhouette of the petals with a light pink tone.
I blend the two layers again and start blending the colors.
Since I haven't worked with the layer mask, some colors came out of the main silhouette, so I start to erase those extra strokes.

Well now on the same layer, I keep adding more shadows with the color red.
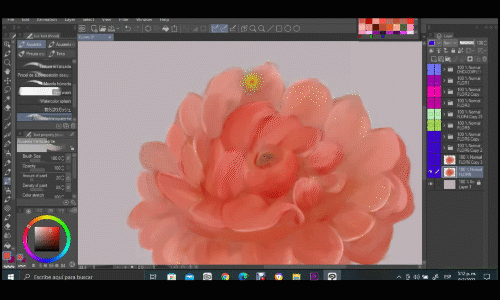
I add a new layer and color the silhouette of the petals with a pink tone.
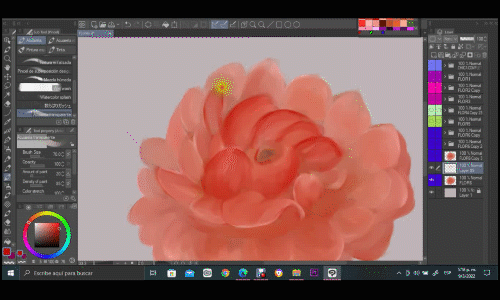
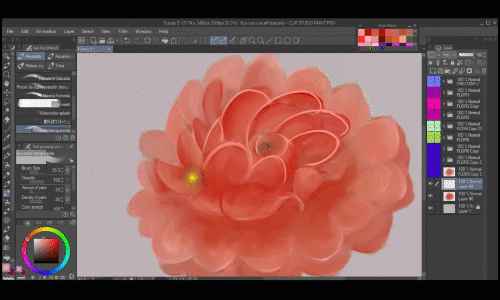
To paint with more freedom I return to the main layer where the color of the flower is and I do
RIGHT CLICK – SELECTION FROM LAYER – CREATE SELECTION
And now I go to a new layer above the others and activate the blending mode, I use a pink tone then, I begin to paint each petal and with the same brush I blur it.
I create a new layer and with a dark brown tone I draw a dot in the center and blur it.
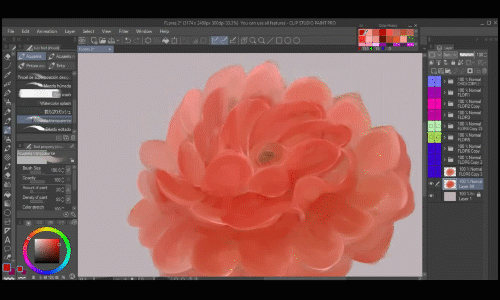
I go back to the main layer to where the flower is and do
RIGHT CLICK – SELECTION FROM LAYER – CREATE SELECTION
Then I add another layer of glitter and paint the bottom part remember that with the transparent watercolor brush I can blur the color.

Finally I add a new layer and choose a white color, now I start to paint the silhouettes above the petals.
I create a new folder and group all the layers inside it. Then I duplicate it and with the Scale/Rotate tool I select the flower and make it smaller.
I create a new folder and draw the stem also a leaf. Once I add some details to the sheet I duplicate it, then I break it with the option
EDIT – TRANSFORM – FLIP HORIZONTALLY
and this is how it looks
How we did previously of this flower I will make another version.
I duplicate the flower folder and remove the visibility of the original, then I merge the copy of the folder, you can do it with the commands
SHIFT + ALT + E Mix the layers
Or use the right click option – merge selected layers
Now I will change the tone of one of the roses so I go to that layer and the EDIT options – CORRECTION OF TONES – COLOR BALANCE.
Next, on a new layer I draw the stem again and place the leaf I had previously drawn on it. I place the flower on another stem and continue drawing more stems and doubling the flowers and so on until the flowers look good together.
When I'm done I group all the layers into a single folder.
And I change the color of the folders so I don't get confused.
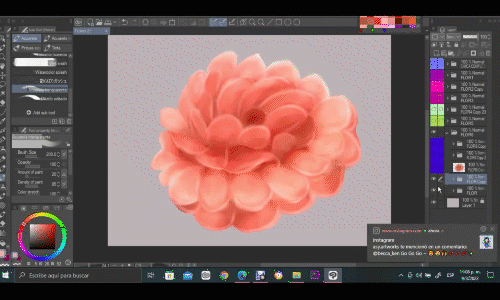
and so I stay.
flower 3
I start by drawing the stem in a new folder and a new layer.
I also draw a sheet and use the lasso tool and the scale/rotate tool to reposition the sheet.
Then I draw another sheet.
I create a new layer and draw the silhouette of the rose with the transparent watercolor brush, then I create another layer and activate the layer mask. Then, with a light pink color I draw my guide lines.
Later, I go back to the first layer and color according to the lines I just drew,
Then I go back to the second layer and start coloring in pink following the guide lines I drew on the same layer.
With the same brush I am blurring.
Now I combine both layers.
Then I add a new layer and with a darker tone I add the shadows and with the same brush I blur
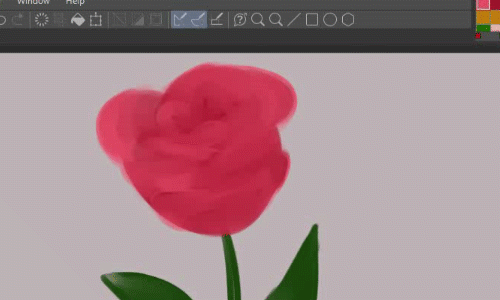
Now I create a new layer and activate the add glow blending mode and before painting I go back to the first layer and select the rose with RIGHT CLICK – SELECT FROM LAYER – CREATE SELECTION
I do this to make sure I don't get out of the outline of the rose.
Then I begin to give light to the rose with a light color. Then with that same color and brush I diffuse the light.
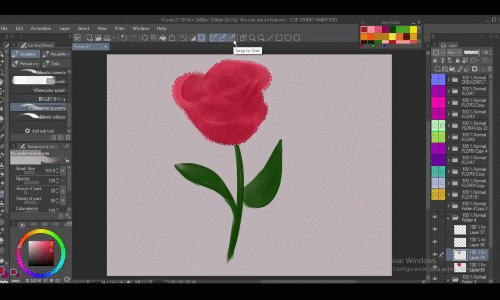
Lastly I add another layer and continue adding light, but this time I only draw a thin line around the rose and its petals.
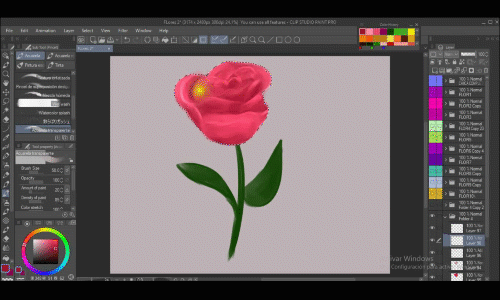
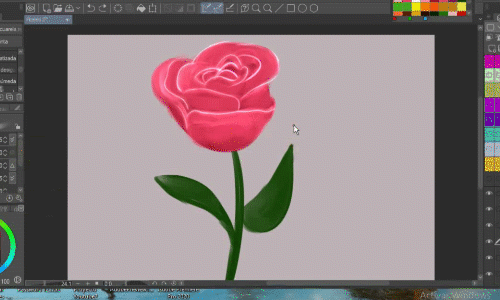
Next, I am going to create a new folder and in this I will group all the layers.
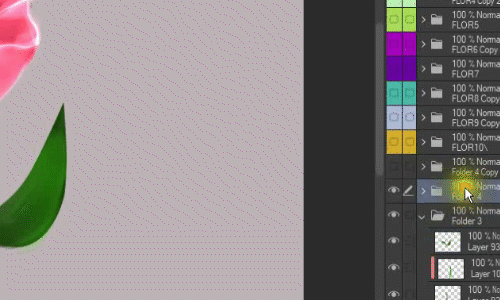
Now I'll duplicate that folder and start working on the copy.
I look in my previous folders to where the rose is without the stem and duplicate it. And then I mix it up and take it to the new folder.
And so I stay.
I start drawing a new stem and repositioning the rose.
I decided to change the color of the rose so I'm going to
EDIT – CORRECTION TONE – COLOR BALANCE – Hue/saturation/lightness – TONE CURVE
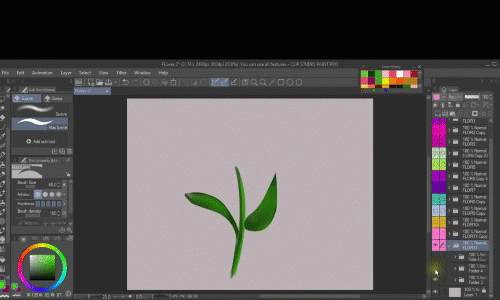
And now I relocate the rose and duplicate it on each stem many times.
I go to the folder where I had the sheets, copy them and paste them in the new folder.
Then I use the lasso tool to separate them and then I resize them and position them on each stem.
Now I group all the layers and create a new folder and arrange them there.
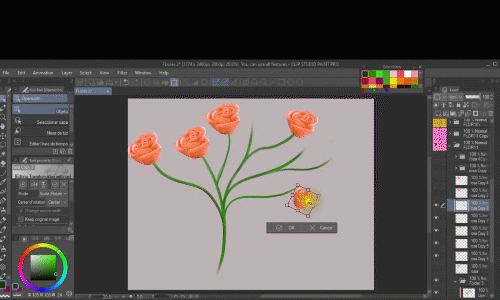
I duplicate the layer and look for the rose that I previously changed color to and reserve it without the stem.
I copy the purple rose I go back to the folder I just copied and remove all the pink roses
Now I paste the purple rose and place it on a stem and then duplicate it many times, relocating them one by one.
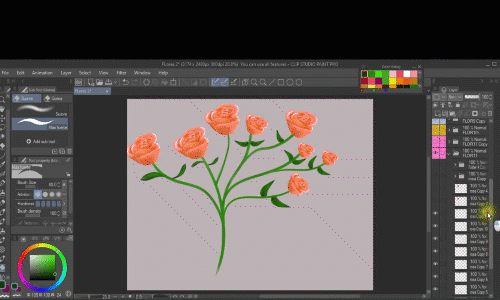
I kept drawing more flowers and that's how they stayed
By the way, in CLIP STUDIO ASSETS you can find many flower brushes, some free and others not, you can shop around there are many good things.
Here are the flowers applied in an illustration
Thank you for coming to I hope you liked it.
FOLLOW ME!
https://www.instagram.com/becca_ken/
https://www.instagram.com/beccaken_designs/
TikTok
https://www.tiktok.com/@becca_ken
My shop
https://www.redbubble.com/en/people/beccakendesigns/shop
Kofi


Comment