Get to know 3D drawing figures easily in CLIP
Preface
There are very detailed instructions on how to use [3D Sketch Doll] in the official published article.
So I will try my best to explain the parts that do not overlap with the article, or that I still think are important.
↓The following is the official article
Where can I find 3D sketch puppets?
[Material] palette → [3D] → [Body type]
Please find [Body type] in the [3D] category in the [Material Panel] and drag the required human shape onto the canvas.
(Note: Models are divided into male/female)
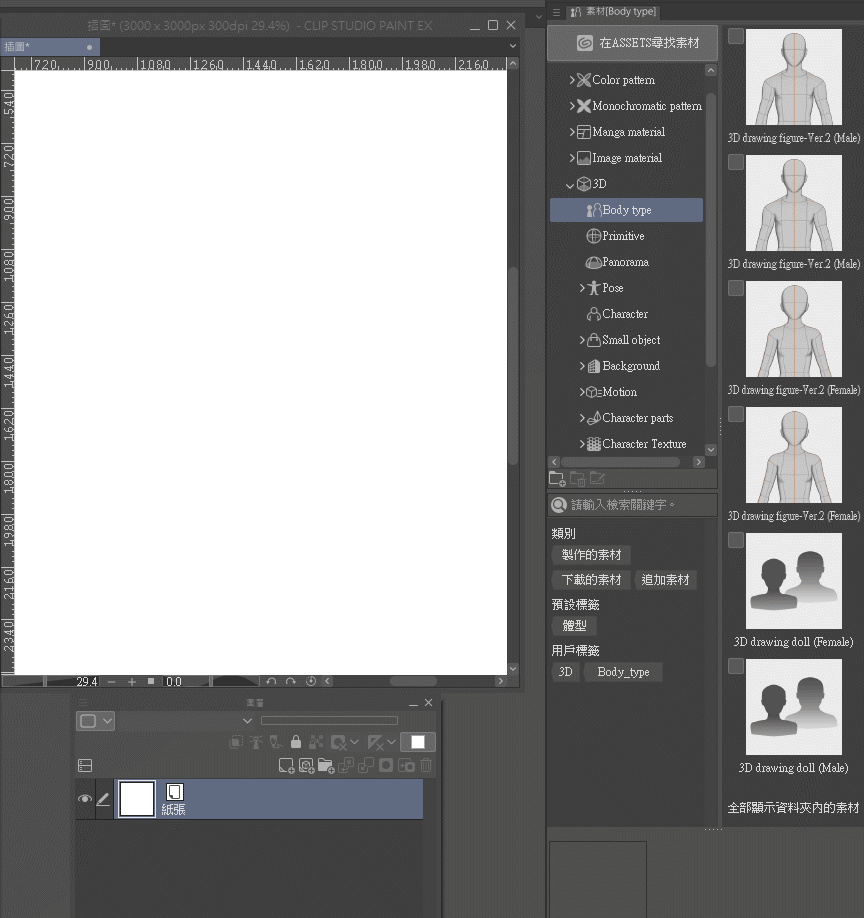
Easily understand 3D objects
(If you usually use 3D objects, you can skip this step)
This section will give beginners a brief introduction to how to adjust the model.
The purpose is to prevent you from feeling unfamiliar with the system and to quickly familiarize yourself with it.
✨ To operate 3D objects, you will need to use the Object tool.
So when you want to adjust a 3D object, remember to click the Object tool first to select the 3D object on the canvas.
Unable to select 3D objects, most problems arise from this.
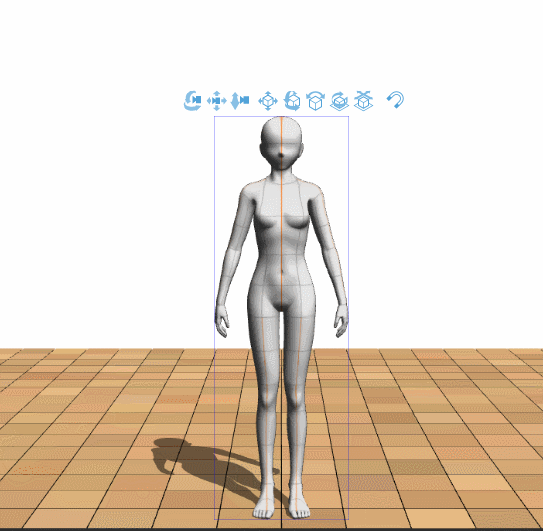
The function of the first three buttons is to help the user view the model and [change the viewing angle]. (The latter are all adjustments to the model)
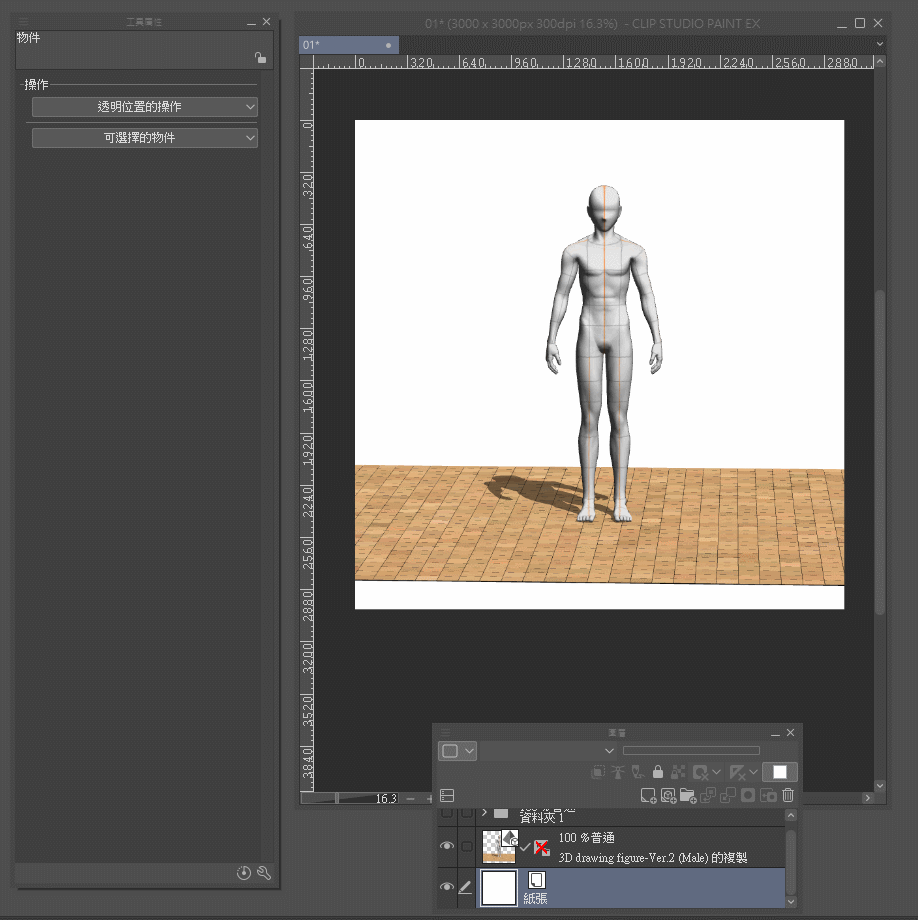
In order to let you see the functions of these three buttons more clearly,
I added this material I picked up at the store as the floor.
[Button 1] Change the viewing angle. Please press and hold the left mouse button when using it.
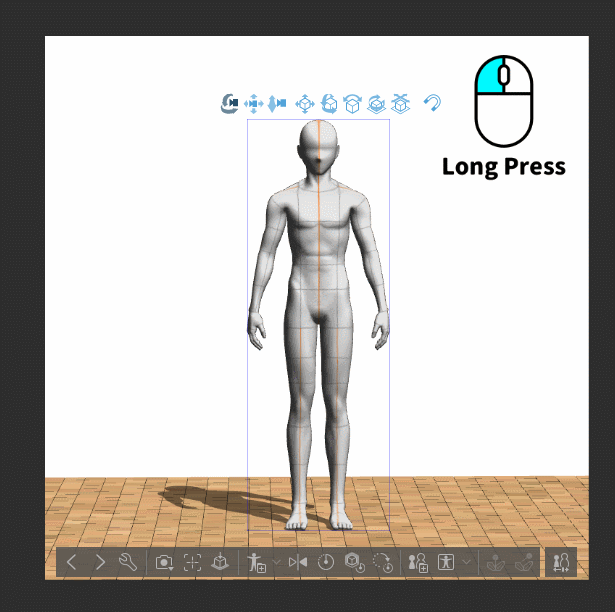
[Button 2] Change the viewing position on the canvas. Please press and hold the left mouse button when using it.
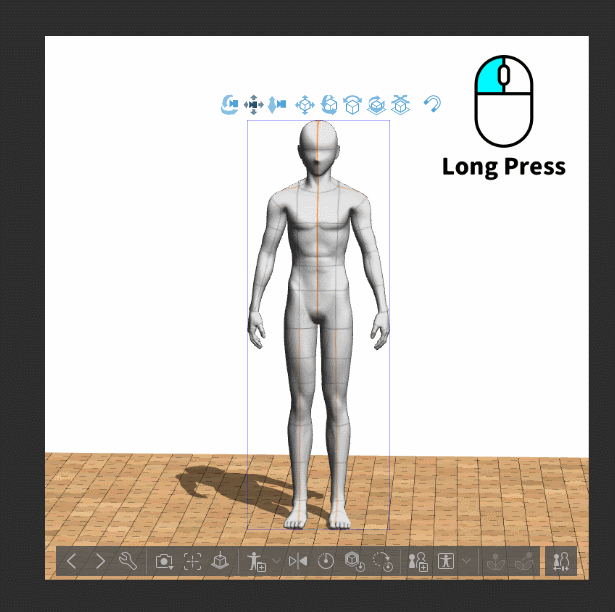
[Button 3] Change the observation distance (far and near). Please press and hold the left mouse button when using it.
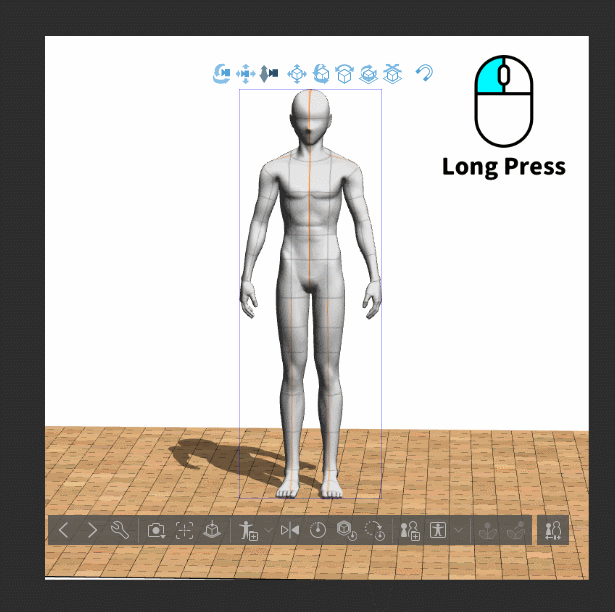
2022/08/14 [Correction, sorry that I made a mistake here due to personal habits]
✨ [No matter which button the mouse is parked on 1, 2, or 3, without selecting any model, you can use the mouse wheel to achieve the following effect]
Sliding the middle mouse button (scroll wheel) can also change the focus and enhance or weaken the perspective effect.
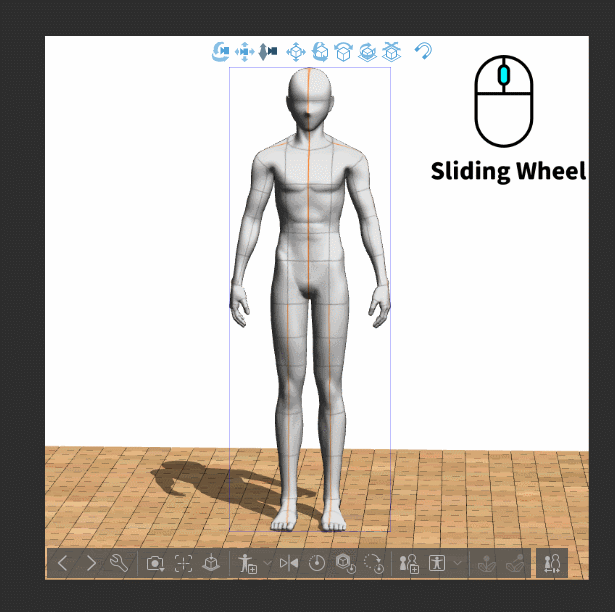
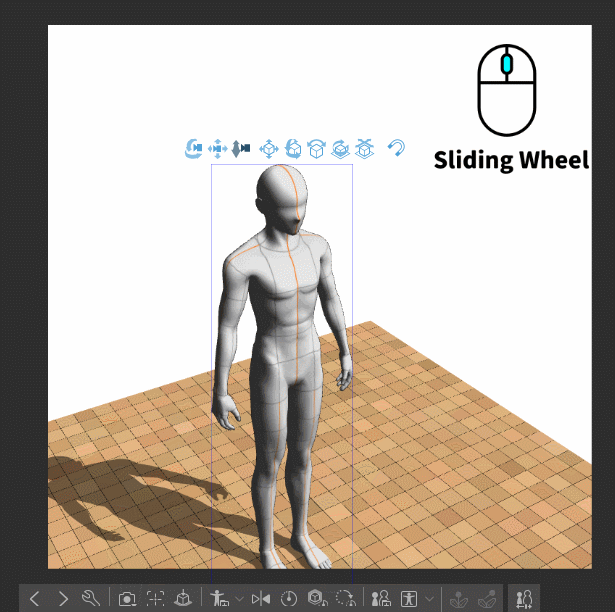
❗ ❗ ❗ 2024/03/18 ⬆ ⬆ ⬆
I don’t know when, the official changed the function of sliding the middle mouse button (wheel) to change the focal length.
Now sliding the middle mouse button (scroll wheel) will turn into [Zoom Canvas]
Now to change the focal length, go to Tool Properties => Angle => Perspective and make changes.
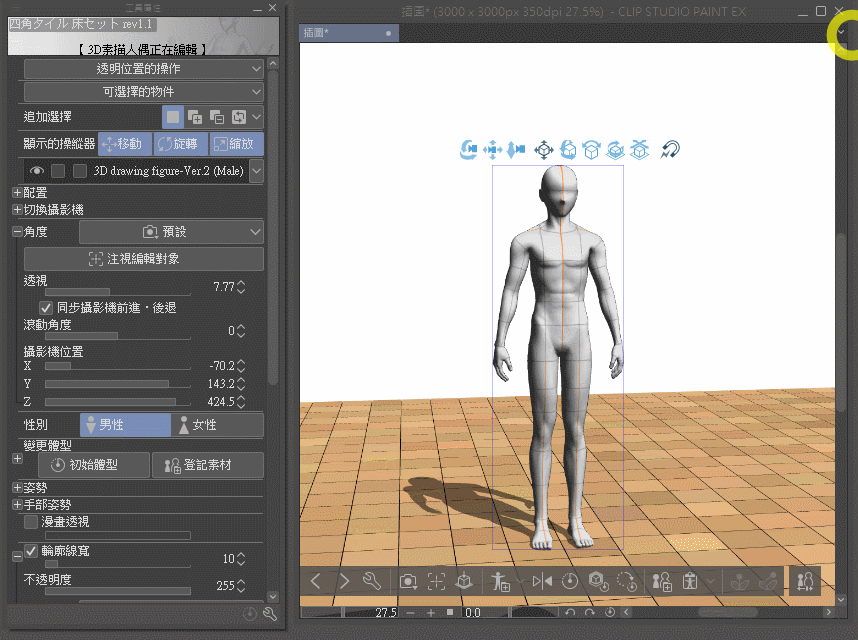
❗ ❗ ❗ Updated here——-
Although at first glance, these three keys represent rotation, movement, and zoom, they act on the viewing angle.
So using the button will not cause your model to change its original size, or its angle or position.
, the evidence is that the proportions and positions of the floor and the 3D sketched figure have not changed.
You can use these keys to adjust an angle that suits your needs.
✨ Next, we officially enter the process of moving, rotating, scaling, and adjusting the movements of the 3D sketch puppet.
Please double-click the left mouse button on the 3D sketch puppet to call up the control ring located below (center point of the object).
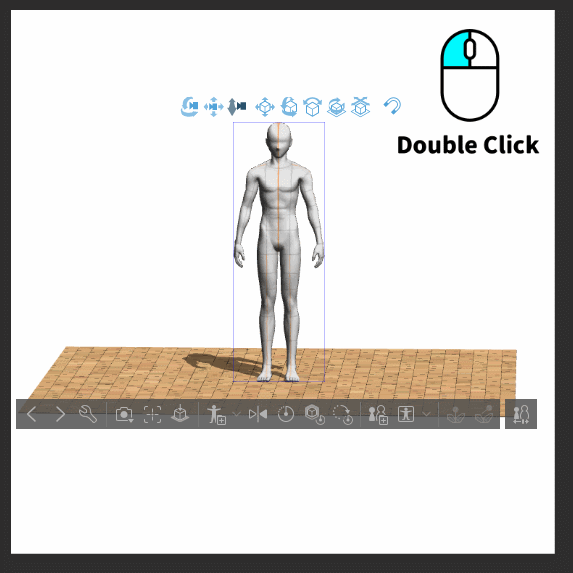
The outermost gray ring is used to adjust the size of the model. (It will turn orange when selected)
Only the selected objects will have their size changed. (So the floor remains as it is)
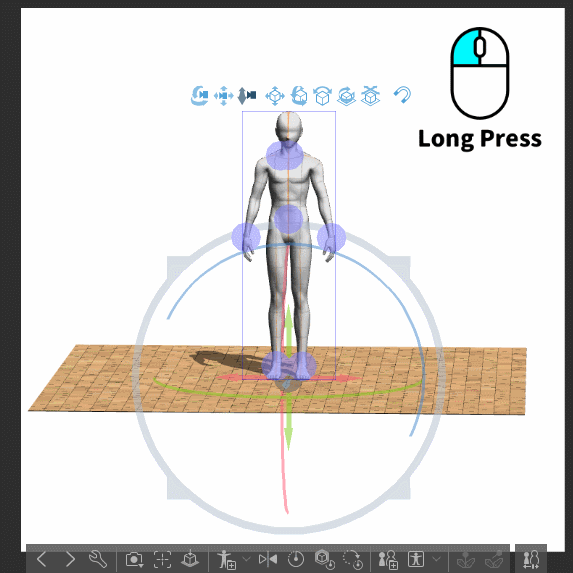
Then the blue circle, red circle, and green circle in the inner circle can control the rotation of the model in three axes respectively.
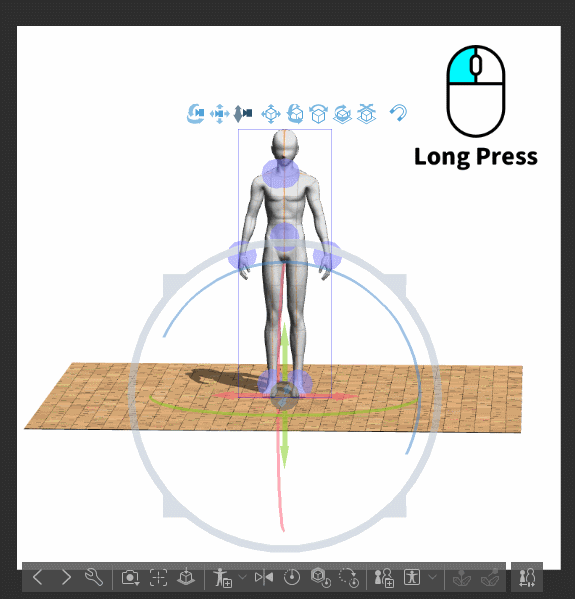
The innermost cross line is used to move the model position.
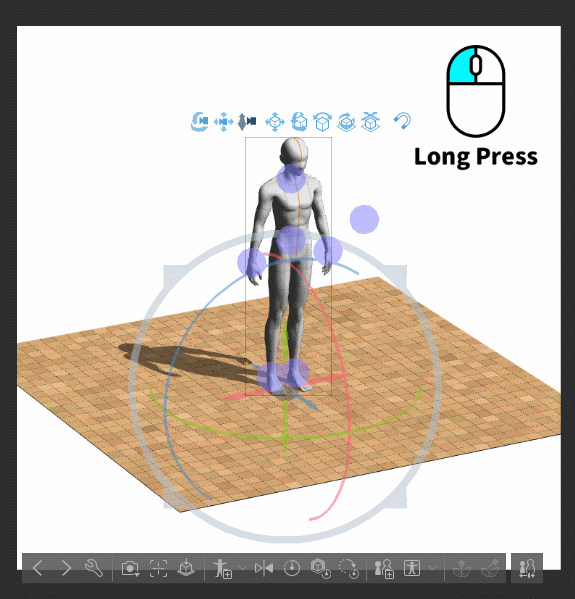
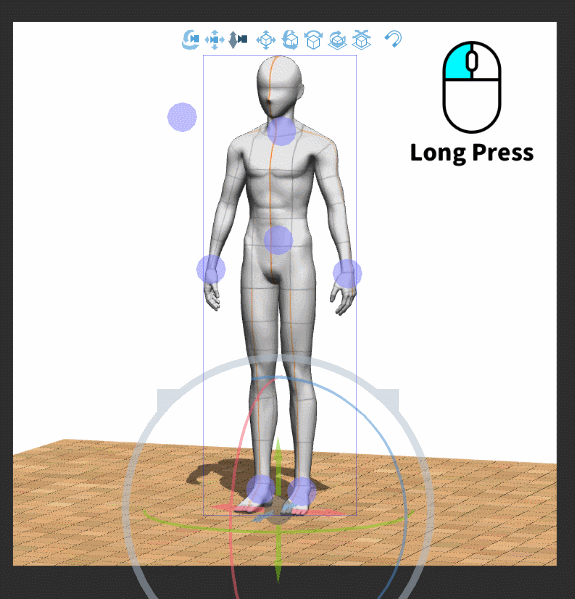
✨ Double-click the 3D sketch puppet with the left mouse button, and purple dots will appear at the same time.
It is a control point that can directly control joints or line of sight.
You can think of these dots as several transparent and elastic threads that will be tied to parts such as hands and feet.
The purple dot in front of the character's eyes is where the line of sight is aimed.
[Learn to adjust your body shape]
As long as you click on the 3D model, you can find the controller field for adjusting the body shape in the Tool Property panel or the Sub Tool Detail panel.
Adjusting the brace variables for body shape
👆 Up = increase muscle (female models will become plumper)
👇 Down = less muscle (no muscle)
👈 To the left = to become thinner (thin)
👉 To the right = to become fat
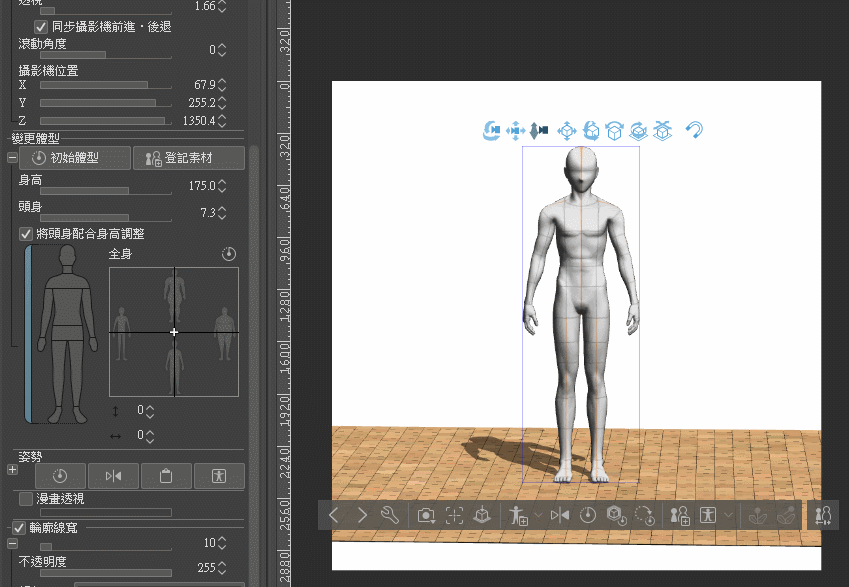
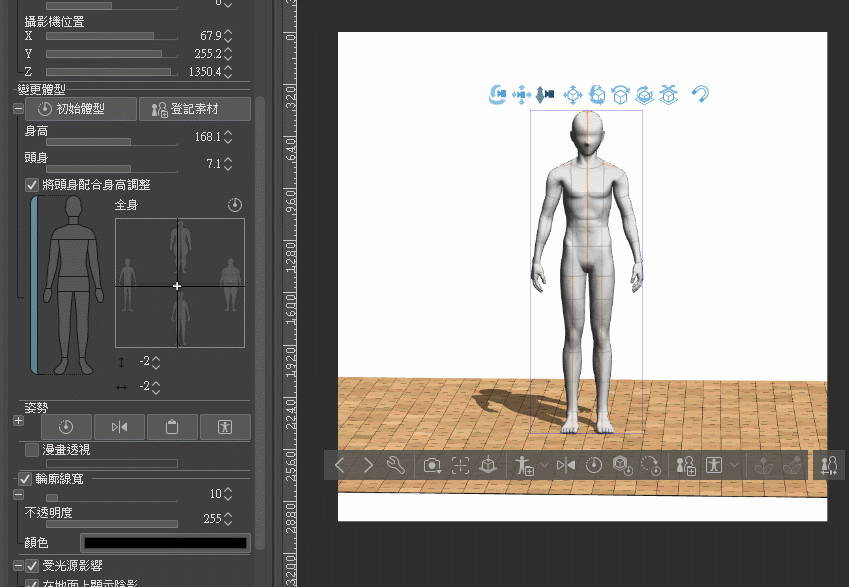
The more commonly used ones are to change [height] and [head-to-body ratio].
But the length of the hands and feet can be fine-tuned.
It’s just that these block panels should be used less often.
Using the CLIP material store, you can also get many body shapes that have been adjusted by others and you can use them.
The downloaded materials will appear in the Download folder in the Material panel.
[Register body type as material]
Use [Register Material] on the Tool Properties panel,
Or
[Register 3D sketch puppet in the material panel] on the object launcher (the bottom list of 3D objects),
You can register your adjusted body shape and store the materials in the material library.
(The storage location depends on personal needs, as long as it can be found when needed)
When you need to use it later, drag it directly from the material library.
Or put it on the original model and you're done.
(P.S. To apply it to an existing model, remember to click on the model and drop it in the purple frame)
[Learn to adjust your posture]
The first step in adjusting your posture is to think about the posture you want in your mind.
But for convenience as a teaching example,
I briefly drew the [waiter] posture I wanted next to it.
For your reference.
✨ Each step in the next step will have a GIF dynamic picture for step-by-step operation. If you can’t understand the static picture, you can refer to the GIF first.
✨ STEP01.
First, let’s start with [Hands].
Viewing the model from a slightly off angle makes adjustments easier.
1. Bend your hand and adjust the palm of your right hand to a suitable angle.
2. Rotate your palm and find the purple control point corresponding to your wrist.
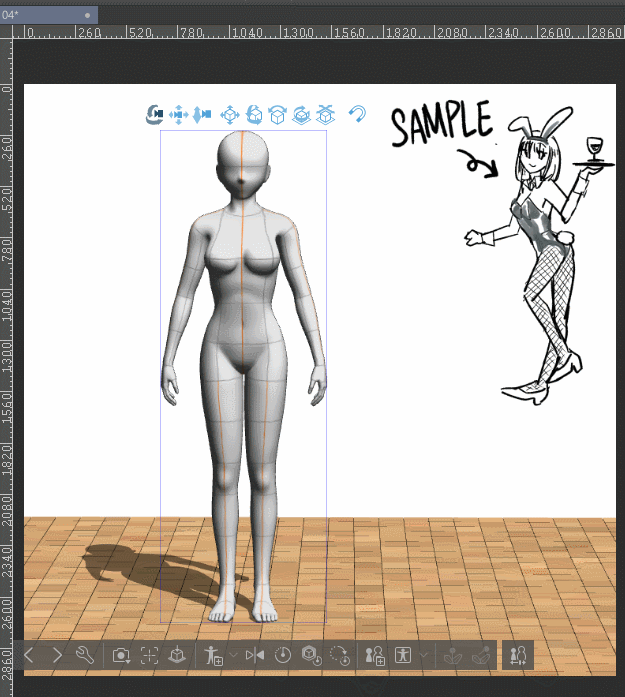
Because our right hand action setting is [make a fist],
Please double-click to select the palm part of your right hand (blue slash) and confirm that only the palm is selected before proceeding to the next step.
The [Posture] field in the Tool Property panel allows you to quickly raise your fist with your open hand.
But you must first select the palm of a single hand, otherwise the left and right hands will be modified together.
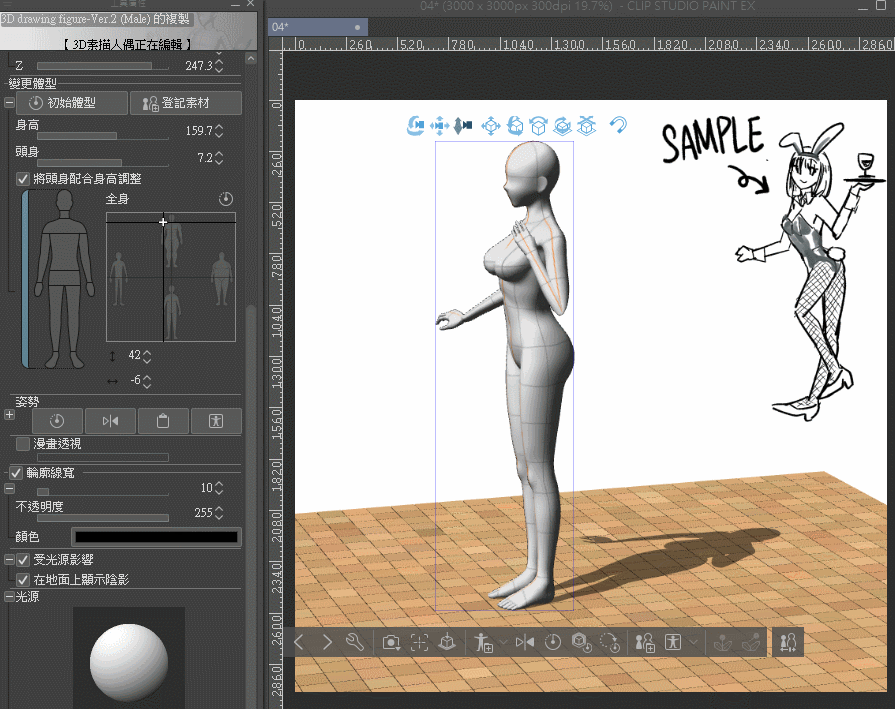
✨ STEP02.
Start adjusting the left hand part.
The focus of this part is first to adjust the shoulders, and then to adjust the distance between the wrist and the shoulder.
Sometimes the posture feels wrong no matter how you adjust it, because the position of the hand itself is incorrect.
Placing it too close or too far away from the main body may look weird to you.
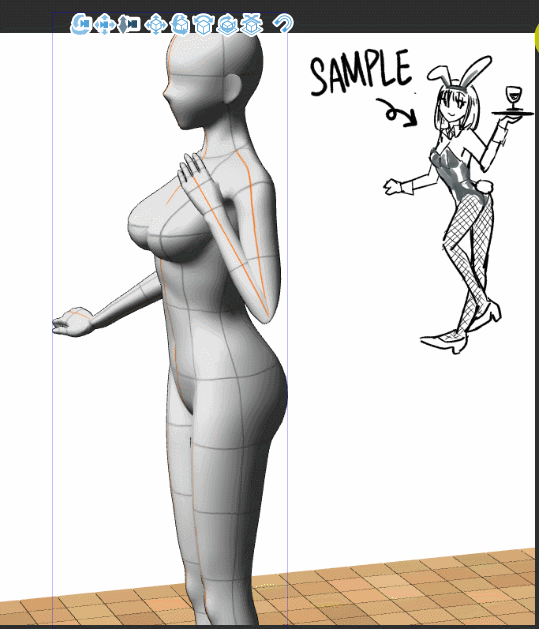
Although I roughly brought out the desired feeling with my left hand,
But the shoulder looks obviously stretched,
We need to fine-tune our shoulders to the proper position.
The adjustment standard is that if our human body actually takes this action, the arms and shoulders will form a straight line.
Adjusting according to real-life movements will make the posture more natural.
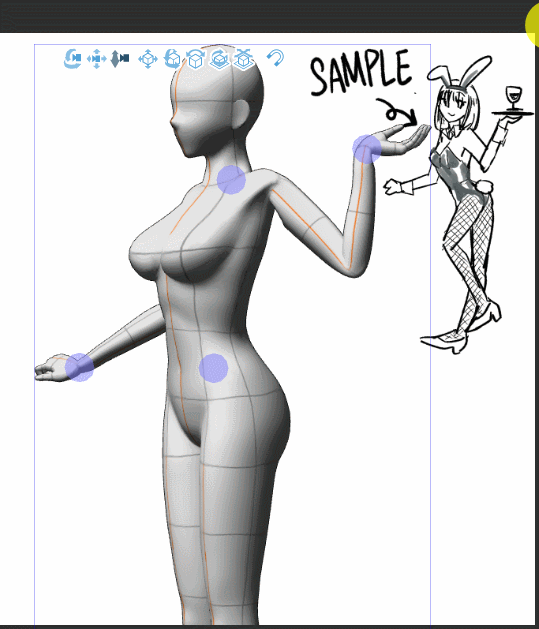
✨ STEP03.
The angle of view is based on the buttocks, and the angle of rotation of the upper body is adjusted.
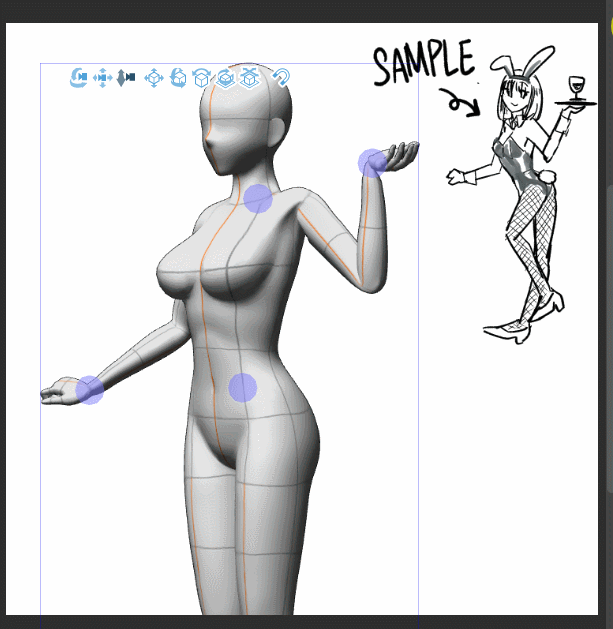
✨ STEP04.
Use rotation control points to adjust the body curve.
Lift your butt and chest up.
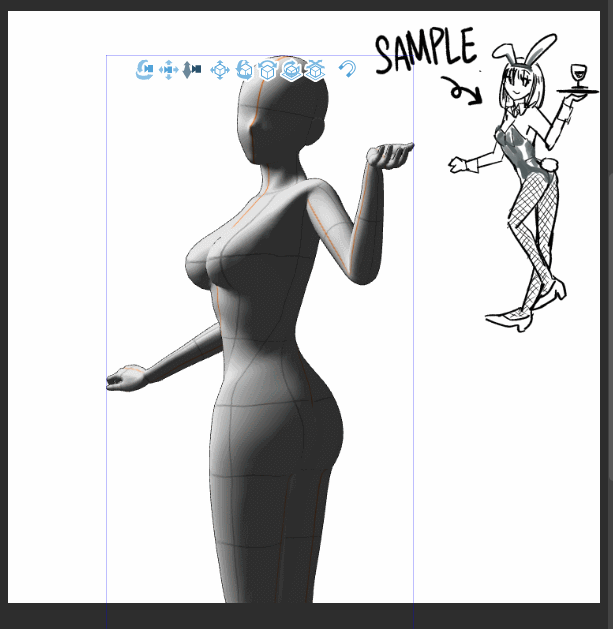
✨ STEP05.
Adjust the legs
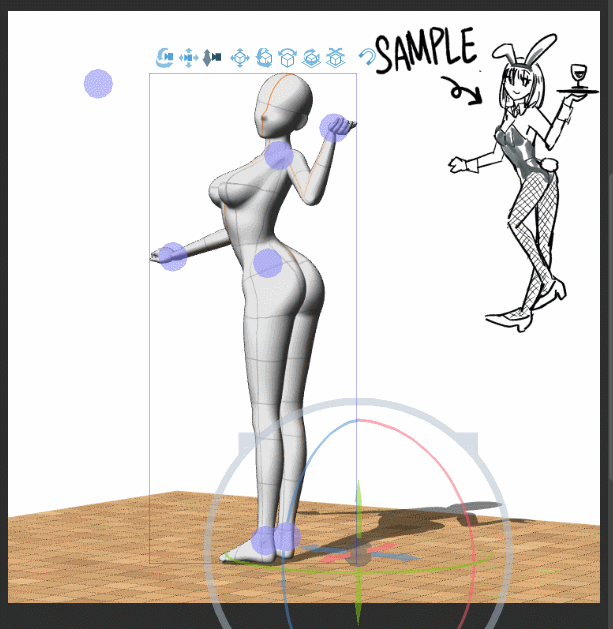
✨ STEP06.
After winding is roughly completed, remember to let the feet of the 3D Sketch Doll touch the ground.
Use the button [Set the model on the ground]
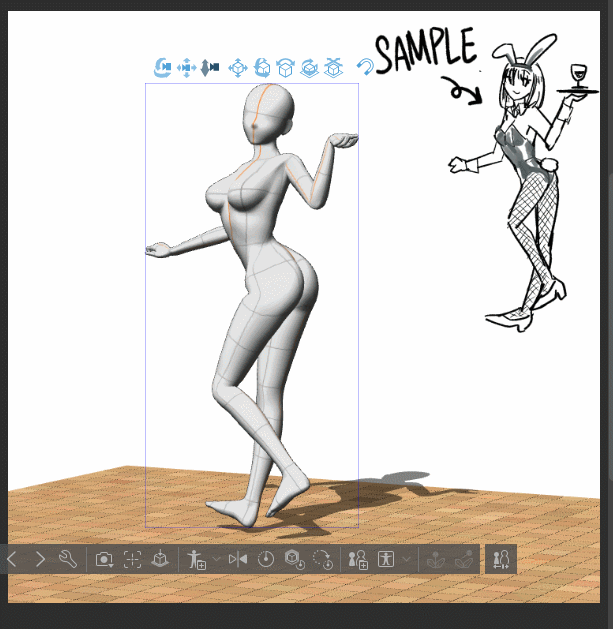
✨ STEP07.
After roughly adjusting the model's posture,
Remember to switch to other perspectives to check whether the model is adjusted correctly.
In this part, my right hand and legs need to be adjusted.
✨ STEP08.
Finish
turn around
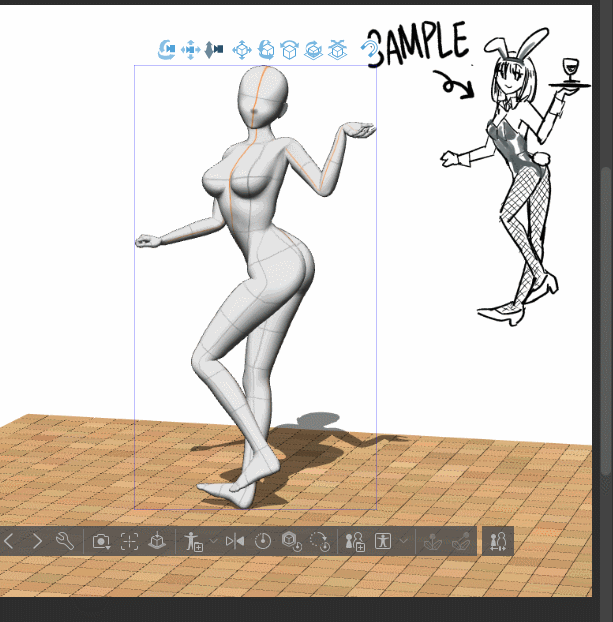
✨ I have put this pose in the material store. You can download and compare if necessary.
[Registration posture as material]
Because we not only adjust the hand movements, but also adjust the posture of the whole body.
Therefore, please select [Register the whole body pose into the material].
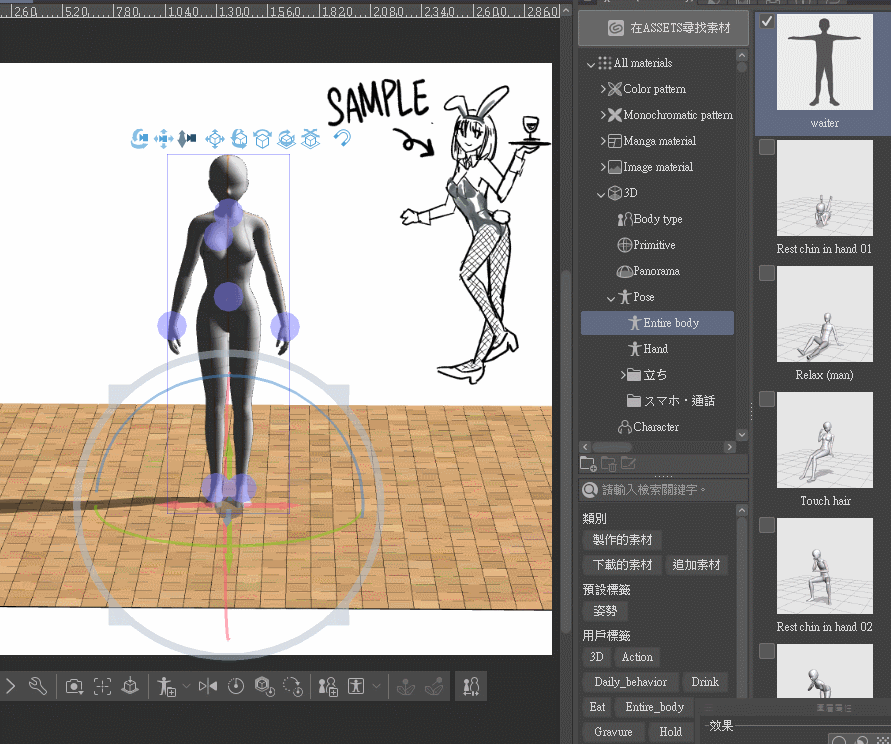
Next time you can drag it directly from the material library and use it.
If you want to change the pose of the model to different sides.
You can make good use of the [Reverse the model's pose left and right] button.
[Differences in body shape and posture] Why do I use materials downloaded from the store, but the model is female/male?
Although after reading the above article, I feel that body shape and posture are systems that are not easily confused.
However, since the [pose] in the material library does not necessarily need to be applied to the 3D sketch puppet that already exists in the canvas,
It can be dragged directly from the material library.
In addition, material stores usually give new covers to the materials.
Therefore, beginners may not be able to tell whether they are downloading body shape or posture when they first use it.
✨ I mention it specifically because this link may cause confusion for beginners.
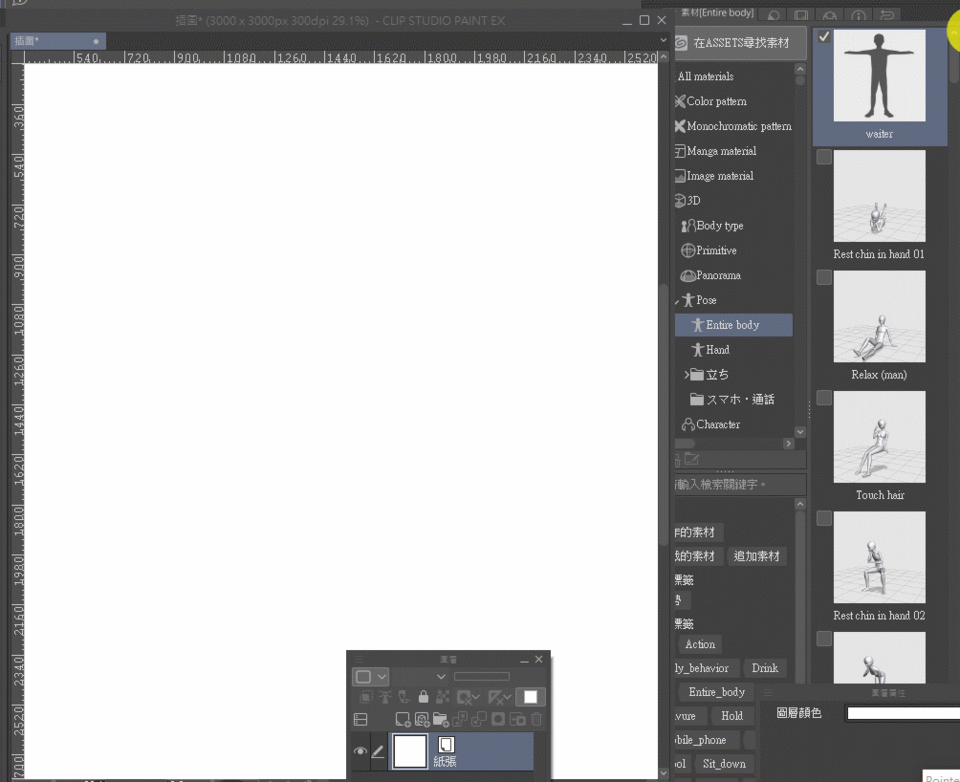
Take the posture you just made as a demonstration.
You will find that I used [Female Model] before, why did it change to [Male] when I took out [Pose] directly?
This is because the posture only stores the action, and does not specify what kind of 3D sketch puppet it is to be put on when saving, like the body shape.
Therefore, if the pose is pulled directly from the material library, the 3D sketch puppet will use the preset model first.
✨ How to change (set) the default model
File => Environment Settings (Ctrl+K)
Module settings in the 3D field can change the default model.
Just restart the software after applying.
However, in order to avoid such trouble in daily life, learn to apply the poses to the 3D sketch puppets that already exist on the canvas. It will be more convenient in the future.
[How to apply poses to 3D sketch puppets? 】
Although searching directly from the material library for the postures you need to use is one method,
But you can also use the [Apply pose material to module] button to find the pose you want to apply.
The posture materials you have downloaded and created in the past will all appear here.
You can make good use of keyword or TAG search.
When using [Hand Posture Material],
If you only want to use one glove, remember to select the palm first.
Otherwise both hands will be changed.
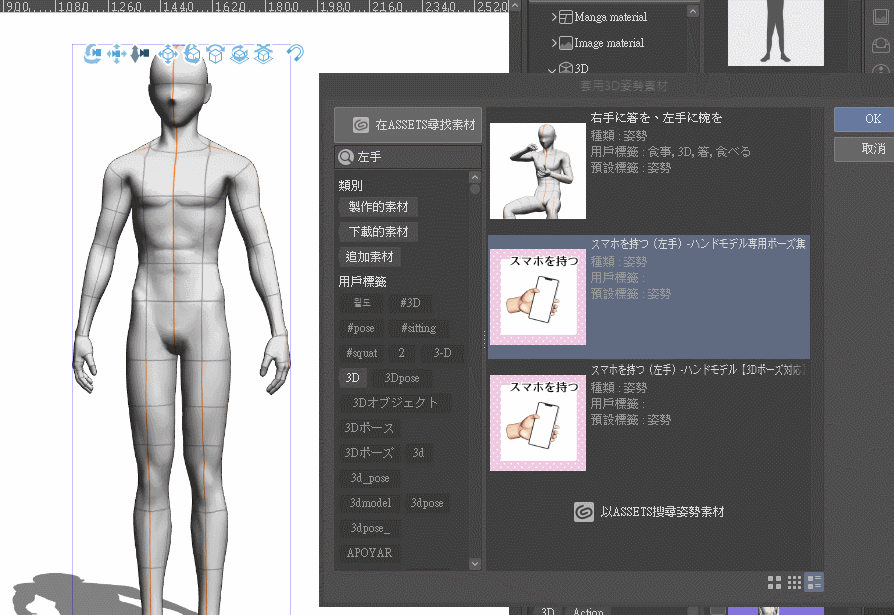
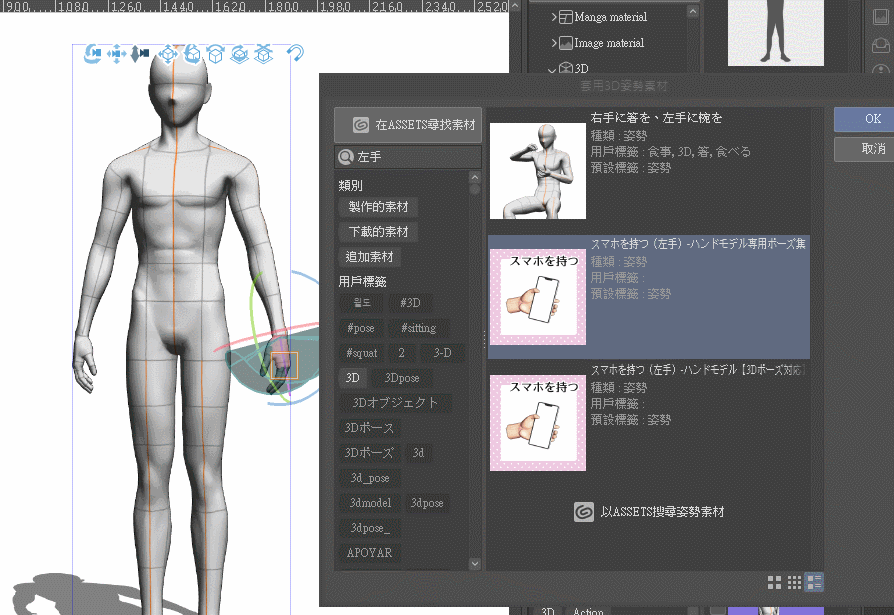
✨ 【Added on 2022/08/14】
If you want to drag the [pose] directly from the material library and put it on the 3D sketch puppet.
There are two ways.
The first method is to directly release the [Pose] 3D sketch puppet from above.
(Note: Be sure to place it on the puppet, otherwise a new puppet will appear on the canvas.
Second, select the 3D sketch puppet whose pose you want to change, and place the pose on the puppet's 3D layer.
(Example picture, even if there are two puppets in the same 3D layer, changes can be made)
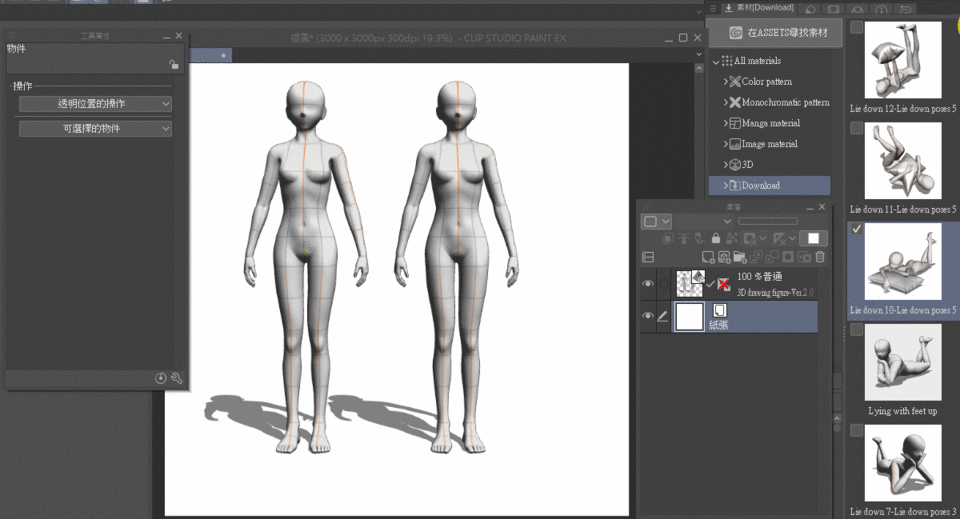
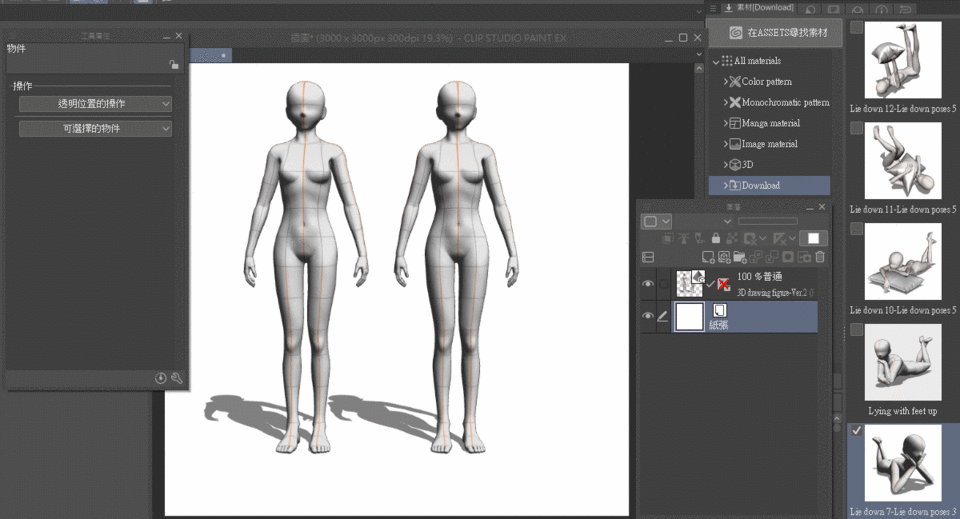
Extended practice - how to quickly make the 3D sketch puppet assume a sitting posture?
Use exercises to supplement your skills.
✨ When there is already a model on your screen, and you want to place the 3D sketch puppet in the same space (under perspective),
But the positions of the imported 3D sketch puppets always drift everywhere. What should I do?
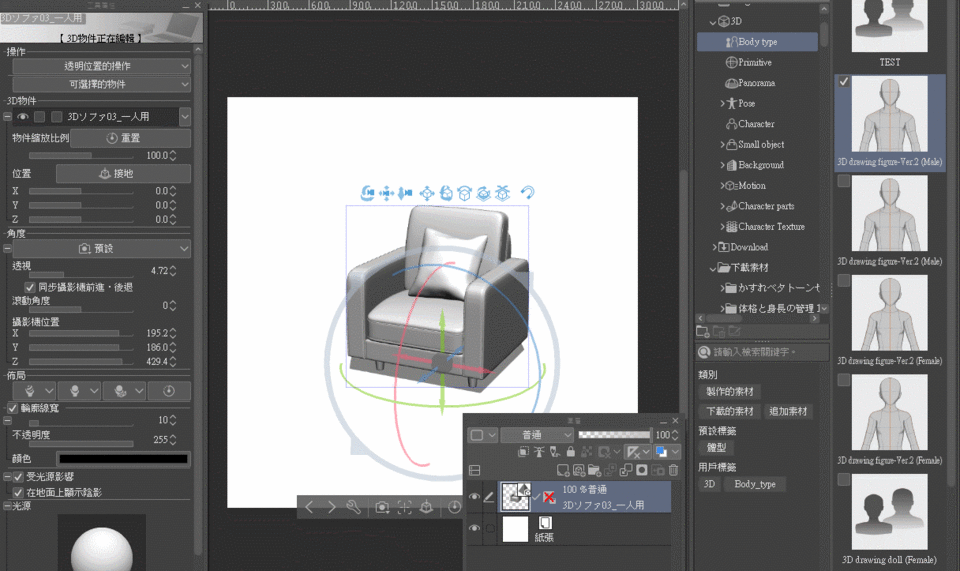
Please make good use of the Tool Property panel.
Set the X, Y, and Z axes under [Position] to 0, and the 3D sketch puppet can quickly move to the starting point in the center.
✨ The secret to quickly making your 3D sketch puppet sit down is the pelvis.
Position your butt first so that your feet can be adjusted more easily.
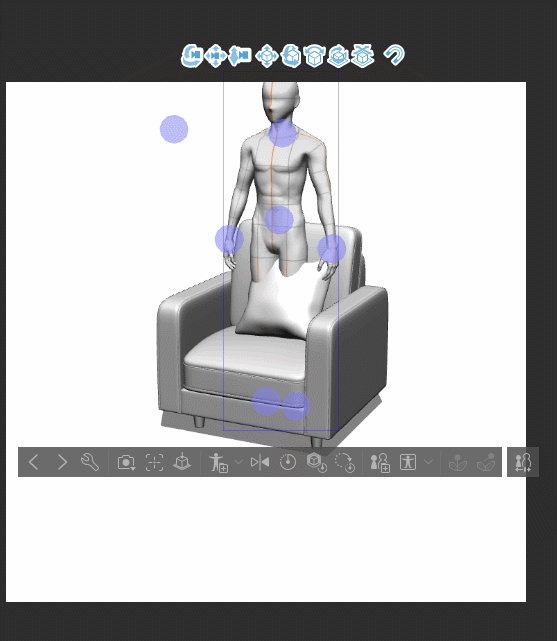
This principle actually applies to other 3D software as well.
When facing a character model, we usually start from the pelvis when posing, because that is usually the [center of gravity] of the character.
✨ 【Added on 2022/08/14】
If you want to sit the model on the floor,
Also move your butt first.
Just after the movement, remember to rotate the control axis and tilt the pelvis so that the thighs will reach the correct position.
Extended exercise - How to place the adjusted model into different model layers?
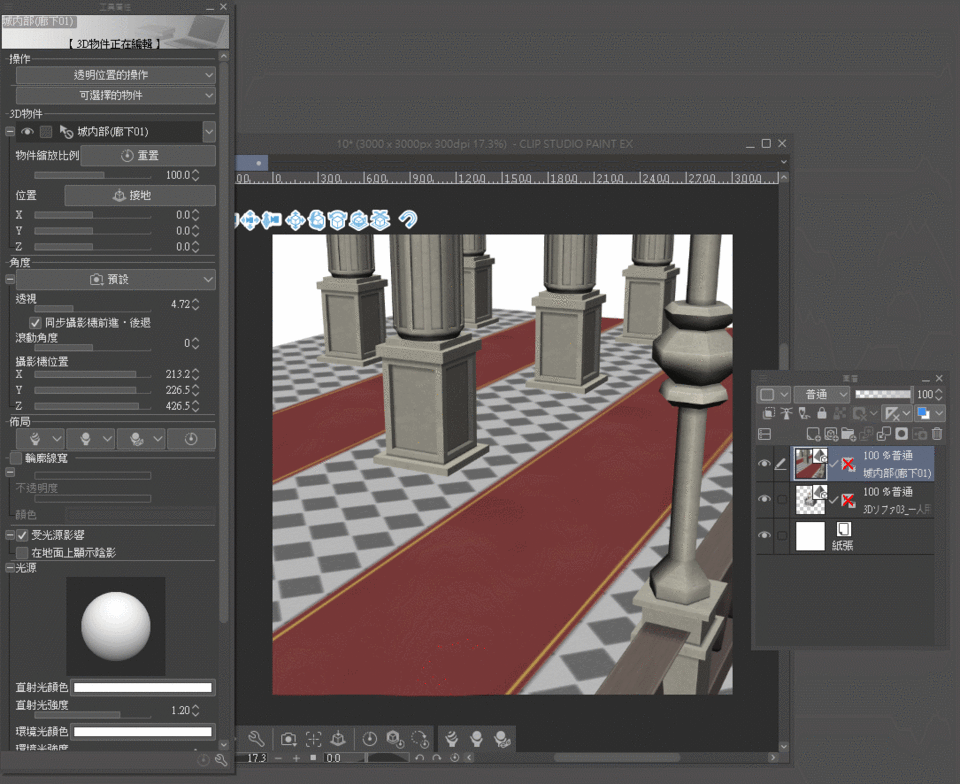
✨ Suppose there are already two model layers on my canvas, but I want to merge the model of [person sitting on the sofa] with another scene. What methods can be used?
Answer
After copying the material, click on the layer of another model and paste it.
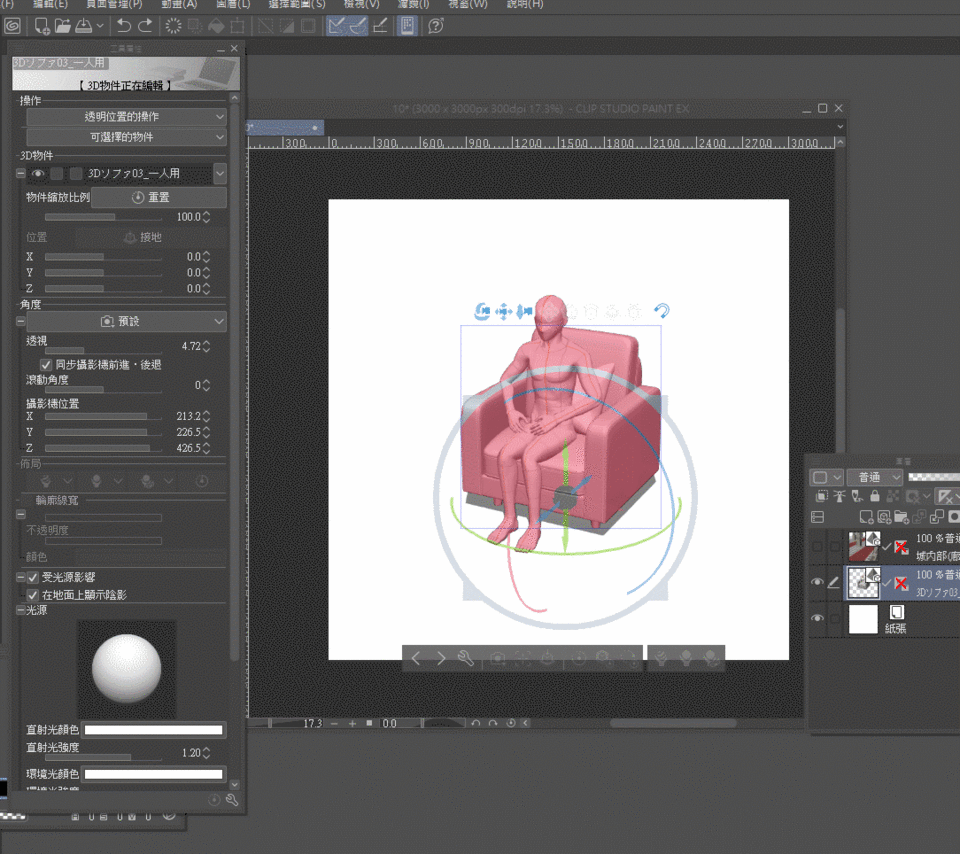
✨ Why do you need to inform me when you just copy and paste?
Because in the future, you may synthesize two models yourself and put them into the material library for collection.
However, this material is not [registered as a 3D object material].
So when it was taken out of the material library, because it was not judged as a 3D object, it could not immediately share the same layer with the existing 3D model on the canvas.
(3D objects registered as materials will be labeled as 3D objects)
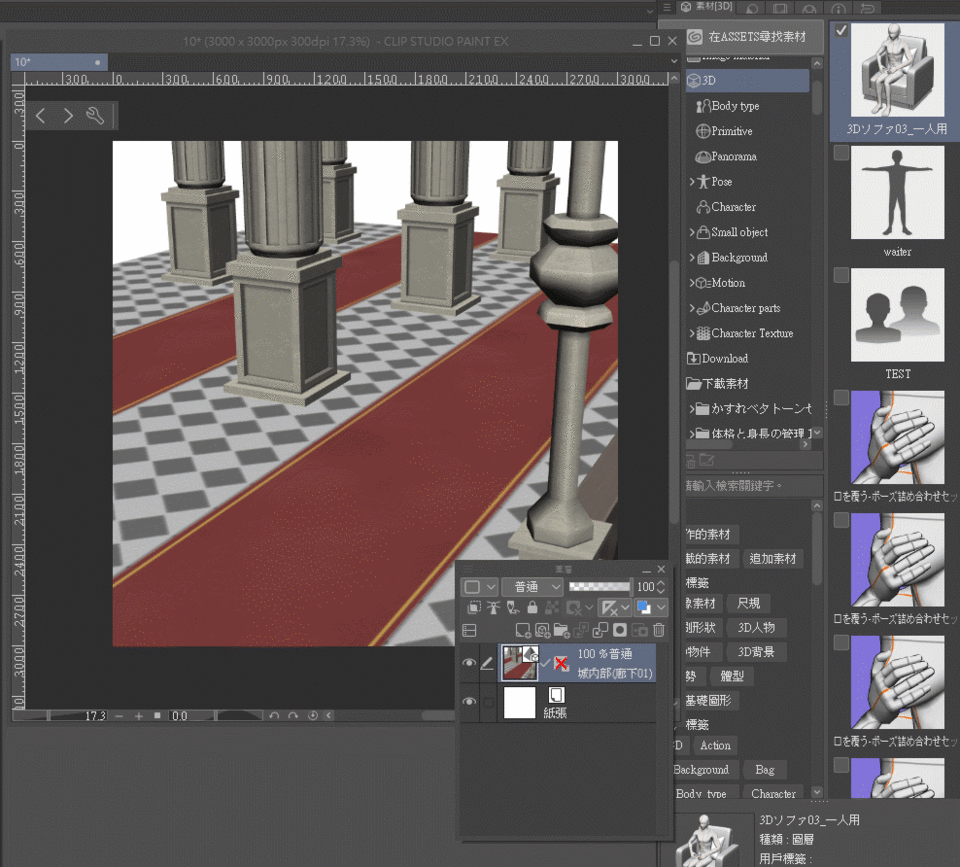
At this time, I wanted to merge the materials into the same layer, so I had to use a roundabout method of copy + paste.
Or change it to place the 3D scene into the layer of [people sitting on the sofa].
3D materials used//
end
I actually drew it using the examples prepared in the posture teaching, and I always felt that it was impossible to show the true value of the 3D sketch puppet without drawing. XD"
Personally, I think 3D models are very suitable for assisting in drawing drawings with a greater sense of perspective or special angles.
I don't usually draw girls, I hope you like it.
(roughly choosing an angle)
(Finished)
(overlay)
Because of the differences in idioms in reading, I try to avoid using too many words when writing articles, and I try to use pictures where possible. But I still find it difficult to write this article. 030"
(This is already my fourth article published on TIPS)
I hope this article can help you.
Thanks.
My IG
https://www.instagram.com/nelviy_manga/


Comment