
1. Introduction
Architecture plays a major role in creating fantasy settings. If you don’t know where to start for creating unique and creative fantasy architectural backgrounds, then this is the guide for you.
In this guide, we will go through all the fundamentals you need to get started on creating your own unique fantasy architecture settings and backgrounds.
2. Understanding Characteristics of Various Architectural Eras
To illustrate convincing and immersive fantasy architectures, getting inspiration from and building up on the characteristic details of existing architectural styles is very helpful.
While many architectural eras have gone by, here I will focus on the unique characteristics of three of the most prominent ones:
2.1. Gothic Architecture Details
Gothic architecture is a fantastic choice for fantasy architecture building blocks that evoke interest with tall, graceful forms and distinct, clean details that feel delicate yet solid.
Characteristics:
Roofs: The most common types were high cones, gabled/sloped, and flat.
Cresting: It is the ornamental, spiky decorations on top of the outer building walls.
Pointed arches: These were used for doors, windows, and for internal vault support.
Flying buttresses: It is a half arch that connected walls to close-by piers for additional support.
Ribbed vaults: They channeled the ceiling's weight to the outside flying buttresses.
Wooden hammer beams: These were delicately carved vault supports, serving the same function as the ribbed vaults.
Window and wall tracery: It was intricate line pattern relief work that reinforced delicacy.
Rose windows: These were circular windows with delicate tracery.
Ornamental pillars: Pillars were used abundantly in Gothic architecture, each often made up of multiple small columns or ribs with decorations at the top and bottom. Their piers were fancy and divided into multiple planes.
Hoodmolds and ornamental dripstones: These were embossed molds over doors and windows that directed rainwater to the sides.
2.2. Romanesque Architecture Details
Romanesque architecture is thick, heavy, massive, sturdy, and with emphasis on the squat horizontal and its elements are great for creating a dark somber mood for your fantasy background.
Characteristics:
Roofs: Mostly flat, gabled, low cones, or steep cones.
Small windows: They were rounded arch windows that needed to be small for maximum support for the heavy building structures.
Buttresses: These were pillars against the wall that supported the vault’s weight.
Rounded arches with fixed ratio: Used for windows and doors.
Archivolts: These were fine mold bands that went around the arch’s curve.
Thick walls: Made up of large stone blocks or two wall shells filled in with rumble.
Heavy piers: These were massive and thick, like tree trunks.
Arcading: It was the rows of rounded arch columns that served as walkways or were against a wall as a blind arcade (a decorative feature).
Barrel vault: This was a simple vaulted roof that extended as a circular arch across a length of walls.
Groin vaults: These were formed with the alignment of two barrel vaults at a right angle and allowed better illumination and support.
2.3. Middle Eastern Architecture Details
Middle Eastern architecture gives a very majestic and poised impression with its domed roofs and the counterbalancing contrast of its tall and sharp minaret towers. You can take multiple elements of this architectural style to integrate into your own fantasy background.
Characteristics:
Domed roof: These could be central domes or smaller or partial domes.
Minarets: These are attached or freestanding tall and narrow towers with conical or domed tops.
Central fountain or pool: Often found in the courtyard.
Horseshoe arch: An arch type used for doors, windows, and other openings.
Arabesque: It is the surface decorations with rhythmic interlacing patterns of foliage, lines, or abstract geometric patterns that can continue infinitely (like on domes).
Pendentives: These are large expansive arches that go upward and inward at the same time to support the dome to be placed on top.
Other architectural styles you could explore:
Asian
Mesoamerican
Viking
Modern
Futuristic
3. Combining and Exaggerating Elements for a Fantasy Touch
To create our own fantasy world, we need to combine reality, history, and inspiration. With our understanding of different architectural elements from the previous section, we can combine elements from different eras and give them our own twist.
Example: Gothic flying buttresses combined with Middle Eastern domes.
Similarly, we can combine and exaggerate our fantasy background's natural elements.
Example: Wave-shaped hill.
4. Composition
There are multiple ways of composing our architectural fantasy backgrounds. Here are four such ways that will help you start composing right away:
4.1. Rule of thirds:
If you can’t decide how to compose your sketch, you can start with the rule of thirds, a widely used compositional rule due to the natural appeal it creates.
Divide the thumbnail into three equal sections both horizontally and vertically. You could start by placing your horizon line on either of the two lines instead of the direct center of the canvas.
You could align other important elements, such as the focal point of the main building, with another intersection of these lines. You can use this rule for both interiors and exteriors.
As shown in the above example, having a clear foreground, midground, and background will help you compose backgrounds that have good depth.
To compose with the rule of thirds, you can use this template:
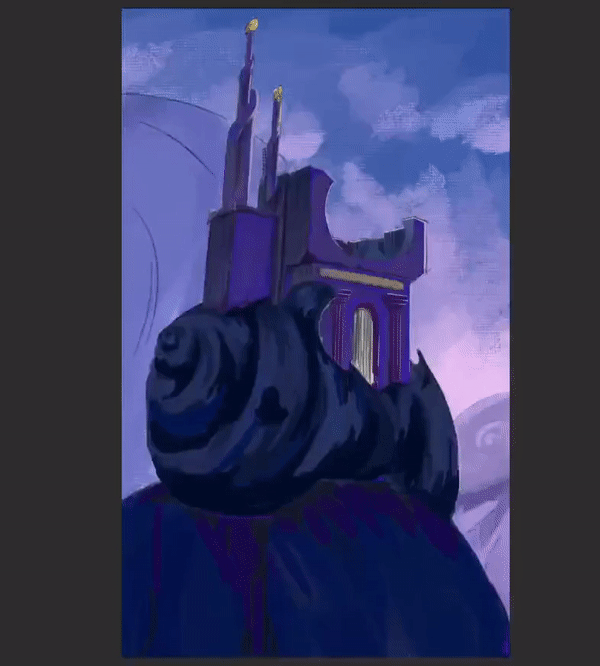
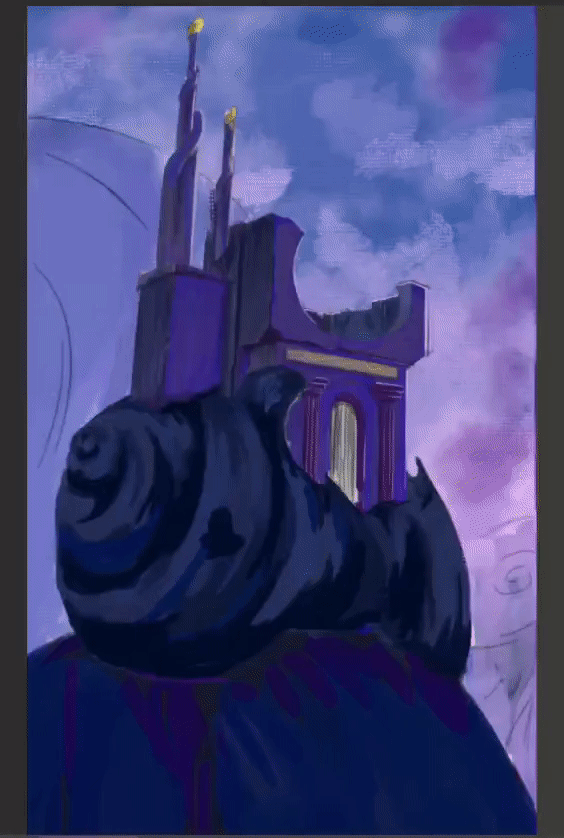
4.2. Centering:
Centering is great when you want the architectural structure in your fantasy background to be the focal point and have a dominant presence.
It can be used in introductory instances where someone comes across that structure and is taking in the scene in front of them.
As seen in the above example with the repetition of snail shell swirls, having certain repetitive elements throughout your drawing will help tie everything together and make it more cohesive.
4.3. Intimate views:
Rather than showing entire structures, we can zoom in on a certain area to better connect emotionally with the scene. This could be from inside the building or the city.
4.4. Let the environment dominate:
Your fantasy world’s surreal elements could be present more in the environment than in the structures. In such cases, letting the environment dominate will help tell a better story of your worldbuilding.
5. Easier Thumbnailing and Sketching with Helpful Tools
Having a concept in mind will give direction to the thumbnail sketches of your fantasy background. Whether you want to show a bustling city, isolated ruins, or a desolate interior, defining your architectural and natural elements will help narrow down the type of scene you want to create.
During this process of thumbnailing your concept and sketching, the following Clip Studio Paint tools with help make your work quicker and easier:
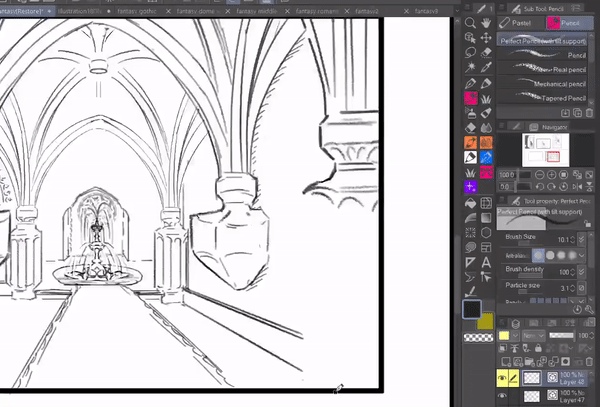
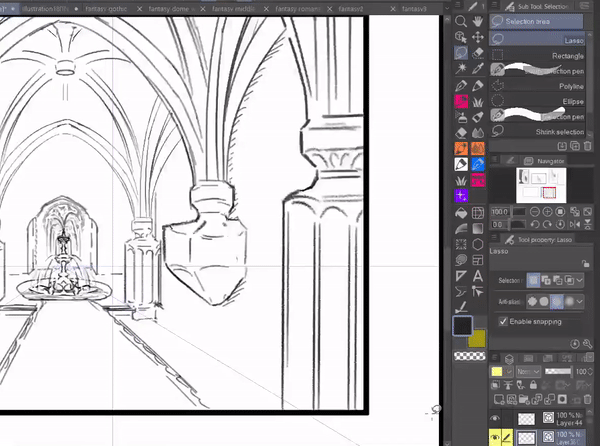
5.1. Perspective ruler for accurate lines:
Rather than doing free-hand perspective first and then making it accurate, the perspective ruler lets you create crisp structures with accurate perspective from any angle.
To add a perspective ruler to your canvas, go to [Layer], [Ruler/Frame], and then [Create Perspective Ruler]. In the pop-up window, choose whether you want a one-point, two-point, or three-point perspective.
To add the ruler to a thumbnail in your canvas, create a panel of your thumbnail border. Then repeat the above steps with the panel layer selected.
You can move the ruler and adjust the vanishing points and angles with the [Object] tool.
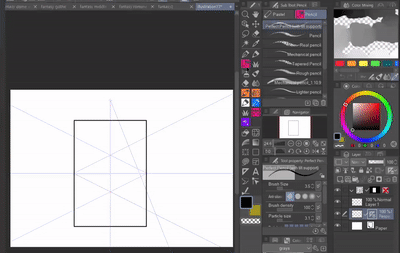
By keeping your perspective ruler in a separate layer, you can toggle its layer on and off to switch between straight lines and freehand details.
5.2. Parallel ruler for straight lines at a desired angle:
If you are tired of constantly redrawing lines because they are not straight enough or at the wrong angle, then you will find the Parallel ruler very useful.
To open the tool go to [Ruler] in the Tool palette and then choose the [Special ruler] sub-tool. In the Tool property, choose [Parallel line].
Now draw the ruler at the desired angle on the canvas. With this, any line you draw in this layer will be parallel to the ruler.
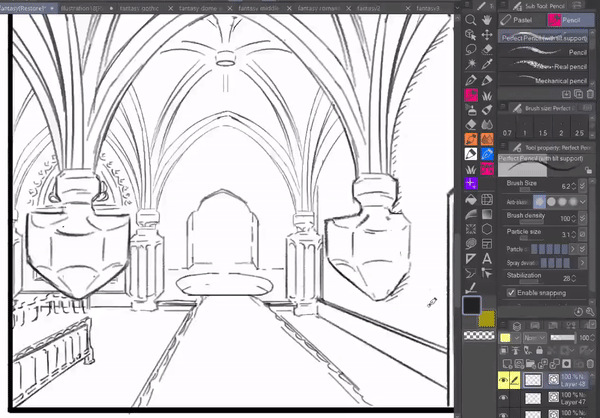
5.3. Vector layers for resizing your thumbnail for the base sketch:
Don’t want to redraw the thumbnail for the final sketch? The answer is simple: Use vector layers when drawing the thumbnail.
Vector layers do not lose line quality when scaled so you can duplicate your thumbnail and resize it to however large you want and save yourself time redrawing from the start.
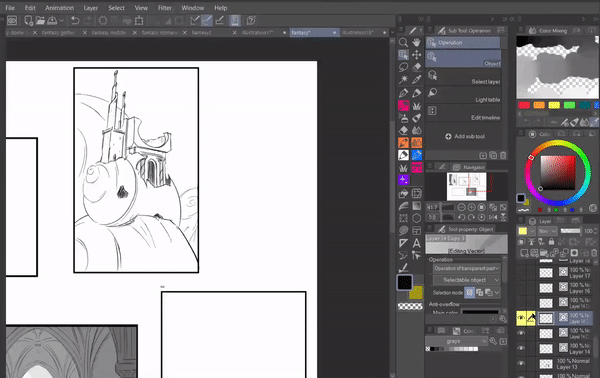
If you want to change the line art brush, change the [Brush Shape] in the Tool property palette of the [Object] tool. If you want to make the line art thicker or thinner, change the [Brush Size].
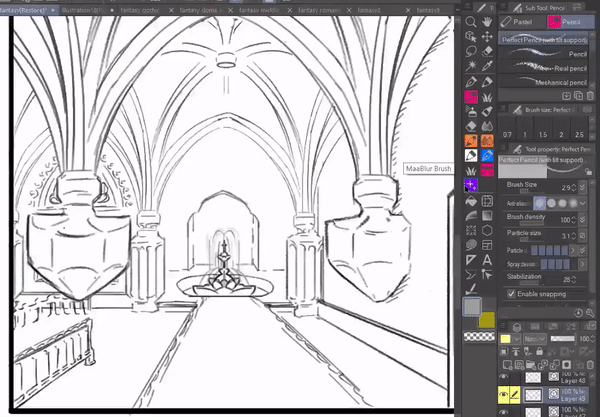
5.4. Vector lines for curves in perspective:
Vector lines also allow you to easily draw curves in perspective. For the desired curve, draw a straight line in perspective, then you can manipulate its control points with the Object tool.
5.5. Vector eraser to erase lines faster:
With vector layers, you can use the vector eraser, which lets you erase complete lines with a single touch or swipe.
I set mine to [Erase up to intersection], to erase only up to the point the line intersects with another. It makes it easier to have crisp edges and to quickly remove any extra lines.
5.6. Symmetry Ruler for symmetrical sides and intricate patterns
The Symmetrical ruler is another [Ruler] sub-tool that will help you draw anything that has repetitive elements in equal spacing. This could be complete buildings, arches, windows, decorative patterns, arabesques, rose windows, and more.
For elements that repeat on two opposite sides, such as arches and fountains, we set the [Number of lines] to two in the Tool Property palette of [Symmetrical ruler].
For patterns, such as arabesques or rose windows, we can set the Number of lines higher.
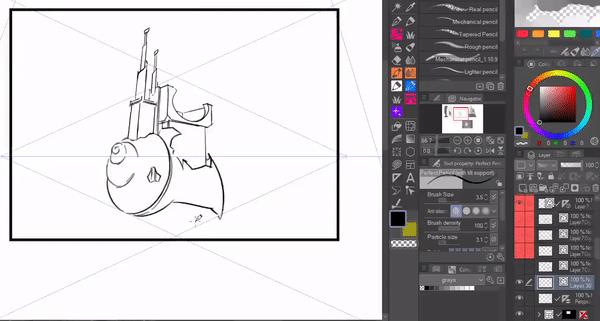
Final Thumbnails:
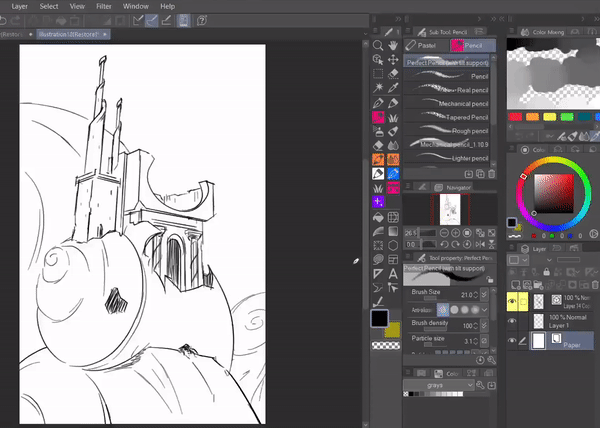
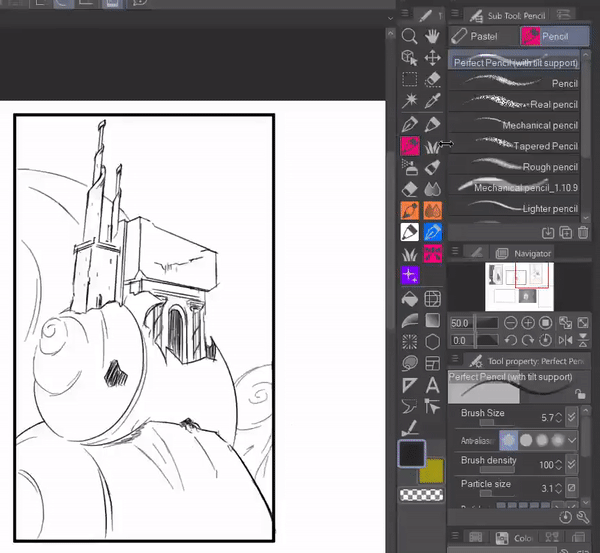
Here are my two thumbnails combining the concept of flying buttresses and domes with wave rocks.
To improve on the first sketch, I exaggerated the elements further to give a more dominant fantasy vibe and to create a more dynamic composition.
And following are my two thumbnails combining snail shells with gothic and romanesque-inspired castles respectively.
Try experimenting with different combinations of architectural and natural elements and see what you come up with.
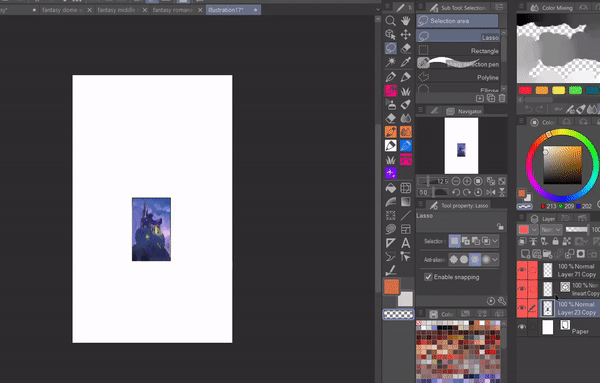
6. Setting the Mood with Color Studies
Since we are illustrating a fantasy background, we can be very bold with our color choices. Color studies will help you quickly explore different color themes from which you could choose one for your final background illustration.
I keep my thumbnails in two layers, a vector layer for the sketch and a normal layer below it for the distinction of the foreground, midground, and background. My color study is between both these layers in one to three new [Normal] layers.
Here are my four color studies for the fourth thumbnail:
Each of these color studies tells a different story despite the same base sketch. I have chosen to work with the third option, which uses the complementary color scheme of purple and yellow.
Bonus: Completing a Fantasy Background illustration
I started my painting process by transferring and resizing my thumbnail on a new canvas with the method shown in Section 5.3.
Then I cleaned up the base and refined the colors and the shapes.
Next, I added details to the background and foreground and added the light sources in a [Vivid light] layer. I also increased the color intensity in some areas of the building using a [Multiply] layer.
Lastly, I added lightning to the illustration using an [Add Glow] layer. Here is the completed background:
Final Thoughts
I hope you found this tutorial helpful and that the tips here helped you come up with new concepts for drawing fantasy architecture backgrounds. Thank you for reading!
Users who liked this post


Comment