
Anthropomorphism
If you don't know what anthropomorphism means, it's basically giving objects or animals human-like traits. Without further ado, let's get started!
STEP 1 - Finding References
Every artist should know that references are very important. For this project, I'll be using the funfetti cake as an example.
When I find my references, I would pick the ones that stand out to me most and can help me make my character look appealing. So, each reference you choose should help inspire you to incorporate an element from their creation onto yours.
Remember, you don't have to include all of the elements from the references you chose. The purpose of these references is that they help you with forming more ideas and giving you inspiration, and maybe even improve or modify them!
STEP 2 - Adding Spice
For this step, you'll have to come up with a noun. But since this project is about making an anthro character, you'll have to come up with a noun relating to a person or humanoid character.
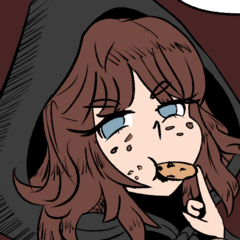
For mine, I'll pick a witch!
So, just like STEP 1, I'll look for more references relating to witches.
STEP 3 - Mindmaps
This is an optional step (but highly recommended). Personally, I use this exercise a lot when designing my characters.
First, write down both the subjects you picked for this project.
Then, expand your ideas by writing whatever comes to mind in relation to them.
For example, you can't have a party without a funfetti cake, or a witch without their broomstick to cause mayhem, and so on!
Then, I just keep expanding my ideas until I can come up with an interesting design with the keywords from the mindmap!
You can either experiment with all the ideas in the mindmap or just pick a few keywords that you're interested in.
STEP 4 - Sketch Exploration
This step will be subjective because everyone has their own way of interpreting things. But I'll try my best to explain my thought process in my sketches.
Initially, my idea throughout the whole project after looking at my references & mindmap was a playful elemental witch that harnesses fire - specifically stealing flames from candles.
Then I had another idea where I thought it'd be cool to have a cake slice as a hat, but it didn't really turn out the way I wanted it to. After exploring the pose, it gave me an inspiration where I thought about a guardian that protects birthday parties!
After that, I had another idea of having the exact opposite of a guardian. A prankster - she'd have decoy candles that plant itself in the cake and she'd steal frosting and other toppings off of the cake. Then I started sketching on another pose and tested out other silhouettes and shape languages.
After my draft sketches, I decided to stick with the initial pose that I drew and modify so it looks more appealing. In my final sketch;
I drew the candle as if it has just ascended from the cake, thus some frosting on the bottom of the candle.
Next, I thought it would be cool for the hat to appear like a frosting, and I added some sprinkles throughout the art piece to make the scene feel more alive and colorful.
I also had this idea where she could make use of pieces of a popped balloon as a storage space.
STEP 5 - Colors
For my artwork, I'll be using the color palette from the funfetti cake references that I've compiled together.
First, color pick the images and jot the colors down. Then, put an overlay layer on top of your palette and fill it with any color mood you'd like. I usually like blues & pinks, but you can experiment that yourself!
If you don't know how to use blending modes, here's how:
You could also do the overlay layer after your painting, but that's up to your preference. Don't be afraid to experiment other blending modes as well!
For me though, I like to add new colors throughout my painting if I feel like it'll look good. However, the overlay technique should be a good trick, I've been using it since I started out drawing up until now! It will definitely help you make your artwork look more consistent.
Here's my coloring process if you're interested:
Base colors
Shadows
Detailing and effects
Conclusion
You've reached the end of the tutorial, congratulations!
I hope you've learned a thing or two about anthropomorphism and hopefully you'll get to create a unique character of your own!
Please like and comment if this tutorial helped.
Thank you so much for reading!
Users who liked this post


Comment