
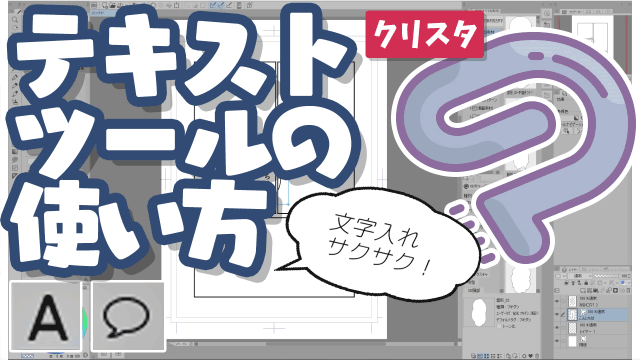
Introduction
I will introduce how to use the text tool, which has become convenient with the 2.0 update.
If you are a beginner or want to know how to use it efficiently, please read it.
Be sure to check out the video version as well.
Basic usage of the text tool
Select the text tool from the tool palette,
You can enter text by clicking where you want to put the text.
(Shortcut: T)
Once entered, you will see below
Click the check icon to complete your entry.
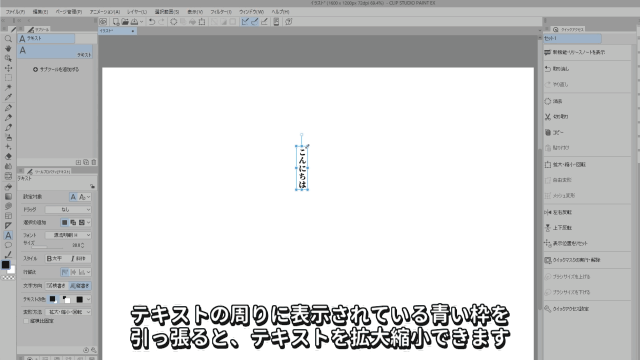
If you pull the blue frame that appears around the text,
You can scale the text.
If [Fix aspect ratio] is not checked, the text ratio will change.
Check [Fix aspect ratio] in tool properties.
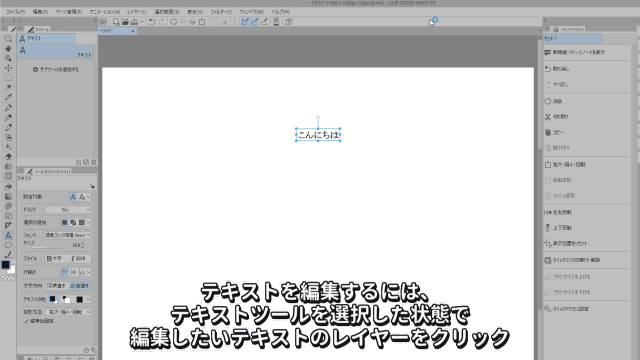
To edit text, with the text tool selected
Click the text layer you want to edit. You can modify or add characters.
There are two ways to set the font type, orientation, etc.
One is the text tool's
This is a method to set in advance in the tool properties.
If you want to set it later
Set with the object tool (shortcut: O).
You can freely change the font type, text direction, etc.
How to edit text in bulk
With the 2.0 update, the text tool has become more useful.
Edit multiple texts at once!
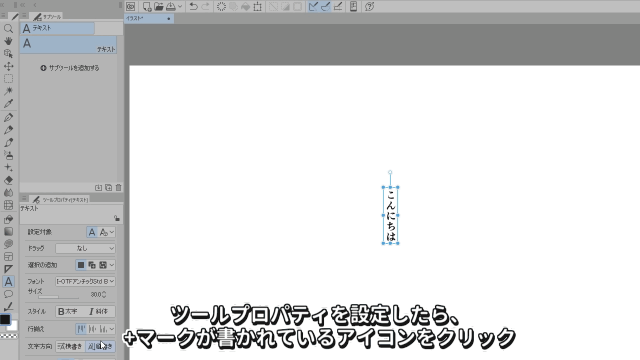
To do so, you may need to set it up in advance.
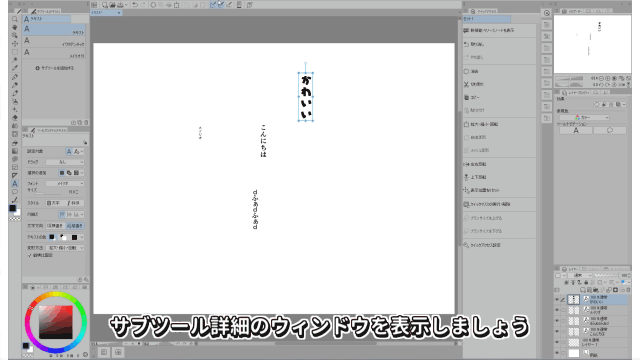
Display the sub tool details window,
Set the tool property setting target of the text tool to [Selected].
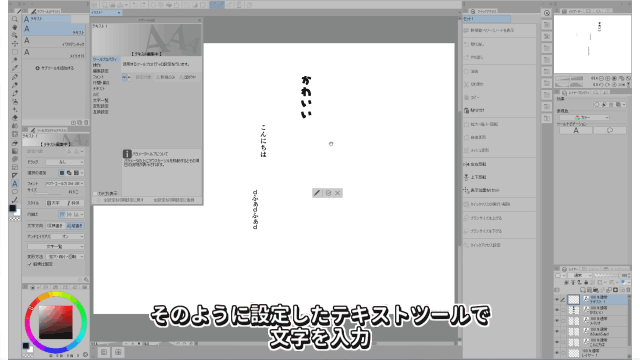
Enter characters with the text tool set like that,
Select all the text layers you want to change at once with the Shift key.
When you change the font in the tool property, 3 texts are changed at once!
If you don't use the previously EX-only feature [Story Editor],
Bulk change of text was not possible.
PRO version also for manga production etc.
Isn't it easier to do it?
Save frequently used settings
It's hard to set the text tool every time.
Save frequently used settings.
After setting the tool properties,
Click the icon with the + mark.
Creates a copy of the currently selected sub tool.
Give it a descriptive name.
A copy is saved in the text tool palette!
You can always call this setting in the future.
You can change the settings later as well.
Set frequently used fonts and sizes
If you save a few, it will lead to a reduction in text input time.
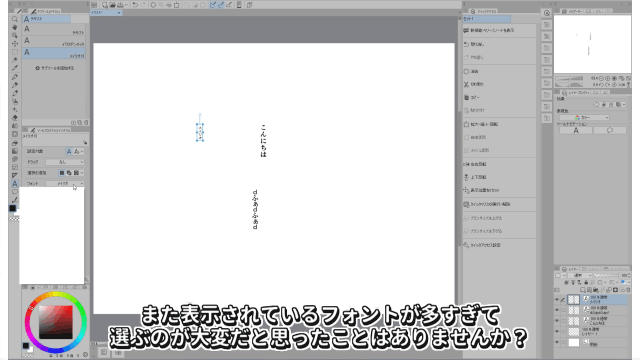
Also, too many fonts are displayed
Have you ever found it difficult to choose?
By default, all fonts in the terminal are displayed.
This can also be resolved by saving the settings.
displayed on the right side of the [All Fonts] tab
Click the icon that looks like a gear.
Click the icon labeled A to create a new font list.
Give your new list a name and choose any font.
After selecting, press OK to save.
Your newly created list has been added!
It is a good idea to create a list of fonts that you use frequently.
Setting the text addition method
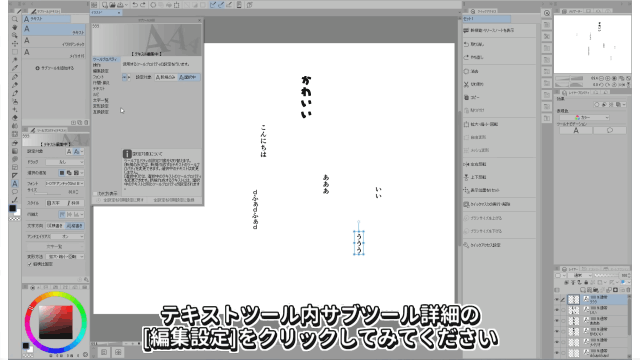
sub tool details in text tool
Try clicking Edit Settings.
The video setting is [Automatically detect insertion position].
If you change the add method setting to [Add to selected text],
The text "Eeeee" is added to the "Uuu" layer,
Two texts grouped together on the same layer
If you add it as it is, it will be in one layer
More and more text.
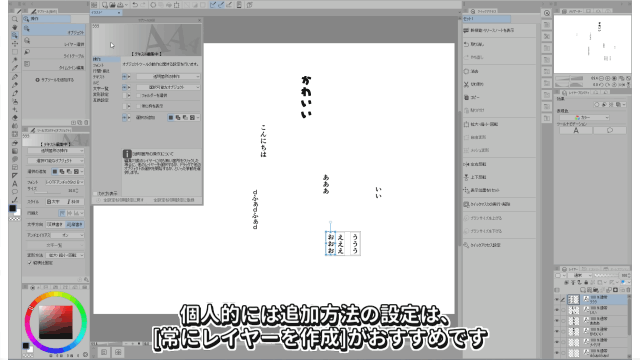
Personally, I recommend [Always create a layer] for the addition method setting.
If you put each text on a separate layer,
Easy to select only arbitrary text with layer selection tool
This is useful when you want to move only a specific text layer.
Layer selection tool (shortcut: D), when you drag any layer
Selects all layers drawn within that range
If you drag the "a", "i", "t", and "cute" layers together,
The four dragged layers are now selected.
You can move all 4 layers together!
You can quickly select any text from many texts,
It saves time when arranging comic lines.
If there are too many text layers,
Put it in a folder and put it together
Balloon settings
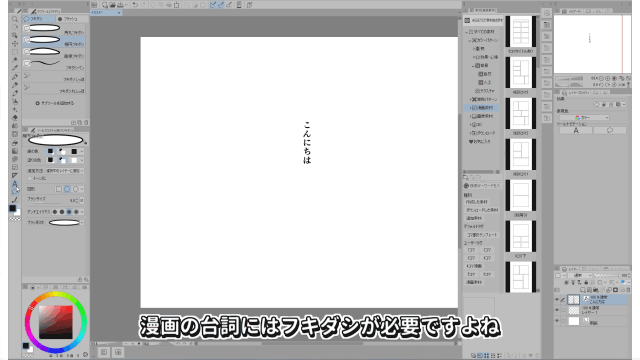
You will need balloons for your comic dialogue.
You can add it with the balloon tool,
The text is not centered so you have to adjust it yourself.
I personally recommend using the balloon material!
CLIP STUDIO ASSETS has a lot of great materials.
This time, I will use this "hand-painted balloon" material.
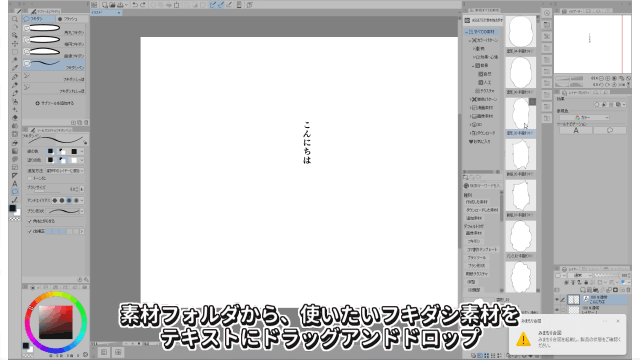
Select the balloon material you want to use from the material folder
Drag and drop to text.
Then the text is placed in the middle of the balloon!
You can change the size of the balloon by moving the point on the edge of the blue frame.
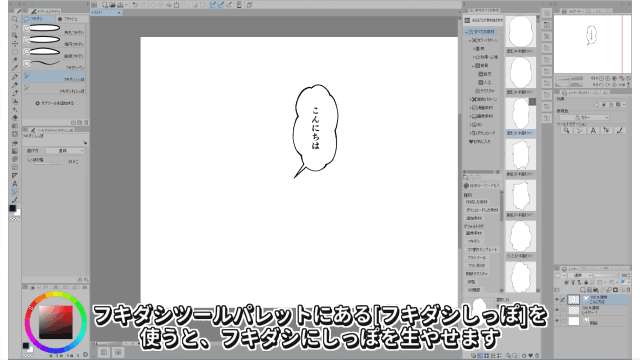
[Balloon tail] in the balloon tool palette
Use it to make a balloon grow a tail.
The width of the tail can be changed with the tool property.
If you want to change the position or width of the balloon tail later,
Change it with the object tool.
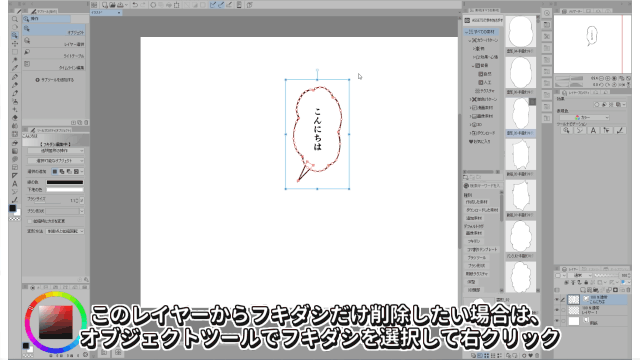
If you want to delete only the balloon from the layer,
Select the balloon with the object tool, right-click,
Select [Delete] from the menu that appears.
Only the balloon disappears while the text remains.
When you want to change the balloon material to use,
Let's use another material after deleting it like this.
In the tool property, the color of the line of the balloon, the color of the background,
You can change the opacity of the background and the thickness of the line.
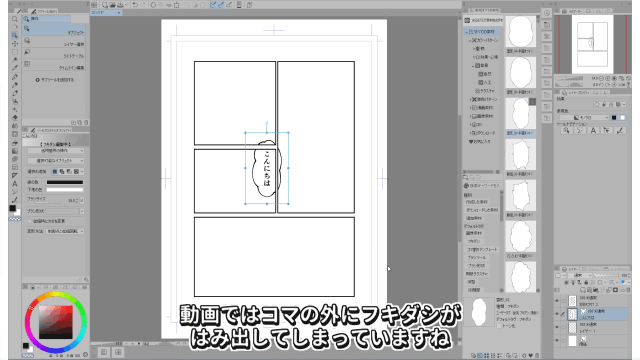
I want the balloon not to protrude outside the frame.
If you want to show only part of the balloon, use a layer mask.
Select only the part you want to show with the selection tool.
From the [Menu] bar at the top, [Layer] → [Layer mask] →
If you select [Mask outside selection],
Out of selection is no longer displayed!
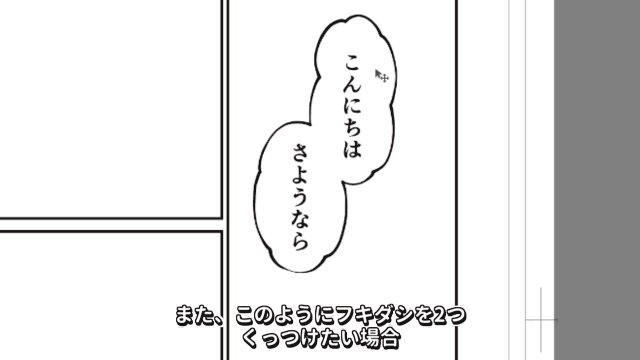
If you want to attach two balloons,
If you combine layers, the balloons will also stick together.
The part where the balloon is attached is attached.
You can also change the position later with the object tool.
How to add borders to text
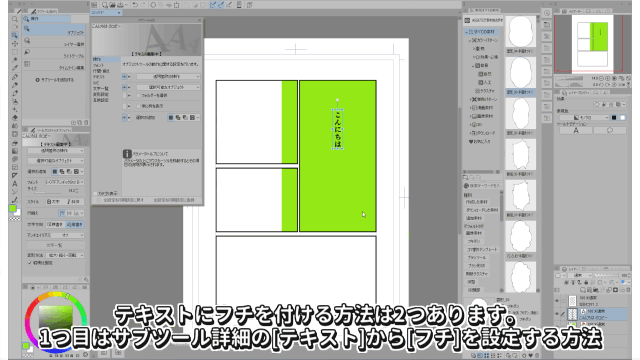
There are two ways to add borders to text.
The first method is to set the [Border] from [Text] in the sub tool details.
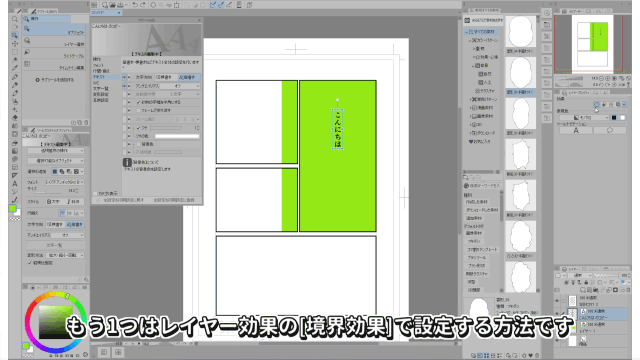
The other method is to set the [Border effect] of the layer effect.
Use any method you like.
summary
Here's how to use the text tool.
Let's make a work by mastering the text tool!
Users who liked this post


Comment