
The hands can reflect the emotions of the characters we draw, so sometimes implementing them in the illustrations is necessary depending on what we want to express.
Hellooo! In this tutorial I will show how we can draw hands, I will teach from its structure to how we can use 3D models to draw them.
Structure
In the image we can see the hand seen from both sides.
If we divide it into shapes to study its structure on the drawing, it would look like this.
Many have difficulty with the proportions that their hands should have, so we'll start with that.
Here we have a hand as an example.
(This will be the basis for the tutorial although the hands can have different proportions such as the length of the fingers or the size of the palm so that will depend on your taste and preference)
(Clarifying that the hand is smaller than the head but they are almost the same length, you can check it by looking in the mirror, putting your hand outstretched in front of you and to the side of you to see what the proportions are)
If we put references to understand its structure it would look like this.
The first thing we have to take into account is that the middle finger will be our base for the hand, if we look at the image we will realize that the hand is divided into two.
The first half is where the palm is and the other half is where the fingers are.
(The first half ends where the knuckles are)
At the part where the fingers meet, the middle finger is divided in two where the first circle (a bone) meets.
The part where the palm is the same is divided again in half to be able to locate the thumb bone.
The red line of the palm is the base for the fingers since it has to follow the same inclination for the size of the fingers.
The knuckles or finger bones are not at the same height, the highest knuckle is from the middle finger and the lowest one is from the little finger)
(Something important is to see that the longest finger is the middle finger, then it could be the index and ring finger, then the little finger and finally the thumb)
For the fingers there is no exact rule since each person has different length fingers, an example is the little finger that can be smaller or larger.
For the thumb we can be guided by the bones of the index finger (blue circles) to be able to do it.
fingers and palm
In order to understand how we can draw hands we have to know the internal structure.
The fingers are connected.
The tendons are attached at the wrist.
Separation of the fingers
When the fingers separate a little, it is possible to see a curved line that is between them, the more tension and the further apart they are, the more noticeable it is.
The fingers are not just joined as in the small images but a small space is left between them to draw the line.
Knuckles
(The knuckles on the other hand (red circle) are diamond-shaped only separated)
When the hand is closed the knuckles stick out, they don't stay in a straight line.
It is possible to see that the smallest knuckle is from the little finger since it does not protrude too much.
Fingers
The structure of the finger would look like this.
(Remember that the finger is half of the hand)
In order to draw the fingers with greater precision, we can surround the reference circles to create a relief on the finger.
So that the finger does not look very straight, we can make more curved lines.
The side finger looks like this, the marks that we have on the hand are drawn to make it look better.
When the finger is bent we have to draw the folds that are formed to make it look more real.
To better understand the shape of the fingers I will give examples.
In the image we can see that the fingers have a rectangular shape but tend to be thicker at the base and thinner at the end.
To better understand the shape of the fingers, you can make the lines as a sketch and draw on them.
(When you are studying the anatomy of the hands you can put the lines on the image)
Example:
Nails
The nail can be the style that you prefer since it will depend on what you want to draw.
There are different types of nails (shapes)
1. Almond
2. square
3. oval
4. oval and square
There are more types but these are the most common.
Mistakes
A mistake that can be made is that the fingers are not proportioned with respect to length and thickness.
The index finger looks very small compared to the others.
One tip is to see that the entire hand forms a kind of trapezoid or rectangle when we draw it, since sometimes the fingers can be poorly positioned.
(It will also depend on the type of hand, since there are hands with larger palms or larger fingers)
Example with fingers together
Another important point is to take into account the thickness of the fingers when drawing so that they do not look ill-proportioned, they have to be similar in size to the knuckle bones in the palm.
Ranges of motion
(It is important to know the range of movement that the fingers have because it can look malproportioned if we draw the fingers incorrectly)
An example can be the thumb, the finger has more mobility than the other 4 fingers.
Usually fingers reach a limit of 90° between each joint when bent. (image number 3)
Hand can move back and forth or side to side.
Examples of hand movement ranges (image 1 and 2)
Palma
The palm itself has a pentagonal or hexagonal shape depending on which side the hand is being viewed from.
The yellow triangle in the image is formed from the ends of the structure and the middle of the palm.
Palm to the side
Taking references to draw the palm from the side is very helpful, drawing simple lines for the fingers also helps you understand their position and shape.
The hand is three-dimensional so the structure must be the same.
Example
We draw the structure. (the yellow marks on the sketch are the middle of each line)
We put the reference circles.
And we draw.
We put details.
Note: It is important to know that if we want the hand to look wider we have to draw with more folds and curves increasing the size of the fingers to make it look rounder.
Perspective
Using one of these example hands we will observe how to draw in perspective.
We can see that there is not much difference in the central line of the hand, only that it is curved, the palm can be seen more three-dimensional but what changes the most is the shape of the fingers.
The fingers also have a three-dimensional shape with a rectangular shape so you have to observe how the fingers look from different angles.
Previous example of the fingers
Example
angles and details
When drawing hands, it is best to have references to guide you, since sometimes we can make mistakes with the size or shape of the hand, so a technique that can be useful when drawing is to identify the angles of the hands, how they connect with other parts and in turn learn how the hand is structured.
Example: Here we can see how the fingers are in one position and how a kind of curve is formed in all of them (the yellow line).
Details
Another thing that I consider important are the details since you have to perceive some things like the folds, the nails and the wrinkles of the hands.
(The little finger, ring finger and middle finger is not very well understood how they are positioned)
It is also important to highlight the shape of the fingers, since that is how we can define them.
This is an example of how the finger looks from the front when it is bent, it is necessary to define the folds and the marks that the fingers have on the bones.
The details are still important if we want to distinguish the ages.
In image number 1 we can see that it is smaller, rounder and without wrinkles so it is younger (like a child/adolescent)
In image number 2 the fingers are already more defined and the bones of the palm can be seen a bit, so it is from an adult.
In image number 3 the skin looks more wrinkled and some veins are noticeable so it is from an older adult.
(Some people can see their veins so it doesn't just mean older people)
References
Your hand and 3D models
We can have several reference sources on the internet such as videos, books, images of other artists, but we can also practice with our hand since we can take all the photos we want and study its structure.
Example: In the photos we can draw what its structure and angles would look like.
(Example of how it looks without details)
In red are the details that I consider to be important.
We can also draw fingers for study reference.
We know that when the finger is bent it is half of the whole finger, it is easy to draw what is missing knowing that it is the other half.
When you use references, do not copy for the sake of copying. Study, observe and understand why it looks that way.
Compare the reference with your drawing and see your mistakes to learn and improve.
Simple shapes:
You can look for alternatives such as geometric figures, lines or just simplify the shape of the hand if you don't feel comfortable drawing in this way.
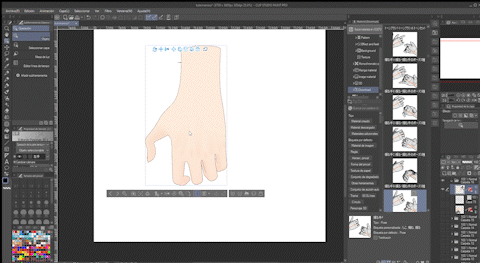
3D Models
Another resource that they can use is the 3D models in CLIP STUDIO.
Example:
You can download materials in CLIP STUDIO ASSETS such as poses or 3D hands.
It's easy to use the 3D tool, just drag and drop the pose you want on the model.
I leave this tutorial to make it easier for you to edit the 3D models.
When we want to draw a hand holding an object it is preferable to have a detailed reference of what we want.
Styles
Depending on the type of style you like to draw, you can use the structure that was seen and adapt it to yours to make it easier for you.
END
Thank you very much for reading until the end, I hope this tutorial will help you when you start drawing hands, since personally when I started practicing it was difficult for me to understand their movements and proportions but with a lot of patience I managed to draw hands.
Start with the basics that is the structure and the base, then you can start doing hands in perspective or with difficult movements to understand step by step the way it moves.
Users who liked this post


Comment