
Intro
Hello everyone, today we are going to see some practical tips on how to use the Ruler tool in Clip Studio Paint from version 2.0 that might help you in your projects for design, comics, storyboards or illustrations.
We will start exploring the Sub-Tool rulers, and the different options that you can find on the Tool property, Layer palette and Command bar. Also, we are going to use the Line, Curve and Figure rulers to draw simple shapes. We will see how to create rulers from vectors to draw icons, letters or redraw over existing illustrations.
Later we will see how to use the Symmetrical ruler to make a mirrored image and combine Special rulers to draw movement effects and save time in the sketching and inking process.
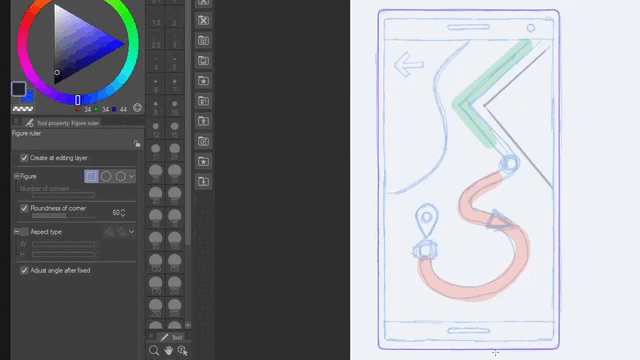
For this tutorial we are going to use the designs and drawings from the images below as a main example but you can apply all these features and effects in any kind of project. So, let’s begin.
1. How to Create and Manipulate Rulers
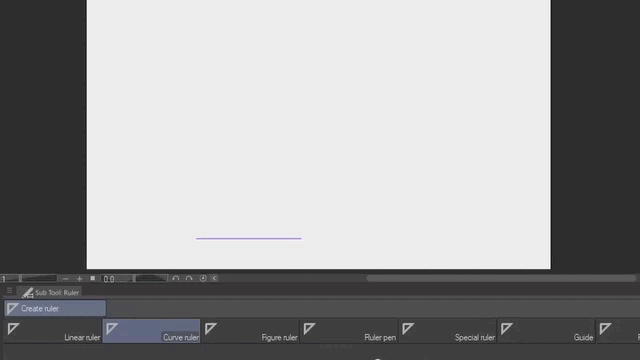
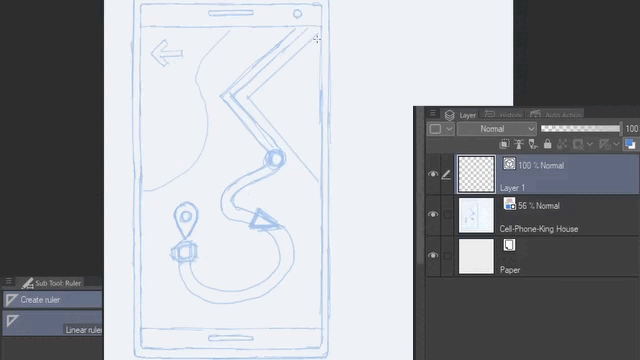
In order to create a new Ruler select the Ruler Tool icon from the Tool Palette. Then select one of the Sub tool rulers for example Linear ruler and click and drag on the canvas. You will see that an icon appears next to the thumbnail on the Layer palette.
All the rulers that include ‘line’ in the name will usually create rulers with just one click and drag. But other rulers like curve, figure and some special rulers will need the creation of multiple control points or double click to confirm the creation of a new ruler.
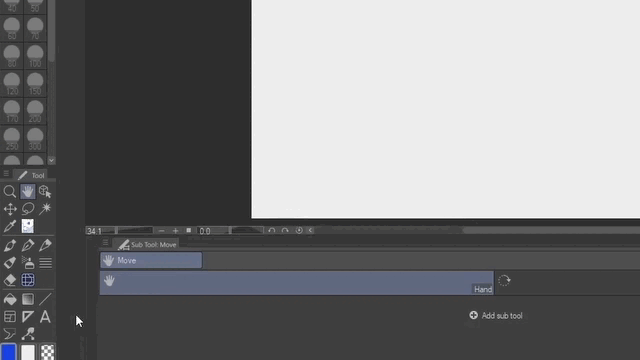
Once you have created a ruler you will need the Object tool to manipulate it or edit the ruler. You can click on the Cube icon on the Tool palette or use the keyboard shortcut “o”.
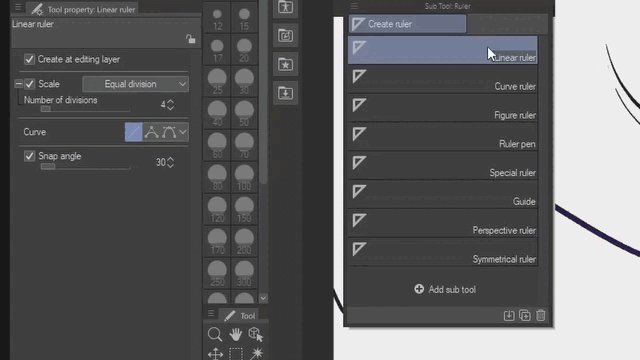
1.1 Ruler Sub-tools
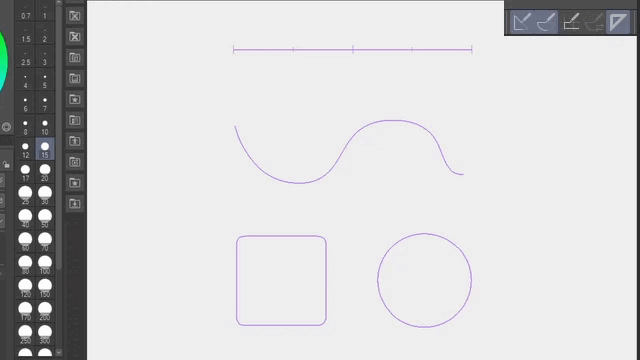
You can find eight default Sub tool rulers in the Sub tool palette.
For this tutorial we are going to explain the first three Line, Curve and Figure in one chapter since they are the more basic and easier to understand.
Then we will see the Symmetrical ruler that can be useful to quickly mirror your drawing or design.
And finally we are going to see some of the Special rulers to easily draw multiple parallel lines, curves, radial effects and concentric circles.
1.2 Object Tool & Tool Property
Now in order to edit or manipulate any type of ruler you will need to use the Object tool and the Tool property palette.
If you just created the ruler and there is nothing else on the canvas you can directly click over the ruler with the Object Tool.

But if you have lines or different elements on your canvas you will need to click on the Ruler icon on the Layer palette first and then click over the ruler in the canvas.
Then you can move a whole basic ruler with the bounding box or select one of the control points and place in another location.
NOTE: Special rulers don’t have bounding boxes around them and the way to move them may vary from one ruler to another.
From the Tool property palette you can change the settings before creating the ruler. You will find different options for each type of ruler.
NOTE: You can change some options after the ruler is created with the Object tool but keep in mind that some options can only be customize before creating the ruler.
Now if you want to discover more options click on the Wrench or Sub tool details icon. Then click on the Eye checkbox to show or hide the options that you want or need. For example Snap angle, Scale and Number of divisions.
1.3 Layer Palette Options
If you right-click over the Ruler icon in the Layer palette you will see different options for the Ruler. You can also find those from Layer > Ruler/Frame. From these options all the related with Showing the ruler are going to be the most used.

In case you just want to change if the Ruler is shown in All layers, Same folder or only in the Editing target click on the Ruler icon at the top of the Layer palette.
Since we are probably going to use the feature Show/Hide ruler a lot it is a good idea to assign a keyboard shortcut to it or place the icon into the Command Bar next to the Snap options.
IMPORTANT: You can move the rulers through different layers by clicking and dragging the ruler icon onto another layer. You can also copy the ruler by holding ALT before clicking over the icon and you will see a red square around the destiny layer.
1.4 Snap to Rulers
By default you can find the icons for Snap to Ruler and Special ruler on the Command bar to the left of the Snap to Grid icon. These also have default keyboard shortcuts CTRL+1 for the first and CTRL+2 for the second.
If the Snap to Ruler icon is not active even if you draw over the ruler(s) the line will not follow the ruler shape. This is useful when you want to use the rulers just as reference.
Also, you can hide the rulers holding SHIFT and clicking over the Ruler icon in the Layer palette or with a keyboard shortcut or from an added icon on the Command bar as we saw in the previous point. That way even if you have the Snap to ruler feature active the lines will not follow any invisible ruler.
This also can be useful when you want to see the lines of your drawing just after you used the rulers or when you want to draw without any ruler or guide around.
Finally, you can also turn off the Snap option for specific rulers from the Tool property palette. You will see that the ruler change the color to green instead of blue-purple. This is Useful when you use multiple rulers in the canvas or just want to use rulers as reference.
On Special rulers you can also click on the little “diamond” icon that appears when you select a special ruler.
1.5 Using Multiple Special Rulers
You can find 6 Special Rulers from the Tool property drop menu. We are not going to count Guide because it has its own Sub-tool and is not that special as the others.
Now you can create more that one Special Ruler in the same layer. But when you create a new ruler the previous one will turn green which means that its Snap option is off.
However, you can quickly jump between Special rulers with the default keyboard shortcut for “Toggle special ruler snapping” CTRL+4 or add a new one. You can also add the icon to the Command bar. You can find this feature from the menu View > Toggle special ruler snapping.
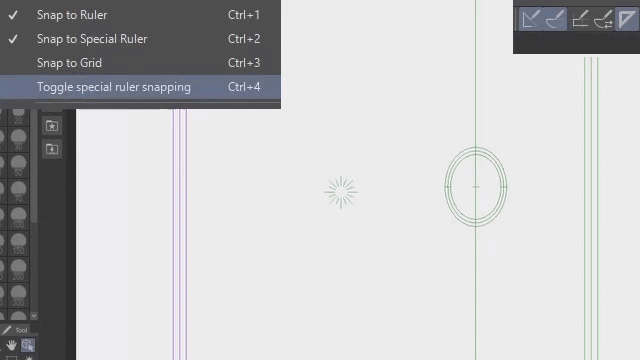
The Toggle special ruler snapping option will also work if the Rulers are in different layers. For that you can select the layers linked to the different rulers or change the visibility to Show in All layers.
Now you can combine and use multiple Special Rulers to improve your workflow when drawing or designing.
2. Linear, Curve & Figure Rulers
Before continue please make sure that you already know the basics of how to create and manipulate rulers. If you feel that you don’t understand the subject please read the first part of the tutorial again.
2.1 Scale and Measurements
The Scale option for the linear ruler in the Tool property palette allows you to use different type of measure such as cm, in, mm, pixels. To activate this feature click on the “Scale” and select the system from the drop down menu.
This can be useful for Print projects or when designing something for screen displays. Moreover you can measure areas or elements using two or more rulers with different systems at the same time. For example, you can turn off the Snap option to one of them and you will have let's say a green ruler for pixels and a blue-purple for centimeters.
Also, you can find Equal division from the drop down menu which can be helpful when you need to quickly calculate or divide for example a thumbnail canvas into equal sections.
You can also use this option with Curve and Figure rulers but you will need to add it from the Sub tool detail palette.
2.2 Line and Curve Rulers
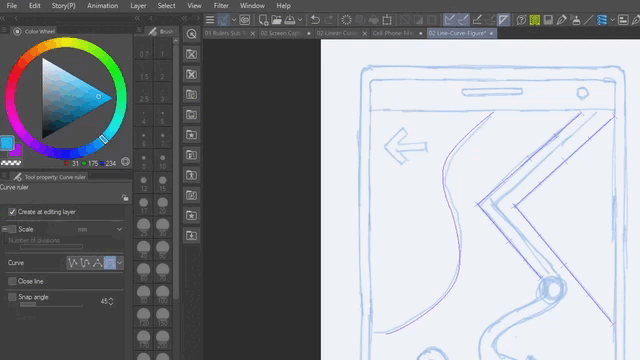
Now to use these ruler lets place a sketch in a layer below with low opacity or with the default Layer color effect. And create a new Vector Layer above the draft.
NOTE: Vector layers are recommended for line art since they will allow you to edit the lines after drawing in a non-destructive way.
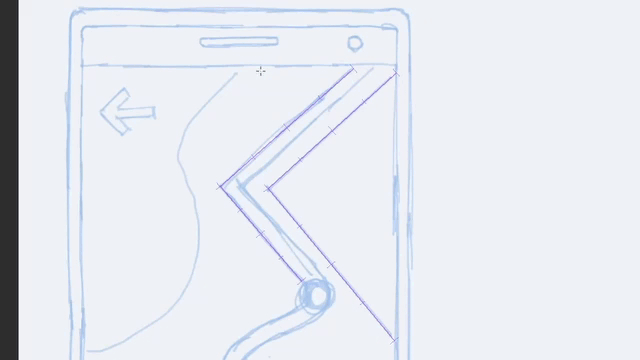
Then select the Line ruler and make a ruler by clicking and dragging the cursor over the canvas. You can repeat the process and draw more straight lines on your design before start drawing.
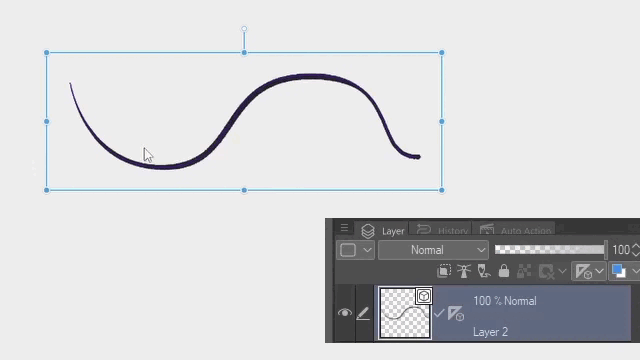
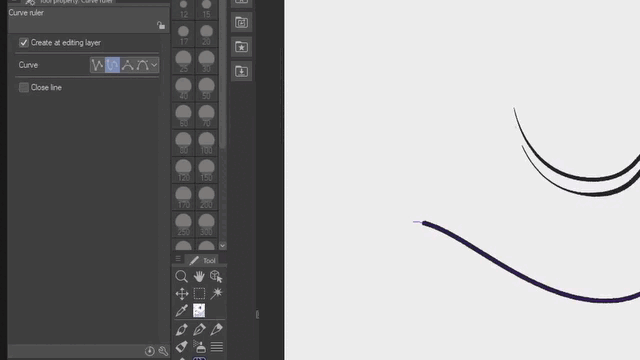
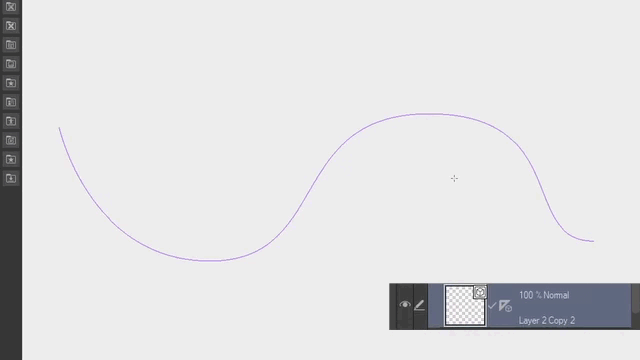
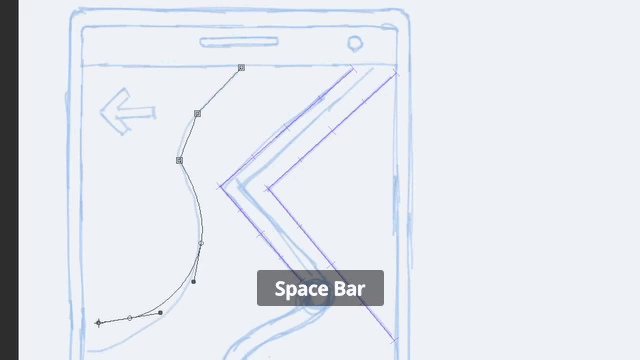
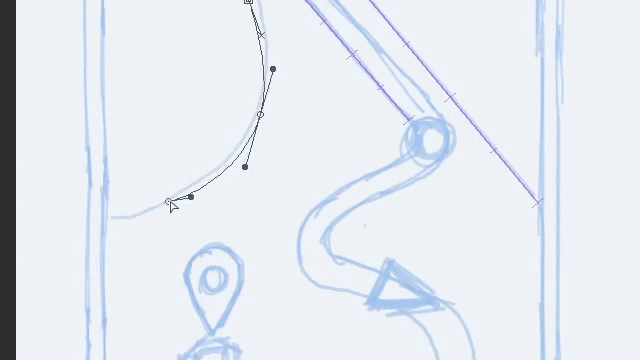
Now select the Curve ruler and choose one of the 4 types of curve. I prefer the Cubic Bezier since you can quickly create straight and curve lines with it.
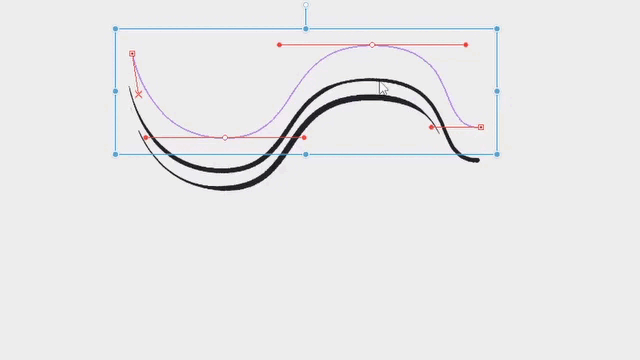
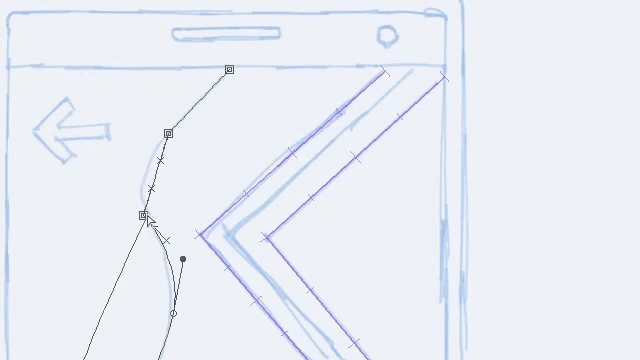
You will need to click one time to create a starting point and click again to create another control point. If you drag the cursor while holding the click it will create a curve with handles.
You can also hold the Space bar to move the last control point created or hold CTRL to move any selected point from the ruler.
In addition, you can click over any previous control point to delete it. Or click over any part of the curve line to create a new point.
Once you have finished press Intro/Enter or double click on the canvas to confirm the creation of the ruler.
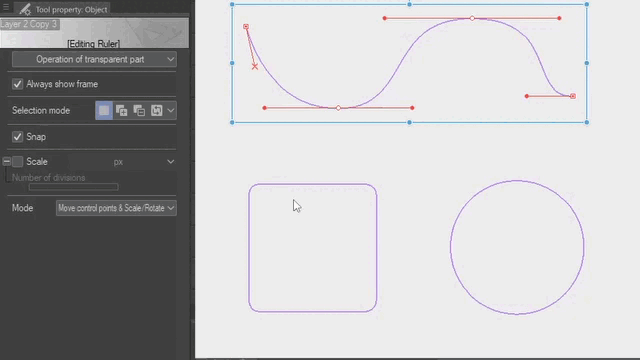
If you need to adjust or edit the ruler you can use the Object tool. You can also move, copy and paste the ruler in a similar way that when you edit vectors. Just make sure to click first over the icon on the Layer palette.
Then you can use different brushes and sizes to draw following the shape of the ruler. You can also try different colors.
To learn more about vectors and curves you can also check:
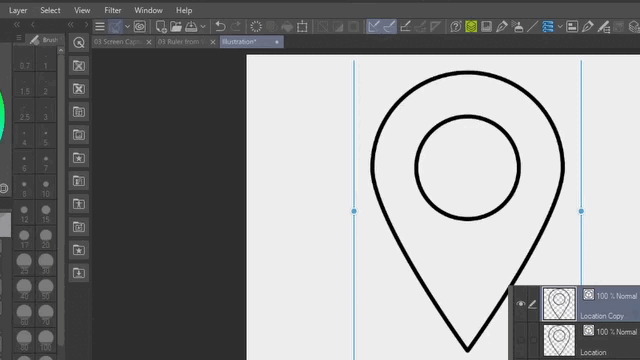
2.3 Figure Ruler
With the figure ruler you can create rulers base on Rectangle, Ellipse and Polygon shapes.
Following the sketch/draft lets make a rectangle with rounded corners. To do so click on the Roundness of corner checkbox in the Tool property palette and select the amount of “roundness” for example 60. Then click and drag the cursor over the canvas to create the rectangle shape. Adjust the angle if necessary or hold SHIFT to restrict the angle. Then press Enter/Intro or click again to confirm the creation of the ruler.
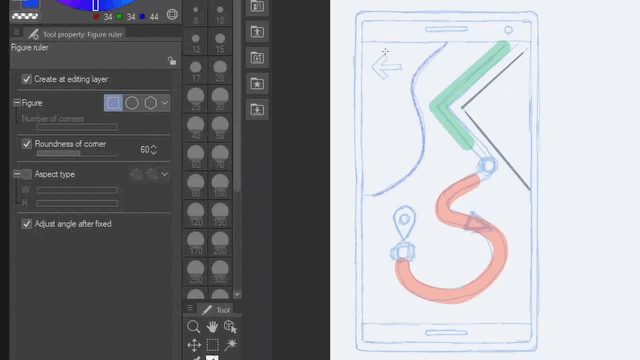
Repeat the process with all the rectangle shapes with rounded corners.
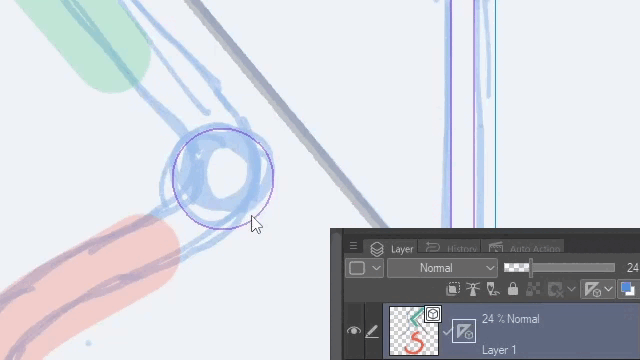
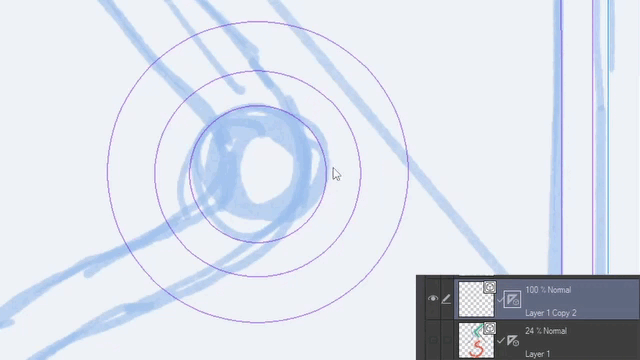
Now select the Elliptical shape and turn on the Aspect type from the Tool property palette. Make sure the values are the same to keep the aspect ratio 1 by 1. Then click, drag and click again to confirm the creation of the ruler.
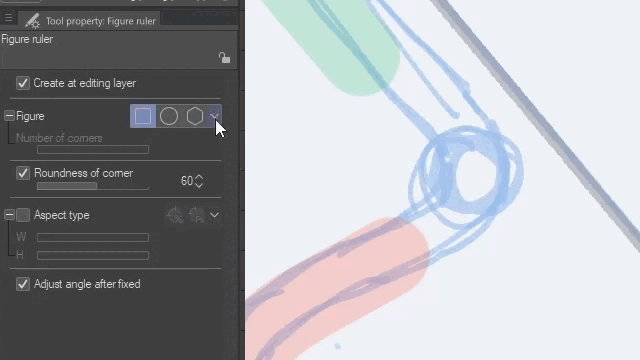
You can select the Ellipse ruler with the Object tool, and copy and paste the shape in the same place. Then holding SHIFT+ALT drag the bounding box from the corner to create concentric circles.
2.4 Draw along Ruler
In case that you want a fixed width of line without variations of pressure you can use the “Draw along ruler” option from the Layer options.
First select one or more rulers with the Object tool. Then right click over the Ruler icon in the Layer palette or go to Layer > Ruler/Frame > Draw along ruler. Confirm the Line width and Anti-aliasing then press OK
You can select different rulers and use multiple colors and sizes for each ruler. But if you don’t select any ruler with the Object tool all the rulers in the Layer will be drawn with the same color and size.
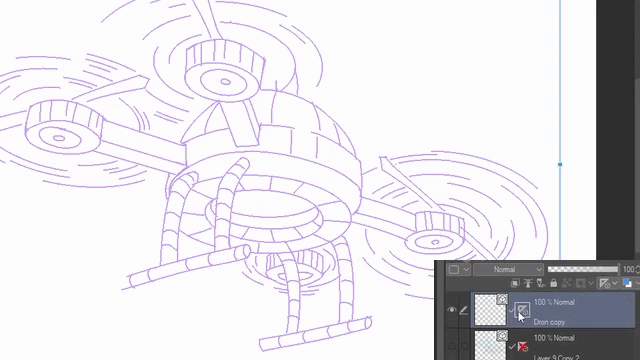
3. Ruler from Vector
You can create rulers from any Vector layer. To do so go to Layer > Ruler/Frame > Ruler from vector. If you want to keep the original make sure to duplicate and hide the original layer.
Then you can delete the vector lines with the delete key or with the icon in the Command Bar and start drawing following the ruler.

3.1 Importing Vector Icons
You can import vectors in SVG format from File > Export vectors. Select the file you want to import and click Open.
You can also Copy and Paste vector lines from other apps or programs such as Affinity Designer.
Then you can create rulers from the vectors and start drawing using the pressure of your pencil or stylus. Or use Draw along ruler for a fixed line width.
3.2 Ruler for Letters
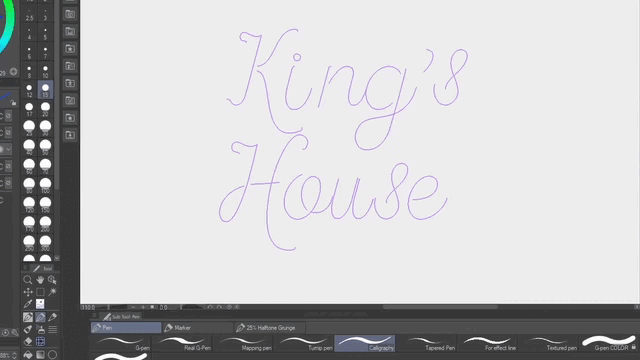
You can create, edit or import vectors to help you to draw or trace letters over them either as reference or using the Snap to ruler feature. For this example lets try to draw handwriting letters.
You can use the Calligraphy pen or any other brush to quickly draw with your pen or stylus.
You can also use Draw along ruler in two separate layers with different Line width and move the one on the top to create a quick 3D extrude effect on your letters.

3.3 Re-draw over previous base
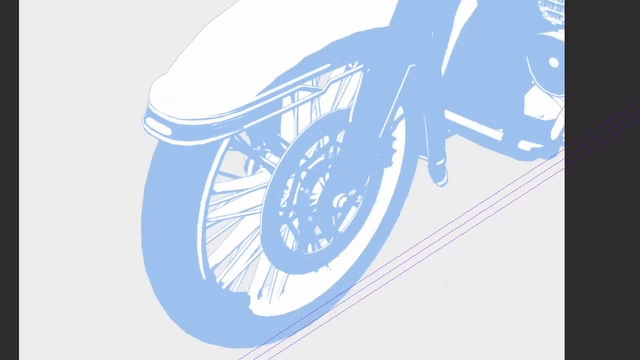
The feature of creating rulers from any vector layer can be useful when you want to redraw over a previous base for example to highlight sections or areas in the illustration.
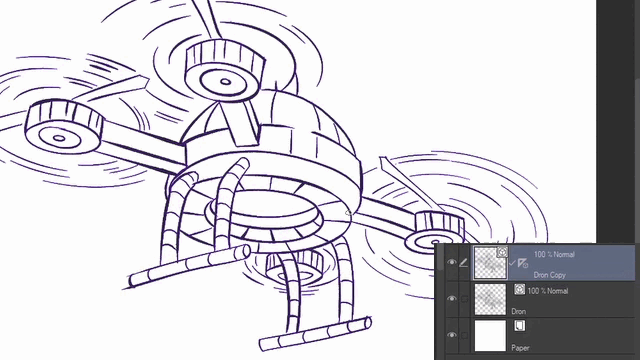
You can also use it to add color to the outlines in logos, shields, illustrations or any other type of project.
Or use Draw along ruler to quickly create a version with a fixed line width for blueprints or technical drawings.
These are just a few examples of what you can do with this feature. So feel free to find more use cases and share them if you want in the comment section.
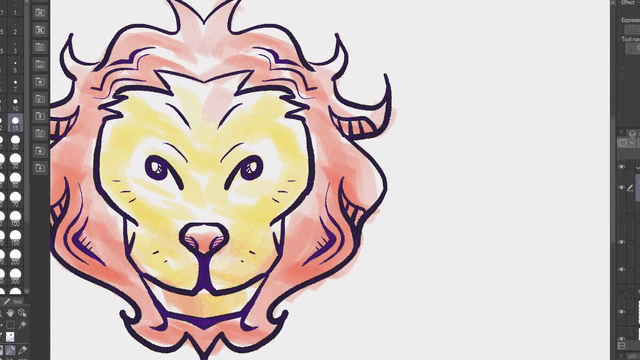
4. Symmetrical Ruler
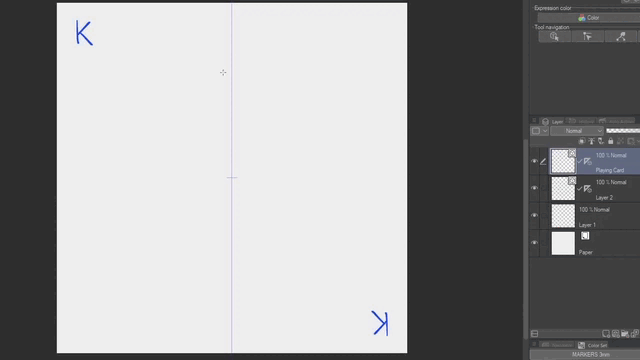
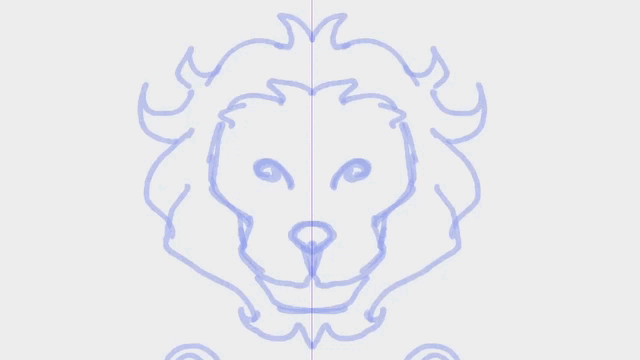
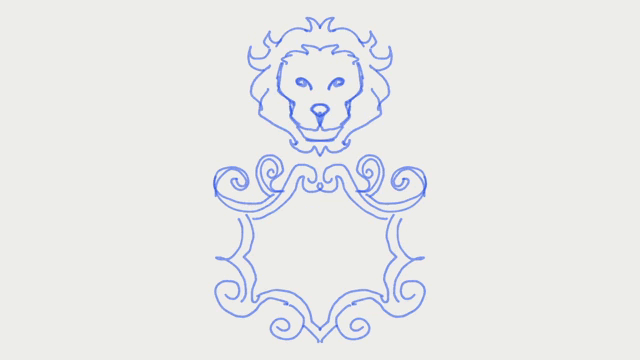
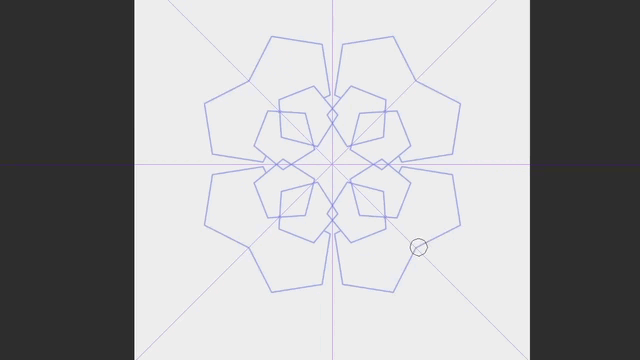
The Symmetrical ruler can be useful to design logos, symmetrical drawings, playing cards, patterns, architectural ornaments and more. Also you can use it for sketching, inking or to add color. For this tutorial we are going to see the settings used for the design below.
But you can use this feature and settings in any kind of project for comics, flat design logos or illustrations with blending brushes.
4.1 Setting up Line symmetry
You can use the Symmetrical ruler in any part of the canvas. Just make sure to have enough space in both sides to reflect the image.
But if you want to make a perfect symmetrical image you should probably start with a square canvas of one or two thousand pixels. Also, as we have seen so far it is recommended to create a Vector layer for lines.
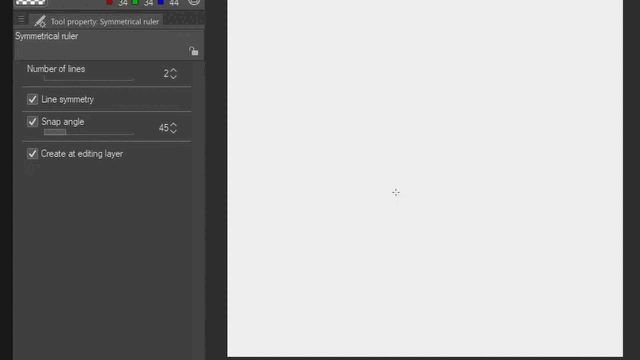
Then select the Symmetrical ruler sub tool. Keep the number of lines set to 2 and turn on Snap angle to 45 degrees and make sure that “Line symmetry” is also turn on in the Tool property palette.
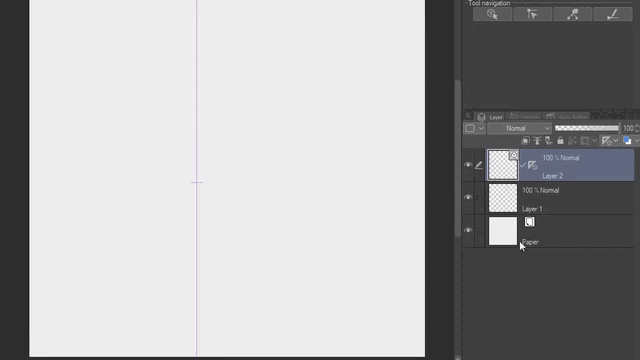
Now click and drag to see the direction of the ruler. Let’s place it in an angle of 90 somewhere the center.
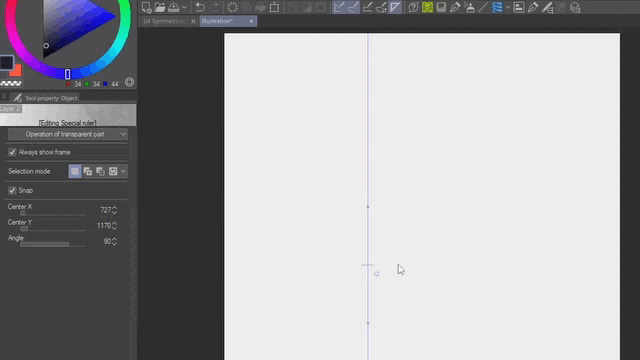
With the Object tool select the ruler icon in the Layer palette and then click over the ruler in the canvas. You will see the handles when the ruler is selected.
In order to place the rulers in the center you can use the values on the Tool property palette.
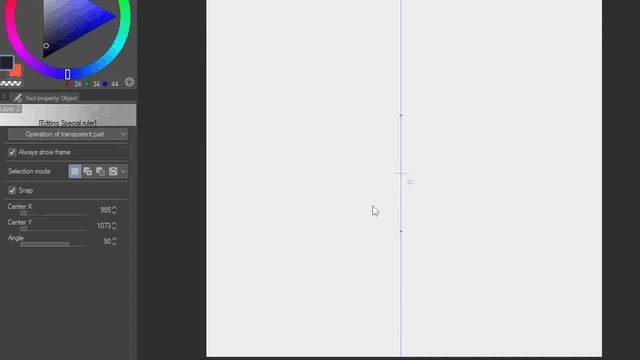
But a faster method that works in any canvas size is to use the Align/Distribute palette. Set the Alignment base to Canvas and click over the Align horizontal and vertical centers.
IMPORTANT: The setup we just saw is to create mirrored images. If you want to create images that are opposite like those in playing cards make sure to turn off the Line symmetry check box in the Tool property palette.
4.2 Drawing and Filling with color
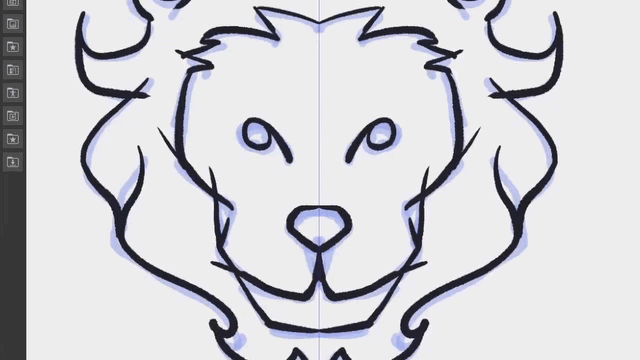
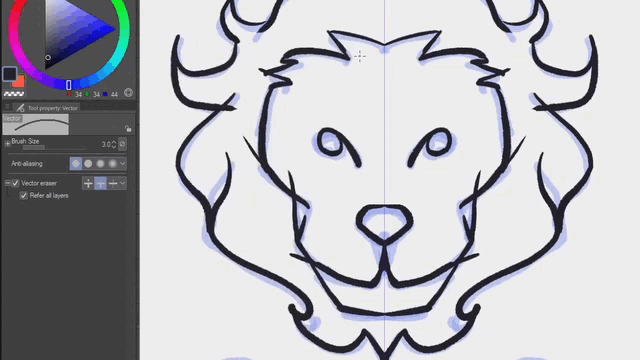
Now you can choose any brush, color or size and start drawing at any side in the Vector layer. Anything you draw will automatically appear in the other side like a mirror. For example in the drawing below I start drawing the outline on the right side and the inner lines on the left side.
If you need assistance with your drawing you can setup and add a basic or special ruler. Just make sure to draw in the side where the second ruler is placed.
You can also fill closed lines with the Fill tool. First change the visibility of the ruler to Show in All layers or Same Folder if you group the layers. Then select or create a Raster Layer below to use the Fill tool.
Select the Fill tool and make sure that has Refer multiple to All layers or Reference layers in the Tool property palette. If you select Reference layer make sure to set the vector layer as Reference with the lighthouse icon in the Layer palette.
Then you can start clicking and filling closed lines and shapes at both sides with different colors.

If you want to learn more about Reference layers and Fill tool you can also check:
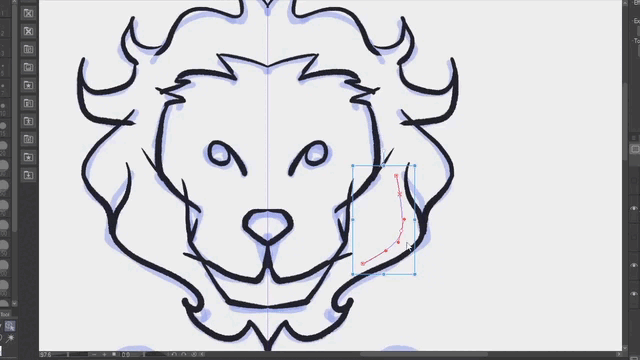
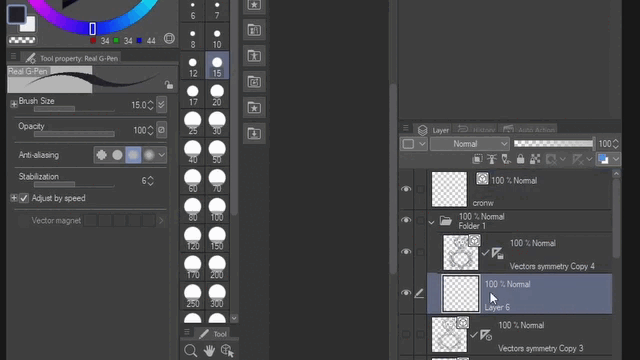
4.3 Vector eraser and Correct line (Enable snapping)
Let’s say you want to use the Vector eraser for intersections while using the Symmetrical ruler. If you have the default settings it will only delete the lines in one side.
In order to erase lines at both sides you need to open the Sub Tool detail palette from the wrench icon. Then choose Correction and click on the :Enable snapping: check box. You can also make the option visible in the Tool property palette if you like as we saw earlier in this tutorial.
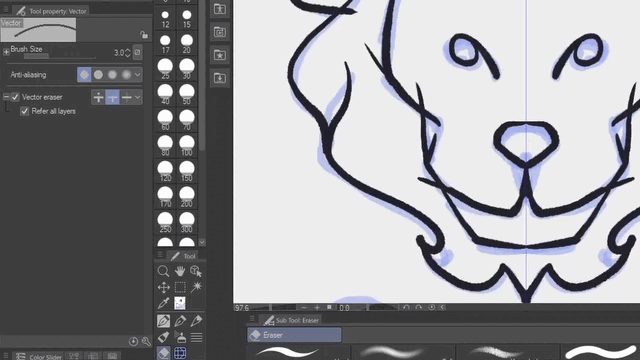
Now you can use the Vector eraser and delete lines in both sides at the same time.
You can also use some of the Correct line sub tools like Pinch vector line, Adjust line width and Redraw vector line. Just remember to Enable snapping as we just saw above.
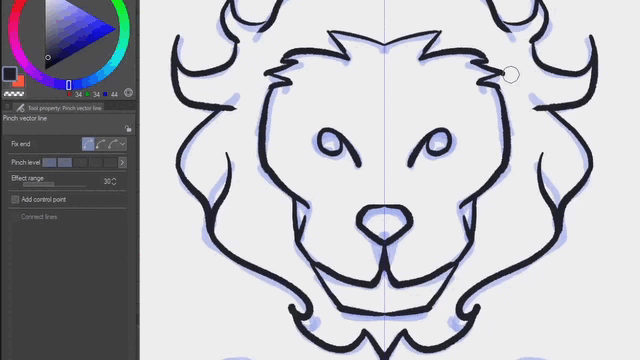
NOTE: If you want to use other sub tools with Raster or Vector layers make sure that Enable snapping or Snap to Symmetry ruler is available. For example you can create Selection areas, Liquify (raster only), Figure shapes, Lasso fill (raster only) and more.
Here you can see all these features in use and some steps of the process in a short time-lapse.
4.4 Number of Lines
You can also increase the Number of Lines to the maximum of 16 in the Tool property palette. This will allow you to quickly draw abstract colorful geometric patterns with any brush, size or color.
You can also try lower numbers like 8 and use Figure shapes with Aspect Type specified by ratio in 1 by 1 to get interesting mirrored shapes. If you hold SHIFT you can restrict the angles of the shapes.
Then you can use the Snap to symmetry ruler feature and play with the Pinch Vector sub-tool to modify the lines and the Fill tool to add some color to the geometric design.
Finally, let’s say you need a diagram for the RGB or CMYK colors. You can set the Number of lines to 3 and click over the line of the ruler holding SHIFT to create a perfect circle which will be mirrored in the 3 areas of the canvas. Then Turn off Snap to ruler or hide the ruler and Fill the diagram with colors.
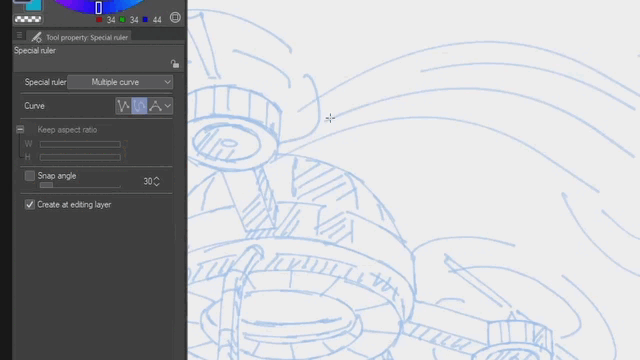
5. Special Rulers
You can find six Special Rulers from the Tool property drop menu. We are not going to count Guide because it has its own Sub-tool and is not that special as the others.
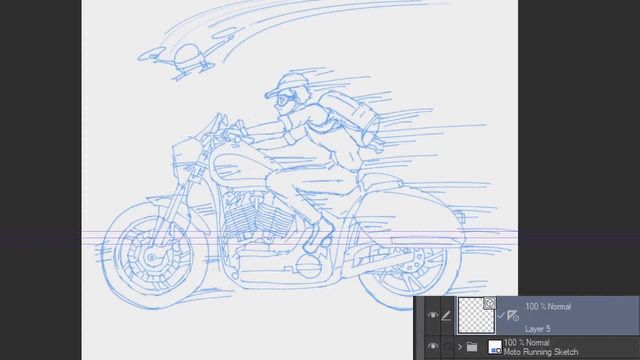
These rulers are specially useful when you want to draw movement effects in comics or illustrations. But you can also use them in other projects. Let’s take a quick look to the six rulers.
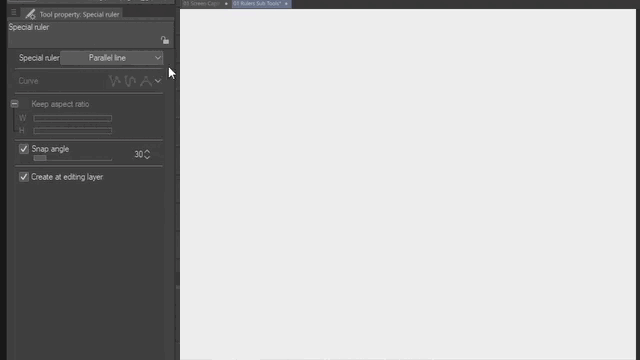
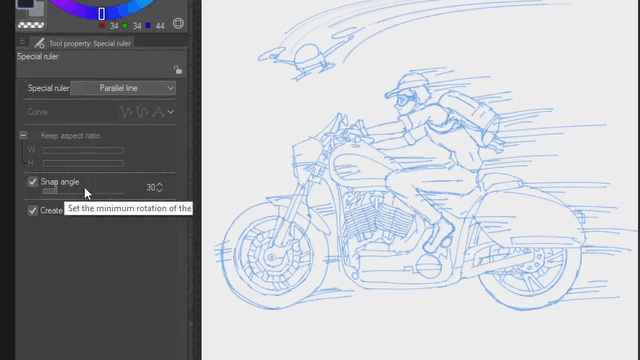
5.1 Parallel line
The Parallel line is very similar to the Linear ruler with the main difference that it will allow you to draw following the direction of the ruler in all the canvas creating parallel lines.
To create a vertical or horizontal Parallel line ruler make sure to keep the Snap angle option turn on with a value of 45 or 30 degree at the Tool property palette. Then click and drag on the canvas to define the direction of the ruler. If you just click once it will create a horizontal ruler.
If you need to adjust the angle later select the ruler with the Object tool and change the number of the angle in the Tool property palette. Or use the handles on the canvas.
Then you can draw multiple parallel straight lines with different brushes, colors and size.
Remember that you can change the angle before or after the creation of the ruler accordingly to the needs of the image.
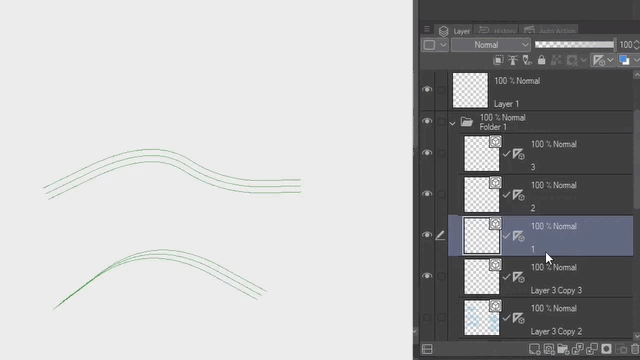
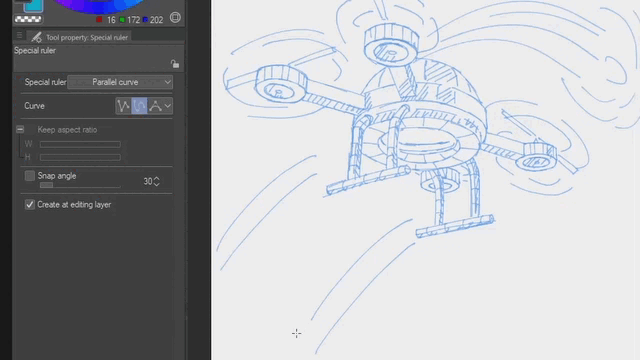
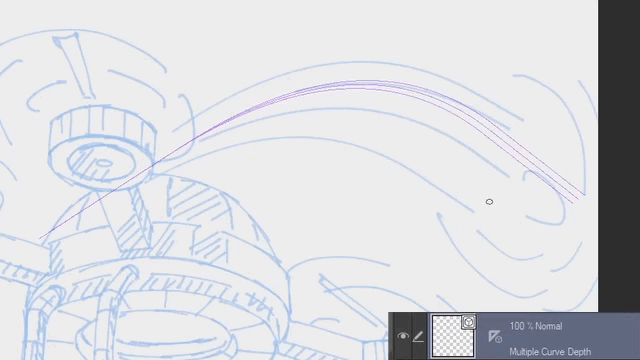
5.2 Parallel curve & Multiple curve
Now the Parallel curve and Multiple curve ruler can be useful when you need to show movement with curve lines. You can select three types of curves Straight, Spline and Quadratic Bezier. I prefer Spline to control the points but you can try them by your own and see which one do you prefer.
You will need to click one time to create a starting point. Then move the cursor and click again to create a curve and add as many points as you want. Once you have done press Enter or double click on the canvas.
If you need to make adjustment or edit the ruler use the Object tool as we saw in the first part of the tutorial.
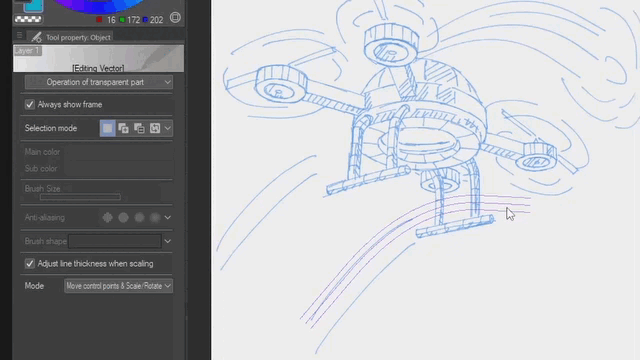
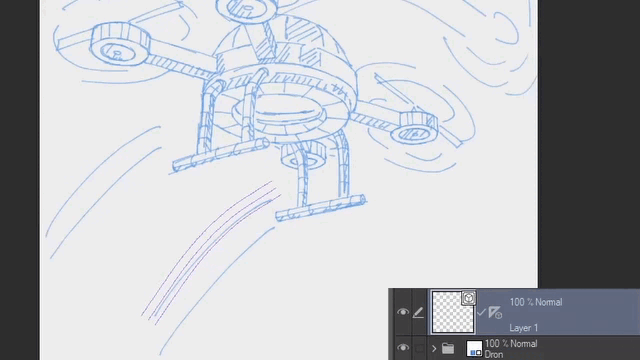
Then as before use any brush to draw or paint lines following the direction and shape of the parallel curve ruler.
The Multiple curve ruler is similar to the Parallel curve ruler but with an extra handle that will allows us to create the illusion of depth.
Create the ruler in the same way we did with the Parallel curve ruler and select it with the object tool. Then move the circle from the handle to adjust the effect of depth. I recommended you to move the control points to cover all the area in the canvas where you want to use this ruler.
Then as usual draw with any brush over the ruler trying to create the illusion of depth in your image. You can use this ruler with fast moving objects.
You can also combine the ruler with other special rulers such as the Parallel line to get mixed movement effects.
IMPORTANT: If you draw to far away from the ruler you may find some particular behaviors. For example with the Parallel curve you may notice that lines outside or above gets rounded while lines inside or below gets close and sharper edges. In contrast as long as you don’t move the extra handle in the Multiple ruler you can draw the same shape all over the canvas.
But if you used the extra handle to create the illusion of depth you probably will have problems following the ruler if you draw above or outside.
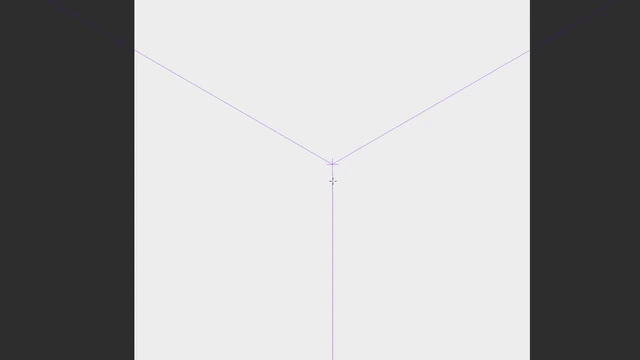
5.3 Radial line & curve
Both rulers Radial line and curve will allow you to draw lines that converge at a center point. This will focus the attention at the subject or object placed at the center where all the lines encounter. In few words they will help you to create focal points.
First select the layer where you want to place the ruler and from the Tool property palette select Radial line. Then click anywhere on the canvas where you want to place the focus of attention and move it with the Object tool if necessary.
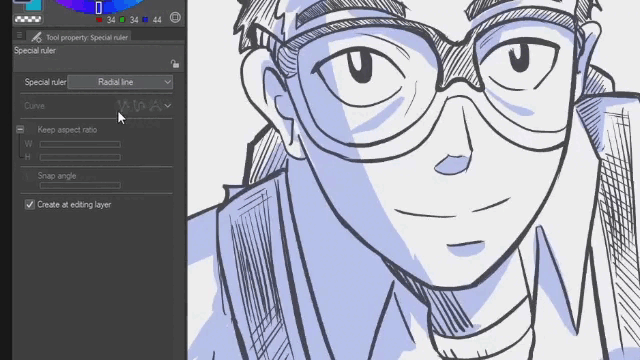
Then use any brush, color or size to start drawing and painting following the Radial line ruler.
Now for the Radial curve you will need to create various points like we did for previous curve rulers. Also, it is a good idea to cover all the area in the canvas where you plan to use this dynamic effect.

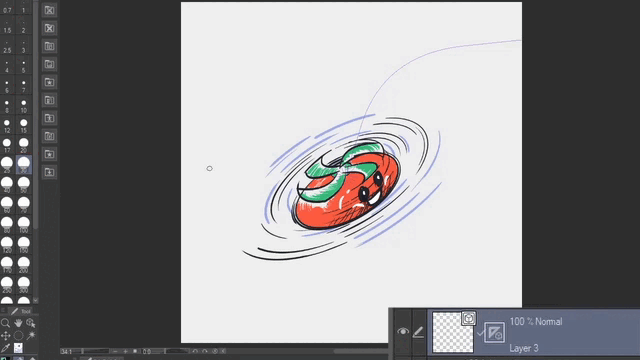
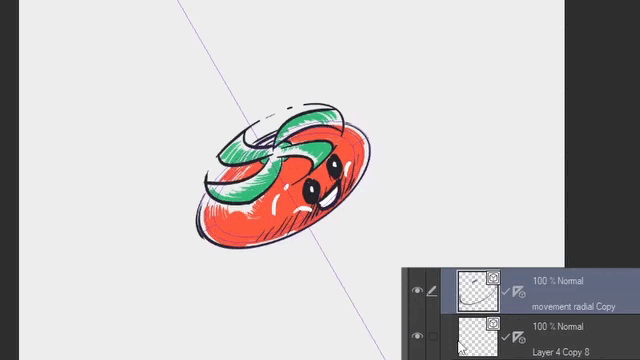
This effect can be practical for elliptical moving subjects such as sport-balls, energy and flying tomatoes.
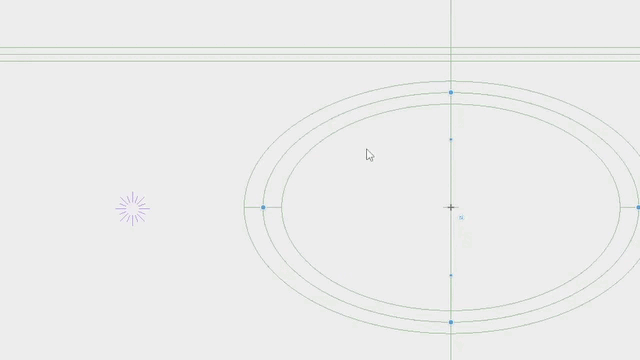
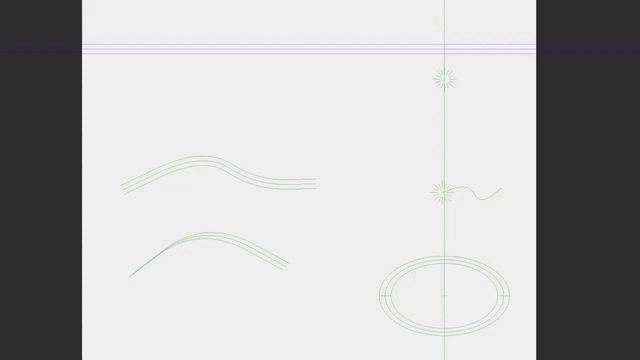
5.4 Concentric circle
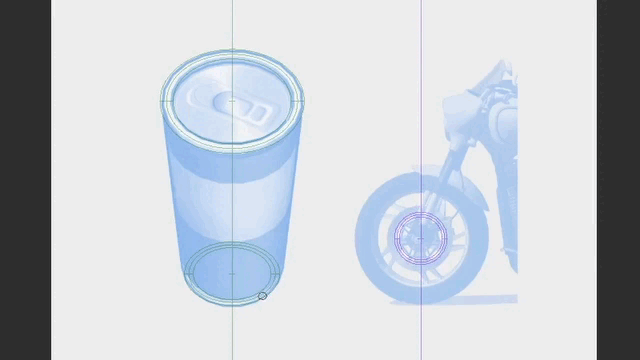
Now the Concentric circle ruler is like a super-powerful Elliptical ruler that allows you to draw multiple circles around a center point.
It should work fine for any solid object or subject that include circles or ellipses in it like wheels, cups, plates, round shields, vinyl discs, etc.
But we are going to see that it could be really helpful to draw traces of elliptical movement such as in propellers, rain drops over water or flying tomatoes.
First select the layer where you want to use the ruler and from the Tool property palette select Special ruler > Concentric circle. Then click and drag to create the ruler.
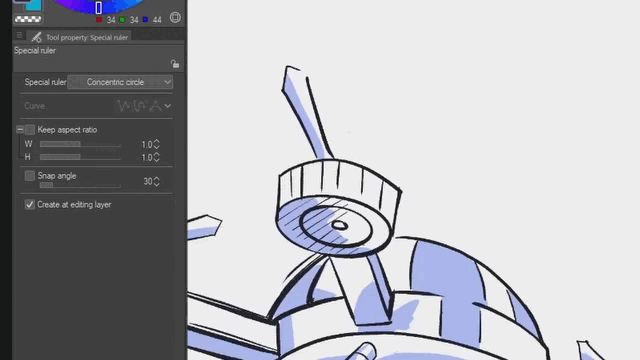
Now with the Object tool select the ruler to adjust the size and circular or elliptical shape with the four big blue control points.

To adjust the angle change the value in the Tool property palette or use the two smaller handles up and down of the center line.
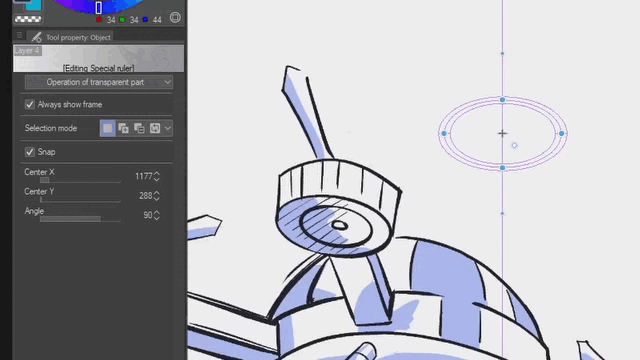
If you want to move the ruler around click over the ellipse where there are not control points and drag the ruler to its new position.
If you click and drag the ruler from the center this will move following the line that pass through the middle of the center.
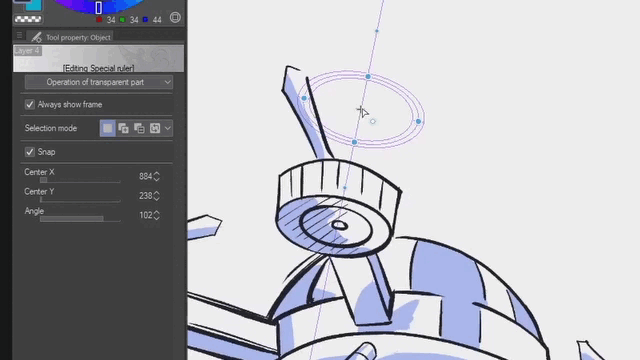
Then choose the brush that you want and draw incomplete circles around the subject in movement. Remember that you can adjust the ruler as necessary.
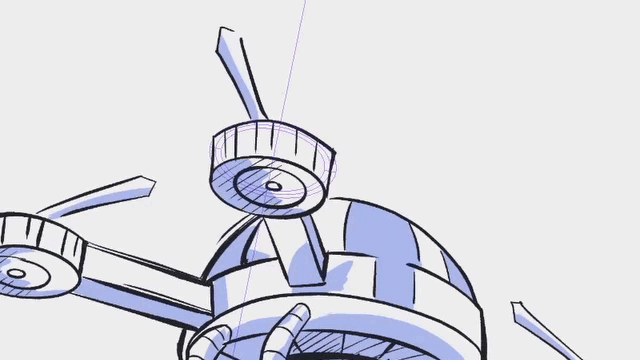
You can also setup multiple Concentric rulers and draw more organic and elliptical subjects like in the example below.
6. Rulers for Isometric drawing-perspective
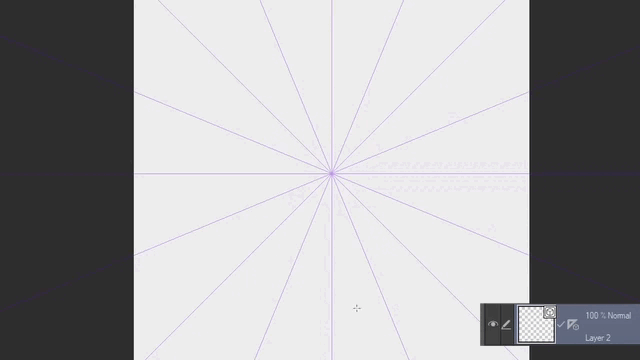
In order to create perfect isometric designs first select the Parallel line ruler and set the Snap angle value to 30.
Then create three parallel rulers converging at the center. Set the first one to 30, the second to 150 and the last one to 90. You can also use inverted values like -30 or -150.
Finally, choose the brush that you want and start sketching in the active ruler. And remember that you can quickly toggle from one ruler to another with the CTRL+4 keyboard shortcut as we saw in the first part of the tutorial. Then you can draw over the base with clean straight lines.
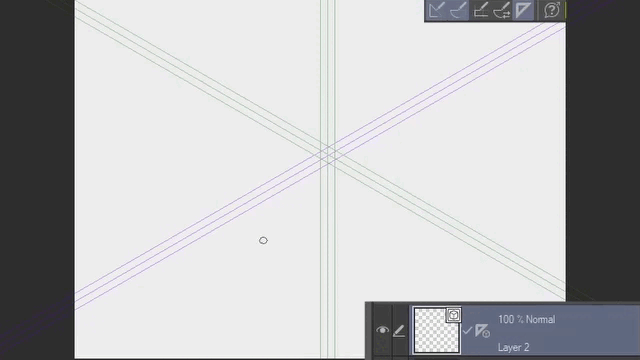
NOTE: If you want to draw lines in other angles you can use a Linear ruler with the angle that you want or need. For isometric drawing usually an angle of 45 works well with the 30 and 150 we are using for this example.
Once you get practice you can start making more detail drawings. Here you can see a time-lapse for an isometric building. Also it is a good idea to assign the toggle shortcut to just one letter or number like “4” or use the icon in the Command bar. That way you can change from one ruler to another in a faster way.

Summary and Conclusion
In summary, you can use one or multiple Rulers or Special rulers combined in different projects for comic, storyboards, comics and illustrations. You can easily make logos or shields with the Symmetrical ruler, Isometric drawings with Parallel rulers. And create the sense of movement with different types of Special rulers.
Remember that you can easily turn off/on the Snap to ruler feature with the shortcuts or from the Command and toggle or jump between different Special rulers.
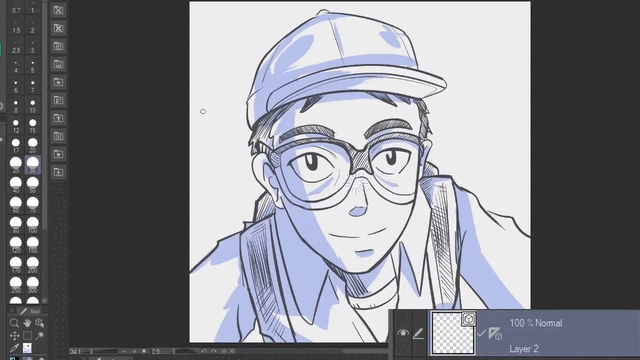
Here we can see the images made with the assistance of the rulers in gray.
And here you can see the images with some color in a vertical format. Which supposedly will make the frames/panels easy to read on small vertical screens.
If you want to know what happen next in the story don’t forget to leave a comment below.
So, I hope you have found something useful in this tutorial about using Ruler sub-tools in your designs and illustrations. Feel free to leave a comment or share your thoughts about the subject below. This is Ed saying until the next one.
More tutorials:
Users who liked this post


Comment