
Intro
Hello everyone, today we are going to see some useful text features (new and improved) in Clip Studio Paint version 2.0 that can help you to design book covers, posters, thumbnails, banners, quickly edit text in comics and more.
We will start creating a Font list and then we will duplicate and edit custom Text Sub tools settings for different tasks and projects. Also, we are going to see how to wrap text at frames, work with ligatures and how to select multiple text frames to change the color, font and other properties at the same time or to align and distribute them.
For this tutorial we are going to use a Poster design as a main example but you can apply all these features in any kind of project. So, let’s begin.
NOTE: If you want to learn more about all the settings for text and balloons you can also check the official series from Clip Studio:
1. Create Font List
Whether if you have a large collection of fonts and spend a lot of time scrolling or you just want to group fonts for different projects. You can use multiple font list to easily select or change the font to the one that you need.
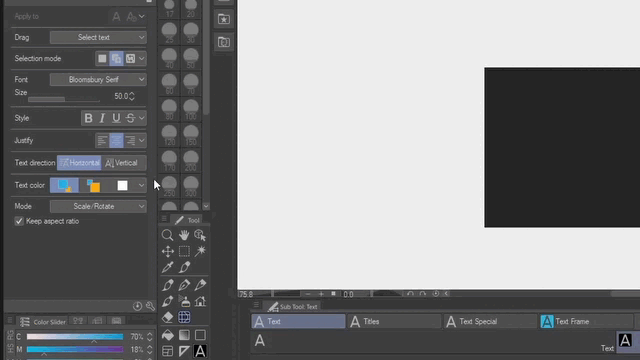
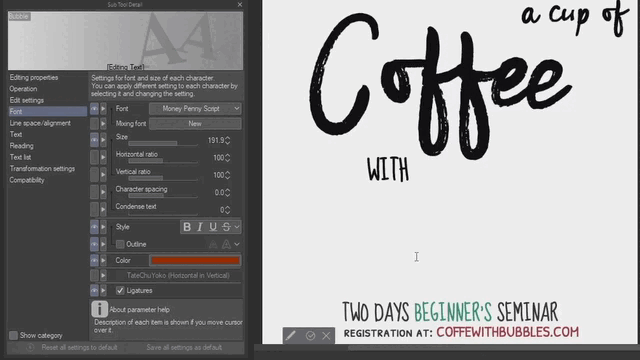
To create and “Font list” select the Text tool or use the shortcut “t”. Then click on the Font drop menu in the Tool property palette and select the Gear (Cog wheel) icon to Open the Font list Settings Dialog.
Click on the “A+” icon to create a new list and put a name to the list. These lists are show in alphanumerical order so you can use numbers from 1 to 10 or letters like A, B, C to place the lists you use most at the top.
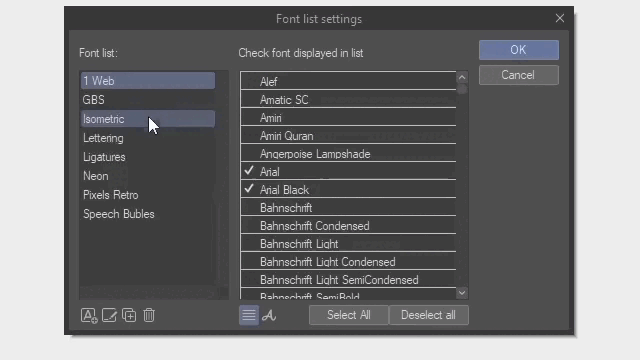
Then you can click on the displayed fonts on the right that you want to add to the list and click ok. Also, if you click on the “A” icon you will see the names displayed in that specific font.
Now, every time you want to use the list you have created expand the Font drop menu in the Tool property palette and click on the Drop menu (All fonts ) next to the gear (cog wheel) icon.
Here we can quickly change the font for the text that we are going to use in the poster design.
2. Custom Text Sub Tools
If you constantly jump between projects and don’t want to change multiple text properties every time you need a different font size, color, style or so. You can have more than one Sub tool for text in the same way that you can duplicate, create or import Sub tools for brushes, selections, fill, balloons, etc.
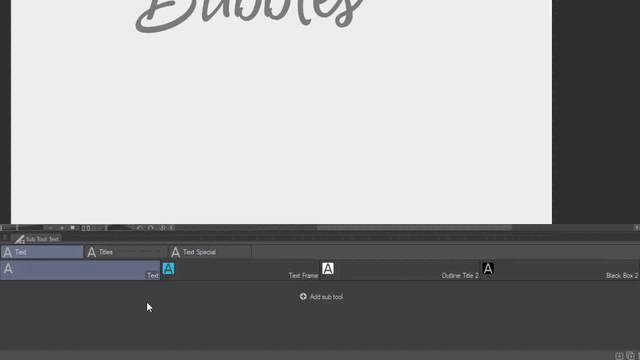
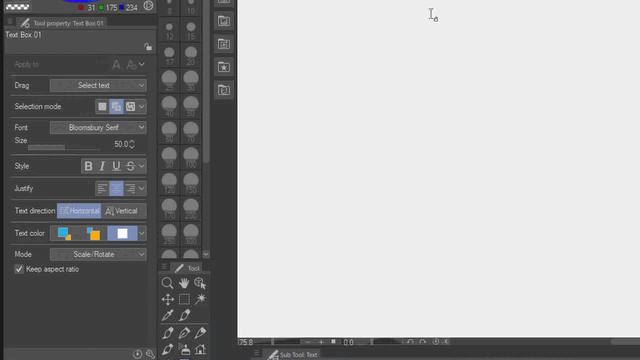
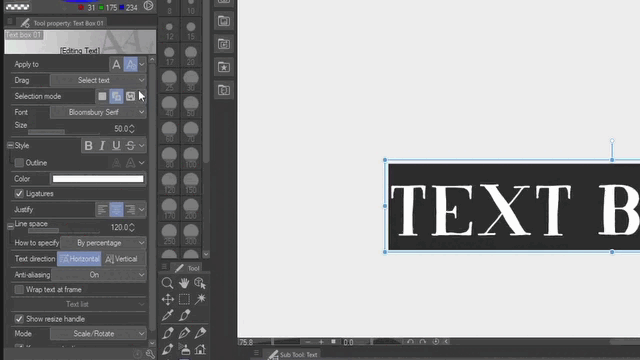
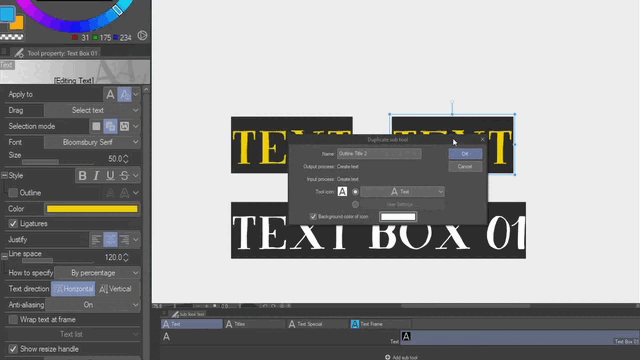
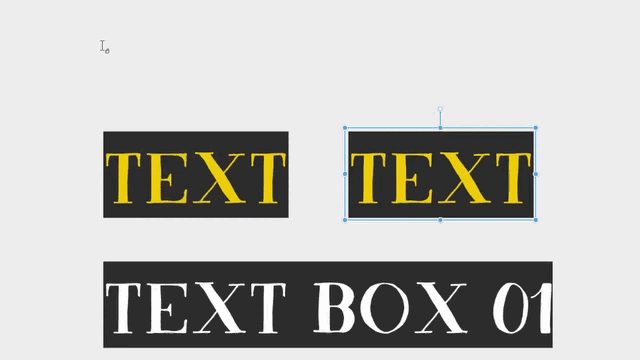
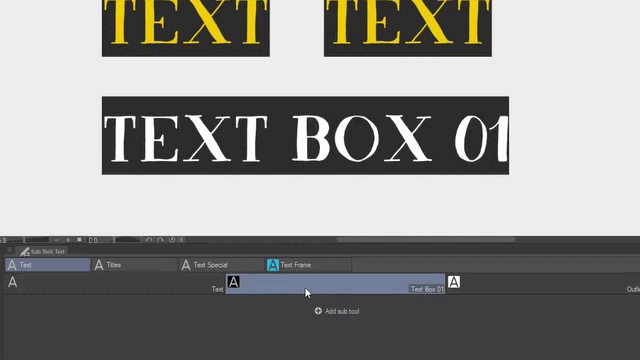
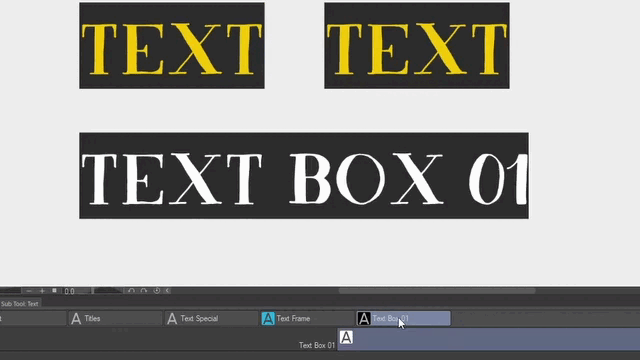
First, right click over the Text sub tool and choose Duplicate. Name the new sub tool for example “Text Box 01” and click OK.
2.1 Text Box - Background & Color
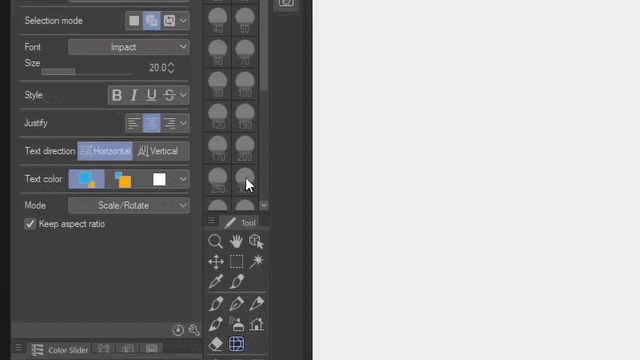
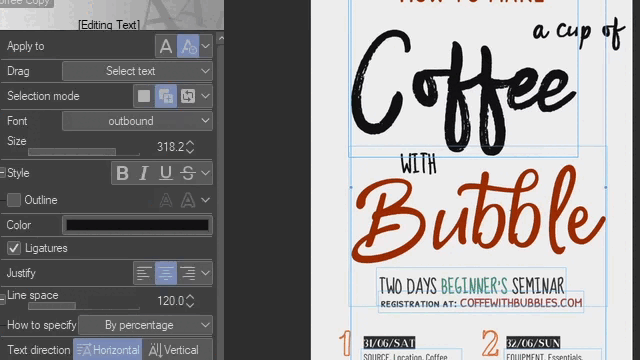
Now, before clicking on the canvas you will see the essentials properties for text on the Tool property palette. Here you can customize the options that you want for the “Text Box 01” like the type of font, size or color.
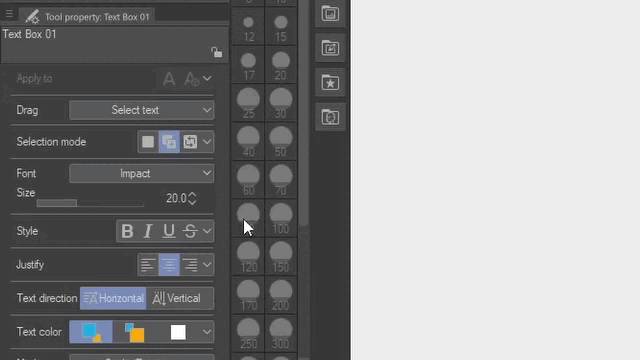
Now for the text color you can decide if you want to use the main or sub color or assign a specific color to use. Let’s choose Select user color for the custom “Text Box 01”. So, it doesn’t matter what color you have in the main or sub color palette, the text color will always be the same for this custom text sub tool. I am going to pick a middle gray so it can be visible on dark and light backgrounds.
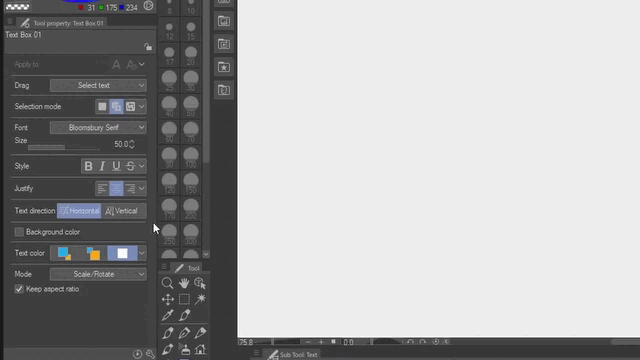
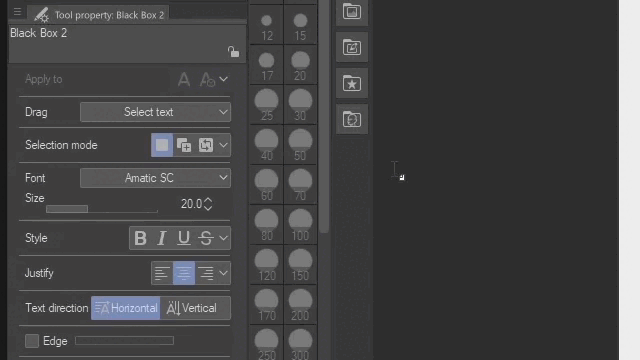
You can also add more settings to the Tool Property palette. Go to Window and select Sub Tool Detail or click in the wrench icon in the Tool Property palette. Then make the options visible with the eye icon next to the name. For this example let’s add Background color from Sub Tool Detail > Text.
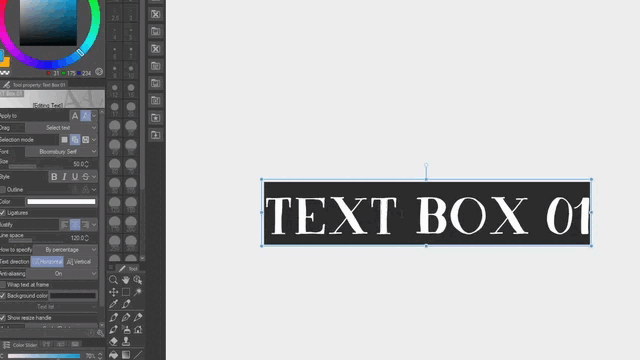
Click on the check box next to Background color and select the color for the background. Then you can click on the canvas to start typing your “text box”. Once you are done click on the ok/check icon.
IMPORTANT: Once you have created the text in the canvas the option “Apply to” will be available on the Tool property. By default it will change to “Selected text” and you will see less or more settings than before.
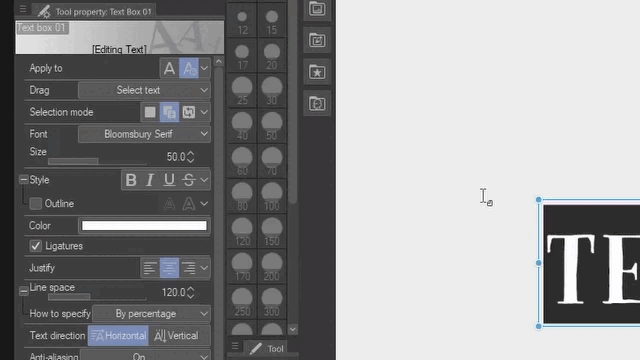
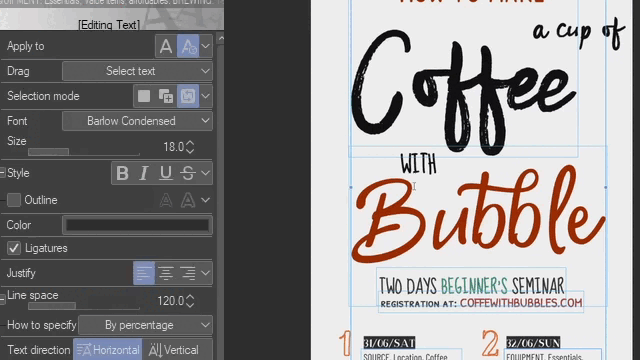
You can customize your settings in the same way we did earlier from the Sub Tool detail palette, adding the options you use most when editing text. In my case the “Color” setting under the “Font” category.
Then you can quickly try different hues and values in design projects such as posters, banners, thumbnails , comics and so on. If you work in similar projects I recommend you to keep “Color” in your Tool property settings.
NOTE: You can also double click with the text tool over the text frames and select a different color for specific letters or words.
You can also select Apply to New only. So, every-time you click on the canvas it will create a new text layer. This can be helpful if you have a text selected and don’t want to repeat the same settings from the selected text. Specially if you are using another custom Text Sub Tool.
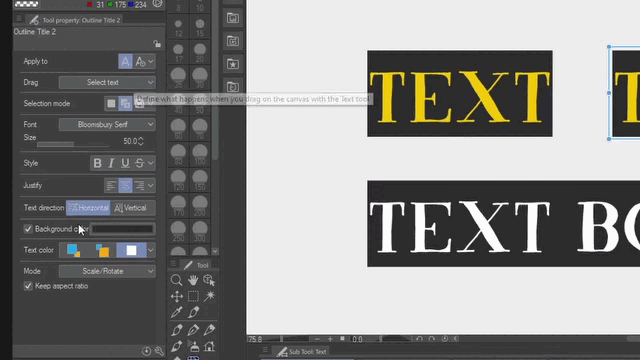
2.2 Outline - Edge Text
If you duplicate a text Sub Tool to make a new one, try not to have text layers selected but if you do have one or more text selected. Choose Apply to “New only” (as we saw recently) in the Tool property palette before any customization of the settings (you can change it later).
For this example let’s make visible “Outline”, “Edge” and “Edge color” from Sub Tool detail > Font and Text respectively. You can also turn off and hide “Background color” to keep the palette clean.
Select the font and size and click the check box next to Outline and Edge. You can also increase the edge size.
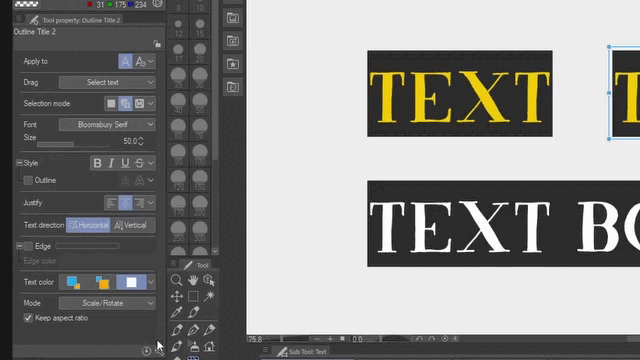
Use the same color for the text and edge color. And remember to increase the size of the edge to make the outline more visible if necessary.
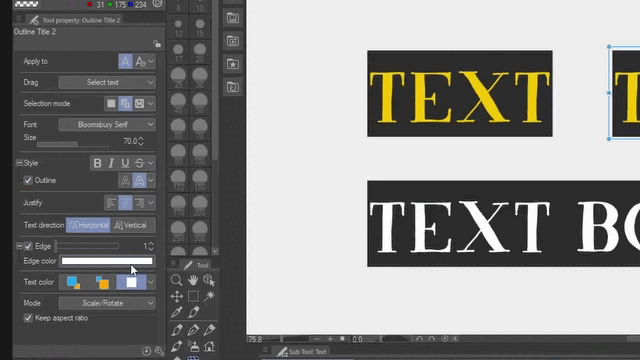
Once you have customize all the settings you can click on the canvas and start typing your “Outline Title” and click OK.
Then as we saw earlier you can choose Apply to “New only” or “Selected Text”. It all will depends of what you want or need to do in that specific moment. In general if you are customizing a new Text Sub Tool use “New only”. If you want to change different properties to an already created text in the canvas then choose “Selected text”.
NOTE: Also, remember you can use “New only” in order to not repeat the same settings from a selected text. Specially if you are using a different custom Text Sub Tool.
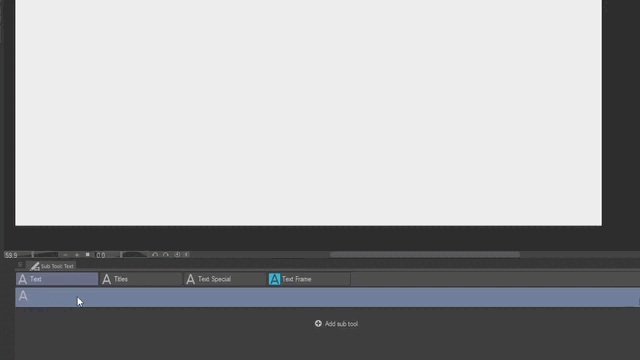
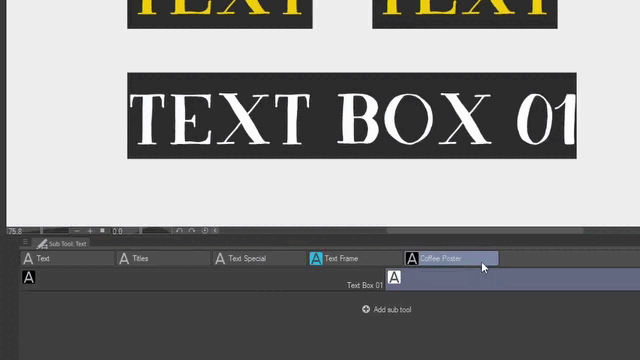
2.3 Organize Text Sub Tools
You can create multiple custom Text sub tools for different projects of design, lettering, comics and more. And you can group them in tabs dragging them in the Sub Tool palette.
Click, drag and release when you see the red border appears over the location where you are going to place the sub tool.
If yo want to change the name of one group right-click over the tab name and select “Sub tool group settings”. Rename the group and press the OK button.
You can also move the tabs around to place them in the order that you want or need. Just click, drag and release when you see the red border appears.
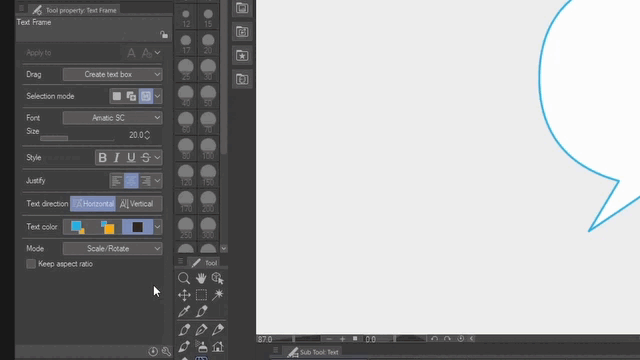
3. Wrap text at frame
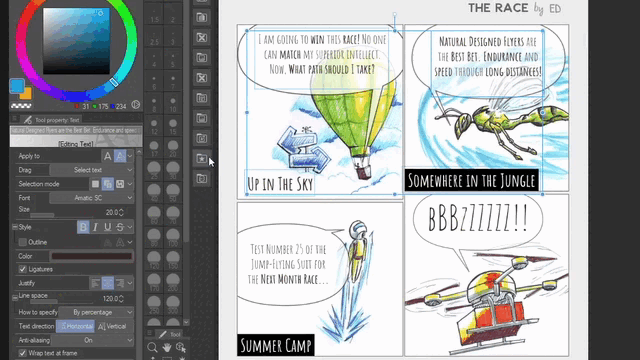
If you work with paragraphs or speech bubbles in comics I recommend you to add “Wrap text at frame” to your Tool Property palette from Sub Tool detail > Text.
To create a text frame or box. Click on the check box next to Wrap text in frame in the Tool Property palette. Now click on the canvas (or balloon) and start typing or copying your text in the default box size. Then you can drag the controllers to resize the box and the text will adapt to the dimensions of the bounding box.
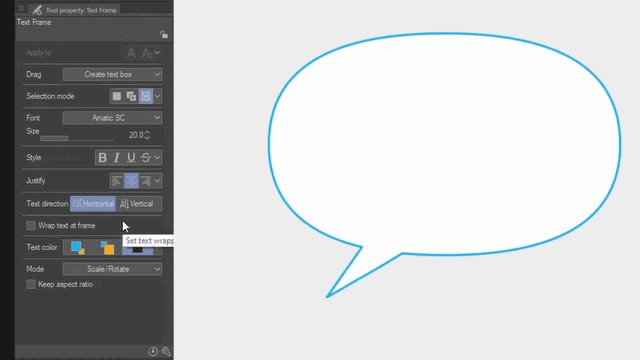
You can also decide the size of the box by dragging the mouse over the canvas before creating the text box. To do so, make sure that on the Tool property palette the “Drag” option is on “Create text box”.
This option can save you a lot of time when placing text. Without it you will have to manually press Intro and Delete to divide the lines and organize the words inside the text boxes.
4. Installing & Using fonts with Ligatures
Now from version 2.0 Clip Studio Paint you can use ligatures with fonts that support these combinations on characters or letters.
The first step is to find and install fonts that support ligatures. You can install them directly from Clip Studio Paint from the Font drop menu in the Tool property palette. Just click on Add font from file and select the fonts you want to install.
Now you can find free fonts from Google fonts or buy them from type designers. In general they come under categories such as script, brush or handwriting.
In the link below you can find a lot of handwriting fonts but you need to explore and try them to see which one support ligatures. All of them are licensed under the Open Font License.
In my experience paid fonts are more likely to support different kind of combinations in double letters, vocals and more.
In addition when you buy fonts you can get bonus material like complementary typefaces or “Swashes Fonts”.
The text tool support ligatures by default. But if you want to turn this option off you can do it from the Sub Tool Detail > Font > Ligatures. Also, it is a good idea to add this option to the Tool property palette if you plan to work with this feature.
In addition with the Text tool you can double click and select just one combination of characters inside a text frame and turn on/off the ligatures for those specific letters.
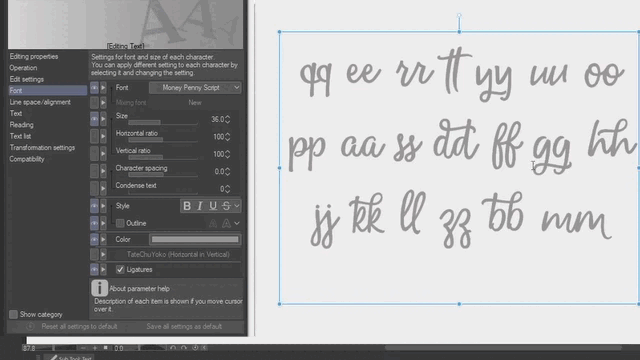
Now you just need to explore the different combinations of characters and use them in your designs, illustrations or comics.
5. Selecting multiple text boxes-frames
Selecting multiple boxes is by far one of my favorite new text features. Whether you are working on design projects or comic speeches bubbles it will save you a lot of time.
NOTE: Although, you can use the Object tool or the Layer palette to select text. In this section We are going to see the 2 main options for selecting text using exclusively the Text tool.
5.1 Drag to Select Text
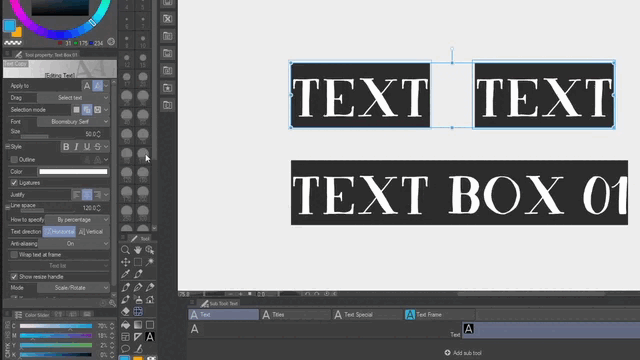
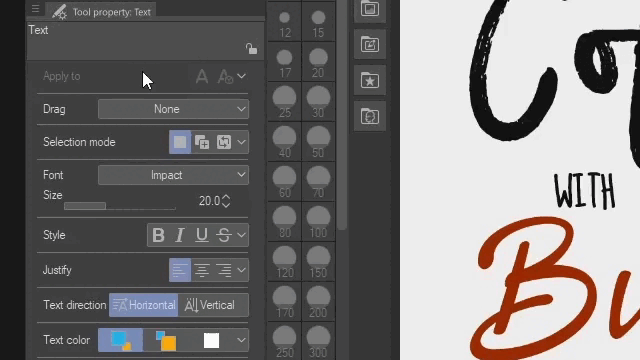
With the Text tool selected go to the Tool property palette and on the Drag drop menu choose “Select text”.
Now, let’s say you want to select all the text in your canvas and change all the colors to white. To place the text over a dark background.
Click and drag the mouse all over your canvas document. Then all the text layers will be selected showing you the Resize handles around them.
Now you can simple select the new color that you want. For example white or light colors to place the whole text over a dark background.
With this selection method it doesn’t matter if you have multiple folders, vector, pixels, textures, correction layers or balloons in the Layer palette. It will only select text.
And then you can change the font, size, color or any other font/text setting. This feature can be particularly useful to edit comic speech bubbles.
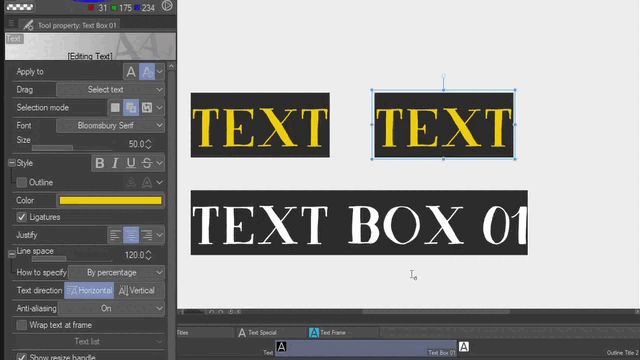
5.2 Add to and Toggle Selection
Now let’s say you just want to select two or three text frames. Or add one more to an existing selection. You can go to the Tool property palette and on the Selection mode drop menu choose “Add to selection” or “Toggle selection”.
With both “Add to selection” and “Toggle selection” you can click over a text frame that is not part of the selection to add it to the group of selected frames/boxes.
But with “Add to selection” if you click over a selected box all the others will be automatically deselected.
In a different way with “Toggle selection” if you click over a selected box/frame it will deselect the one you have click on.
If you double click over a selected text frame/box you will enter to the edit mode for that specific text.

You can apply these selection techniques to improve and speed up your workflow in projects where you need to use text for designs, comics, and more.
6. Align and Distribute Text
Align/Distribute is another new feature in Clip Studio version 2 that you can use with text frames/boxes. You can show the palette from Window > Align/Distribute.
You can also learn more about the Align/Distribute palette from the official tutorial or other tips published on Clip Studio Tips:
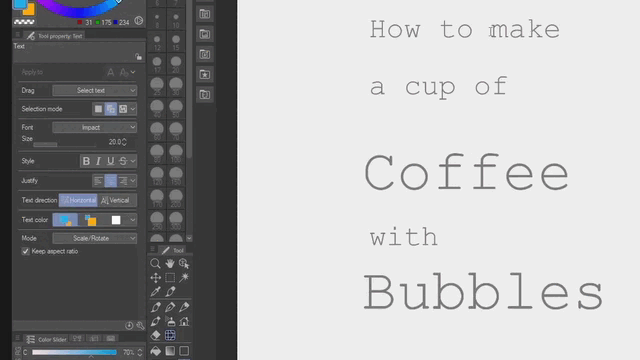
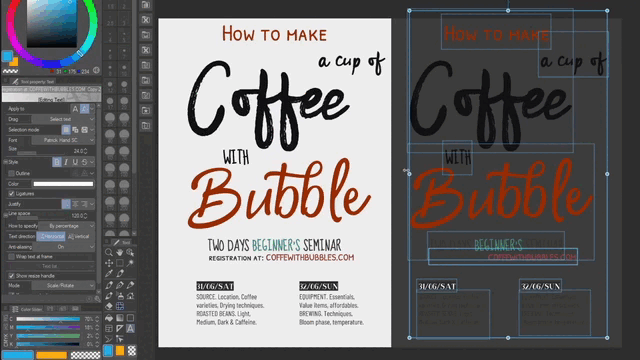
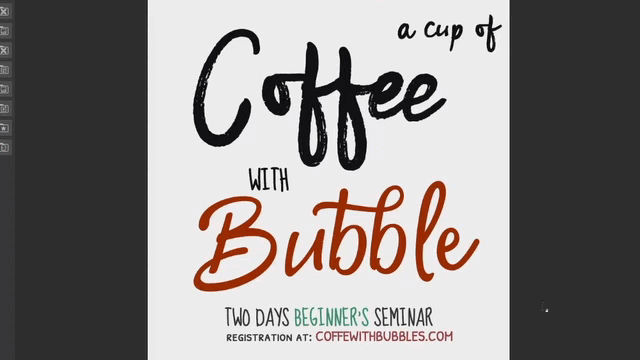
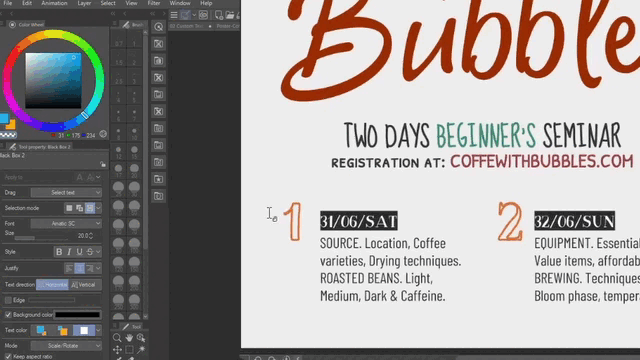
For this tutorial we are going to see how to align and distribute the text in a poster for a Coffee seminar.
First make sure to click on the “Align to text pixels” check box in the Align/Distribute palette. This will allow us to align the pixels from the font and not the bounding box with handles around it.
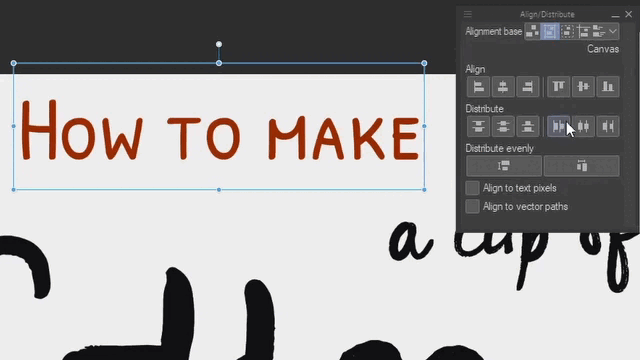
Now you can select the 3 text frames for this example “How to make”, “a cup of” and “Coffee”. And on the Alignment base choose Object and click on the Align to left edges icon.

Then you can deselect “How to make” and click on the Align to right edges icon.
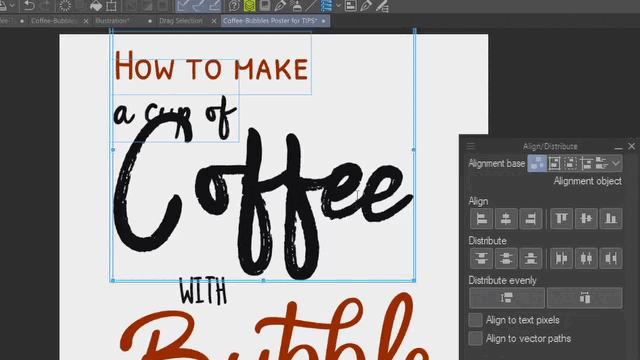
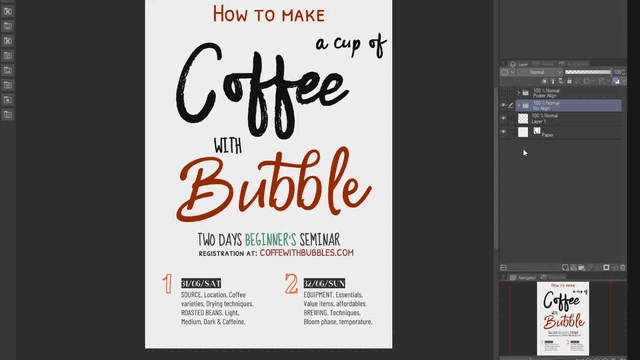
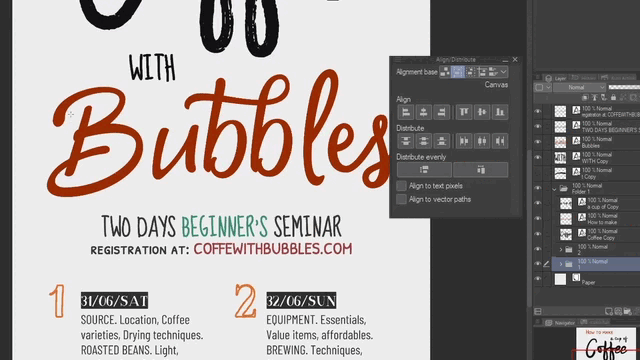
Select the three text frames and Create a folder with the text layer(s) inside. From the menu Layer > Create folder and insert layer inside.
Next, change the Alignment base to Canvas and with the folder selected click on the Align horizontal centers icon. Make sure to select the Folder layer and not the individual text layers.

Using these alignments options you can quickly place main and secondary text frames in your canvas document. Also, it can be really useful when you edit or add text to a box and need to place it at the center again.
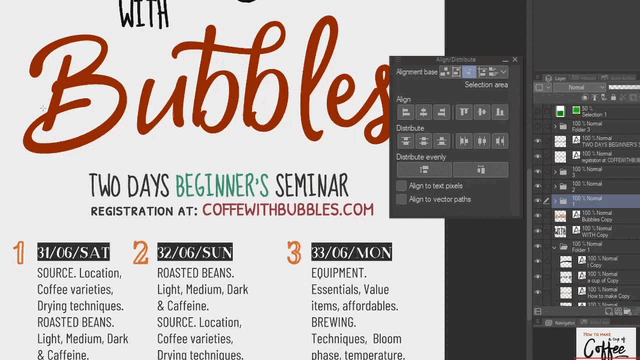
Here is another example for align or distribute text boxes in your document. First you will need to group the text frames inside a folder as we saw earlier.
Then with Selection area tool create a rectangle selection where you want to align the group. Select the first group and on the Alignment base choose “Selection area” and click on the Align left edges icon. You can do the same to align the second group to the right of the selection.
Now if you have three or more groups. You can select the folders (not the individual text frames) and click over the Distribute horizontal spacing icon.
You can also create a selection for example from your frame border and align text boxes with the edges of the frame.
NOTE: If you want to align the background color edges of the custom text box, you will need to turn off Align to text pixels.
And those are just a few examples on how you can use the Align/Distribute palette with text frames. Whether you are working on titles for posters, books, banners or paragraphs with information or any other kind of text.
Conclusion and final details
As we saw you can use all the new and improved features on comic speech bubbles or to design posters. But you can also use these for book covers, banners, thumbnails and so much more.
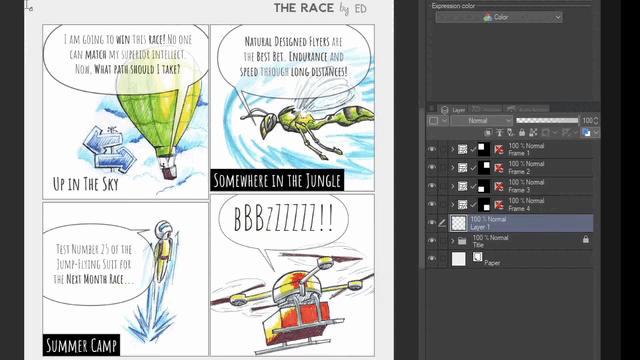
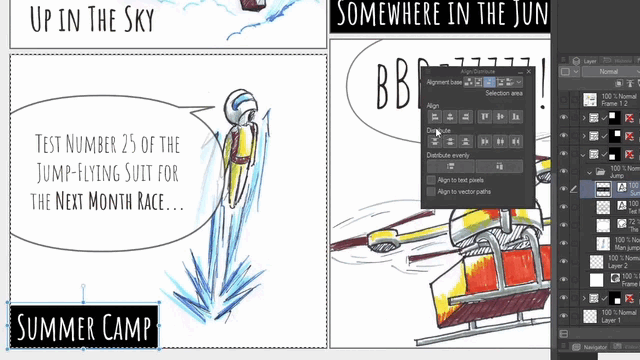
Here we can see four comic frames where some of the features we saw were used. Some of them are custom Text Sub Tools, Wrap text at frame, Align/Distribute and Selecting multiple text boxes.
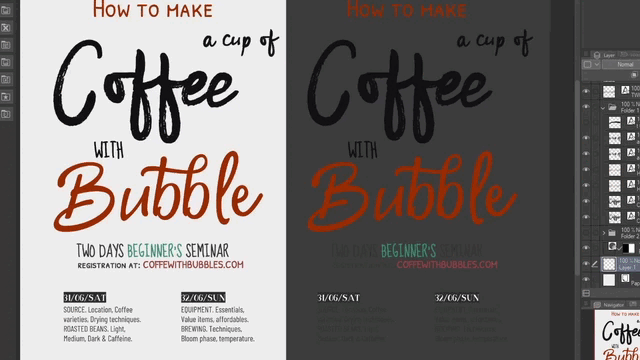
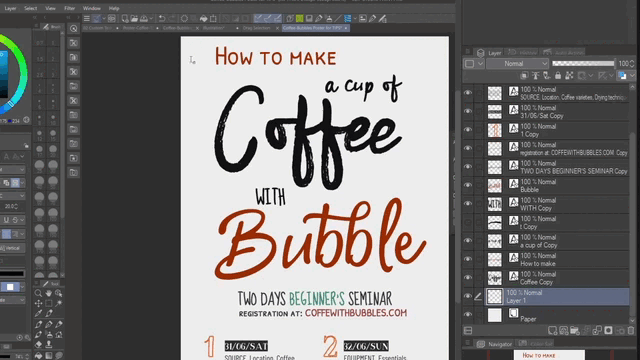
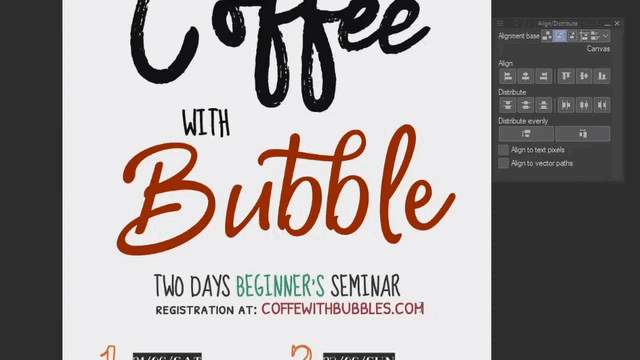
And here is the poster that we use as example to shown all the features in this tutorial including ligatures, font list and more. The first version is text only, the second has more texture and the last has a dark background with light color fonts.
The dark version was quickly made following the steps we saw in “Selecting multiple text boxes-frames”. As for the one with texture you can learn more about it in the first link below along with more tutorials. But in summary I added some paper texture and use brush shapes with texture on the line borders over a light color background.
So, I hope you have found something useful in this tutorial. Feel free to leave a comment or share your thoughts about the subject below. This is Ed saying until the next one.
More tutorials:
Users who liked this post


Comment