
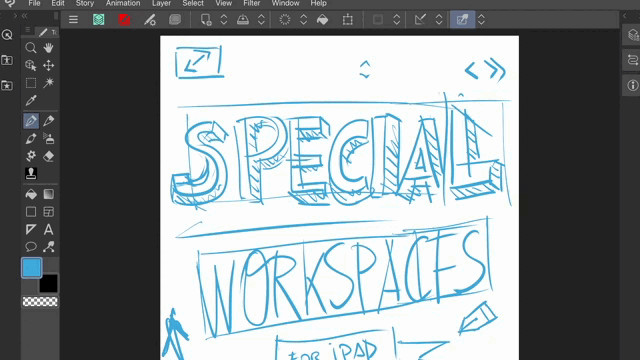
Intro
Hello Everyone, today we are going to see how you can customize you Clip Studio Workspace in your iPad from scratch.
We are going to see how you can change the interface color in Simple and Studio Mode. We will create our own Palette layout from square one with an empty/blank workspace material. Then we are going to customize shortcuts with the Edge Keyboard, Command Bar and use Quick Access with our smartphone screen and more. So, let’s begin.
Simple Mode on iPad
If you are a beginner or just want to sketch on your tablet or iPad you can find all what you need on “Simple” Mode. To load this mode go to the Clip Studio Logo Menu and select Switch to Simple Mode.
Or even faster from the three lines Sandwich menu > Switch to Simple Mode.
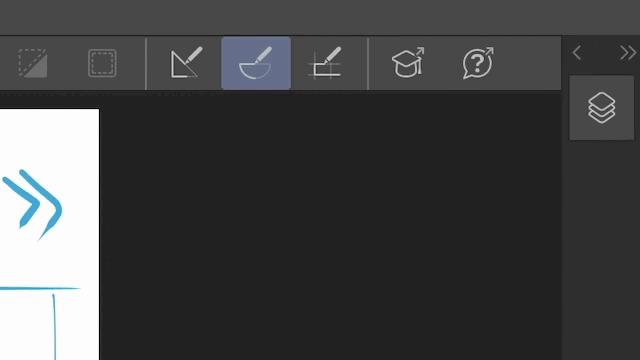
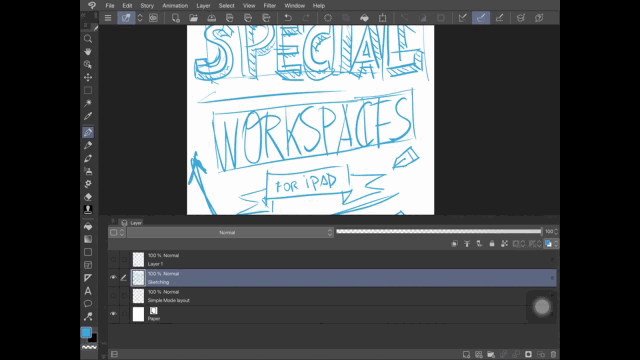
Here you will have all the tools (A) on the left and the Layer palette (B) on the right. At the top you will find the 3 dots menu and command icons (C) to Undo, Redo, Materials, Save your file, and open Clip Studio.
If you need more space you can minimize the Layer palette with the arrow at the bottom of the palette.
Or swipe from the edge to reduce its width to a thinner column.
Now let’s tap over the three dots menu and select Preferences and Help
Here you can Flip the interface layout. Moving the Tools to the Right and the Layer palette to the left.
And you can also turn on and off the Dark mode.
That’s pretty much it. You can choose any brush and freely start sketching without worry about the Tools and Layer palette getting in your way. These will automatically hide if you touch them while drawing.
Once you are done sketching or need more features and palettes you can go to the Studio Mode from the three dots menu and select Switch to Studio Mode.
Studio Mode Interface Preferences
To modify the Interface in Studio Mode you can go to the Clip Studio Logo menu and select Preferences.
Then select the Interface tab from the List on the left to see all the options related.
Under the first Option Color you can change the Interface color between dark or light.
You can also adjust the density of the different shades of gray moving the slider at the right. To get clean and light palettes.
Or a contrasting and dark interface for all your tools and palettes.
You can leave the second option Layout on. This is turn off by default on desktop version of Clip Studio Paint. You should only turn it on if you have a screen tablet that support touch like a Cintiq pen display on a desktop computer. But if you uncheck and tap OK all the layout will back to its default.
Now if you need more space or just want to hide the Bar with information about the Date, time, Battery, etc. Uncheck the option “Show status bar” and tap Ok.
This will give you more space on your tablet or iPad. Just be careful with the Split View menu at the center of the screen. If you bring the menu by mistake just wait around 5 seconds until it hides or disappears.
For the Edge Keyboard. You can decide if you want to Swipe or use a button to bring the virtual edge keyboard to your screen. Or hide it completely in case you are using an external keyboard.
The two last option “Show explanation when tapping icon” and “Use stylus hover on applicable devices” are self explanatory and should not affect to much the look of your workspace and interface. I my opinion you should let them always on.
Note: All these changes are not going to be save if you register the Workspace as material.
Save & Manage WorkSpaces
Default Workspaces
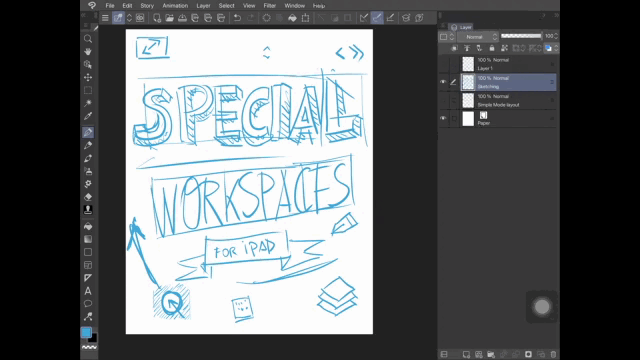
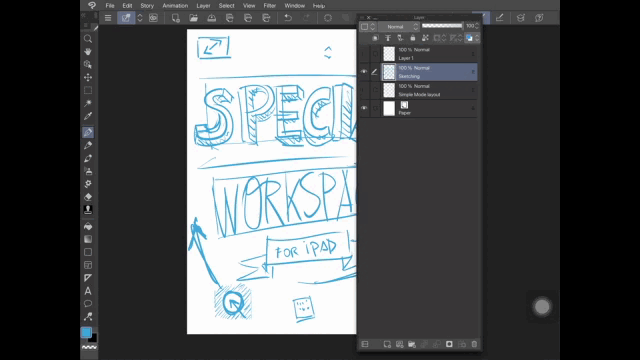
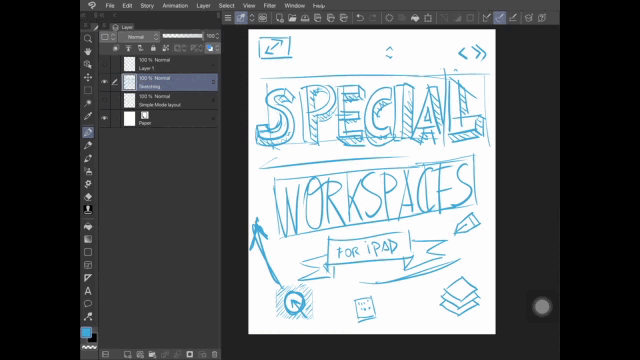
Now here is a current default workspace for iPad with all the Palettes minimize and with default shortcut icons in the Command bar.
You can find three more default Clip Studio Workspaces these are Illustration (A), Comic (B) and By Category (C).
NOTE: For some reason the Default layout shown above is not listed with the other three.
This is the default layout for Illustration (A).
And this is the default palette and Command bar layout for Comic (B).
Finally, here it is the By Category workspace (C).
IMPORTANT: Before continue, it is a good idea to save your workspace either at the beginning or when you finish to customize your workspace. The size of these files are really small so you don’t have to worry about storage on your device or in the cloud. And you can always delete them if you don’t need them anymore.
Save or Register Workspace
So, to save your workspace go to Window > Workspace and Register workspace or Register workspace as material. The first one will save it locally on your device. If you save it as Material you can syncing to the Cloud with your Clip Studio Account or even share it on Clip Studio Assets.
Let’s save a new one on the device and call it “Workspace Test” and tap OK.
If we go to Window > Workspace again we will see that we are currently using the new workspace. So if you make any change to it and load the previous Workspace you will see the differences.
If you intentionally or accidentally move a palette or change a shortcut and don’t know how to go back. You can always go to Window > Workspace and select Reload the workspace. This will get you back to the layout you were using when you save the Workspace.
Change Name or Delete Workspace
If you want to change the name of your Workspace or delete it. Go to Window > Workspace > Manage Workspace.
Here you can select the Workspace that you want and delete it or change name of settings.
Fun fact you can delete all your Workspaces and leave the window empty.
IMPORTANT: Please only do that if you have a backup of your custom workspaces or if you use any of the deafults Clip Studio workspaces.
If you do that you can always use “Reset to Default” or load one of the three Clip Studio workspaces for Illustration, Comic or By Category.
You will see a pop up window asking you if you want to register the workspace before importing any of the defaults workspaces.
Register and Sync Workspace Material
Now here is my current workspace for iPad with all the palettes that I use most along with the shortcuts and icons in the Command bar.
Let’s save it as a Material. Again go to Window > Workspace and Register as Material.
Confirm the name you want to use for the workspace.
You can use a thumbnail image if you want. Tap over the folder icon and find your image. For this example I am using a PNG of 240x240 pixels. Then select the Folder where you want to save it. If you plan to share it use the Download folder and add tags to the material.
Now to have a backup on the cloud first open Clip Studio Start from the Clip Studio menu.
Next go to Manage Materials and find the Workspace we just save as Material.
Selected the workspace and tap Switch syncing and turn it on. Then wait a moment until the syncing process is completed.
Finally, tap on Cloud to see you workspace along with the other materials you have created and saved before.
Palette Layout
Import Workspace Material from Assets
You can search and find different type of workspaces for Desktop or tablets on Clip Studio Assets.
But if you want to optimize the limited space available for the canvas on your iPad screen. It will be better to start from scratch. So you can decide what palettes do you really need.
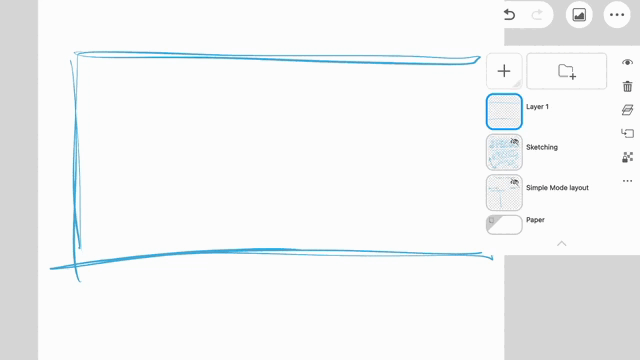
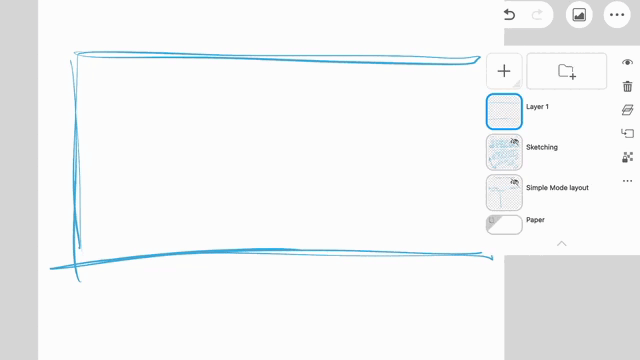
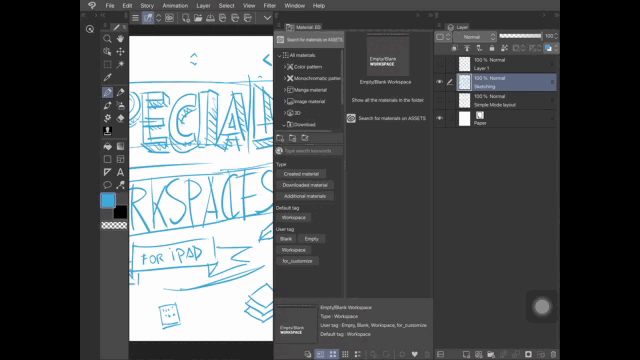
Here I publish an empty/blank workspace where all the palettes have been hidden including the Tool palette and Command bar. You can find the link below.
Once you have downloaded the Workspace open a Material folder from Window > Material.
There go to the Download folder and find the Material with the Empty/Blank thumbnail and drag it into the canvas or tap over the icon Paste selected material to canvas.
If you haven’t register your previous Workspace you will see a pop up windows telling you to do so.
Next, leave all the Import settings from the check-boxes active and tap Ok.
You will see a new message telling you where the new workspace is saved and how you can revert or change the layout to the previous workspace.
Show and Hide Palettes
Now every time Clip Studio has an update and introduce a new palette you will see it open in the middle on your canvas when you load a different or new workspace. In this case is the Layer Comps palette from version 3.0.
To hide or show any Palette go to Window and select the palette you wan to hide or show.
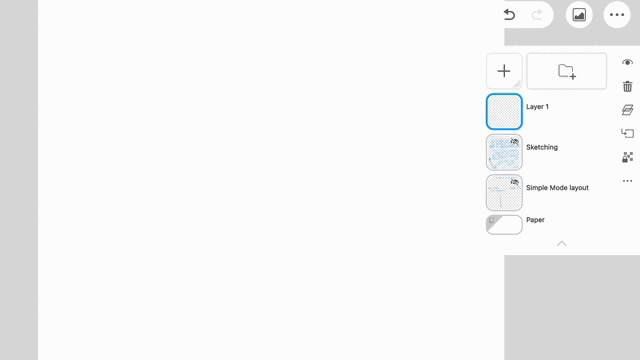
Now we have a complete Empty/Blank workspace with only the menu at the top of the layout.
So, to start let’s add or show the palettes we saw in Simple Mode. Go to Window again and select the Command bar to make it visible.
Repeat the process with the Tool palette.
And finally, add the Layer palette to complete the basic layout we saw in Simple Mode.
REMEMBER: You can always hide or show any palette from the Window menu. So, anytime you have a problem trying to find a palette just go to Window and select the palettes that you need or want.
Minimize Docked Palettes
You can compress the size or minimize docked palettes in two ways with the small arrows at the top corner.
The simple or single arrow will left the icon of the palette visible. If you tap over the icon or single arrow above you will make the palette visible again.
The double arrow will hide the palette and the icon leaving just a line with a double arrow at the top. If you tap the double arrow you will maximize the palette again.
Docked and Floating palettes
You can tap and drag over the name of the palette to undock or detach the palette from the column. You will see a red color showing you where you are moving the palette.
You can leave it anywhere on your canvas as a floating palette. Just be aware that floating palettes are above or in front of other elements in your workspace. So, try to place them wisely and don’t hide other palettes by mistake like the Command bar in the image below.
You can tap and drag again to dock the palette to the left. You will see a red line showing you where you are going to dock the palette.
You can also place it at the bottom. Just tap and drag over the name and see the red color to guide you.
For my personal workspace I am going to place the Layer palette docked to the left. Again tap and drag the palette name and see the red color to know where you are moving the palette you have selected.
You can resize the width or height of the palettes dragging from the edges whenever you see a double direction arrow appears.
Now let’s go to Window and make visible the Sub Tool palette and Tool property palettes. Personally, I like to arrange them as floating palettes so let’s tap a drag to undock them.
Then resize both from the edges and try to place them in your workspace layout. If you feel that the place you choose is not working for your workflow you can always move it later.
For the Sub Tool palette I like to use a horizontal orientation and place it at the bottom left. This way I can easily check my brushes or other tools at a glance without the need of scrolling too much.
Once you have selected your tool or change the properties you can minimize the palettes with the single line icon at the top left.
When you don’t need a palette anymore you can hide it tapping the “x” at the top left corner or from the Sandwich menu > Hide palette. You can always make them visible from the Window menu again.
If you have decided the places and size of the palettes you can Lock the position and height or fix the width of docked palettes. From Window > Palette dock. This will prevent that you accidentally move or resize the docked palettes by mistake. We can still resize floating palettes though.
Finally, for my personal workspace I like to resize the Tool palette in two columns. That way I can see all the tools at a glance without scrolling. Moreover, it will make the main and sub color squares larger, therefore easy to tap over them.
Tab & Pop-up Palettes
Now let’s bring more palettes to the layout. From Window select Quick Access just below the Command bar. We are going to review this palette later.
In the meantime dock it to the left behind the tool palette.
Then minimize it with the single arrow so you can still see the icon.
Now let’s bring a Material Folder palette from Window > Material…
And place the palette below the Quick Access icon. So don’t release it over the Quick Access icon but below. This is to avoid to group the palettes so in case you hide or close one the other will not appear in its place instead.
For the right side I will bring the Tool Property palette and place it behind the Layer palette.
Then minimize the palette with the single arrow. If you tap and hold over the icon you can choose if you want to Display the palette as tab or as a pop-up.

Pop-up palettes (A) will be shown without any square or border around them. In contrast Tab minimize palettes (B) will be inside of a square.
Now Pop-up palettes will appear over your workspace in a similar way to floating palettes. But these are going to automatically hide when you tap somewhere outside the palette. In the image below we can see that the Tool palette is not visible as long as the Quick Access pop-up is activate.
In the other hand Tab palettes will expand and push any other palette that is also docked. Below we can see how the Layer property palette push the Layer palette to the center of the workspace.
Also this type of palette will remain open until you minimize it with the single arrow at the top again. Or until you tap over another icon that are located in the same column.
If you have multiple palettes docked to the same column you can also tap over the same icon to collapse the palette. And see all the collapsed icons in separate squares.
Just make sure that you place the palettes below (A) each other and not one over the other creating palette groups (B).
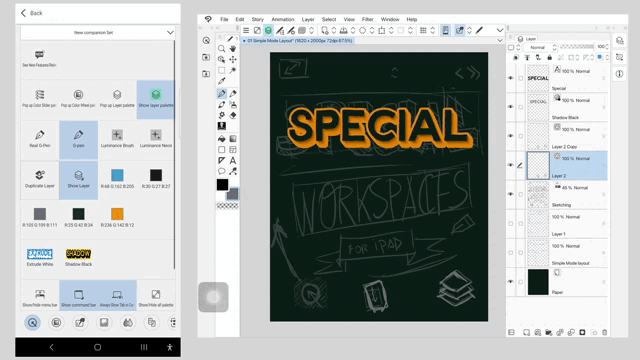
Now repeat the process and place all the palettes you want to use as pop-up or tab collapsed palettes. For the left side I choose Quick Access (A), Material folder (B), Material Download (c) as pop-up palettes. And for the right side Layer property (1), History (2) and Information (3) as tab palettes.
Extra Tip: On the Quick Access palette you can change how the icons are shown from the Sandwich menu at the top. For this example let’s choose Tile 4 columns. We are going to see why later in the tutorial when we connect our Smartphone to the iPad.
Edge Keyboard Shortcuts
Swipe from the right or left to make the Edge keyboard visible. Here you can see different “T” buttons with a number next to it. By default they don’t have any assigned shortcuts.
So, in order use these buttons as shortcuts, go to the Clip Studio Menu and select Shortcut Settings…
Under Category choose Menu commands and scroll down and expand the Window menu.
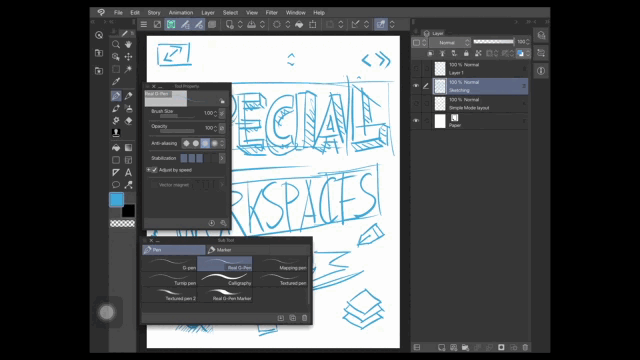
Next find the Layer palette and tap Edit shortcut. Then press the T1 button in the Edge keyboard.
Now scroll up until you find the Sub Tool and Tool Property and assign the T2 and T3 buttons to each of them and Tap Ok to confirm.
You can now press over the different “T” buttons and quickly hide or show the Palettes for which you assigned the shortcuts.
If you need to hide the Edge keyboard try to swipe over the Space bar icon. That way you will avoid to use the shortcuts by mistake.
NOTE: Depending of the resolution or orientation you can see less or more buttons. For example in horizontal orientation on an iPad 9th generation you can see until T6 buttons and in vertical until T10.
Custom Command Bar
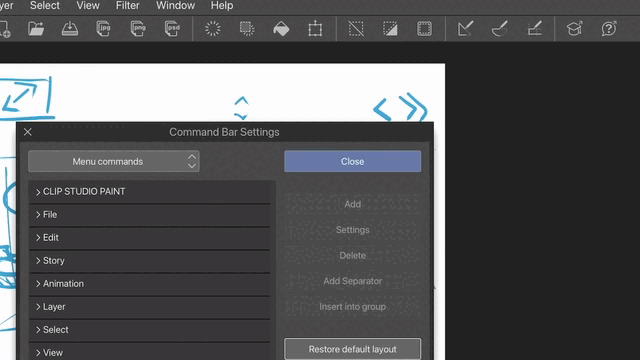
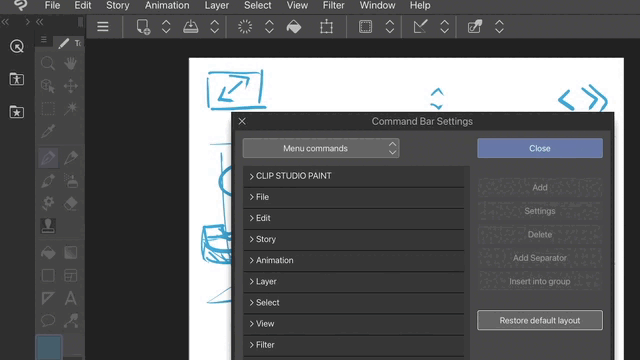
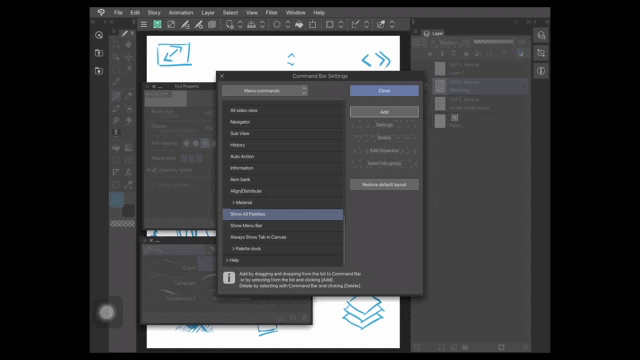
To open the Command Settings go to the Clip Studio Menu and select Command Bar Settings…
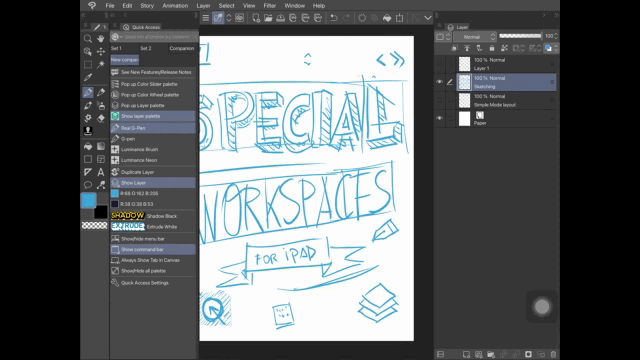
Or tap and hold over any icon or empty space in the Command Bar and tap over Command Bar Settings.
Here you can use the buttons from the right to Add (A), Delete (B) or Group (C) any type of command in Clip Studio Paint.
Note: You can add different commands from the Menu, Pop-up palettes, Options, Tools, Auto-actions and Drawing colors. For this tutorial we are going to add palettes from the Menu commands.
To optimize the limited space available on the iPad screen let’s select the undo icon in the command bar and press delete. You can always use the two fingers tap gesture to undo if you want.
Then tap over the redo icon and press delete again. Remember you can always use the three finger tap gesture to redo if necessary.
Then you can do the same with all the icons that you don’t use regularly on you workflow.
REMEMBER: All the changes made to the Command bar will only be save in the current workspace. So, you don't need to worry about making mistakes while customizing the interface. You can load one of the default Workspaces to see the default command bar again or press “Reset default layout”.
Now you can manually create group of icons to save space and keep similar commands organized in the same place. Tap and drag any icon and release it over another icon. You will see a red color showing you where you are moving the icon.
You will notice that a drop down menu arrow appears next to the icon indicating that now is a group. Repeat the process and drag the other icon to complete the group.

With this process you can group the commands under a drop down menu. So you can put together similar commands under one main icon. Here you can see all the commands related to Snap to Rulers and grid.
We can continue deleting the icons we don’t use very often and gathering similar icons on the Command bar. By doing so we can save space to optimize even more the workspace for iPad or tablet. Here is how it looks my custom Command bar so far.
These is how I put together the group icons. (1) The New Document group contains Open and Open Clip Studio. (2) The Save group also include Export in JPG, Export in png and Export in PSD. (3) The Delete icon is in the same group with Delete Outside Selection. For (4) selection commands I gather Show border of selected area, Deselect and Invert selected area. And as we saw earlier (5) Snap to Grid, Snap to Special Ruler and Snap to ruler are in the same drop down menu.
Now I recommended you to move the features you don’t use to often to the right and keep the frequently use on the left. This way if you expand for example two docked palettes you will still see the most used commands without the need to tap on a drop down menu.
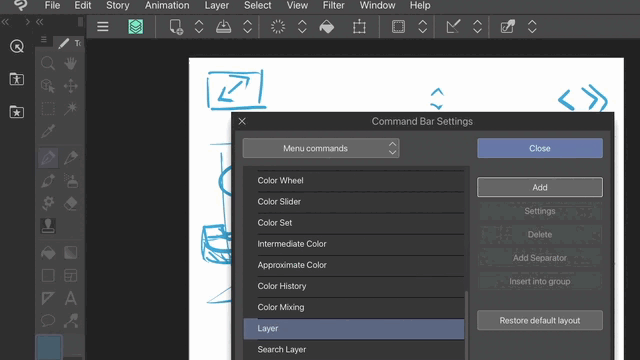
As we saw early in this tutorial I use the Layer palette very often. So don’t close the Command Bar Settings yet and tap over the sandwich menu icon and from Menu commands scroll down to Windows > Layer and press Add.
The Layer icon will appear next to the Sandwich menu in the Command bar.
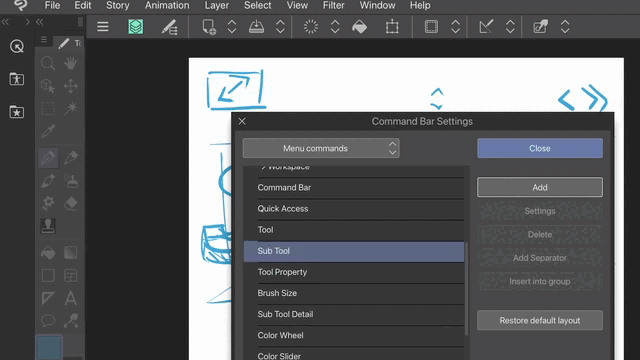
Now tap over the Layer icon that we just add on the left and scroll up until you find Sub Tool and press Add again. The icon is going to appear next to the previous selected icon as we saw before.
Let’s add Tool property but without selecting any icon first. The new command will appear at the end to the right.
You can always tap and drag to relocate any icon with the red color indicating where you are placing the command.
You can continue adding more palettes, tools or other commands. Remember to place the most used icons to the left and move the features you don’t use often to the right. That way you can always see your palettes and tools when you need them. To complete my most used palettes I will add the Navigator right next to Tool Property.
You can now easily show and hide the palettes we just add. Just tap over any of the shortcut icons. You can also undock and adjust the size of the palettes as we saw earlier. For example I like to place the navigator as a floating palette at the top right below the Command bar.
Now if you wan to customize the background color of any icon. Tap and hold over the icon and select Icon settings.
Tap over the Background color of icon checkbox and select any color that you want.
You can always change it for another color. The default icon will adapt to the brightness of the color value. And you can also deactivate the checkbox to remove the color entirely.
Note: You can save the layout of the custom Command bar when you register a Workspace. But you cannot save the background color assigned to default icons.
And if you prefer the default Command bar you can always tap Restore default layout from the Command Bar Settings. Just be aware that if you didn’t save you Command Bar with a workspace any customization will be lost.
Hide All palettes
So, to help you to save time and have more space on your canvas you can add the icon Show/Hide all palettes to your command bar. Open the Command Bar Settings and from Menu commands scroll down to Window > Show All palettes.
I recommended you to place it next to the sandwich menu. That way it always remains visible.
Now simple tap over the icon to use the whole space on you canvas. All the palettes will be hidden including the Tool palette. Only the Command bar and the top menu will remain visible.
You can press the icon again if you need to select another layer or adjust the size of your brush and hide all the palettes again to continue sketching, painting or drawing.
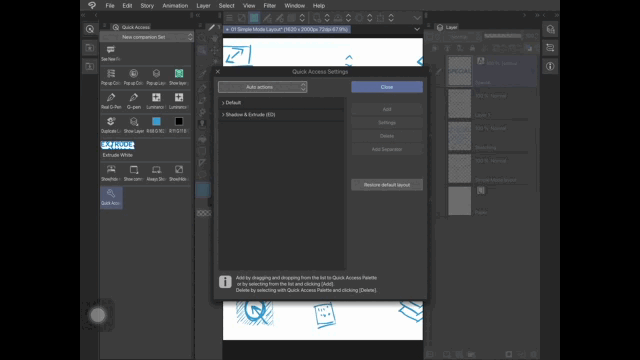
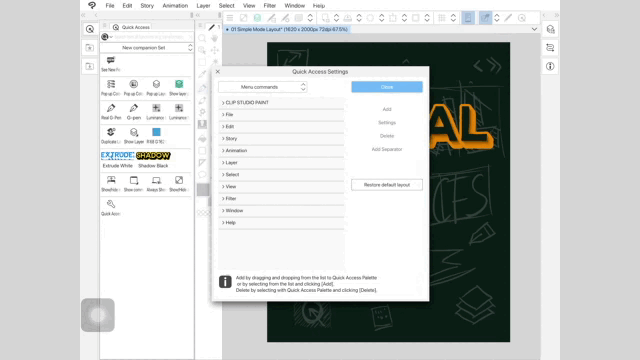
Quick Access Settings
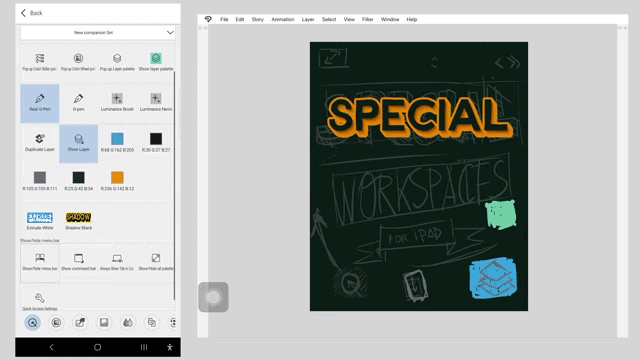
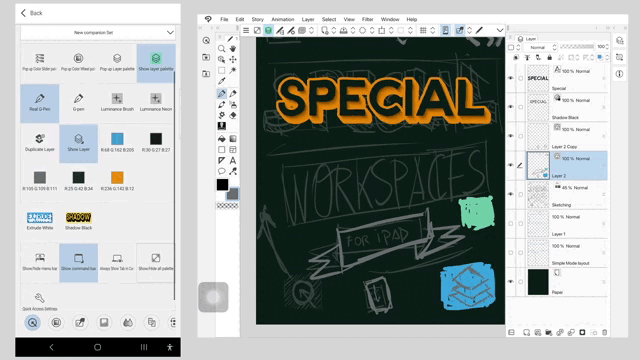
The Quick Access palette is very similar to the Command bar but you can move it and place it anywhere on your Workspace layout and not only at the top as the Command bar. Another difference is that you can’t insert the icons into groups. Here is my current set but you can always add more icons or delete them if you don’t need them anymore.
Also you can create multiple sets. As a matter of fact, you have a few loaded by default Set 1 and Companion. You can select the set that you want from the Drop down menu at the top of the palette.
Note: Just be aware that while Command Bars can be part of Workspace Materials you cannot save Quick Access Sets as part of a Workspace material. So, try to always take a screenshot of your favorite Quick Access set to remember the commands and replicate them later. You can swipe from the left down corner with your apple pencil or press the home and top buttons at the same time on your iPad to take screenshots.
You can create a new set from the Sandwich menu > Create set… choose a name and tap OK.
If you don’t need it anymore go to the Sandwich menu again and choose Delete set.. and tap Yes to confirm your decision.
Now to edit the Quick Access palette go to the Sandwich menu and choose Quick Access Settings.
Or tap and hold anywhere on the Quick Access palette and choose Quick Access Settings or tap over the wrench icon at the bottom of the Set.
Here you can add different commands, pop-up palettes, tools, colors or actions as we did with the Command bar.
I am going to select an Auto action and tap Add. Then you can drag the icon anywhere on your Quick Access set.
Note: If you tap over an icon first the new access will be added next to the selected icon as we saw with the Command Bar shortcuts.
You can also delete any of the existing shortcuts just select one and tap Delete.
Now let’s customize the icon for the Auto-action. Tap and hold over the icon we just add and select Icon settings...
Then Select Specify image file from the pop-up window.
Find the image you want to use on your iPad files. I recommend you to use a PNG with transparency. And for the size something around 60 pixels height should be fine.
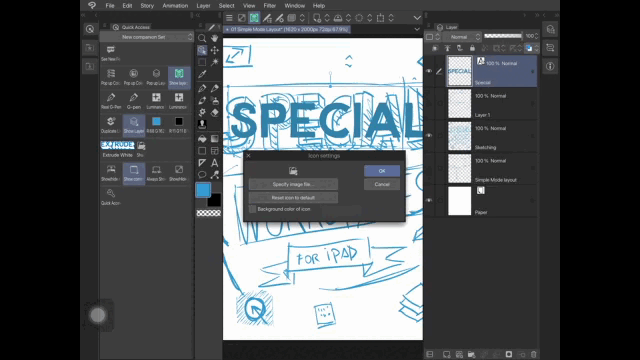
As we saw before you can use a background color which will be more noticeable if you have an image with transparency.
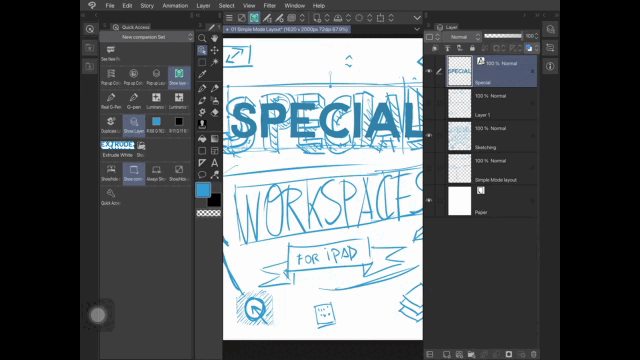
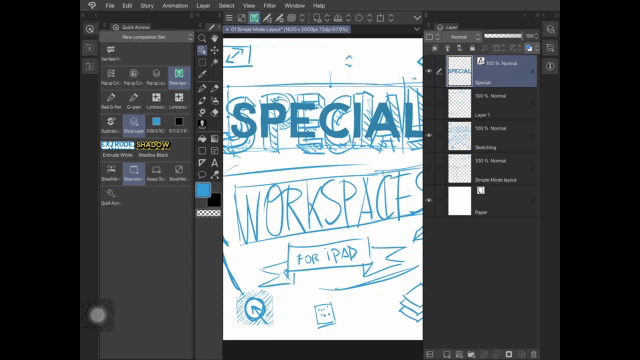
Now you can select any layer and tap over the Auto-action shortcut to “Play” the auto action in your document. For this example it creates a solid Black shadow from a selected text layer.
Add Drawing Color
If you want to add colors to your set go to the Quick access settings. And from the Drop down menu select Drawing color. There select any color that you want and tap Add in the Quick Access settings window.
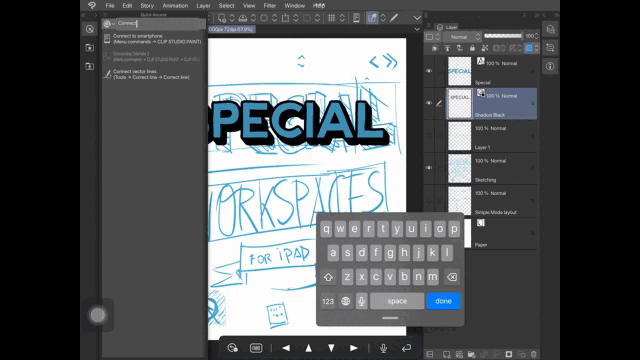
Search bar
From version 3.0 you can use the Search bar at the top of the Quick Access palette. If you don’t see it go to the Sandwich menu and select Show search bar.
Tap on the search field and start typing the tool or feature you are looking for. Let’s type Connect to search the Connect to smartphone feature.

Then you can tap and hold over the result and add it to any of the existing Quick Access sets.
Connect to Smartphone & Full Screen Mode
From version 2.0 you can connect your phone and iPad using the same WiFi network. To do so you need to have Clip Studio installed and running on both devices.
Now on your iPad go to the Clip Studio menu and tap over Connect to Smartphone. You will see a QR code on the screen.
Then on your phone in Clip Studio Start go to the gear icon at the top.
And select Companion mode to scan the QR code from the iPad screen.
Tap over the option Scan QR code.
And use your camera to scan the code and wait 2 or 3 seconds until the connection is established.
Now we will see the Quick Access palette on the smartphone screen in 4 columns. That is why we changed the list view to 4 columns before. Also with this view you can see most of the icons at a glance.
You can tap and use the shortcut icons from your phone in the same way you did from the pop up palette before.
Now you can open the Layer palette (1), use the pop-up Color Wheel (2) or select the Real G-Pen (3) directly from the Quick Access on your smartphone.
If you wan to take full advantage of the limited space available on your iPad screen you can also Add these four icons from Menu commands > Window > Command Bar, Show All Palettes, Show Menu Bar, Always Show Tab in Canvas.
Then just tap the shortcut icons to leave only the Menu visible at the top of your iPad screen.
Now if you are sure that you have a pretty strong Wi-Fi connection that are not going to fail any time soon and will disconnect your phone from your iPad you can also tap the icon to hide the menu and enter Full Screen mode leaving only the canvas visible on your iPad.
For the record you can also control the Color wheel along with the size and opacity of the Brush. Just tap over the icon at the bottom of your smartphone screen.
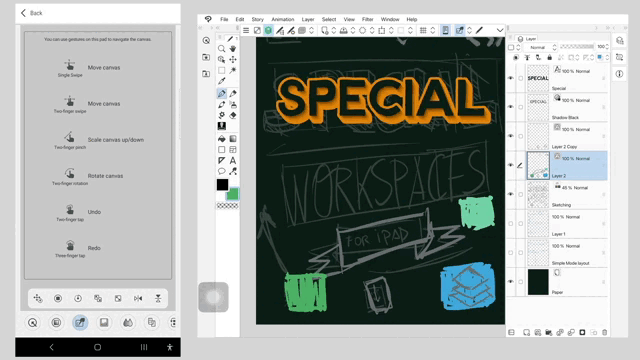
If you often use the Navigation palette you can also find some of the options in the third icon below along with some basic touch gestures.
Feel free to explore the other features on Companion mode on your smartphone.
Mixing Workspaces
You can also use a Palette layout from one Workspace and the Shortcuts and Command bar from other. Here you can see the Custom Command Bar we made early with the default Palette layout from the Comic workspace.
To do so first load the Workspace with the Command bar and shortcuts you want to use.
Then go to Window > Workspace and select the one with the Palette layout you want for your iPad.
On the pop up window deselect the Shortcut settings, Command bar and Preferences checkboxes.
And now you can use a new Hybrid Workspace. If you like the new layout of the palettes with the command bar you can always Register the Workspace as a new one.
Or you can also Reload the Workspace with all the check-boxes active to bring the default Command bar again.
Summary and Conclusion
So, those were some tips that you can use to customize your own Workspace for iPad or tablet. Now you can Flip the interface or change to dark mode on Simple Mode.
Import Workspace materials to customize your own Palette Layout from scratch.
Assign different shortcuts to the Edge Keyboard buttons or Customize your Command Bar and Quick Access icons in Studio Mode.
Moreover, remember that you can save workspaces to the Cloud with your Clip Studio Account. And work on your project in a Full screen workspace connecting your Smartphone and iPad through the same Wi-Fi network.
If you have any question about Workspaces for iPad feel free to leave a comment below and I will do my best to answer. I hope you have found something useful. This is Ed, saying “Until the next time!”.
Workspace Material:
More Tutorials:
Users who liked this post


Comment