
Video tutorial ( i recommend watching this first )
Introduction:
Welcome, artists and enthusiasts, to our tutorial on creating stunning animations using Clip Studio Paint! Animation has always been a captivating medium, allowing us to bring our drawings to life in dynamic and exciting ways. And with Clip Studio Paint, the process becomes not just accessible, but incredibly rewarding.
In this tutorial, we'll dive into the fascinating world of animation within Clip Studio Paint, exploring its intuitive tools and powerful features that make the animation process both seamless and enjoyable. Whether you're a seasoned animator or just starting out, this guide will walk you through the essential steps to unleash your creativity and craft beautiful animations.
So, grab your stylus and let's embark on this creative journey together as we uncover the magic of animation in Clip Studio Paint!
Animation Process in Clip Studio Paint:
Setting Up Your Canvas
Begin by creating a new canvas in Clip Studio Paint. Adjust the canvas size and resolution according to your animation requirements.
These are the requirements i use , you can change them to your liking !
Animation Timeline
In Clip Studio Paint, the Animation Timeline is a feature that provides a visual representation of your animation sequence, allowing you to control and adjust the timing, duration, and playback of your animation. Here's an overview of how it works:
Accessing the Animation Timeline:
To access the Animation Timeline in Clip Studio Paint:
you click on Window then down below you click on Timelime(X) .
you'll see the Animation Timeline at the bottom of the screen. It typically appears as a horizontal bar with markers representing each frame of your animation.
Key Features of the Animation Timeline:
Frame Markers: Each marker on the timeline represents a single frame of your animation. You can navigate between frames by clicking on the markers or using keyboard shortcuts.
Playhead: The playhead is a vertical line that indicates the current position in the animation timeline. You can move the playhead to preview your animation at different points in time.
Frame Controls: The Animation Timeline provides controls for adding, deleting, and duplicating frames. You can also adjust the timing and duration of individual frames using these controls.
Playback Controls: Clip Studio Paint offers playback controls, such as play, pause, and loop, to preview your animation directly within the timeline.
Onion Skin Settings: You can enable onion skinning directly from the Animation Timeline, allowing you to see previous and/or next frames as ghosted images to assist with animation continuity.
Using the Animation Timeline:
Editing Frames: You can edit frames directly from the Animation Timeline by selecting a frame marker and making changes to the content on the canvas. This allows for quick adjustments to timing, position, or any other aspect of your animation.
Adjusting Timing: By dragging frame markers along the timeline, you can adjust the timing and spacing of your animation frames. This allows you to control the speed and rhythm of your animation sequence.
Adding and Deleting Frames: The Animation Timeline makes it easy to add or delete frames as needed. This flexibility allows you to refine your animation by fine-tuning the timing and sequence of frames.
In summary, the Animation Timeline in Clip Studio Paint is a powerful tool for managing and refining your animation projects. By providing a visual representation of your animation sequence and offering intuitive controls for editing and playback, the Animation Timeline helps streamline the animation process and bring your creative vision to life.
Animation Folder
An Animation Folder is a container within Clip Studio Paint where you can organize and manage all the elements of your animation. It acts as a parent folder for animation-related layers, allowing you to keep your animation assets organized and easily accessible.
How to Create an Animation Folder:
Creating an Animation Folder is simple:
on your timeline you’ll this little icon ( see picture below) click on it to add a new animation folder .
Using Animation Cels Inside the Animation Folder
Creating Animation Cels: To create an animation cel, you first need to be within an Animation Folder. Once inside the Animation Folder, you can add a new animation cel by clicking on the "New Animation Cel" button or selecting it from the menu. Each animation cel layer represents a single frame of your animation sequence.
Drawing or Animating: Once you've added an animation cel layer, you can draw or animate on it just like you would on a regular layer. Use Clip Studio Paint's drawing and animation tools to create the content for each frame of your animation.
Organizing Frames: Animation cels are organized sequentially within the Animation Folder, with each cel layer corresponding to a specific frame in the animation sequence. You can easily rearrange the order of frames by dragging and dropping the animation cel layers within the folder.
Editing Frames: You can edit individual frames by selecting the corresponding animation cel layer and making changes to the content on the canvas. This allows for quick adjustments to timing, position, or any other aspect of your animation.
Animating with Onion Skin: Onion skinning is a feature in Clip Studio Paint that allows you to see previous and/or next frames as ghosted images, helping you maintain consistency and continuity between frames. You can enable onion skinning while working on animation cels to assist with frame-to-frame animation.
Applying Effects: Animation cels can also be used to apply effects and transformations to individual frames. For example, you can add motion blur, scale or rotate objects, or apply color and lighting effects to create dynamic animations.
Playback and Preview: Once you've created your animation sequence using animation cels, you can preview it within Clip Studio Paint to see how it looks in motion. Clip Studio Paint provides playback controls that allow you to play, pause, and loop your animation directly within the software.
In summary, Animation Folders in Clip Studio Paint are a powerful tool for organizing and managing your animation projects. By creating Animation Folders and adding animation cel layers inside them, you can create and edit animations with ease.
PS :
But here's the thing: you can't just add any layers inside. You need to use animation cel layers. Think of these as special layers designed for animation. Everything you include in this animation folder will move as individual frames, creating a single shot or sequence.
Here's an example to make it clearer: imagine you have three frames numbered 1, 2, and 3. When you draw something in frame 1 and then create a new frame (let's say frame 2), it's like moving from one frame to another in a flipbook. Each frame is like a snapshot of the action, and when you flip through them quickly, it creates the illusion of movement.
So, to sum it up, by using animation cel layers inside your animation folder, you're essentially creating a series of individual frames that, when played in sequence, bring your animation to life. It's like putting together a series of pictures to tell a story through motion.
Animation Cels
In Clip Studio Paint, animation cels are special layers designed specifically for creating individual frames of animation. Here's how they work:
More concepts
Onion Skin
Onion skinning is a feature in animation software that allows animators to see multiple frames simultaneously, typically with a translucent effect resembling onion layers. This feature is invaluable for creating smooth animations by providing visual reference points for motion and timing.
In Clip Studio Paint, onion skinning enables animators to view both preceding and succeeding frames while working on the current frame. This allows artists to maintain consistency in movement and positioning throughout the animation sequence. By adjusting the opacity of the onion skin layers, animators can control the visibility of previous and subsequent frames, making it easier to understand the motion flow and anticipate the next poses or movements.
example :
the color green on the case show the next cel
and the blue color indicate the previous cel .
Copy past your animation cels .
Copying and pasting animation cels in Clip Studio Paint is a straightforward process. Here's how you can do it:
Select the Cel to Copy:
Copy the Cel
once you click on duplicate the layer will be duplicated in your folder.
But it wont appear on your timeline
Clip studio name your layer automatically , so if the layer you copy paster name was ‘3’ the copied layer name will be ‘4’ make sure your remember the name of the pasted layer .
Now for it to appear on your timeline, you go to your timeline.
+ Clickon**assignceltoframe**.
a window should appear like this .
now remember the name of the pasted layer being “4” you click on 4 and it will appear on your timeline, you adjust it then to your liking !
Drawing process .
storyboarding.
Before diving into animation, it's helpful to plan out your sequence with a storyboard. Sketch out key frames to visualize the flow of your animation.
in this case i make a sketch where i draw the first shot then in a new layer i add the changes .
i add the changes written in red ( optional )
dividing layers .
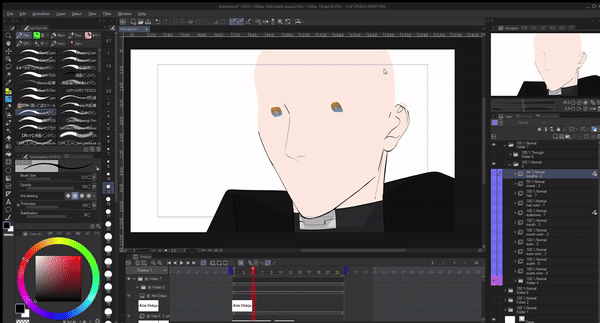
since im not animating the whole illustration and keeping the head and clothes not moving i draw them first in a sperate layer in a normal folder not an animation folder .
then i move to my animation folders , and draw each one separatly .
this allows you to erase and edit them easily and avoid mistakes .
pupils + color
eyes + color
mouth + color
eyebrows+color
hair+color
Extra
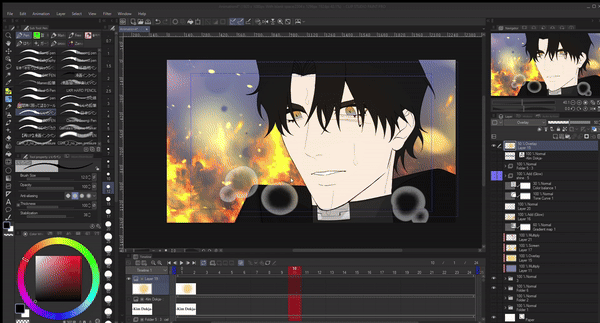
Background and Sfx.
start by chosing the location and the effects and add them on top in a seprate normal folder
This the background i went with .
then Extra effects.
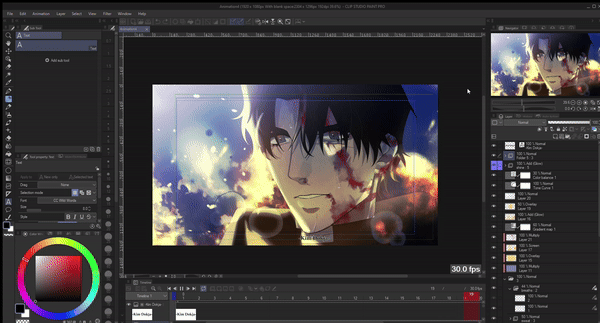
Final animation .
And now we arrived at the end of our tutorial , i hope it was easy to undestand , i tried to explain as much as i can ! ifyou have any questions dont hesitate to write them in the commets !
Extra .
Brush.
brush i use for lineart , i recommend a little to non pressure pen this way your line will be even and easy to redraw/trace .
Japanese animation-Animation production material Collection 2020
Workspace
Users who liked this post


Comment