
Introduction
Hi! I’m Minaka, a graphic designer and illustrator based in Brazil and this is my first tutorial :)
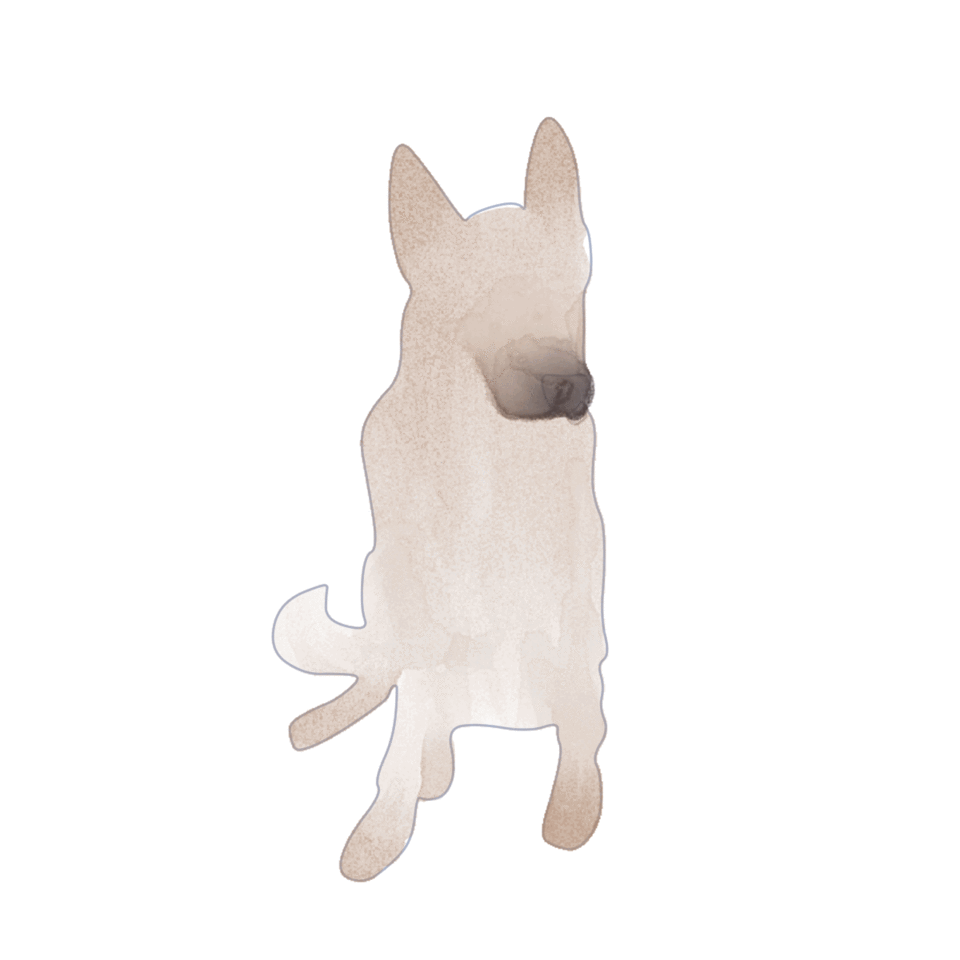
In this article, I’ll walk you through my process of painting a friend’s dog named Luna in watercolor and how I like to approach the subject. Hope you like it ^^
Initial idea and sketching
For the initial idea, I always start my drawings with a rough sketch and this was no different. I usually like to use the default pencil brush or the SU-cream pencil brush for this step, but any brush can do. I like to keep very loose and messy because I think this is where the drawing has more gesture and movement and I like to translate this into my final pieces. Below, I’ll leave a link for some of my favorite pencil brushes :)
Creating shapes
When doing traditional watercolor, I love to apply water first and let the ink spread on the paper, creating those little edges when dried. So, for digital watercolor, I like to use the continuous curve tool to trace my sketch and create a solid shape. You can also just use the shrinking tool to quickly select your sketch, but since mine are messy and filled with random lines, I rather use this tool to create a more clean space for coloring.
Also, don’t forget to change the color of the line for better visibility and to do it on a vector layer. Vector layers give you the ability to edit the shapes with the correct line tool, adding or deleting control points and other functions.
Now, this step is entirely up to you and how you want the final result to be. You can make each shape in a new layer if you want to paint it separately (in this drawing, it would be head, ears, tail, paws, etc.) or do it all together if you’re looking for a more organic feel :)
Painting
When you’re done creating the shapes, toggle the vision of your other layers (the little eye button on each layer) leaving only the vector layers. If you have done separate shapes, you’ll have to color it one by one, if not, then you can select the whole shape. Using the shrinking tool, select your shape and create a new layer for painting. You can use any of the default watercolor brushes, but my favorites are the wet wash and the watercolor marker collection. Below, I’ll link some of my favorites from Clip Studio Assets :)
In this stage, there are a lot of stylistic choices you can make! You can choose to do something very loose with only the outline shape, you can make the shapes very defined for a more detailed look or you can blend them in to balance both. Due to the translucent nature of watercolor, sometimes I also like to overlap the shapes, showing the different layers of ink on the drawing. It’s up to you ^^
Another option is to paint a specific spot and blend it in the direction of the ink flow, like when you pour ink in an already wet area and it spreads. This gives a very watery and flowy feel. Painting in one layer makes the colors blend better, but if you want a more strong value, I suggest doing it in a separate layer.
Details
If you’re using the watercolor marker set I linked above, there are some great brushes that I like to use for detailing. These look very good for adding watercolor and salt stains for a realistic texture and if you use the Nishiki (二色) version, you can blend it pretty well!
When finishing my watercolor paintings, I also like to go in with a translucent brush and darken the edge of the shapes while blending it a little. And for more sharp details like the eyes, I like to use pencils brushes or this brush from the watercolor marker collection to do some lineart and lock in the shapes.
Texture
Finally, we’ll talk about texture! I love using textures in all of my illustrations, be it from Clip Studio Paint or just a few random strokes on the background. It makes your art closer to the traditional medium and can add just enough to make it more interesting and eye-catching. My personal favorite is the one from the watercolor marker set, but I use others depending on the nature of the drawing. Below, I’ll link some of my mostly used ones :)
It’s important to note that some textures only work on top of the other layers, while others work in any layer position and some can change the colors when applied. I also recommend adjusting the opacity of it, since a lot of textures can be too harsh and make your painting looking visually cluttered. Another option is to apply it only to the background, leaving the painting more clean.
Conclusion
So that’s the end of this tutorial! I love to work with watercolor digitally, especially because it helps with my fear of making mistakes when using traditional ink hahaha It’s always good to remember that we can always start again :)
Anyway, I hope you find this article useful and can’t wait to see all the beautiful artwork of yours. Thank you so much for reading and happy creation! ^^
Users who liked this post


Comment