Drawing Faces 360 - Like you mean it! Full Step-by-Step
Hi! Soulstinger is back with another tutorial that will help you draw faces in (almost) any angle.
Let's be honest: Drawing faces in perspective takes a lot of practice and it can be a bit daunting at first...
but after this TIP you should have the knowledge and the ressources to overcome this obstacle and learn how to draw any character in any angle.
So without further ado let's start!
... and while you are still around: Be sure to leave a like and a comment :-)
01 - Video
02 - Drawing the Head in Perspective
First of all I want to show you how you can construct the human head from a cube in perspective.
Starting from a cube is a good idea because it will determine the viewing angle and perspective of your face (1). With more practice you will be able to just imagine the cube without drawing it.
See how I use the cubes as a guideline to create rounded shapes (2).
With that you are able to place the main features of the face, like the eyebrow line, jaw line and nose tip (3).
After that I'm placing the eyes and the mouth (4).
The ears are really important for the viewer to determine wether the head is tilted or not. Imagine the ears to be the axis of rotation of the head. (5)
I think it is very important to always practice drawing the whole head except only the face. Also you should really practice to draw the head together with the body so you get a feeling for how it has to look. (6)
I put together a very good selection of anatomy and drawing books for you in last section of this tip
... Drawing the Face in Curvelinear Perspective
As you can see in the following example you can transfer this technique to any type of viewing angle and perspective type. Here I placed some cubes into a so called "fisheye" perspective grid.
Want a short explanation on what a this curvelinear perspective is?
Well, it's a type of perspective that has 5 vanishing points and the perspective lines are curved as you can see at the end of the animation below.

Just download the following perspective grid material from assets.clip-studio.com that I've created for you.
TIP: Try to use just a part of the grid. It's great because this type of perspective feels more organic and alive than the "standard" 3-point-perspective.
03 - A Little Help from 3D ! - with Download Links
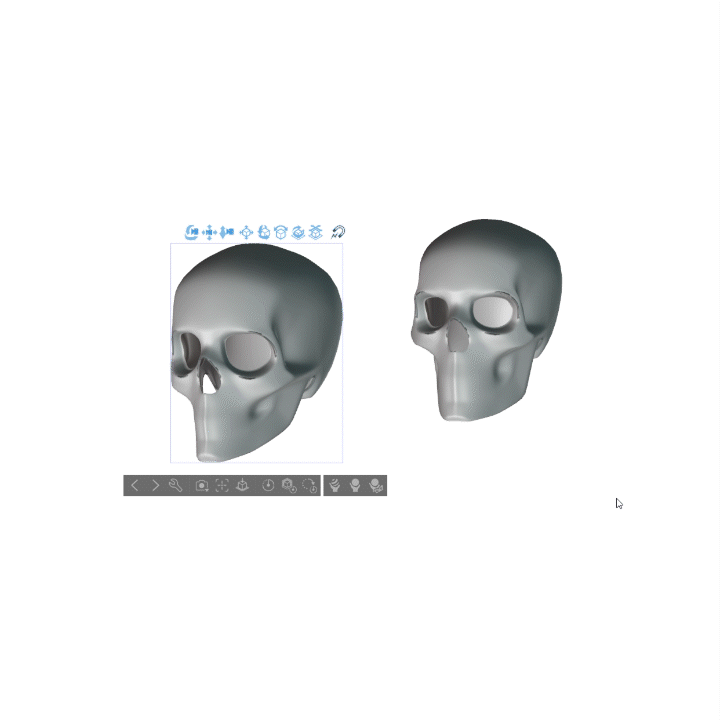
I thought it would be great to have a 3D head model that gives us a good starting point for (almost) any character. So I searched a bit and found this great simplyfied skull by VAA on sketchfab.com.
Thanks to the user VAA for providing us with this downloadable skull.
I took this one as a reference and modeled my own version in Blender 3D and transformed changed the proportions according to some photo material to get a more feminine and a more masculine version of the head.
Down below are the links to my original 3d models, check them out and like the assets if they are helpful! Thank you.
A short note:
Please disable light and shadow in the tool property panel for best results because light is baked into the texture.
This is how they look in action! How cool is that?

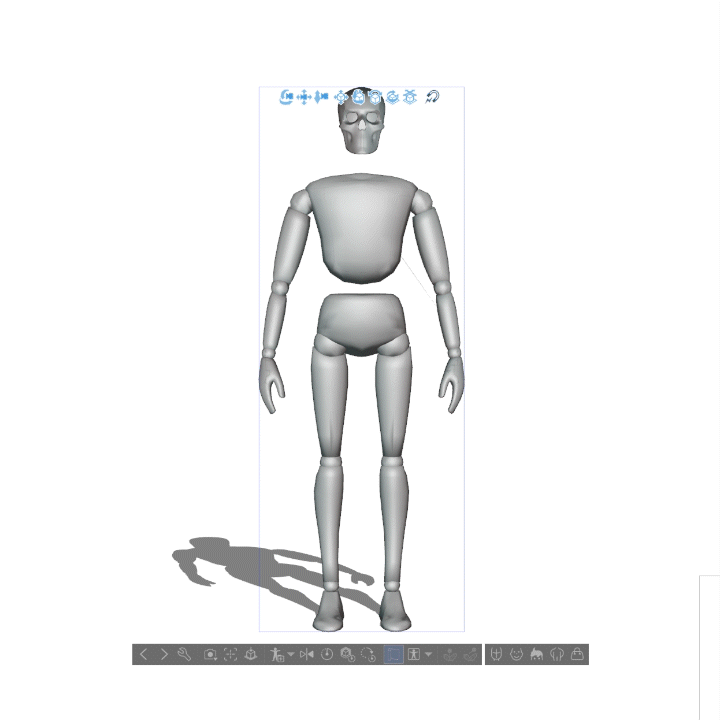
To get the best out of it I put the head model on top of a rigged mannequin I created some while ago and it worked like a charm!
You can just drag and drop it into your canvas and use it like a normal 3d character inside of Clip Studio Paint.


I would recommend to check out another tutorial I made a while back on how to use and pose 3D characters in Clip Studio Paint.
04 - How to draw Faces and Characters over 3D Models
As you can see, it's really straight forward to work with these kind of models. The simplified head model gives us some great landmarks and starting points.
Just proceed like in the examples before. Sketch a cross and start placing the faces features like mouth, nose, eyes and ears.
The mannquin can be used to pose a whole model and quickly try out different artistic ideas. It can help to draw some simple shapes around the head so you remember the perspective of the head at all times.
Please check out the video on youtube for further examples and in-depth guideline in putting these models to use.
05 - One last Advice!
Please keep in mind that the 3D models are just some basic and rough guidelines to get the perspective and the placement of the major anatomical features right. Be very cautious in using 3D models because your characters will tend to look a bit stiff.
So turn down the opacity of the 3d layer and try to understand the shapes with your own thoughts by drawing on top of it.
Don't get caught in the trap of overusing 3D !

06 - Some closing words and...
This concludes my TIP!
I tried to make a good combination of a youtube video that explaines some workflows and also this written tip where I can reference to some files and some books. I hope you liked it and it was useful! Please don't forget to like this tip okay ? :-)
If you have any question left, please leave a comment here (or on youtube!).
Get in touch with me and show me your amazing works. I'm looking forward to it.
Bye!
...Links
Also check out my other Tips, my Instagram and my Gumroad-Store with a lot of other good things!
07 - List of Books
These books are my treasure and I can recommend them to anyone who is serious about drawing the human figure. What I like about them is that the knowledge can by universally applied so they never get old and are indipendent from style.
Bridgeman made a very comprehensive overview of the human form. The head is also shown there.
Last but not least, this one is an absolute must if you are into perspective drawing. This book is indipendent from style and teaches fundamental skills in drawing in perspective. I found this gem way to late but could incorporate a lot of my former drawing skills into these techniques.
It's never to late hehe


Comentario