Tips for using vector Layers in Clip Studio Paint
Introduction
Hello, everyone! Welcome to my tutorial where I'll be showing you some personal tips for when I use vector layers for my line work.
We will go from this to this using vector layers for the lineart portion of the process:
Make sure to also watch the video version of this tutorial!
So, what are vector layers? They are a type of layer that you can use in Clip studio Paint; unlike regular layers, you can grab, resize and manipulate each individual stroke you make allowing you to quickly edit your line work for a more efficient and comfortable process.
Some basic tips
Now here I’ll show you a few basic things that you can do with vector layers.
By default on Clip Studio you will be drawing on a raster layer (or a regular layer), to draw on a vector layer you can click on the icon on the right side of the new layer button (the one with the little cube).
With a raster layer when you move it everything drawn on that layer will move, same thing if you want to rotate it, resize it, and more. The only way to move elements individually is by grabbing the selection tool (in this case the lasso tool) and select the element you want to move.
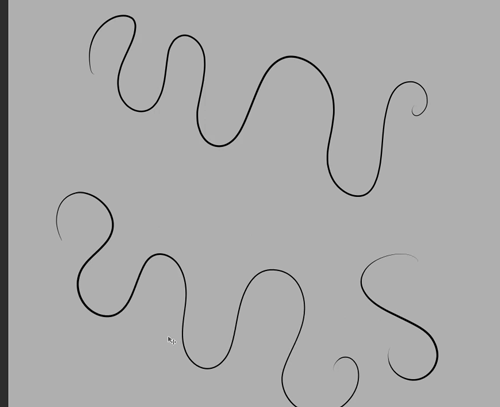
With vector layers you just select the operation tool, click on the element you want to move and it will affect the selected part only, even if it overlaps with other objects. You can also rotate, resize, select multiple strokes at once and even delete the selected parts without affecting the rest of the layer.

With a vector layer, any strokes or lines you make will have control points (those little white dots) which will allow you to manipulate and change an already drawn stroke, easily giving it any shape you want!
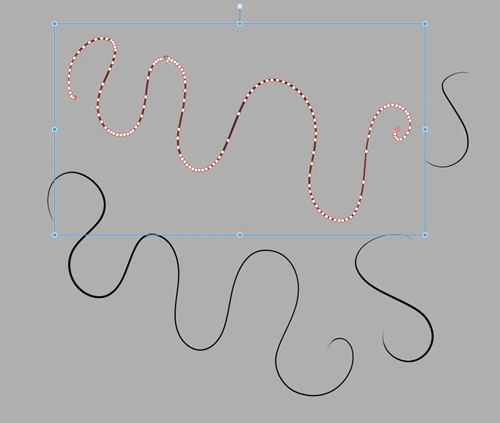
You can also modify the width of the stroke even after you already drew the line; you can make lines thinner or thicker by just selecting them, then click on the Operation tool; under the tool property, you will have the option of brush size to modify it up or down! This is very useful, I especially use it when I need to scale down something and the line becomes way too thin. With this I can make it so it is bolder again.

One last thing for this section is that when on a vector layer, you can also change the colors of individual strokes; click on the Operation tool then select the lines you want to change, and on the tool, property tab click on the colored square next to the “Main Color” option, there the color settings window will open with your color wheel; from there you can pick any color you want, press ok and it will change!

Keep in mind with overlapping lines that the last one you draw is going to be on top of the others, following the example shown, if you want the red to be on top of the blue, the red line needs to be drawn first; this feature can be extremely useful for when you want to color your lineart to give it a finishing touch!
Applying these tips, and more!
Now after teaching some basic tips, let's apply them to an actual drawing; here I’ll be showing you parts of my lining process for this sketch of a character. I’ll be using the symmetry ruler for this piece since I want the drawing to be symmetrical.
Modifying only part of the stroke
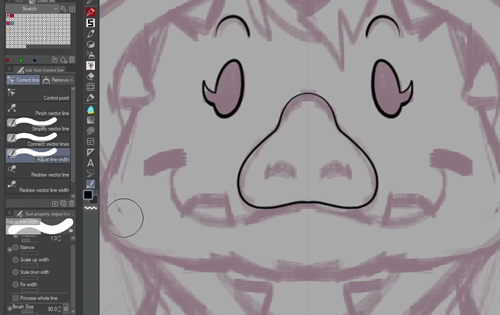
So first, for this linework I wanted to have a general contrast with line weight. So for example, on her nose I wanted the tip to have a smaller line width while I also wanted a stronger line on the bottom.
To do this and to only modify part of the stroke, you can go to the “Correct line" section on the toolbar (by default it is on the lower side), and go to the “adjust line width” tool.
Generally I only use the Thicken and Narrow option. Thicken makes the line width stronger while Narrow makes it more thin. So I first used Thicken and made a few “strokes” until I was happy with the weight of the line and I did the same process on the tip of the nose but with the Narrow tool instead.
Erasing on a Vector layer
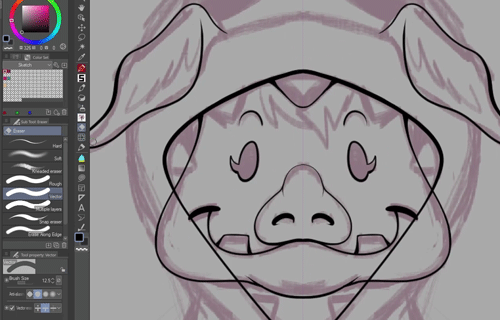
One extremely useful thing about Vector layers in Clip Studio is that when erasing you have the option to only erase up until lines intersect.
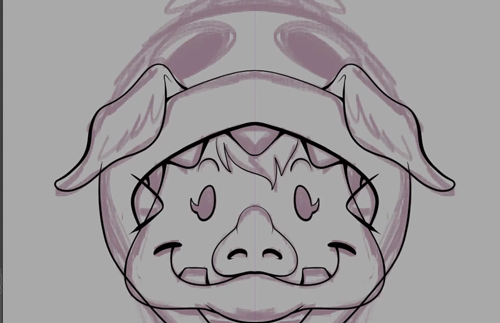
With this you can do your linework first without worrying too much about your lines crossing each other and just erase it and clean it in seconds, like shown in these clips!

An extra tip
So this isn’t necessarily a feature of the vector layer itself but more of a recommendation I want to make if you use vector layers for your linework and also use the symmetry ruler; generally when drawing vectors with symmetry when selecting the strokes it will move one side instead of both.
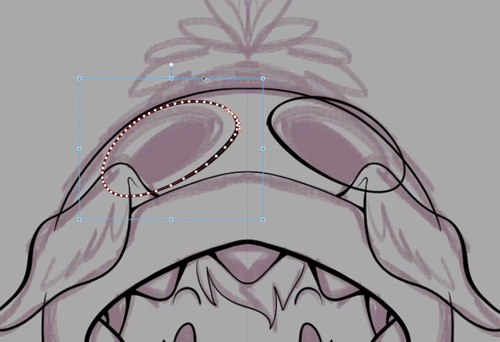
so here’s a selection tool made by user Pharan that allows you to move both sides at the same time including on vector layers; I’ll link it here so you can also download it on the Clip Studio Assets website!
You can get it here: https://assets.clip-studio.com/en-us/detail?id=1974271

Conclusion
And there it is, all my personal tips for doing lineart with vector layers, hope it was useful to anyone that may be new to the program or hasn’t tried out vector layers yet! Here it is the final result. Hope you enjoyed this tutorial :)!


Comentario