
Hello, nice to meet you. This tutorial is aimed for those who may want to draw, but do not have a tablet or pen to use (but anyone can use this tutorial!).
Don't let not having a tablet stop you! You can still create so much with just a mouse, the trick is using the tools provided in Clip Studio Paint to your advantage! This tutorial will touch up on a few tools, but will mostly focus on the Figure Tool's Curve feature. (You can learn more about the Figure Tool from the manual below).
I find this tool to be helpful when creating line art digitally, with just a mouse. In this tutorial, I will share the basics of this Curve tool, and my personal tips you can try out yourself!
[1] Sketch and Set Up
For this tutorial, I will be using a sketch I drew with pencil and paper. You can use any sketch you would like, we are going to touch it up further when we begin creating the digital artwork.
It looks a little messy, doesn't it? That's the fun part about sketches! You can get as messy as you want, no one will know in the final result!
You can use any method you would like when setting up line art. For this tutorial, I will do what I commonly do. It is a strange set up, but this is what has helped me, and you can do the same. I make a new file with the sketch (or, open the sketch in Clip Studio Paint), then make a new Fill layer. With this Fill layer, I decrease the Opacity to around 40%.
This method helps me see the line art against the sketch with ease. You can also apply Levels ([Edit] > [Tonal Correction] > [Level Correction...]) to make the sketch easier to see with the color overlay.
Again, it is just a method I use, so it is optional. I recommend you set up which way feels best for you. But let's not forget to make a New Layer before we continue!
Why don't we get started with the curve tool?
[2] Making Curved Lines
You may have seen or even used this tool before, and perhaps took a peek in the manual about it, but I will still cover the basics.
1) The first click you make will be the start of the line.
2) Move the mouse out to where you would like the line to end, then click.
3) Once you click, you will move the mouse to adjust the curve. The further away from the line you go, the more it will curve!
4) Once you click, you will set the curve in the line. Ta-da!
We can thus repeat this method to create curved lines of various widths. Let's see an example of this in action.
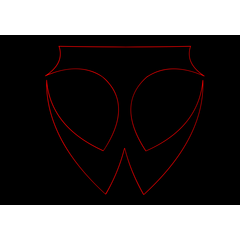
We can start with a curve line in your sketch, such as here. First, we won't worry about the curve, but will start with connecting the points together. Start thinking with the straight line as described above. Click the start of the line, go to the end of the line, then click.
Move the cursor away from the straight line to line the curve up with the curve in the sketch. Once it looks lined up, you can click!
We can use the curve tool to also touch up the line art further if need be.
Let's look at this example here. The line width is not bad, but I want to decrease it just a little bit. I could just use the Eraser tool, however it may be a bit tedious and require more clean up. Instead, we can use the Curve tool.
Set the curve tool to transparent. It may be tricky to use this way since you cannot see the line you make, but don't worry if it takes multiple times!
For this example, you can try to make a line like I did here (except in this case, I made it blue so you can see it). See how this will change the width of the line art? This way, you can erase the line and still have a nice curve.
[3] More Curve tips
You can continuously use the Curve line tool to make a curved line in your line art appear thicker. That way, your line art does not have to be all one width if you prefer some variety.
The Curve line tool is useful because you can use it well with other tools. For example, if you need to move a part of your line art (such as by using the Selection tool), you can then touch up using the Curve tool with ease.
See? It may take some practice and time to do, but when you do it enough, you will master it with ease!
Try using the Curve line tool with other tools! See how you can combine methods, such as with the Straight tool above.
After you are finished laying down your line art, you may want to touch up some areas. You can use the Curve tool, but if you want to really move some areas, you may want to use [Edit] > [Transform] > [Mesh Transformation...]. This isn't necessary for the Curve tool, but I wanted to share some of my methods. After meshing, you may want to touch up and use the Curve tool then.
[4] Finish Up
When you have your line art done... Ta-da! Now you can say you created line art with your mouse only. Don't forget to touch up and remove extra lines, which you can use the Curve line tool for!
Now, if you would like, you can begin coloring. You can use methods like a Fill tool, or even the Curve line tool to color.
However, did you know the Curve line tool may come in handy with shading as well?
In this example, I created a new layer and clipped it to the color below (such as, a new layer named "shade" clipped to the skin color layer). I selected the color the skin, and set the new "shade" layer to Multiply.
As you can see by the placement of the cursor, I have drawn a line and curve it. So, depending on areas of your artwork, the Curve line tool can come in handy when coloring as well!
There are many ways to do one thing in Clip Studio Paint, which means you can experiment and use what tools and methods work for you! Maybe you are more comfortable creating line art with a mouse rather than a tablet, or you are looking to try something new.
Whatever it is, there are no limitations! Don't let the lack of a device or experience stop you!
Les utilisateurs qui ont aimé cette publication


Commentaire