LAYERS in Clip Studio Paint
A. Introducing
Hello and Happy New Year everyone, welcome y’all, how is it doing?
So, I am back with another tutorial. This time I wanna share some tips of my way using layers in Clip Studio Paint. For me, in my opinion, the layers is one of the things that made drawing digitally different from the traditional way.
Today I wanna show you how I work with the layers, from basic to advanced ways to use them in creating artwork. So let’s get started!! O(. ≧▽≦ .)ツ
B. My Main Layer settings
In my previous tutorial, you can find that I am using so many layers while drawing, and most of them has the same structure of settings. Today, I’m gonna show you exactly what purpose of each one that I am using to create my artwork.
So for the simple one, I am basically using these settings:
Sketching layers
Line art
Based color
Effects layer
Correction layer
Since some artwork has the more detailed, the more layers it get. And I usually group the same nature in to one folder to easy setting them.
Remember that every layers inside this folder have the same settings to the folders. As you can see in the image below, the [Color] folder is [Clipping] to the [Based] layer below.
This is the familiar technique that I use in every tutorial of mine.
In another purpose, like making live2D model, which have to use so many many layers, creating folders will make thing organized and easy to find the layer you want to edit.
C. Color Effects Layers
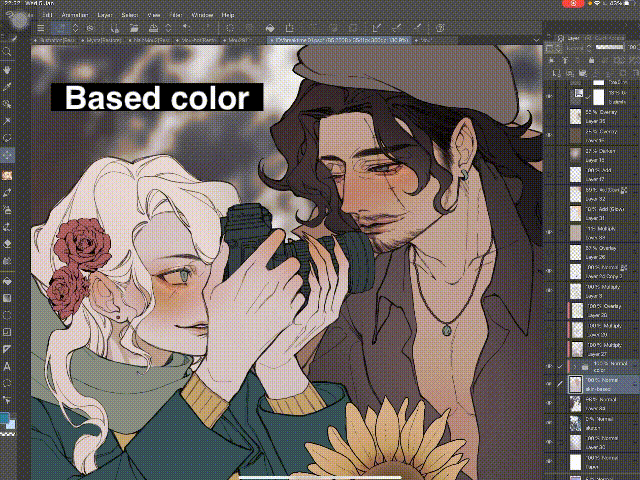
In the previous part, I using an definition called “Effects layers” which means every Layers i use to add more depth to the color: the shading and the lightning.
As I said in the previous tutorials, the ways to create them is:
New layer => Clipping to the layer below => Choose the Layer mode
And then you can shading and adding light in these layers.
For example I have:
D. Correction Layers
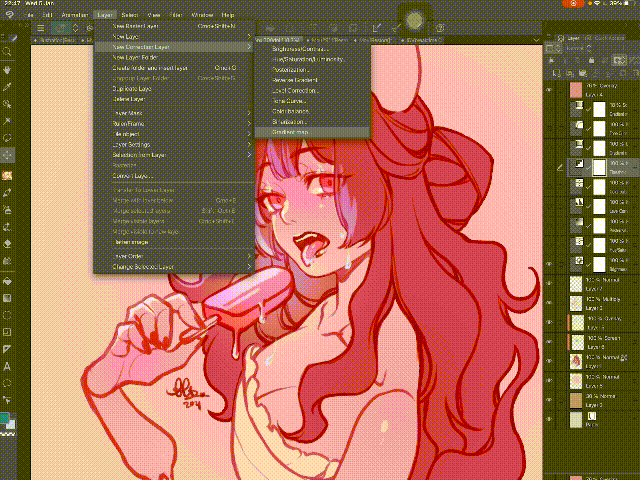
Honestly, I am still not really feel confident about my coloring, so the “Correction Layer” helps me a lot to retouch my color. It made the color gets along and adding more value to my color. Here is some example about using the “Correction Layer”.
First is how we adding them to our artwork:
Next I’m gonna show you some Correction Layers I usually use in drawing:
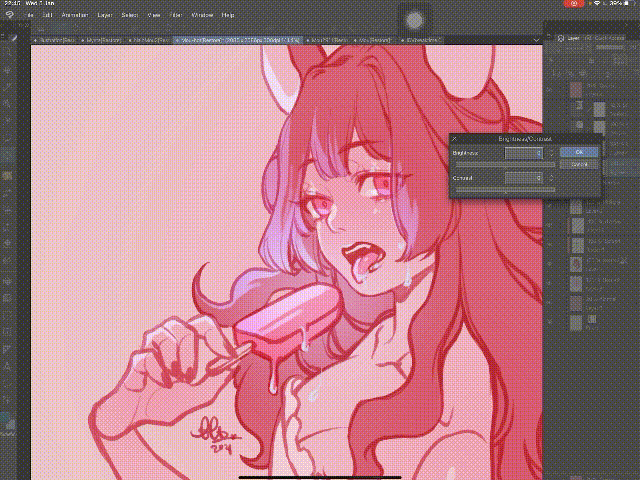
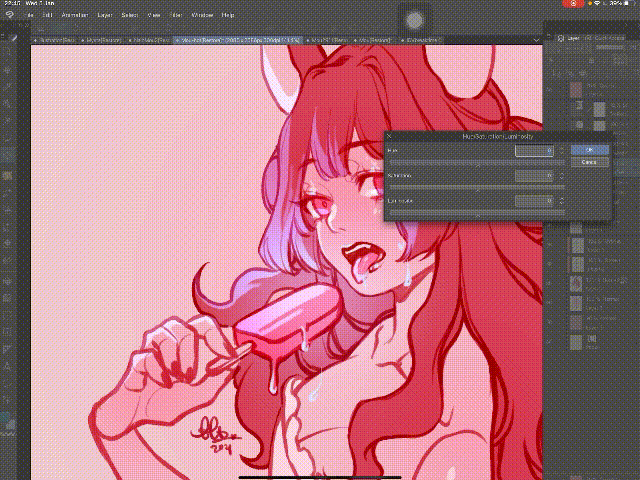
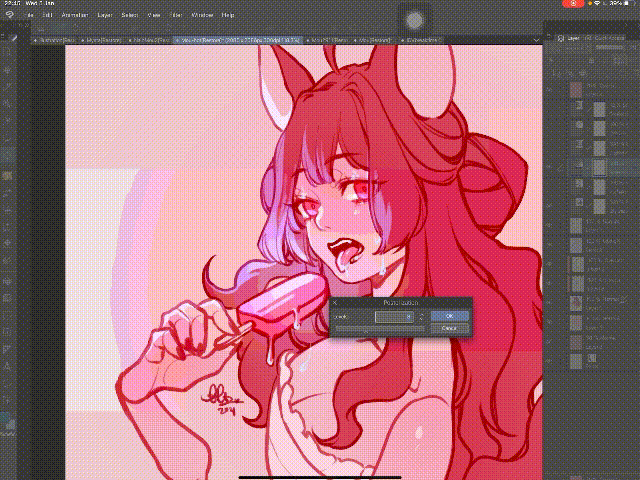
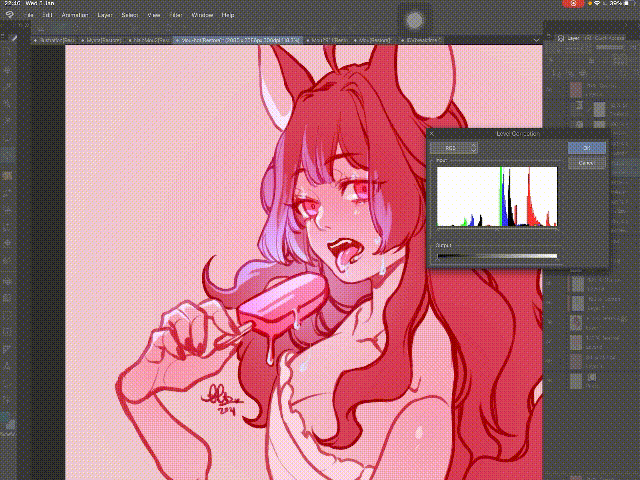
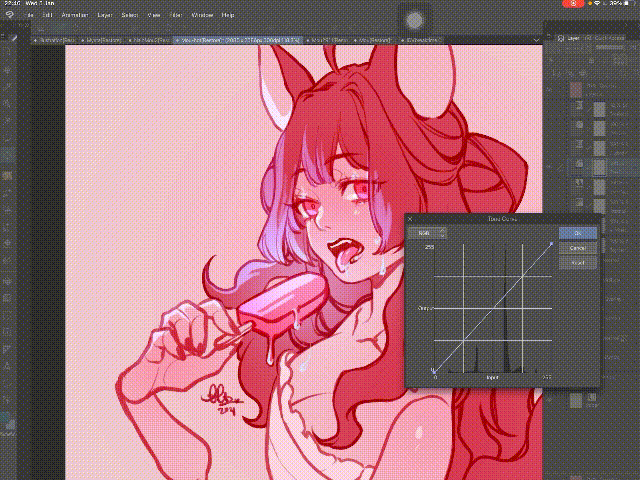
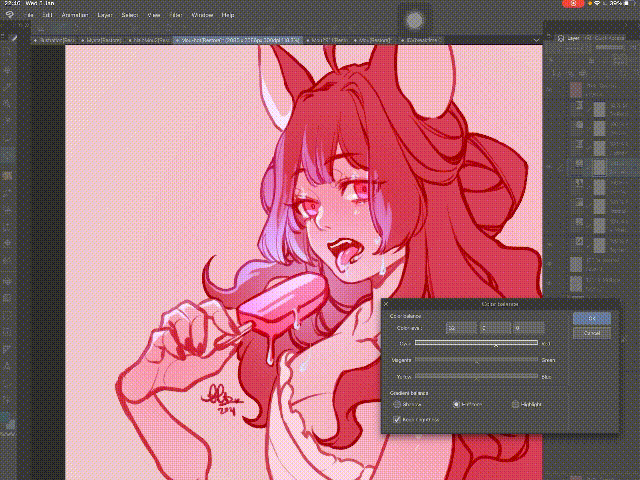
You can try it yourself because adjusting them is quite funny and doesn’t really have a rule (for me), I just slide it until I satisfy with the results.
But, with the “Gradient map”, I have a suggestion.
As you can see, when you simply choose a gradient map to apply on your art, sometimes it gets really weird…
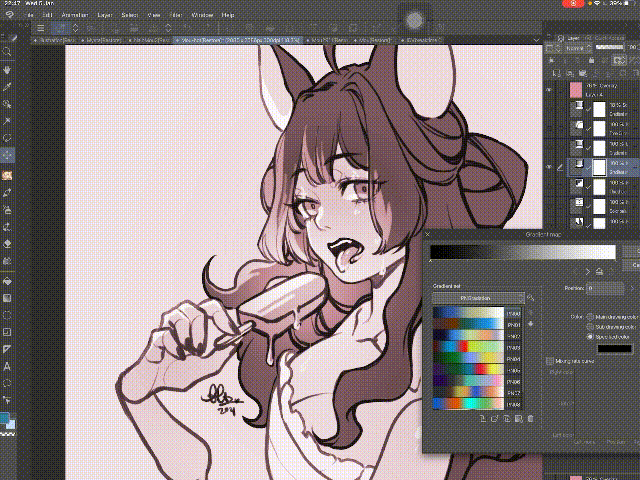
To make everything get along, my way to solve this is:
Changing the opacity of the [Gradient Map Layer] until it mix well to the original color.
Changing the layer’s mode to [Overlay] or [Screen], [Soft Light], [Hard Light], etc… until I feel okay.
Use both ways of them .
Here is the results with the [Overlay] Layer’s mode:
It’s just my suggestion, but honestly, it’s my way to use it. (❁´♡`❁)
D. The Ruler Layer Settings
Since lately I am working with a lot of Vtuber model, I usually use the Ruler to draw the symmetry art. I want to share some of my [Ruler layer] settings to you.
Because it will be so many layers to working with, so I prefer to create a separate ruler layer which I don’t draw anything in it.
But in the settings that you can find on the icon above, I change the object of the ruler for different purpose. Mostly, I use [Show in All Layer] to drawing the whole model, while sometimes, when drawing the details like earrings, I will create another {Ruler Layer} and set it affect to its folder or layer only.
Here is an example:
E. Material Layer:
Sometimes while drawing, I have to make some patterns that repeatedly appear so I find it’s quickly done by using the material layer. Here is the way:
First I have a pattern needs to be repeated here. Now, we go to [Layer] => [Convert Layer…]
In the box that showed up later, choose the type to [Image Material Layer]
Using the [Object] Tool to settings it, you will see the setting shows in the [Tool Property] box like it.
Turn on the [Tiling] mode and now you can choose between three kinds of repeating pattern:
I found it very helpful and saves time! Have fun with your own way of using this function!
F. TIPS of merging Layer:
Since sometimes you have to merge the Layer into one, there is two helpful ways to do it.
This one is merging all the layer to one, but sometime it gets hard when you need to fix anything, so try the [Merge into new Layer] instead.
You will have a new Layer and still have all of your working layer below. You can retouching, adding blurring effects, etc. on this layer. And when you don’t satisfy with it, just delete it, and your previous work still be safe.
G. Conclusion
So this is all the things I want to share a bout my way to working with layers in Clip Studio Paint today, thank you for your patience for another long long long tutorial of mine. I hope I have expression my opinion clearly and easy to understand!
Hope my tips work for you ! And if it does, please give me a heart !!!
You can also follow me on @tokyolondon (IG, dA, weibo) or visit my FB Page @TokyoLondon.Artwork
Thank youuuu <3


Commentaire