
Introduction and Briefing
Creating a character for your comics, games or story is a very exciting but also complicated task. Hopefully we can break out the process in simple steps so we don’t get overwhelmed by all that information.
For the purpose of this tutorial, our character will be based on this short description:
“This is Blue Beard, the fearsome captain of the Pirate vessel Azurite Sails. He’s known for possessing the Sea Skull, a magic key that opens any treasure chest locked in all of the seven seas.”
With this we can take out a few keywords to guide us: the color Blue (because of his beard), Pirate and Magic Key. These are very important, since they’ll help us narrow down our choices and inform all the design decisions, like shapes, silhouettes, colors, motifs, etc. It might seem like an odd combination of words, but these unlikely combinations can often provide us with something unique in the end.
A last tip before starting the design is to research for inspirational images with those specific keywords in mind and build yourself some sort of inspiration board.
Initial Thumbnails
Here we’ll start with the creation. The first step is to take the information above and design some quick character silhouettes, focusing on the big shapes first. For this step we can use any sort of brush provided that is big enough to prevent us from getting too much into details. Here’s my brush settings for the thumbnails and sketches.
As you can see on the thumbnails below, these are very simplified images still, work zoomed out with the big brush. We won’t bother with details yet, and try to produce as many tiny pirates as possible before moving on. I ended up choosing these three designs to flesh out more in our next step.
Sketching
With our Thumbnails done, it’s time to develop them further into a more detailed sketch. This is where we get the opportunity to show a bit more personality for this character with his pose and accessories.
In the example, I mixed and matched some of the items in each silhouette, but still kept our key words in mind so I wouldn’t stray too far from the idea. The Bandana from thumbnail C was replaced by a hat to give the impression that this character is not only a Pirate but a Captain of a pirate vessel. The Key was also added in this part.
In our second example, I’ve picked sketch D and detailed him even further. Take as long as you need in this part, until you start feeling that the character is really coming through.
Detailing and Texture
To help us flesh out the character, sometimes we need to take a step back and approach some specific elements as its own design. So let’s focus on the design of his hair and beard style, and then the Sea Skull key.
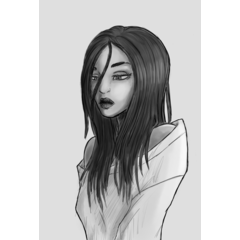
For the hairstyle and beard I pulled a lot of images from my inspiration board as reference to sketch. I was looking for a style that resonated better with someone who spent most of their time out in the sea. In the end, I chose the option E with the bushy beard and wild long hair. It seemed more likely to me, besides I doubt our pirate would have much time for shaving and self-care.
To design the keys, I used the symmetry ruler to my advantage. This type of tool is very handy for designing patterns and complicated contraptions and was perfect to get the look of the key right.
As you can see I selected the “Symmetrical Ruler” from the ruler subtool menu and set the Number of Lines to 2.
Experimenting with other settings in the ruler tool can yield different and unique designs as well. You can see here when I change the Number of Lines to 6 I’m able to get even more interesting and detailed shapes with ease. Shapes like this are good for mimicking lace and fabric patterns.
Bring it all together
Now that we’ve established the final look for our character it’s time to take it to a finish. I lowered the opacity of the sketch layer and made a new layer on top of it to draw our Ink lines. Here’s the settings I used for inking.
After that, it’s time to color our pirate. Here’s the brush settings I used for this part of our concept.
Usually I go about doing a full body flat color layer first so I won’t have to worry about going outside of his shape later on. I’ll paint the whole body shape with an opaque brush, on a layer underneath the Line Art. Remember to stay inside the lines.
After that I flat each element in it’s own layer and clip it to our body layer. In the example here you can see that I clipped the layers only affect what’s shown on our body layer, this way they all respect the constraints of the body shape. This is a good way to make sure your shading on one element won’t interfere with the rest of the body, while still having a great amount of freedom and control. To use this function you need to create a new layer above your body layer and click the “Clip at Layer Below” button highlighted in the image.
Since his beard and hair were blue in our description, I decided to go with a colder color palette for the rest of his outfit combining various shades of blue, purple and brown.
Using analogous colors for your character is a great way to make him seem cohesive but also adds variety without using all the hues available in the color wheel. A tip for this is to try and stick to just one half of the Color Wheel at most.
Using the clip layer technique we’re able to shade our pirate using a multiply layer clipped to the folder containing our color base. For this case I used a purple tone and lowered the layer’s opacity to 49%.
With that we can now add the final details like little shiny spots on top of the metallic parts and a bit of color to our line and we’re done!
この投稿を「いいね!」したユーザー


コメント