Making Profiles Like a Professional

-
 MVP ◆質問に対して適切な回答を数多く投稿し、コミュニティの運営に大きく貢献したユーザーです。MVPは3ヶ月に一度、その間に獲得したポイントを元に決定し、表彰を行っています。
 -
 NVP (New Valuable Player) ◆MVPに次いでコミュニティの運営に貢献したユーザーです。これまでMVPの受賞経験のない方から、獲得したポイントを元に決定し、表彰を行なっています。
 -
 公式エキスパート ◆優れた回答者の証であるMVP受賞者の中からさらに選ばれた、コミュニティで最も優良な回答者の証です。審査を経て当社から依頼し就任いただいています。※旧名称「エバンジェリスト」
 -
 セルシス公認モデレーター ◆モデレーターは、日本語とその他の言語が話せるセルシス公認のスタッフです。ソフトウェアや創作のエキスパートではないので、直接疑問を解決することはできませんが、みなさんがスムーズにコミュニケーションできるように、言葉やコミュニケーションの側面からサポートします。
 -
 セルシス公式運営に関連した公式アカウントです。
Intro
Hello and welcome to a new tip of Clip Studio Paint, dedicated to our creations and today I will explain about the creation of profile icons!
For artists who uses social media to share and express, a good profile icon is ideal to showcase your style to your audience on Twitter, Instagram or other instant messaging platforms such as Discord or Telegram.
Let me demonstrate the characters for this tutorial: the violet warrior, the cat wizard and the kobold warlock!
That and much more what we will see next with Clip Studio Paint...
Drawing 🖍️

Whatever your own style, you are welcome to know of the process of illustration and start on a new canvas and design our profile icon. Thanks to Clip Studio Paint, you can get all the default and necessary tools for sketching, even get paper texture materials.
In the next steps, we will see some details to consider before moving on to sketching...
➜ Expressions 🎭
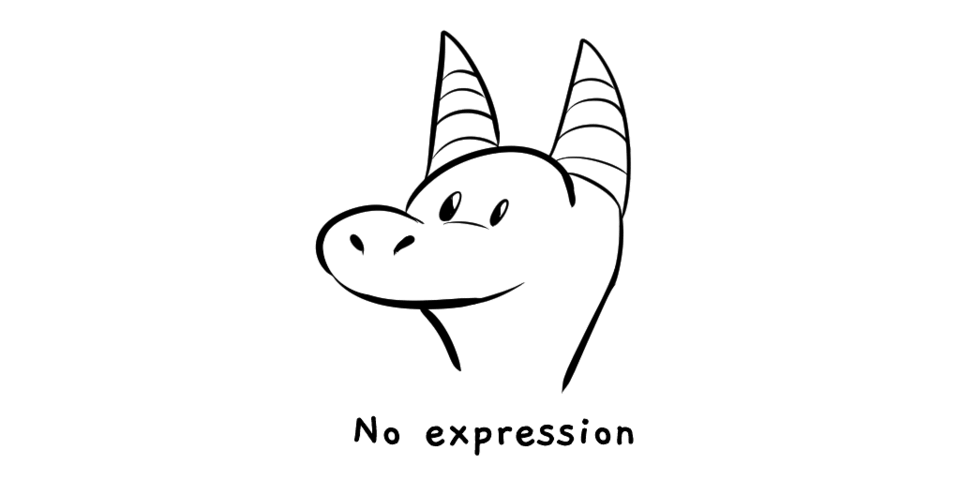
Nail the expression is the key of you want to transmite with your audience. It is good to remember the 6 basic expressions to get started in sketching: happy, angry, sad, fear, disgust and surprise.
➜ Post-It 📝
The fun part for making doodles or sketch, is you can use some tools essentials like the post-it. With the post-it notes, you can add optional details on top, change the eye style and enhance the outfit. Try it!
➜ Sketching ✏️
Starting with the size of canvas of 512x512 for a rough sketch of the model profile, then transform the canvas size in 1024 x 1024 (2X) for the clean sketch and details before the inking and coloring.
Note: You can drawing the 3d mesh for the objects or people of sketch, it will help to undestand the tridimensionality of the model and the perspective. Thinking in 3D!
➜ Illustration 🎨
Finally it's time to make the touch with the clean sketch starting with the colors and lines!
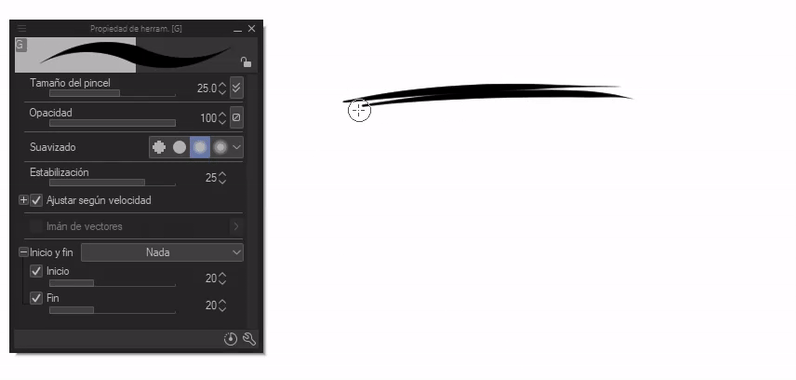
For the profile icon, the ideal size for better resolution is 4096 x 4096, but in this occasion, we can work with 2048 x 2048. I will use the ink 'G' with the adjustment for inking.
And now fill the linearts with the base or silhouette in 50% gray (#808080) and folder layer with the layers for colors and details. I show you an idea about the organization on Layers...
In the process for shade and highlight, here a super trick fo better results in the moment of use the airbrush in a shade layer: using the color expression Gray for paint in values, and the Layer Color for coloring the values in the easiest way...
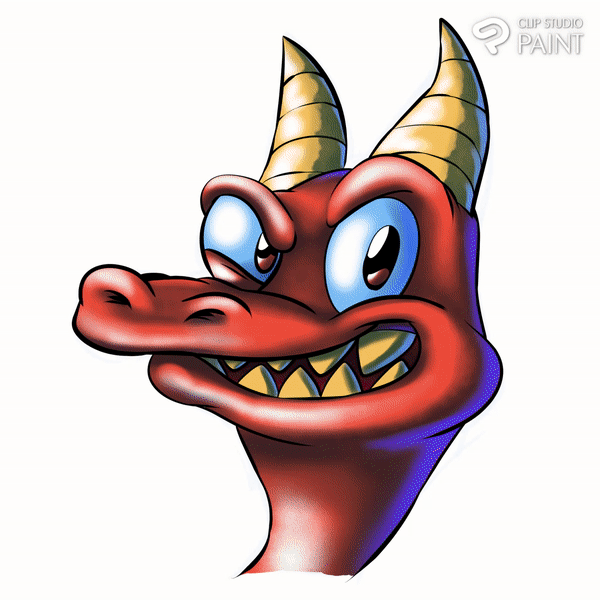
And paint the shades like a concept art!
For the cel light, you can activate the ''Starting and ending'' for better result in the ink...
And add glow to finish the illsutration! I show you the timelapse about the process of the profile...
You can create in Clip Studio Paint a various style of backgrounds, patterns for your profile if your preferred, like these examples to inspire.
Export your profile 📏
Now with the illustration finished, it's time for export to social media profiles. Starting with the Selection tool with 'Elipse', select the area and pressing the Shift key for circle perfect that you want cut.
Once the area is selected, proceed to click Crop in the Selection Launcher and ta-da!
Or you can also export the full size and choose where to crop in the same social network. Now I show you the final result of your profile icon for the social media...
Extras 🏆
At this point, I'd like to share some extra tips to learn more about Clip Studio Paint tools, try out other areas such as expression designs for emotes and even try something with animation and special effects for our profile.
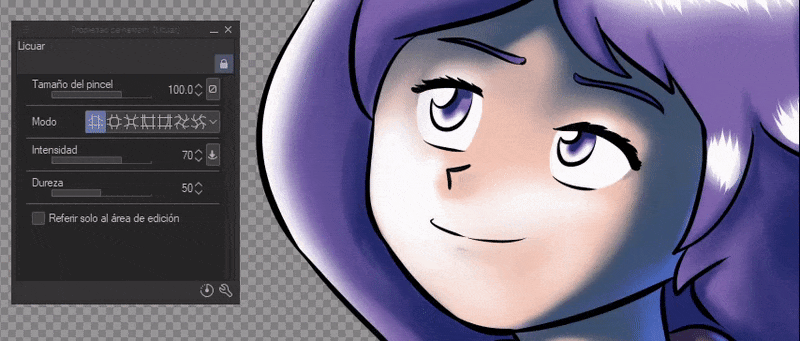
➜ Liquify 🔎
In the last update of Clip Studio Paint, the Liquify tool will help to transform and deform the raster layer of illustration, fixing details and enhance the final art! Here a preview of the use of tool of liquify the profile.
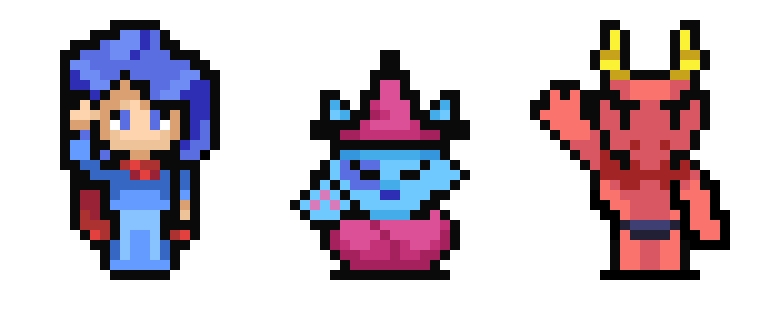
➜ Emotes 🤩
Remember about the technique of Post-it. So this is will be useful for purpose new expressions! With the final art in a small size like 112px x 122px , you can redraw, edit or remix your profile icon to convert in a emote. Here's somes examples of these...
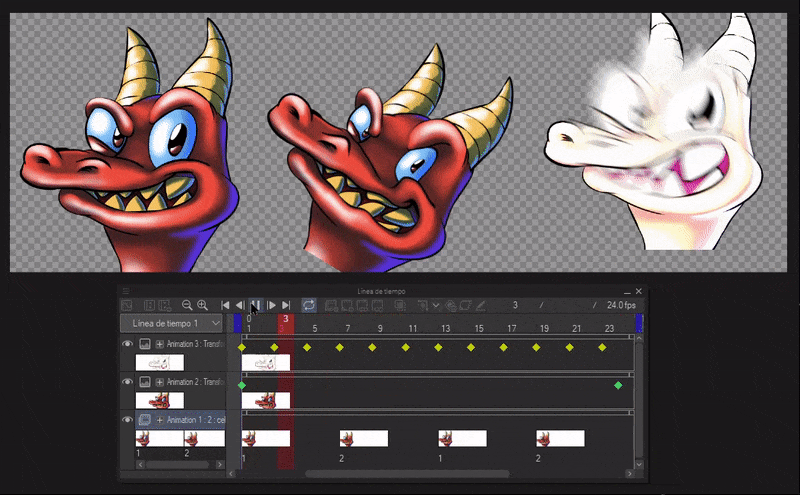
➜ Animation 🎞️
Whether for PRO or EX users, you can create simple animations on the timeline by creating and drawing frame-by-frame or by activating keyframes for tweening layers. Perfect for your videos, GIF stickers or animated emotes!
➜ FX ✨
And the last extra tip is about the knowledge of use the adjustments layer or use the blend mode, in the profile. The next process is about the duplicate the raster final art, apply blur filter, use differents blend mode and enhance with curves...
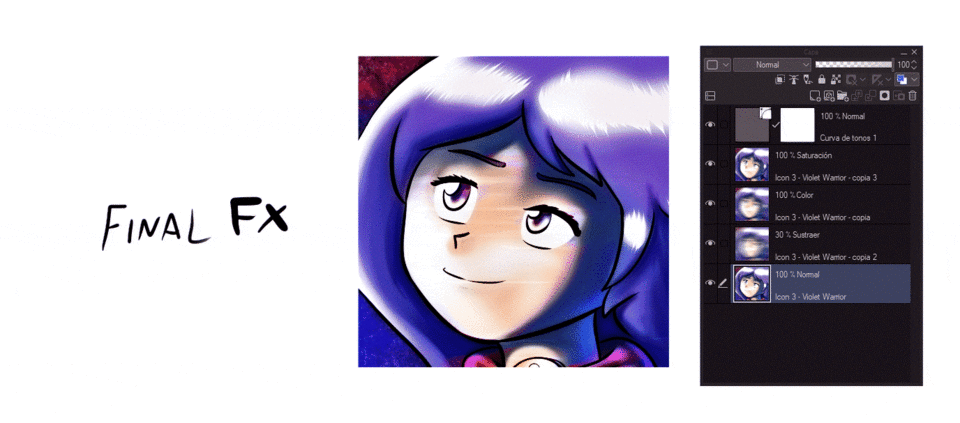
And the result!
Conclusion
Once you have learned the steps, not only did you learn all the techniques and tools of Clip Studio Paint, now you can handle in the creation of new profiles icons as a professional and express yourself with your public what you do!
Thanks for getting here and I'm glad you read the tutorial and I hope it was useful and practical!
I share my link about my portfolio of works and my daily posts!
See you in the next tip of Clip Studio Paint!
この投稿を「いいね!」したユーザー


コメント