
Hey guys! Today I want to show you how I create my very own jewelry and golden brushes.
This trick is a huge time-saver for webtoon or webcomic since you don’t have to draw from scratch the same piece over and over on each panel.
While clip studio asset store has some amazing gems and brushes to offer, I feel that creating your own custom brush makes the over-all style a lot more cohesive and gives a nice personal touch.
The types of brushes we will create today:
- Simple Gold Brush

- Gems and Diamonds

- Gold Chains

- Crowns and Tiaras
Lets get started!
Simple Gold Brush
Find a gold reference image and use the eyedropper tool to select different colors try to select the colors in the order of their appearance.

Draw a small line for each color with a pen tool
Lightly blend the edges between each color.
Next, use the rectangle selection tool and cut out a strip from the center, make sure there are no soft edges! Paste the strip on a new layer.

We can almost start creating our brush! But first we need to set a brush tip material go to Edit > Register material > Image
a window will pop up.
Name the material (remember the name for later). Make sure to check the box at the bottom that says "Use for Brush Tip Shape" otherwise it won't work.
Pick a location to save this new material and click ok when you are done.
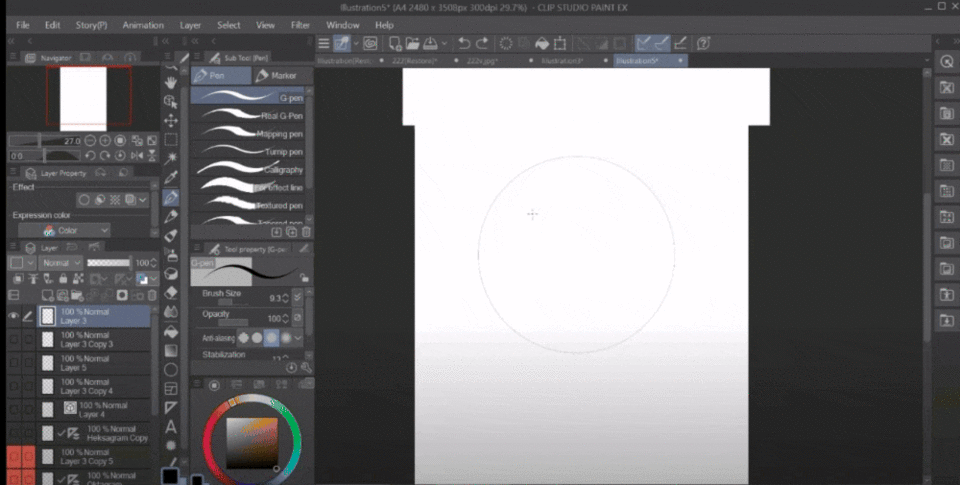
Setting UpThe Brush
Great! We are ready to make our brush!
Go to Decoration > Natural Scene
Find the rainbow brush.
Right click to duplicate sub tool. Name your new brush.
to edit the brush, click the little icon at the bottom to open the sub tool detail window.
From the menu go to "brush shape" click the little arrow, search your material name, choose it, press ok.
the brush should now look like this-
In the menu go to "Stroke" and check the "Ribbon" box for a varied angle brush.
I love incorporating this brush as a base for other materials and jewelry I create.
Gems and Diamonds
Since gems are semi-transparent, we can see the bottom of the stone when we look through the top.
For a more in-depth explanation of transparent objects, check out my other tutorial.
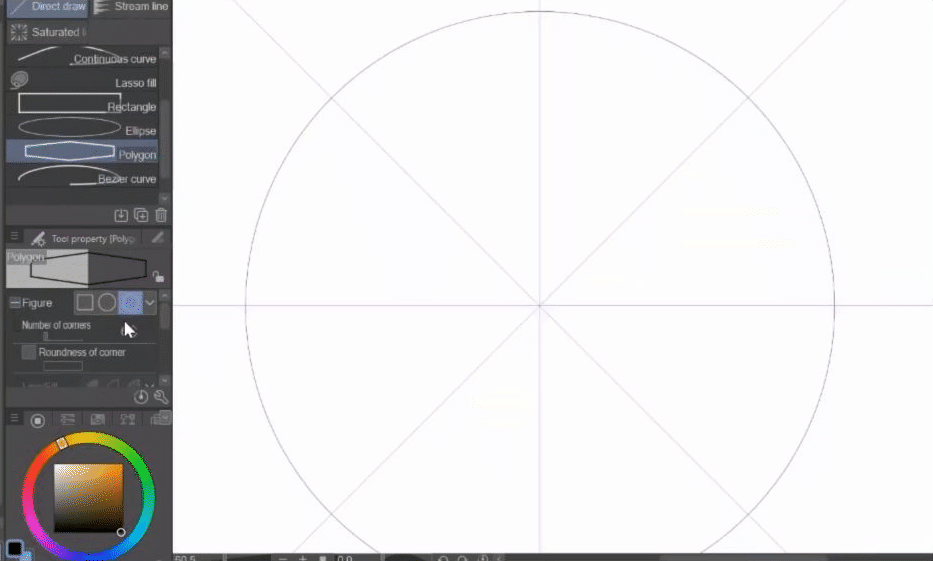
Use the eclipse figure tool to draw a circle (you can also use a polygon). Hold shift while you draw for a perfect shape.
Insert a magic circle ruler, right click the layer and set it to show on all layers. here is the ones I use-
This will allow you to draw symmetrical geometrical shapes.
Align the ruler and circle by transforming the circle (ctrl+shift+t) and putting the little + signs together.
We need to draw two different shapes - one for the top view and one for the bottom.
I use the polygon tool for this step.
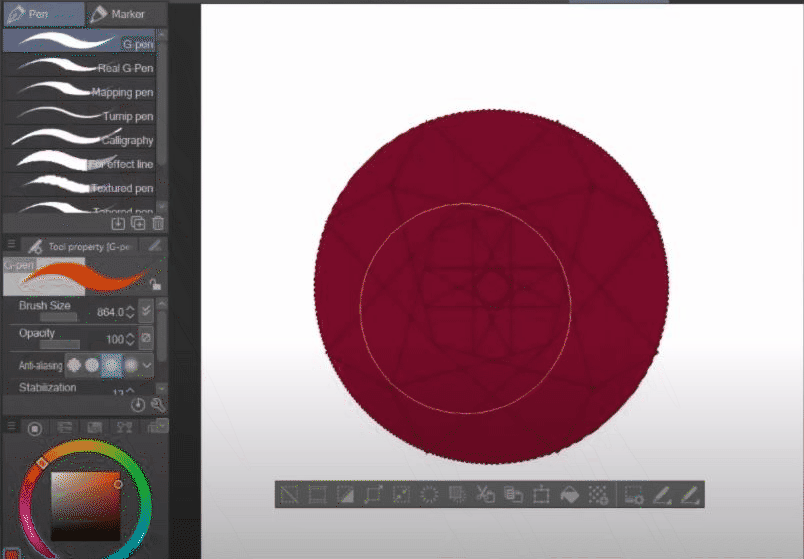
Select the circle and add a solid color on a layer below.
Use the bucket fill tool and set it "refer other layers".
Hide the top view layer. On a new layer start filing in darker and saturated colors, set this layer to multiply.
Repeat this process for the top view of the gem, only this time use brighter colors and set the layer mode to "add glow" or "glow dodge".
Shade outer edges and middle with an air brush.
Fill in a few lighter areas with bucket tool
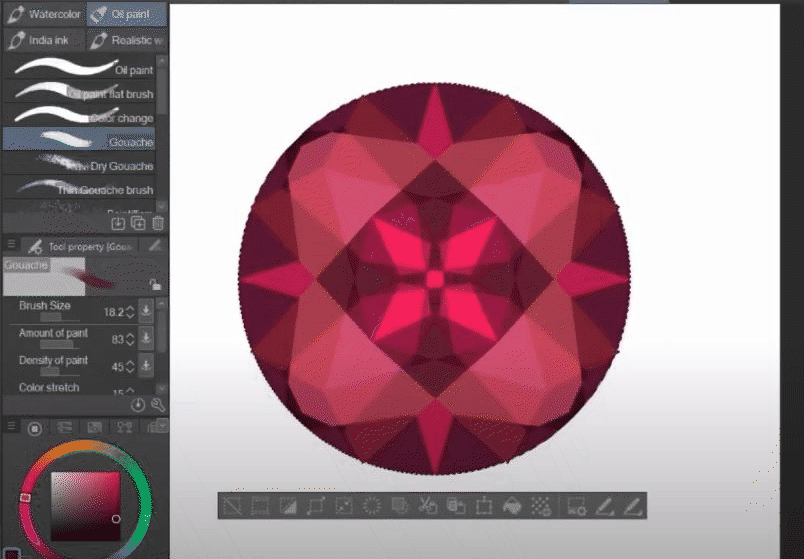
Add glow and reflection layers using crystal and sparkle prism brushes.
Adjust colors if needed.
The brushes I use-
Put layers into a single folder
Transform folder into a shape you like.
Gold Detailing
Now lets add gold detailing!
Duplicate the gem and merge layers.
Add a border effect, set the width and color to a chocolate brown.
Merge it into a new layer, we can now add changes to the border.
Tip: To separate the border, select the jewel (from the original layer) and delete it (from the border layer)
add layers on top the border and clip them to that layer.
Use the gold brush we created and set it to overlay, erase parts with a textured brush.
I love using the gauche brush to do this steps.
Shade some areas with dark orange/ brown/olive shades and set to multiply
Add highlights with orange and yellow tones and set to "glow dodge" or "add glow"
Add brighter highlights with a pen brush, remember - less is more.
Adjust colors if needed.
When you are happy with the result, register the entire folder as a brush tip.
This time, in order to set the brush duplicate the pearl brush in Decoration > Clothing
Repeat steps from gold brush in order to set brush tip.
Gold Chain Brush
Register the golden detailing as a separate brush tip material duplicated the chain brush that Clip studio provides and set this new brush tip.
In the menu go to "Stroke" section, adjust the gap to your liking.
Notice how the gap is set to "fixed"? (single circle icon)
If you set it to "Wide" you can get ANOTHER cool chain brush that looks very 3D.
Variations and More Examples
experiment with using different geometrics shapes for both the base and inside lines .
some examples:
Make the golden detailing fancier by turning on the ruler and adding blobs.

Try duplicating the layer and go to Edit > Transform > Flip Horizontal, rotate shape for cool results.

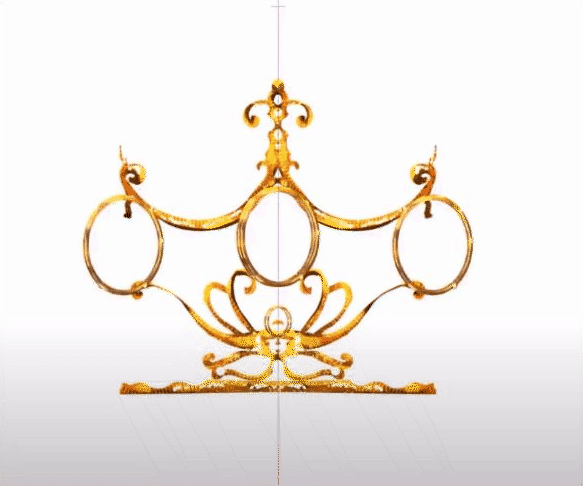
Crown and Tiara
Insert a symmetrical ruler from ruler menu, set it to show on all layers. Make sure the number of lines is set to 2.
Draw a crown or a tiara shape.

Add shading and highlights. This time I used the chain brush we previously created to add texture.
Keep the ruler on while coloring to keep the shading and highlights symmetrical.
Use the select rectangle tool to cut out a shape, take into consideration the edges will connect in the brush.
If you try to register this material as it currently is- your brush won't be seamless.
To fix this, rotate the crown shape 90 degrees (by going to edit > transform > rotate scroll down and set rotation angle to 90.
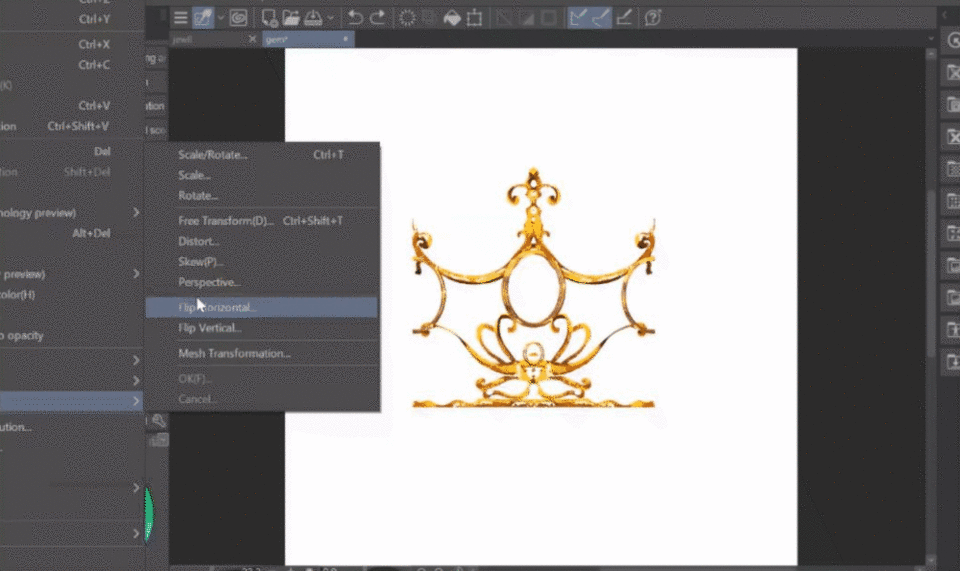
Repeat steps I've explained in previous brushes and set the new material as a brush tip. Make sure that under stroke section, the ribbon option is selected.
Final Results
Mix and match all the brushes we created to create unique jewelry designs in just a few seconds.
combine several materials together to create an earing or necklace material.
The possibilities are endless!
The jewelry in this drawing were created using this brushes
All the brushes I created during this tutorial are available to download for free from the Asset Store
I had so much fun creating this and I hope you found my method helpful. Please like and subscribe if you like my content and comment below what you'd like to see me create next!
이 게시물에 '좋아요!'를 누른 사용자


댓글