QUICK TUTORIAL WITH TIPS | CLIPSTUDIO MOBILE
Hello, MarL here
For the start of this tutorial, I will give a brief introduction of Clip Studio Mobile. I will also show you how to set up your workspace for efficient drawing on your smartphone along with drawing tips.
Please feel free to watch my video as it has the same content. It has timestamp below the youtube description, that can help you watch the content you need quickly. For the "Tips for Drawing" part, I included a Speedpaint so I hope you will like it.
Let's start!
BRIEF INTRODUCTION OF CLIP STUDIO MOBILE
Before we start the main topic, you can download Clip Studio Paint via play store if you're using android phones or App store if you're using Iphone.
Just search Clip Studio Paint and click that install button.
HOW TO BUY SUBSCRIPTION?
If you are wondering, I am using a FREE 3 months subscription that will expire on December 27, 2021. For galaxy user they have a free 6 months subscription.
To avail this sweet free 3 months subscription. At the start of the screen you will see three option, [launch], [sign up to get your first 3 months free] and [I already have a license]. Just sign up or sign in to get the 3 months trial. You will be directed to the [Purchase app] section.
If by chance you didn't.
Go to [Menu] > [App Settings] > [Purchase app]
And pick the subscription you want. Before you subscribe, there will be a reminder that the trial will expire at a specific date and will ask if you want a reminder a week before it expire.
So if you like the application, you can avail the trial anytime just remember to cancel the subscription before the end of the third month.
There are lots of plan to choose from, I recommend the smartphone plan if you're short on money that only cause 46.00 pesos. It's on the very end of the list for the android users so be sure check those.
HOW TO CANCEL SUBSCRIPTION?
Click [account] > [manage monthly plans] > [Active subscription] > [cancel subscription]
CREATING CANVAS
When you open clip studio, there are three option given to create canvas.
►Create a New File
You make your own canvas from scratch. You can customize the size or just choose any of the pre-made option.
of course, the higher the quality you choose might lower the speed of the program.
Make sure you're on illustration mode if you're just drawing, but you can also pick webtoon, comic or even animation depending on what you prefer and what you plan on doing.
Before you make your canvas, I recommend checking that timelapse button. So you can record your art from start to finish.
►New from Device Storage
This is an option where you will import a photo from your device to the application.
►Open File
Here you can open your saved CSP files, png or jpeg.
BASIC FUNCTION
For a brief basic introduction. I separate it to 3 category, edit bar, palette bar and command bar.
►Edit Bar
♦ Switch Eraser tool - where you can quickly swap your active tool like pen, ruler or shape to an eraser.
♦Tool Section
♦Brush Size - where you can easily change the size of your brush
♦Brush Opacity
♦Color Icon
►Palette Bar
The bar consist of [Quick Access], [Layer Section], [Layer Property], [Tool Property], [Color Wheel], [Color Set], [Color History] and [Materials].
For the [Quick access] and [Color Set] I will discuss how to set it up at the "How to Set up Workspace for Smartphone". For the [Materials] it will be discuss in "Tips for drawing".
►►Introduction of Layer Section
Layer Section
1. Clip
2. Set as Reference Layer
3. Set as draft Layer
4. Lock
5. Lock Transparent Pixel
6. Set showing area of Mask
7. Set showing area of Ruler
8. Change Layer Color
9. New Raster Layer
10. New Vector LAyer
11. New Layer Folder
12. Transfer to Lower Layer
13. Combine to Layer Below
14. Mask
15. Apply Mask to Layer
16. Delete Layer
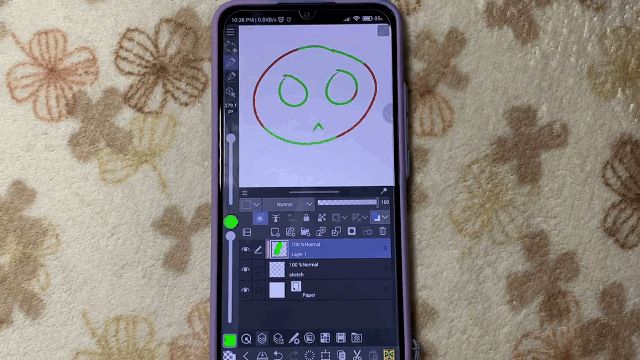
►►How to adjust Layer Section Size?
You can simply adjust the size by dragging the line like button above.
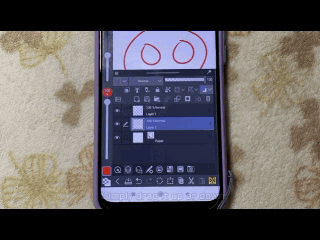
►►How to rename a Layer or Folder?
To rename a folder or layer, [Double tap the text] to rename it.
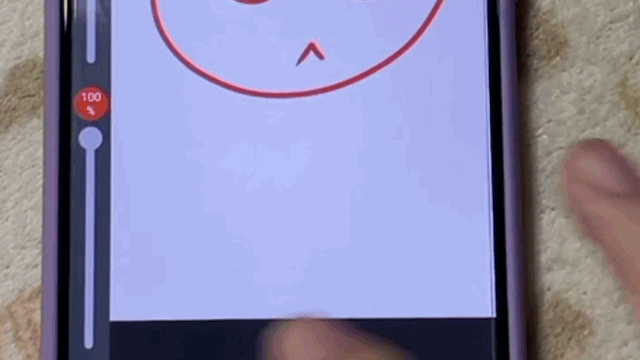
►►How to arrange layer or folder?
Simply drag the button on the right side of the layer or folder
►►How to put layers in folder?
There are two ways to put layers in a folder.
1. Drag the layer individually by holding the right side onto the folder.
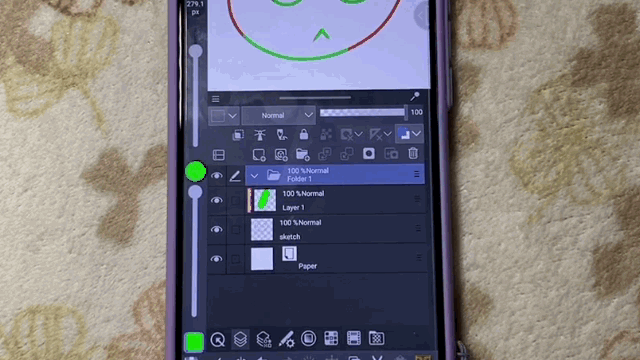
2. Check the box on the left side, the drag them together in a folder.
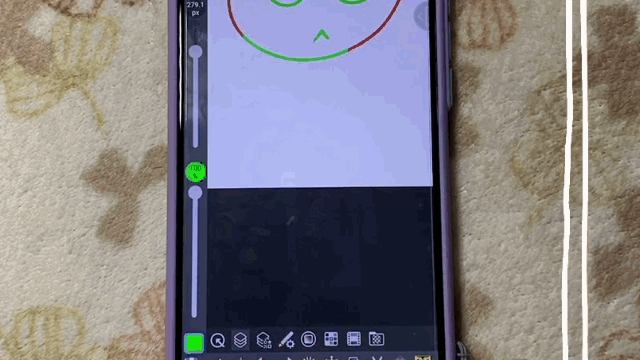
►►How to customize Layers and Folder?
Click [Layer you want to customize] > [Change Palette Color] > pick a color
This function is applicable to both layer and folder
►Command Bar
Command Bar consist of [Close], [Save], [Undo], [Redo], [Delete], [Scale/Rotate], [Copy], [Cut] and [Paste].
SETTING UP WORKSPACE FOR SMARTPHONE
I will also show you how to set up your workspace for efficient drawing on your smartphone along with drawing tips.
For an efficient drawing experience, it's better to set up your workspace on your smartphone. For example, quick access will serve as your shortcut instead of going all the way to the Menu. Customizing your command bar by putting some function that you commonly use or setting up your color set for easy coloring.
►Layout Setting
To change layout setting, hold either the palette bar or command bar.
After clicking [Layout settings], you can rearrange it to your liking. Like moving the edit bar to the right, palette bar above or just stay to the usual default design by clicking [Restore Default Layout].
►Set up Palette Bar
[Hold Palette Bar] > [Palette Bar Setting]
You can now customize your Palette Bar. In my case, I am very satisfied with the default palette bar set up so I continued using it.
►Set up Command Bar
[Hold Command Bar] > [Command Bar Setting]
------------------------------------------
To change Icon
1. Click [flip horizontal] > [Icon Setting] > [specify image file] > [pick the icon you want]
if by chance you want to use your self-created icon, starting from the [specify image file], click [Menu] > [Import]
2. You can also change the background color of the icon.
►Set up Quick Access (Shortcuts)
Quick access are like shortcut buttons. There are 3 set available by default. For the 3rd set you can make your own.
Click [Quick access setting] > [pick the function you usually use] > [add]
You can use [Divider] so that your set looks appealing and organize.
To add set, [hold any set] > [create new set]
To rename a set, [hold the specific set] > [manage new set] and just renamed it.
If by chance you feel lost since the [quick access setting] does not show up in the new set.
[Hold the blank space of the set] > [Quick access setting]
► Set up Color Set
To create your own color set, click [Color set] > [Edit color set] > [Create new set] > [ok]
You can add color to your set by clicking the [Add color] button.
By adding a color the color set will move and will not overwrite your other colors.
------------------
TIPS FOR DRAWING
►Import your Sketch
If you're not use to drawing digitally. You can import a photo that you drew in real life to Clip Studio Paint.
Go to [Quick access set 1] > [import from device storage] > [pick photo]
Rotate photo using [scale/rotate] or you can adjust it using [transform].
You can change the perspective using [Free Form]
Go to [Quick Access set 2] > [Free Form]
Or [hold layer] > [rasterize layer] > [go to Quick access 2] > [mesh transform]
Decrease the layer opacity and have fun tracing your own art.
►Download and Using Materials
Take advantage of clip studio's materials.
Clip Studio has a large community meaning there's lots of material to choose from.
After download, go to [folder] > [download]
Then drag the symbol
You can rotate and move the 3D model. To freely resize the 3D model. It's better if you rasterize the layer.
Decrease the layer opacity and have fun using the 3D model as your guide.
Another example is using a materials. Using only a specific part like hands. There are also ready made body parts in Clip Studio Assets so be sure to explore those.
►Always use Flip Horizontal
Always use [Flip Horizontal] when sketching as it can expose errors that you fail to notice because you are used to drawing in its usual orientation.
►Symmetrical Ruler
Go to [tool] > [ruler] > [symmetry ruler]
draw a line and start drawing
You can modify the ruler. If you want it to show in [All layers], [same folder], or only apply it to the [editing target].
Symmetry ruler is my favorite function. I always use it when drawing heads and eyes.
► Touch Shortcut
I emphasize two touch gesture only which can help you draw easier.
Double tap = UNDO
Hold screen = Eyedropper tool
►Organize your Layers and Folders
It's better to organize your layers and folders. But we all have our own preferences so I won't force this idea.
►Pen Stabilization
The most useful tip when it comes to digital drawing. If you're having problems drawing a smooth line for your line art. For example you tend to create a wave line.
Go to [tool property] and adjust the [stabilization].
Stabilizing your pen will make the program correct the slight movement you are creating with your pen making your line smoother.
I recommend around 25, but you can go higher or lower if you're still not satisfied.
►Merge Visible to New Layer
If you're the type of person who use a bunch of layers and want to merge them in a single layer.
[Hold layer] > [Merge visible to a new layer]
If you're doing this for a transparent Line art, make sure to hide the [Paper layer] before merging them.
►2 ways to quickly make your Line art black
1. Change Layer Color
Make your lineart color using [Change layer color]. Change the layer color and sub color.
2. Lock Transparent Pixel
Another option is using [lock transparent pixel]. It's similar to clipping but you use the same layer.
►Clip
[Clip] is similar to [Lock transparent pixel]. It will help us stay inside the lines that we color. The difference is that [Clip] tend to use a lots of layer.
On the bright side, you're not afraid of making mistake.
►Explore Blending Mode
Blending mode is a very useful tool when it comes to coloring. There are option like, [Multiply] that can help color easily in a lineart with a white background. [Multiply can also be use for shadows and even if I said that, there are many blending option to use.
Effects like lights, color arrays and even a watercolor effect is possible.
So keep experimenting, and maybe in the future you can create your own Art style that no one can easily replicate.
► Explore Brushes
Clip studio has a lot of wonderful default brushes. You can also go to Clip studio assets to download custom brushes.
You can modify the brush, just click it.
Here you can adjust the spraying effect like the particle size, particle density and the direction of the particle.
SAVING YOUR ARTWORK
►Resize first if necessary
Click [Quick access] > [Change image resolution]
This step is optional, if you want to resize your artwork. [Change image resolution] can retain the quality of your art. While [Change Canvas size] might make your art blurry if you try to make it bigger.
►Export Art
Click [Quick Access] > [Export in .png] or [Export in .jpg]
►How to Export timelapse?
To save your timelapse, click [Quick Access] > [Export timelapse].
You can adjust the length, size and ratio of the video. You can also either show or hide the Clip Studio Paint watermark. You can also share it directly to social media. So just choose the options you prefer.
SPEEDPAINT TIMELAPSE
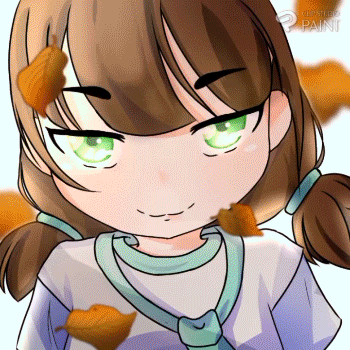
I hope the tips were helpful to you.
Compared to the text version, the video tip will include drawing process together with the "tips for drawing".
Thank you very much for watching!


댓글