How to Animate a Scene Using Keyframes & 2D Cameras!
Introduction
Hey guys, welcome back to another spooky tutorial from your favourite midnight dweller professor Crimsy!
In today’s tutorial we will create a creepy black and white animated screen for Twitch using keyframe animation and a 2D camera in Clip Studio Paint, so without further ado, let’s begin the ritual!
Create your Canvas
The first thing we need to do is to create the canvas for our project.
So simply head to File --> New... And when the project window opens make sure that your canvas size follow the same image ratio as the one you stream with. Most people stream in 1080p, but I’ll be going with a 4K canvas to get the better image quality, which is 3840 x 2160p.
Also don’t forget to make sure your DPI is at 300 as well and then press ok.
Planning & Drawing your Scene!
Once your blank canvas is created, it’s now time to fill it with spookilicious art!
First off, remember that for this tutorial we’ll be animating this scene using keyframe animation only, not frame by frame animation, so we can put as much details in the art as we want to.
Keyframe animation, otherwise known as tween animation, is when you create motion out of static images using the interpolation between the keyframes on a timeline. I guess you could say keyframe animation is similar to moving a string puppet, all the different parts of your puppet are static objects that move independently from each other and visually stay the same.
So when looking for ideas, try to think about what would look good using simple motions, such as translations, rotations and scaling. Try to have enough objects moving in your scene to make it look dynamic, but avoid going overboard with it or your canvas might end up like a chaotic mess.
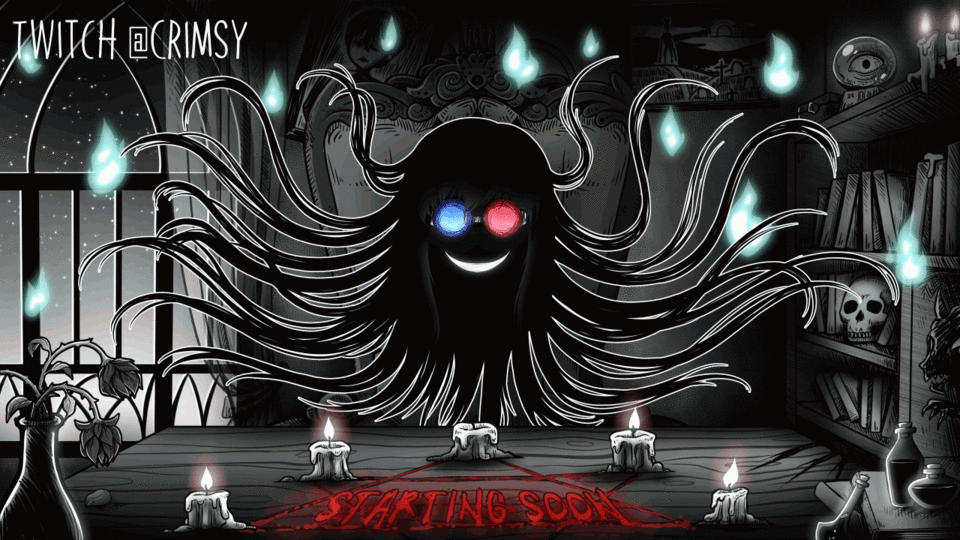
So as you can probably tell, for this project, I wanted to create a dark black and white scene with moody lighting featuring a creepy decor and my Persona’s ghostly head levitating in the middle of it with huge black strands of hair floating up and down.
TIP 01: when in doubt, make sure that your movement will look good, which you can simulate by using Ctrl + T, moving the pivot point (+) of your piece to its origin and rotate it around to see how it will look like.
TIP 02: make the moving pieces as complete and filled in as you can because moving pieces around can definitely uncover holes in your art, which is pretty easy to avoid if you picture them as stand alone assets like this. Basically just make sure to render the whole piece, even if part of it might be hidden behind something else.
TIP 03: add a border around objects you want to stand out a bit. You can add a border to individual layers, but you can also add a border to a whole folder if you like. In this scenario I added a white border to the floating head folder to make it pop and a black border around the table and the roses to thicken them up a bit.
Oh and one last thing we must consider when searching for ideas is that our timeline is limited to 24 frames, that is, if you’re a Clip Studio Paint Pro user. If you bought the EX version then you will not have any frame limitation.
Convert your layers to file objects
So once you’ve rendered all your layers and your scene is starting to look pretty cool, make sure to save your project and create a backup copy using File --> Save As... and giving it a different name. This step is optional, but I like to keep unaltered versions of projects in general so feel free to do it or skip it.
Once this is done, what’s left to do is to convert all the layers and folders of our different parts into file objects so we can start animating our scene.
To do this simply right click on a folder or layer --> go to File object --> and then click on convert layer to file object.
There are many benefits to converting layers and folders into file objects
1. It removes clutter from the project and allows you to animate a single object using a single pivot point.
2. File objects retain all previous layer contents while allowing you to modify the original file as much as you wish, but the best thing about this is doing so will not alter the animation keyframes that already exist so even after you began animating you can still make changes to the art.
3. most important of all, once you enable keyframes on a regular layer, you will notice that said layer becomes locked, which makes you unable to perform common transformation actions like rotations and scaling, but if you convert it first into a file object, you can then go to the object menu and use all the transformation features available.
Or course, make sure to keep each and every part you want to animate as a separate file object. For instance I made a file object for each strand of hair otherwise I could not animate them all separately.
Start Animating your Scene!
Now begins the truly fun part, bringing life into your scene!
First things first, we’ll have to create a new timeline for our animation by heading to the animation menu --> Timeline --> New timeline
When the timeline windows open, simply make sure your playback is set to 24 frames, unless you have the EX version of Clip Studio Paint, in which case feel free to make your animation last longer.
Then change the frame rate to 8 and this will give us a full three seconds of animation to play with.
Then head back to the top menu --> Window --> And click on Timeline.
Now, as you can see, we have our full timeline here, feel free to zoom in or out of it using these magnifier glass icons and also make sure to activate the loop icon to have your animation repeat itself once it reaches the end of the timeline.
Now let’s start animating!
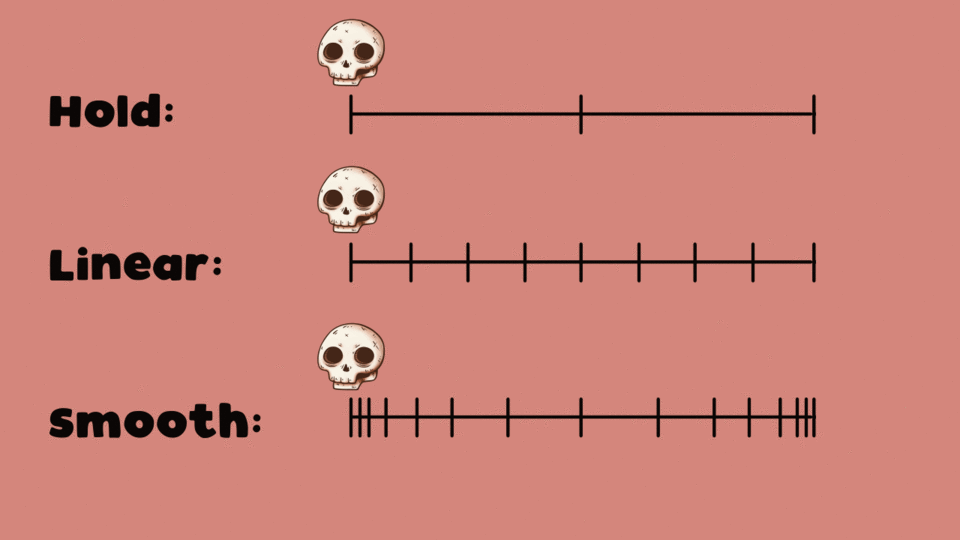
The first thing to consider when creating your keyframes is the type of interpolation you have enabled between those frames. There are three types of interpolation you can choose from, Hold, Linear and Smooth. You can quickly change how your keyframes interpolate by right clicking on the frame and switch to your desired method.
TIP: Note that this is also where you can copy, cut and delete frames if needed.
Here’s a quick graphic explaining how each type of interpolation behaves, but as a general basis, you will most likely want to use the smooth interpolation because this option creates the most organic looking motion.

So First, I decided to create the up and down movement for the head, so I selected all the layers from the character folder and clicked on ‘’enable keyframes for this layer’’.
Then go to the first frame, move the head and pressed the shortkey K on the keyboard to move the layers as a group and click on ‘’add keyframe’’.
And then to make your animation loop perfectly, press Alt on your keyboard and drag your frames to the last keyframe to duplicate them or simply go to the end of your timeline and add a keyframe.
After that, all I did was add middle frames to the animation and made sure to move their pivot point to insure that the rotation would originate from the right position.
TIP: Please note that copy/pasted frames will keep the same pivot point, but newly created frames will have their pivot at the center of the object.
And that’s it, now all that’s left to do is repeat this process over and over for all the hair and move on to the next assets.
TIP 01: it is good to note that you can move each file objects separately with the object transform tool, but you can’t use this tool to move multiple objects at once. You can however enable keyframes on a folder containing multiple file objects that are themselves animated and move, rotate or scale them all around as one entity. You could even create a complex folder hierarchy for puppet animation using this method, but I digress.
TIP 02: Remember to review your animation as often as possible during this process and feel free to hide some folders if your animation preview becomes a bit laggy.
Animating Opacity and Glow
I did follow pretty much the same steps for the entire scene, but it is worthy to specify that I also animated the opacity of certain layers to create the glow effect on the writing and the candles, as well as the smoke coming out of the top candle.
To animate the opacity all you must do is press on the little plus icon of your file object, enable keyframes and create your animation.
Adding a 2D Camera in your Scene
Despite everything looking pretty finished, there is still one last thing we should add to the scene to create even more depth in the movement, a subtle camera movement zooming in and out.
In order to create camera movement in your scene, only head over to the top menu --> Animation --> new animation layer --> 2d camera folder.
Next, simply select all the folders and layers in your scene and drag and drop them into the camera folder.
Animating the camera is also pretty simple. I created a keyframe on frame 12, then went back to frame 01 and scaled the camera down a bit. Not too much, just so the movement does not become nauseating, but just enough so the whole environment appears a bit in motion. Then, copy/paste your first frame at the last frame and you should be good to go.
Lastly, to show your camera’s point of view in the canvas, select your camera folder and in the tool’s property, select the icon ‘’show camera’s field of view’’.
Rendering your Final Animation!
Finally, now’s the time to render your animation and see the fruit of all your hard work before your very eyes.
To render your animation, go to File --> Export Animation --> Select your desired output format.
I personally went with the movie option, then chose MP4 as my file extension, gave it a name and then pressed Save. Once you do this, one last window will appear and let you choose your desired size and frame rate. Don’t forget to check the ‘’Apply 2D camera effects’’ box if you want your camera movement in the final render and press ok.
And now, we just wait, that’s it, so finally let’s take a look at our final render!

Final Thoughts
Pretty cool right? >:)
Now I really hope I covered everything you guys needed in today’s tutorial, if there’s anything else you’d like to know, if you liked this video and are feeling appreciative, then feel free to comment, show the channel some love by liking the video, subscribe if you would like to see more tutorials like this one and let your spirit drift away towards these other recommended videos if you feel so inclined, but that will be it for me, time to cozy up in my crypt, until next time everybody!
Aurevoir~


留言