
Clipstudio’s figure tools are very useful for drawing shapes and interfaces!!
In this tutorial, I will show you how to use figure tools to draw monitoring interfaces, such as:
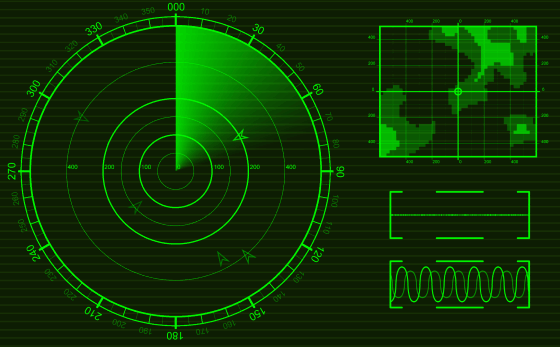
Radar
GPS
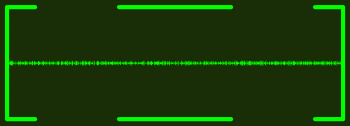
Soundwave
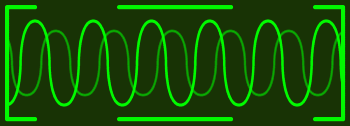
Sinewave
Then animate it for this cool result!!


Let’s start!
Video Tutorial
Designing the display interface
To design the interface display, knowing how it works will give you more realistic detail to your design, you may find the reference on the internet or design your own based on the real instrument.
The main purpose of the interface display is to show the information monitored by instruments. So you must pay attention to the information it will display.
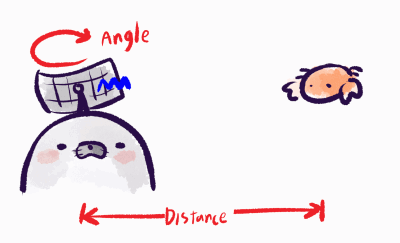
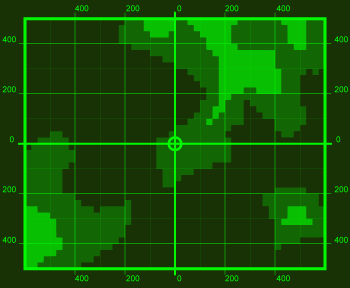
Radar is an instrument that sends the signal wave and catches it when it reflects on some object to detect the position and the distance (from the radar).
GPS is what we’re getting used to in our phones, it simply shows the position on the map from the top view, You may not need to know how it works because you already know how it shows your information
Here I give the quick design based on the real instruments.
The design will provide data like the real instrument.
Radar: Angle position(degree), object mark, and distance from the center
GPS: Obstacles on the map and distance from referent point
Drawing the interface with figure tools: Radar
When the quick design is ready, let’s draw it with figure tools!
Enable the grid, go to [View>Grid]
If the default grid looks unclear for you, go to [File > Preferences] to change its color
In [Ruler/Unit] tab, you can change the [Color of grid line] and [Color of grid dividing line]
You can also adjust the grid opacity in this menu
Now the grid will have a clearer look.
Adjust the grid scaling by the menu [View > Grid/Ruler bar settings]
Set the start point to [Center] this will make the ruler start align to 0 at the middle of the canvas
Adjust the gap of the grid if the default setting is too small or too large for you, if the grid is too small, it will be too hard to see the position to start drawing figure
(here I set to 200 for 2000*2000 px canvas size.)
Let’s start with the distance scale
Create a new vector layer
In sub tool [figure], select ellipse and disable anti-aliasing
Enable the [Snap to Grid]
Draw the circle by starting on one grid point on the edge, the circle will snap to the grid
With a grid, you can easily see the size of the circle and if it aligns with the center point of the canvas or not.
(you can hold [Shift] when you drag, to make the circle with the symmetrical ratio)
For the smaller circle, you can move the start point to the next grid intersection, the top and the left side of the circle will align with the grid line. This makes it so easy to adjust the circle.
This is a reference to the start point for all the circles for my design.
I split the inner circle with a less small gap, so I use the point between two grid intersections (on the grid dividing lines)
To change the circle’s line weight, use the object tool and select the circle.
And in the tool property panel, you can adjust the line weight on the option [Brush Size]
To put on the measurement scale to the circle, separate the scale from bigger degree sections, then trim it to smaller ones. (here I use 10-degree gaps)
Create a new layer to note the value will make it easier to work
I also note the distance scales.
Draw the separate line for the scale,
Create a new vector layer, and draw a circle covering all the designs.
This circle will help us to rotate around the center point of the drawing.
Use the [Mili pen] or [Fill-in-mono pen] in the [Marker] sub tool to draw the split line.
Set the Anti-aliasing to [None]
Draw the split line for 90 and 180 degree
Duplicate the layer by drag it to the new layer icon.
Select the layer and create a free transform (press [Ctrl+T] or go to [Edit>Transform>Free Transform])
Then in the tool property panel, change the rotation angle to 30 degree
Commit the transform by press [Enter]
Repeat the step, copy the layer again and rotate to another 30 degree
We will get 30-degree-step lines
Hold [Shift] and select all the layers, right-click and merge them together
For steps of 10 degrees, I duplicate the layer again and repeat the steps, but instead of 30 degrees, only rotate 10 degrees.
Optional: Use [Object] tool and set the line weight and color in the tool property panel
When finish, merge the layer of 10-degree lines together
Use the hard eraser, enabled the vector eraser with [erase up to intersection] mode
Erase also the outside circle, you will get the line separation for the scale.
Repeat the step also with 30-degree line separation, then change the color with [Object tool]
For the alternative use of creating a circle over the drawing, you can also use the selection tool, it will also snap to grid
Copy the layer of 10-degree scale and draw [Ellipse] over the drawing
Create transform and rotate it to 5 degree
Repeat it again and the scale is done!
Note: Disadvantage for the selection than the proxy circle is you may need to redraw the selection again and again, but you can use whatever you feel it’s easier for you :)
I create longer lines on a 30-degrees scale by copy the layer, create free transform and adjust its size a bit
(Make sure the [change vector width] is unchecked)
For the scale number, type it with the text tool
Then create a new layer, and draw the circle covering the number and whole drawing
Copy only the text and select both text and circle layer
Create free transform and rotate it to 90 degrees, then edit the number
Then copy both layers and repeat the steps with 90 degrees rotate
Repeat the steps again with 30 degrees rotate, now you can have number for all 30-degree steps
Put all the numbers into a folder and copy it again for smaller scale
Adjust the font size a bit down
Create free transform for the folder and adjust it to the drawing, make sure the center of transform is at the center of the drawing.
Rotate it to the scale position
Copy folder and rotate again
Then edit the number to the degree of the steps
You can group the number by select them and [Right click > Merge selected layers]
It will still allow you to edit the number inside the group with the [Object] and [Text] tool
Optional: Adjust the opacity of small scale down a bit to make the big scale looks more pop-out
Add also the number for distance line
The scale is ready
Next step, we will create the scanning to the radar
Create a new layer and draw a white circle coverage the area inside
IMPORTANT!: turn off the anti-aliasing
Convert the layer into a file object. Right-click on the layer [File object>Convert layer to file object]
The area must be set to [Drawing area]
Open the file object.
Enable and set the grid to start from the center with a bit large gap, so you can easily see the center of the circle
Use the [Straight line] tool to make the area for the gradient.
IMPORTANT!: also turn off the anti-aliasing here
Lock the layer transparent
Select the gray -95% on the color palette and draw a line by dragging from the center point to the edge
Select the gray -50% and drag another line, start from the center too and make some angle space between the first line
Draw another line by selecting the lighter gray color and start from the center point
(there are 4 lines here but the latest one may be hard to notice because I use gray -5%)
In the gradient tab, select the freeform gradient, [Normal paint] tool
Set the [Tolerance] to 0
(if not set tolerance to 0, the gradient will leak when the color value is too light, for example: at gray-5%)
Click to fill the area, it will create the gradient by the value of 2 lines
Fill all the other area
There is also some option for the gradient amount between 2 lines to choose.
For example [The lightest shadow] will give more ratio on lighter line than darker line
You can also adjust the value amount by adjusting the graph
Fill all the area, the result will look like this
You may see most parts are gray except some areas with -5% gray color.
Adjust the brightness to make it white, go to [Edit > Tonal Correction > Brightness/Contrast]
The area with light gray will become white
Delete unwanted area, select [Polyline] in the [Selection area] sub tool
Create selection that cut through the darkest area and white area
And delete it ([Ctrl+D] to deselect the selection)
Make it into a transparent part, go to [Edit > Change Brightness to opacity]
Save the file, and go back to the main drawing. It will show up automatically
(if it does not show up, right-click on the layer [File object> Update file object ])
Change the layer color by clicking on this icon on the layer panel (or enable it in the layer property panel)
Set the color to green and the radar sweeper is done!
By converting it to an object file, it will have the layer boundary of the object canvas.
You can simply rotate it to the center of the radar
Add objects on the radar screen
Create a new vector layer and draw the icon for objects on the radar with the [Stright line] or [Poly line] in the figure subtool
Use [Object] tool to resize and move it to the preferred position
You can copy and paste the selected object by [Ctrl+C] and [Ctrl+V]
The copied object will be placed over the original object, move to another position.
Change the color of the line with the [Object] tool and it’s done!!
Drawing the interface with figure tools: GPS
Quick-sketch to the map we going to draw.
The highlighted area will represent the higher ground on the map.
I recommend aligning the corner of the sketch to the grid line, it will be easy to draw map grid in the next step
Draw the border with the [Rectangle] tool
Create a new vector layer and draw the grid
There is several ways to draw the grid, this is what I like to use
1. Draw it with [Rectangle] tool, make it larger than the frame border
2. Draw it with [Polyline] subtool, draw it continuously crossing the frame border
When finish, create a selection a bit larger than the frame border.
Click on the inverse icon (or [Ctrl+Shift+i]) to inverse selection and delete the unwanted area of the grid drawing.
Use the [Object] tool to adjust the size of the line
You can select the lines, cut them with [Ctrl+X], and paste them into another vector layer to separate them and adjust opacity separately
This is the result
Add also the number to make it look more realistic
Create a new raster layer and draw the map with the [Lasso fill] tool, by snapping it to the grid, it will create a cool pixel look!
Draw the highlighted area first
Then draw another area on a new layer, adjust the layer [Opacity] down to see the difference between the 2 layers
Optional: I add the reference point at the middle of the image, and it’s done!
Drawing the interface with figure tools: Waves
For the sound wave, I will modify the [Textured pen] brush to create the sound wave
Click on the subtool detail icon to edit the brush
Here is setting steps
1. Disable the Anti-aliasing
2. Switch the gap to [Fixed] mode and add more gap space
3. On the brush tip option, change the brush thickness to 1000 with direction [Horizontal]
4. Set the thickness dynamic to [Random] with minimum value 0 (click on small icon behind the setting bar)
5. Disable the angle dynamic and change the angle to 90
The brush is ready to use
Register the brush to the preset in the subtool detail panel, [Brush shape] tab
Create a new vector layer and draw a straight line with the [Polyline] sub tool
Click to make several control points on the grid.
Double click to finish drawing
Select the line with [Object] tool and in subtool detail panel,in [brush shape] tab, select the wave brush we created
Now you get a very easy sound wave
In the [Correct line] subtool, use the [adjust line width] tool with [Scale up width] option.
Click on the line to create some different amplitude to the wave
For the sine wave, I draw it with the bezier curve tool
Create a new raster layer and select [Bazier curve] in [Figure] subtool
Click and drag, to create an arm for the first control point
Then click on the middle point of the wave, it will create a curve
(the distance in the vertical area is 6 blocks)
Click and drag it to mirror with the first curve, then double click to commit the line
Zoom in and erase the tip area on both start and endpoint
Convert the wave into the image material layer, right-click on the layer and [Convert layer]
Set it into the Image material layer
Note: you can also convert it into object, it will be easy to adjust the ink width later.
Select the layer with the [Object] tool and enable the tiling option and set the repeat mode
Disable the [Keep aspect ratio] and you can stretch or compress it
To fix the wave into the display area, draw the rectangle selection on the area you preferred,
then right-click on the layer [Layer Mask > Mask Outside Selection]
Draw some border for the wave and it’s done!!
To apply to the main image, put all layers into one folder
Then copy and paste it on the image
Select layer folder and create a transform. Then move it into preferred position
You can change the mode to skew, to align it with the screen angle
If some line is too thin when set in its position,
You can add the edge with the same color to make thicker lines.
Animating the monitoring interfaces
In this part we will enchant the panel with simple animation steps!
On the [Timeline] panel click on [New Timeline] icon
(show this panel by menu [Window > Timeline])
Here is basic setting for loop animation that compatible with Clipstudio Pro
Framerate:8 and Playback time:24
We will use this setting for all the panel, let’s start with the Radar Animation
Select the radar object we prepared, and enable the layer keyframe
Set the new keyframe mode to [Linear interpolation]
Then create a new keyframe on frame 0 and 24
Switch to [Object] tool and click on the object
In [Rotation angle] set the value to -360
Then drag the keyframe a bit back to remove gap between loop
This will make the radar move!!
Optional : to enchant the look, you may also add the growing effect on the object on radar when it got swept on too.
To do this effect, create gradient circle the same as how we work with the radar sweep, but give the dark area larger
Then apply blur effect
Convert it into the object file or image material layer then set the layer color to green and darker green for active and inactive color
Create selection from the symbol layer, right click and [Selection from layer > Create selection]
Then mask outside selection
For animation object with mask, you must click on layer thumbnail to make sure it’s active with layer, not the mask
Then repeat the step of animating the radar sweep(with the same value), so it move together
For the GPS map, I put the focus animation as a circle that shrink into center of the image
Draw a circle in the middle of the image, convert into image material layer, then enable the layer keyframe
On the first keyframe, increase its size until it’s larger than the frame
And on the last keyframe, resize it down to the center point
Then fit it into the frame with layer mask
Make a rectangle selection to the map area
Disable the layer keyframe, then mask the outside selection
Enable the layer keyframe again and it’s done!
For the sound wave animation, we will use frame-by-frame method
Create a new animation folder
Put the wave we created inside the animation folder
Then right click on the timeline and set it to appear on the frame
Use the [Adjust line width] tool in the [Correct line] subtool to reset the line
Use [Fix width] mode and [Process the whole line]
Rename the layer to ‘01’ and copy the layer, it will automatically named ‘02’
Set it to appear on timeline
Use the [Scale up width] mode and disable the[Process whole line] option to adjust the line
Repeat the steps for another keyframe and it’s done!
For the Sine Wave, we must check for the pattern where the wave is repeat
To animate it, just enable the layer keyframe, add start and end keyframe.
Then at the last keyframe, move the object into its repeat position
Note: hold [Shift] key when moving will allow you to move it in horizontal alignment from its old position
Apply the animated interface into your art
Before you gather everything together, you must crop the canvas of the interface file and remove the paper layer.
To easily crop image, make selection with rectangle tool to cover all the drawing area, then [Edit>Crop]
Delete the paper layer and it’s ready
In the main file, create a new timeline with the same setting as the display file (8 frames per sec/ 24 frame playback time)
Then import the display as file object, go to [File>import>Create file object]
You can adjust its angle by setting mode in [Object] tool to [Skew]
Mask or re-order the layer for the correct result, and it's done!!
For the hologram look of the display, check my old tutorial about how to create the hologram effect :
I hope you get some ideas for your art!! Figure tool is fun! Give it a try <3
Please stay safe and enjoy drawing/animating!!
對此投稿按「讚!」的用戶


留言