Painting Natural Sceneries for Beginners and Advanced Alike!
Video version:
Text version:
Hello!
I'm .avi. I work as a professional game illustrator and creating comics and webtoons is my hobby.
This time, I’d like to show you how to understand the general guidelines for painting landscapes, and how to use this knowledge in actual painting!
If you have any questions, feel free to ask in the comments :)
As a bonus, there are some brushes for free download and timelapse videos at the end :)
Also, there are follow-up tutorials about painting snow and winter landscapes and painting sky, clouds and weather, with snow and clouds brushes for free download:
🟪 BASIC GUIDELINES
There are a few general tips that serve as basic guidelines when painting sceneries:
🟧 Planes
The first one is to have the scenery separated into planes that form the three basic groups:
🟨 Background
🟨 Middleground
🟨 Foreground
This not only helps create depth, but makes it easier for you to paint and do adjustments later.
🟧 Atmospheric perspective
🟨 Colors
Basically, it’s about how much the atmosphere changes the colors of objects depending on the distance from the viewer.
It is often taught that the further an object is, the less saturated or lighter it appears…
But I think the more correct definition would be the further an object is, the more it takes on the atmospheric color and brightness, because its colors get blocked by the colors of the atmosphere:
And the atmosphere can be any color and saturation you want!
Long story short, you can think of it as a colored mist that hides more colors of an object the further it is!
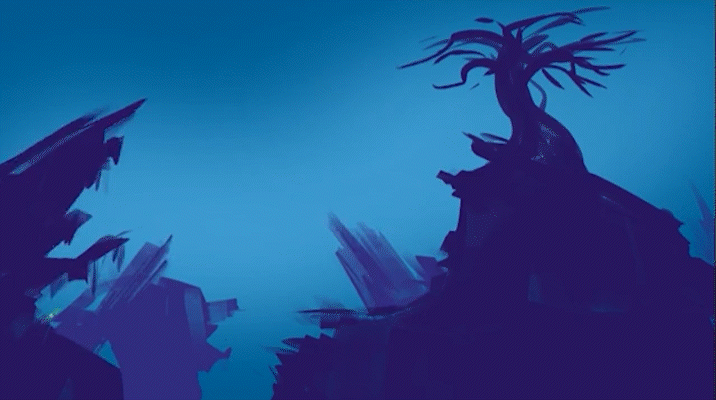
I have “dissected” these two paintings to show you how the most distant planes get more hidden in the “mist” that is the color of the atmosphere:
As you can see, in the case of the second painting, the atmosphere doesn’t have one color - it’s a gradient, but works the same way:
A good way to start is to define the basic colors of the sky or the most distant background, then the foreground in its deepest shadow.
And, as you can see, the planes in between get more of the background color the further they are:
🟨 Details
The same thing happens with details and contrast - just like the atmosphere blocks colors, it overlays details and contrasting objects lose some of their contrast, like in a mist.
🟧 Composition
Even if it’s a landscape that the viewer enjoys as a whole, it’s good to guide their eyes through your painting as if you’re telling a story. This way, they can appreciate all the parts of your picture without skipping something you put a lot of effort in.
Viewer’s eyes usually land somewhere in the center or the middle third of your canvas or on the most prominent element.
From there, you guide them through the picture using shapes, lines, boundaries of dark and light areas, saturated parts, or even the direction to which the clouds flow or where a flock of birds flies.

🟨 Scale indicator
Since trees can grow any size and rocks can be any size as well, it’s always good to have something in your painting that can give the viewer a sense of scale.
In a comic, it’s your characters, while in a stand-alone painting it’s usually a figure of a traveler watching the scenery…
… Or it can be a car or a house, which gives away the human scale, or an animal, like the flock of birds passing in front of the tree.
Even if nobody knows how big the birds are, they still make the tree look enormous:
🟧 Light
🟨 Main light source, secondary, tertiary...
You can have any number of light sources, be it the sun, moon, fireflies, campfire, some kind of magic, etc. But one or two are usually the most prominent sources.
💡 QUICK TIP! - Light rays guides 💡
If you work on a rather complicated large canvas, I recommend drawing guides simulating light rays that will help you decide what is in the shadow when you’re zoomed in.
🟨 Color rim
With a strong light source, the lit areas are rimmed by a color indicating the temperature of the light, in most cases it’s orange or purple, but can be any color, depending on the mood you want to set.
🟨 Back light
I often use back light, also called rim light, in my works. It basically creates a light outline which helps define the overall mood, as well as pop objects against their background.
🟨 Reflected light
Light bounces off of objects, meaning that even an area in the shadow is most likely lit by the light reflected off the ground, be it sand, snow or grass.
It takes on the color of the object it bounces off – from the sand it’s brownish, while from the grass it’s greenish.
🟨 Areas in shadows
There’s a part that doesn’t get lit by any of the light sources… and yet, something still illuminates it!
It’s lit by the atmosphere!
As weird as it may sound, the atmosphere consists of particles that reflect light onto other objects, but since the light is weak, any stronger source of light overwrites it. But it’s still important in places in the shadows.

That’s where the saying “Shadows are blue” comes from! They’re not really blue on their own, but the atmosphere’s color, usually blue, illuminates them!
The same goes for any color of the atmosphere – if it’s purple or green, your shadows will be lit in faint purple or green light as well!
💡 QUICK TIP! Lights on separate layers 💡
If you draw your lights on separate layers like me, it’s easy to change the color of an element.
How about a beach with white sand?
All I need to do is change the base sand color and the light layer that corresponds to the light reflected from it. The same goes for the grass or the stone.
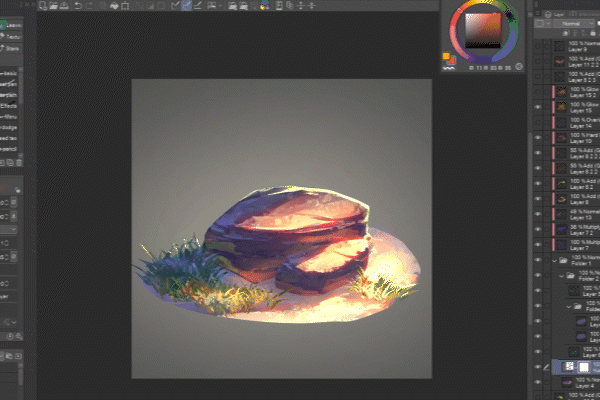
Changing the color of the light to change the setting and mood is also very easy – just by playing around with the color and intensity of the light layers, you can completely change the scene into a sunset or night by a campfire!
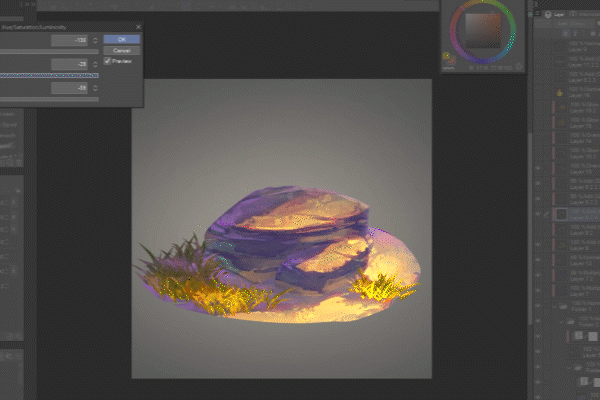
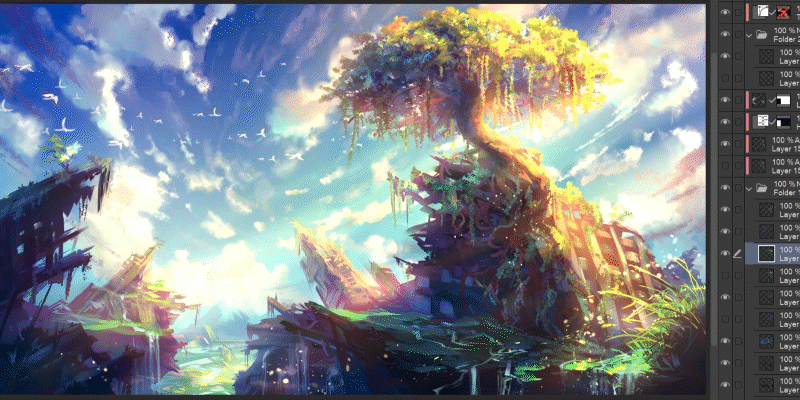
This is extremely useful if you need to reuse elements for a comic or animation in scenes that have completely different light conditions, or if you aren’t sure about either the light colors or the base colors of the elements in the beginning and may want to or have to change them later.
With this setup, you don’t need to worry even if a client comes up saying “Oh, but I wanted the tree pink!”. … As ridiculous as it may sound, it happens quite often and it pays to be prepared! :D
🟪 PRACTICAL TIPS
In this part I’ll show you how to save time while painting natural sceneries with brushes in Clip Studio Paint!
🟧 Textured brushes – ground and rocks
These are my most favorite brushes – flat tips with various blending settings and textures of rocks. I use them most of the time, since they’re great both for defining shapes in speedpainting and for rendering final images.
A great helper for painting textures is the Color jitter with Randomize per stroke function – it adds a natural feel of variety to your painting! I think I have it on in most of my brushes!
From most of my basic painting brushes have Blend duplicates that purely blend without adding color.
🟧 Foliage and grass brushes
I have LOADS of brushes for leaves and grass, either created by me or downloaded and modified. Since I work on projects in various stylizations, each of them gets its time to be used, be it anything from a cartoonish to realistic style.
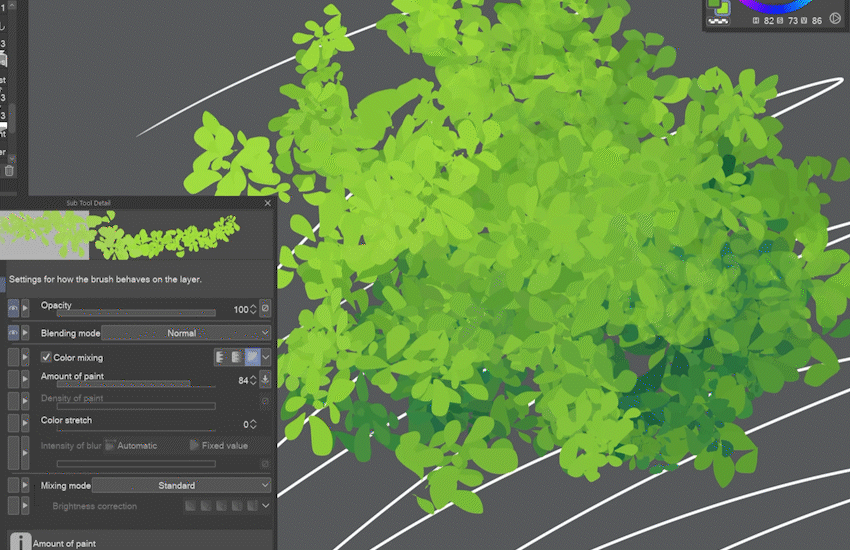
I love the new addition to the Color mixing settings – the Smear option.
The main change is that whether you paint on transparency or colors, it paints each brush stamp in full paint, meaning that it doesn’t leave any half-blended stamps like the first two options do.
In practice, it means you can paint a tree crown or a bunch of grass while blending at the same time, and then pass it to animators without having to worry about it being half-transparent!
🟧 Ribbon brushes – tree branches and trunks
If you have to paint many trees and branches but don’t want them to look the same, the Ribbon type of brush is a great helper – it bends the image in the brush tip just like a ribbon.

For this tropical island I created a palm trunk brush that uses the main color and subcolor. If drawn on a vector layer, I can further twist and turn the trunk to fit the image with the Correct line tools. Now, even though all the palm trees’ trunk base is the same, they aren’t the same at all!

🟧 Stamp brushes and Liquify tool
Stamp-type brushes are another time-saver – like with the palms’ crowns where I just drew one, set it as a stamp brush and painted the background trees in one go! With the help of the Liquify tool, making each stamp look different is pretty easy.

In some cases, just adding randomness to the Thickness and Color jitter of the brush solves everything, like with this mountain forest – all I had to draw was one grayscale tree (so that the brush would use both the main and sub-color) and I can grow forests in the mountains in a few strokes!

🟧 Finishing
Adding finishing touches to your painting is fun on its own – with so many blending modes of layers you can take your time trying to find the ones that unify the colors, lighten or darken them, add more variety to them, or desature them where necessary.
This process is unique to each piece, but when I’m short on time, I mostly stick with Overlay or Soft light for unifying colors, Multiply or Darken for darkening and Add glow or Glow dodge for spotlights.

🟪 Conclusion
These are tips that work for me, but there are many ways to approach painting landscapes, both in theory and in the potential of the tools Clip Studio Paint offers.
None of these are meant to be rules, they’re tips to serve as the base, so if your composition, use of colors, or anything deviates from whatever has been said here or anywhere else but your gut feeling tells you it’s right, trust your guts instead!
The goal of this tutorial is to encourage creators to enjoy painting while finding their way to express their ideas.
Always remember, the most important thing is to have fun!
✨ BONUS: Brushes and Videos of Recorded Paintings ✨
For the daring who made it all the way here, bonuses!
Brushes are available for free download here:
Time-lapse videos of the paintings mentioned in this tutorial:
For those who wanted to support me, I don’t have a Patreon nor I plan to get one. I’m doing this purely for the fun of sharing knowledge :)
I appreciate your messages and thoughts very much, though, thank you!
(´。• ◡ •。`) ♡




留言