
Hair painting
Nice to be with you again, this time with a little tutorial on how to paint realistic hair.
The hair is presented in small and large groups that we will call strands, these tend to follow a common direction when combed, there are always some hairs that "reveal" to that direction
The hair also has a certain "depth" because there are some strands that are above and others below, this also makes us have dark and light shapes in the same section.
Exercise 1
Let's start with this exercise, the first thing is to consider a small color palette, this palette will vary in its tones as we mix.
We make the base stain
We add a little lighter color and we are giving general shape to the tufts
We will use the techniques learned in the tutorial on general painting, varying the properties of the brush and using the eyedropper to combine colors and apply gradients.
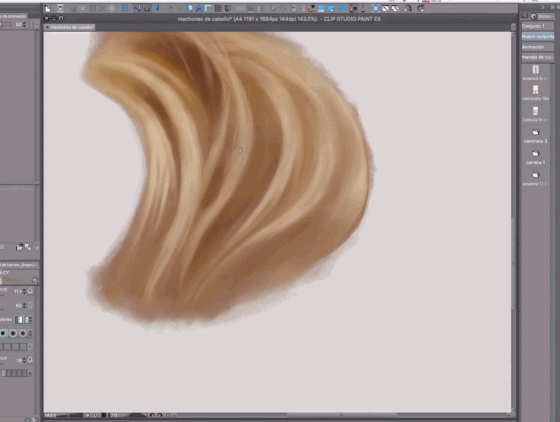
Adding a third, brighter color, the different depths of the tufts begin to be noticed.
As we move forward we integrate large, smaller spots.

As we saw in the previous exercises, there are several ways to approach the painting, but in general the stain is always used, and it is through these spots that we are going to “modeling” the shape as if it were clay or clay.
We paint according to the light that corresponds to each shape.
Once the general modeling is obtained we begin to add finer lights.
You start to see the shape and texture of the hair.
There are very soft lighting changes within the same strand, the shadows and the lights become more subtle, there are small areas of contrast.
And so we have finished our first exercise.
Thank you very much for watching this tutorial, I hope you find it useful, until next time.
Users who liked this post


Comment