Basic method of my style manga Individual management: 07 frames

-
 MVP ◆This user has contributed greatly to the management of the community, by posting many great responses to the questions asked. Once every three months, MVPs are determined based on the points earned during that period and will be recognized accordingly.
 -
 New Valuable Player (NVP) ◆These are the next-best contributors to the community after MVPs. This is awarded to users who have not yet won an MVP award, based on the number of points they have earned.
 -
 Official Expert ◆Chosen out of all MVP awardees, who are already proof of excellence, this is a testimony of outstanding correspondence in the community. After careful screening, they are appointed by CELSYS and assume their position.Note: Formally called “Evangelists”
 -
 CELSYS official moderators ◆Moderators are official CELSYS staff members who are fluent in Japanese as well as various other languages. As moderators are not experts on software or creative work, they will not be able to directly answer your questions. However, moderators will provide communication and language support to ensure that everyone can smoothly communicate with each other.
 -
 CELSYS officialThis is the official administrator account.
BigField style: Digital manga art series # 07 Individual management
Basic method of my style manga Individual frame division
The main part is # 7 of the "Big Field style digital manga art series".
★ Series parent link name: BigField style digital manga art overall management
(BigField-style digital manga series # 01)
【change history】
・ 2020.05.01: Change of image cropping method → Image enlargement
・ 2020.04.26: First edition-TIPS released
・ 2020.03.24: First edition coming soon
・ Before this, I moved to the end of the book! (If you exceed 10 lines, move to the end of the book)
■■■■■■■■■■■■■■■■■■■■■■■■■■■■■■■■■■■■■■■
■ 1: Basic method of my style manga
● 07. Frame split
・ Use "Menu: Shape-> Frame frame" for frame division at the time of completion.
However, Crysta's is difficult to use, so read the "frame frame" created by Comista.
Use the embedded conversion.
・ Comista's "frame frame" concept
・ Actual "frame frame" converted for Crysta
★ Link name: Big Field style digital manga series # 07
Basic method of my style manga Individual management: 07 frames
A: CS_Paint frame frame folder
The outside of the frame is masked.
B: Comic Studio-like frame frame folder
When the Comista file is converted, the CS_Paint frame frame folder becomes double as shown in the figure below.
It will be the structure as set.
・ Outer border: hidden, ruler displayed
・ Inner border: Display, ruler hidden
The inner border works the same as the frame frame folder of A: CS_Paint.
Therefore, the layers and folders below the "border" are masked outside the border.
It will be hidden.
As shown in the figure, place "Character 2" between the outer and inner borders above the "frameline".
By arranging it, you can realize drawing that protrudes from the border of "Character 2".
However, since the drawing outside the outer border is hidden, the outer mask range is necessary.
Expand to the outside.
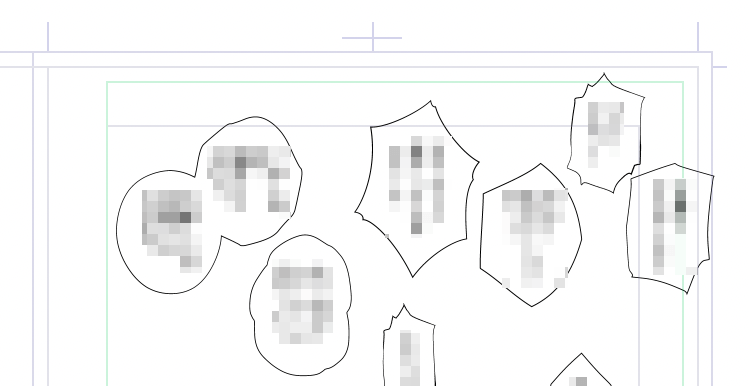
C: Format of the manuscript including the frame frame folder
Create 2 patterns of manuscript format including frame frame folder.
① One frame along the basic frame
(2) A total of 12 frames in 3 rows and 4 steps along the basic frame
For the 12-frame manuscript, delete unnecessary parts according to the name and transform the necessary frames.
Su.
(2) Taking a total of 12 frames in 3 rows and 4 columns as an example, frame 1 is hidden except for frame 1.
When you complete according to the name, select the next useful frame and complete it according to the name
Let me go. This is repeated.
A specific example in the case of frame 1 is shown.
・ All frame frame folders so that the contents of the draft folder including the provisional frame dividing line below can be seen.
The white solid deepest mask is hidden.
・ First, select the inner border folder and use the object tool to create frames according to the name.
Transform.
・ Next, select the outer frame frame folder and set the outer 10mm to match the shape of the inner frame.
As a guide, transform the ruler line (frame frame is hidden) with the object tool.
-If necessary, expand the outer 10 mm according to the degree of pop-out drawing of the drawing target.
● Part of the frame frame folder is hidden
You may want to hide a part of the frame frame during frame division. ‥
There are various methods, but an example is shown.
<Proposal A>
・ Place the target frame frame in one folder.
(Name: Partial border mask folder)
・ Select the inner border layer with the free selection tool. Select only the line you want to display next
Delete from the current selection with the tool (partial release).
・ Finally, mask the selected area on the partial border mask folder.
But,
<Proposal A> has a drawback that the pop-out drawing is also masked when the drawing pop-out arrangement is made.
<Plan B> Improvement plan for Plan A
・ Mask processing of plan A is not a folder
Realize with a solid white layer. (Omitted below)
‥
<Plan C> Improvement plan for Plan B
・ Realize the white solid layer of Plan B in the folder of Plan A. Inside, not a folder
I tried to use the border mask processing, but it seems that it cannot be set freely.
・ If necessary, create a selection layer in consideration of the ease of mask processing.
(Name: Selection range: For free mask inside the frame)
<Plan C> Improvement plan for Plan B
・ Select the inner border layer with the free selection tool. Select only the line you want to display next
Delete from the current selection with the tool (partial release).
・ Create a selection layer with "Stock selection" and select: Free space in the border
Move it to the top of the layer and select "Transfer to lower layer" to make one selection.
・ Finally, the selection range on the free mask folder inside the border
The following measures were taken to mask the borders and the like.
In plan A, create a frame folder on the outer border
In Plan B, create a white solid layer between the outer and inner borders
In Plan C, create a folder between the outer and inner borders
‥
<Draft D> Draft ABC improvement plan
・ Draft ABC mask folders and layers with borders Layers with rasterized borders
Do it.
・ The drawing mask inside the inner border can be placed in the drawing folder or layer as needed.
Perform individually.
・ If necessary, create a selection layer in consideration of the ease of mask processing.
(Name: Selection range: For border mask)
・ After transforming the frame frame folder according to the name, rasterize the next frame frame.
・ Raster ray created by "right-click → rasterize" on the inner border folder
Change the name of the ya and place it under the selection range: border mask layer.
(Name: Border rasterization) → * Processed by auto action
・ Ctrl + click the border rasterization layer to create a selection
Stock "selection range".
(Name: Selection range: For border mask) → * Processed by auto action
・ Delete the part to be displayed, leaving only the area to be masked next, from "Stock selection"
To do.
・ Selection range: Select the border mask layer and perform "Return from stocked selection range".
Create a selection range.
-Finally, mask the selection on the border rasterization layer.
<Auto action processing>
Rasterize the frame border of the frame frame folder and rasterize it inside the frame frame folder
If you move the border, the size of the raster border will be reduced and displayed.
This is because a part of the outside of the raster border is hidden in the mask area.
To avoid this, the following processing is required.
<How to display the raster border size normally>
・ Select the mask area. (Ctrl + click the mask icon)
・ Expand the selection area. (As a guide, half the original border size)
・ Change the mask area by filling.
The point is, usually, use a B: Comic Studio-like frame frame folder to draw a border.
This is a method of rasterizing and using the "frame line" when processing.
● Multiple frames into one frame
Basically, create an independent frame frame folder, and create a frame frame folder for each frame.
Make it the style to create. (→ A: Independent frame frame folder)
However, in terms of name, even multiple frames may be created in a single frame frame folder.
The frame name is expressed as "frame folder 01-04".
● B: Comic Studio-like folder operation of frame frame folder
Comista-like frame folder frame folder with duplicate frame frame folder structure
The behavior of dividing, border division, and dividing frame frames at equal intervals is unified.
A: It will be different from the frame frame folder of CS_Paint.
First, A: CS_Paint frame frame folder frame folder division, border division, frame frame
An outline of the behavior of division at equal intervals will be described.
The [Frame Folder Split] tool splits the [Frame Frame Folder] for each frame as well as the border.
It is a tool to be done. The [Border Split] tool only splits the border, and the [Frame Border Folder] is
It will not be split. Change the division method of the same tool and set it as a separate independent sub tool
I'm just doing it. If you play with the settings, the difference will be Ayafuya.
<A: CS_Paint frame frame folder>
B: Comista-like frame frame folder A: Same procedure as CS_Paint frame frame folder
Even if you execute frame folder division, border division, and frame frame at regular intervals, it does not work.
I can't help showing examples that I can't do, so
Be aware of the duplicated structure of the frame frame folder and try a possible method.
<B: Comic Studio-like frame frame folder>
Original frame frame
[Frame folder division]
-Since the border is divided multiple times, select it to assume a divided image as a guideline for work.
Create a range and "stock the selection".
-Place frame frames vertically instead of duplicate nesting.
-Hide the upper border (important) and select the lower border [Split frame folder]
To execute.
・ Hide the two lower borders and select (Important) to show the upper border.
Execute [Split frame folder].
-Display the two lower borders and change the name to the original duplicated structure.
The "stock selection" created as a guide for the split image is unnecessary.
-Correct the two display ranges of each upper border with 10 mm outside the lower border as a guide.
The point is that the lower border and the upper border are not nested, but a hierarchical relationship is built to make the other party.
It was verified that the frame folder can be divided by hiding it.
[Border division]
-Since the border is divided multiple times, select it to assume a divided image as a guideline for work.
Create a range and "stock the selection".
-Place frame frames vertically instead of duplicate nesting.
-Hide the upper border and select the lower border (important) and select [Border division].
To execute.
-Hide the lower border and select the upper display (important) and select [Border division].
To execute.
-Display the lower border to return to the original duplicated structure.
The "stock selection" created as a guide for the split image is unnecessary.
-Correct the display range of the upper border with 10 mm outside the lower border as a guide. -Correct the display range of the upper border with 10 mm outside the lower border as a guide.
[Split frame frame at equal intervals] (Folder split: Layer duplicate folder)
-Place frame frames vertically instead of duplicate nesting.
・ Hide the upper border and select the lower border (important). Dividing method = vertical 2 horizontal 2,
Folder division: Execute [Split frame frame at equal intervals] in the layer replication folder.
-The lower border folder was closed, but the three newly created border folders are opened.
Because it was closed.
・ Hide the four lower borders and select the upper display (important).
Execute [Split frame frame at equal intervals].
-Display the lower four borders to form the original duplicated structure.
-Correct the display range of the upper border with 10 mm outside the lower border as a guide.
[Split frame frame at equal intervals] (Folder split: unchanged)
-Place frame frames vertically instead of duplicate nesting.
・ Hide the upper border and select the lower border (important). Dividing method = vertical 2 horizontal 2,
Folder division: Execute [Split frame frame at equal intervals] without changing.
・ Hide the lower border and select the upper display (important).
Execute [Split frame frame at equal intervals].
-Display the lower border to return to the original duplicated structure.
-Correct the display range of the upper border with 10 mm outside the lower border as a guide.
■: Change history
[Change history] (All)
・ 2020.05.01: Change of image cropping method → Image enlargement
・ 2020.04.26: First edition-TIPS released
・ 2020.03.24: First edition coming soon
■■■■■■■■■■■■■■■■■■■■■■■■■■■■■■■■■■■■■■■


Comment