Collage of dialogue boxes and materials
Preface
Hello everyone,
This time I share the dialog box and materials to create a collage painting.
The process of filtering the required materials in the downloaded material library,
It can also help you come up with ideas for paintings or speed up the progress of completing your work.
This article introduces various methods of applying materials to the final draft.
Preparatory work
The creative idea this time is mainly based on the frame totem design.
It only extends all the way to the main character design.
The following will be based on the production process,
Explained one by one in stages.
This demonstration picture is a black and white line drawing.
The size of the demonstration picture is 21X21CM, and the pattern resolution is 600.
Dialog box and material combination
▲Draw the frame (round frame design)
First, pull out the range of the dialogue frame (circular frame) on the canvas,
Go to the Tool Properties panel,
Click Wrench Pattern (to open the detailed settings window).
If too many materials are downloaded,
As a result, the material cannot be found immediately,
The collection mark can be used or added directly to the available brushes.
In the auxiliary tool details panel,
Category distinctions are quickly found in "Creation Materials".
Material internal settings
Accessibility internal settings
Brush size-->Stroke (ribbon)-->Inversion setting (depends on the situation)
The cursor moves to the operating object,
Make detailed adjustments.
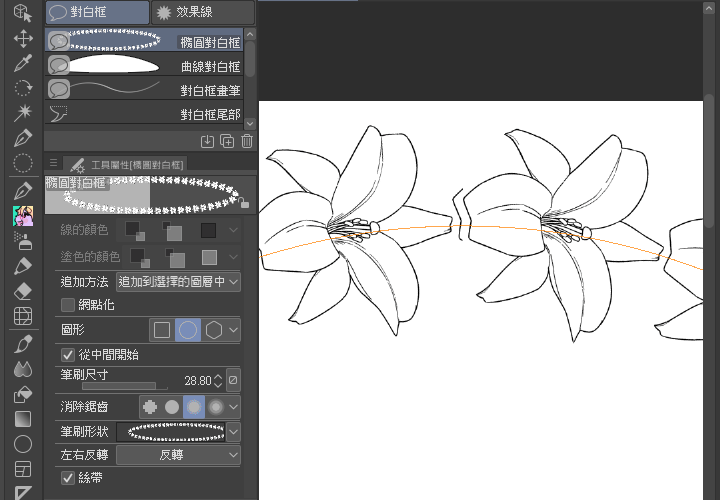
Adjusting the value with the buttons is rough,
Available Manually set the value up to the "second decimal place"!
▲Frame processing
If the frame is completely black,
Can be converted into black lines on a white background.
There are two processes,
Please refer to the demonstration process (GIF animation).
(1) Edit--->Select range bordering (the line is inside the graphic).
Use shortcut keys (AIT+DELETE/CTRL+D) for some processes
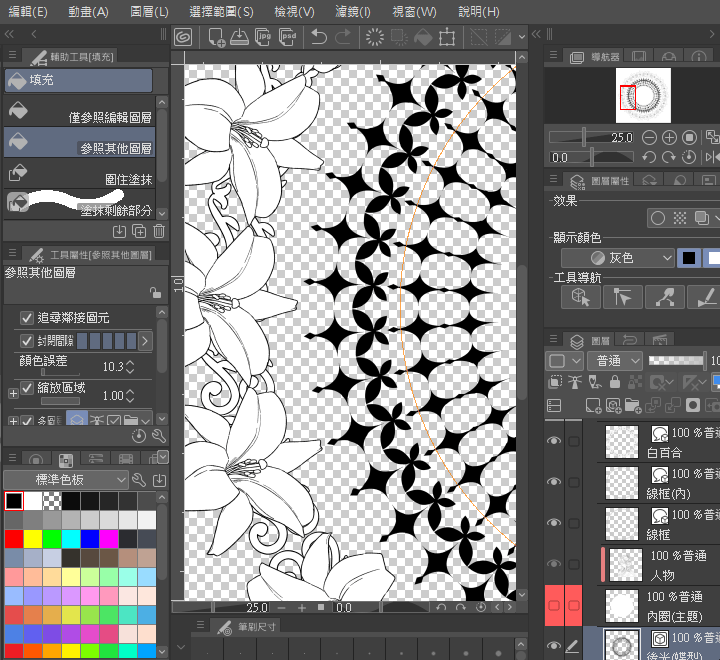
(1) Edit--->Select range bordering (the line is inside the graphic).
Use shortcut keys (AIT+DELETE/CTRL+D) for some processes
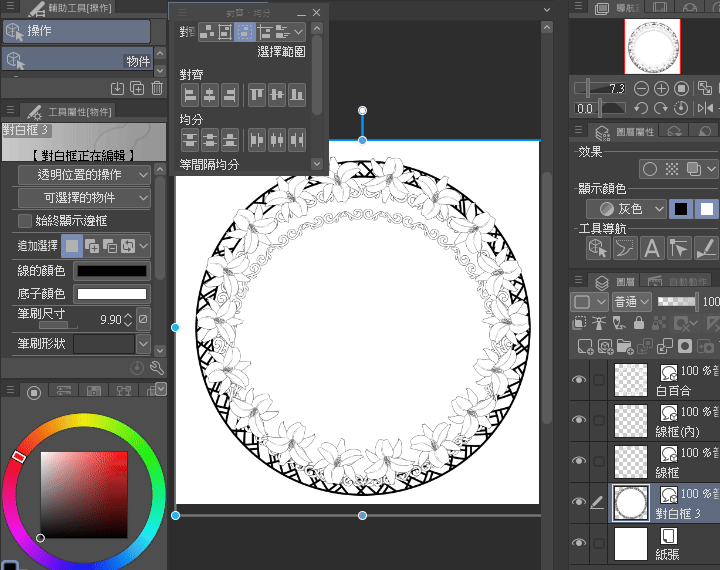
(2) Effect-->Border effect (bold lines outside the graphics).
▲Alignment tool
Select all vector layers,
And the setting is based on canvas.
First click on the vertical line center alignment,
Then click Align to the center of the horizontal line.
Totems on different layers can be
Combined into another totem or frame.
Please refer to the demonstration process (GIF animation).
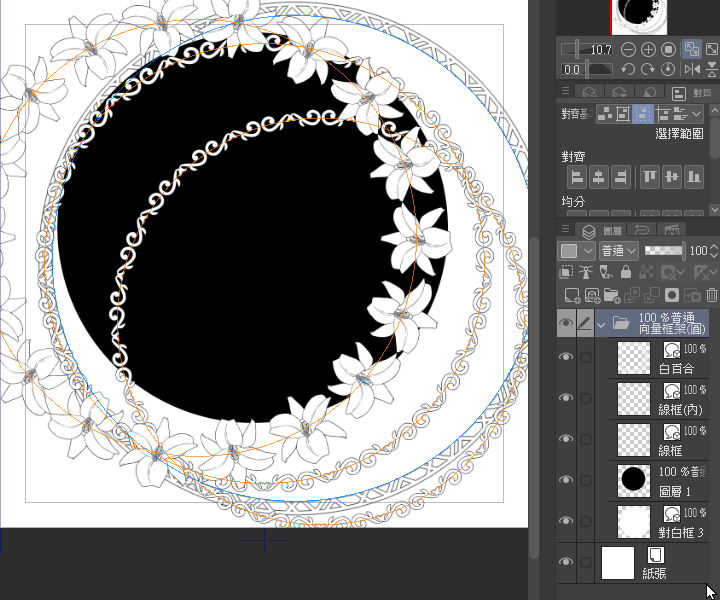
Character subject (avatar drawing)
▲Use of vector layers
Vector Layers and Mesh Deformations:
The outline of the character's main body is drawn on the vector layer.
Because of the characteristics of vector layers,
It can make the line drawing have a clean effect.
The overall aspect can be modified with deformation (Mesh deformation).
In terms of details, use adding pen and then deleting.
- Character
Put the figure drawing materials into the vector layer.
Each material needs to be on an independent layer.
Edit individually to adjust the size and angle,
Use layer groups (Create Folders) to group content and organize it.
Vector layer and intersection properties:
Using the vector layer properties,
Lines can be deleted without being on the same layer.
But be clear on which layer the lines are drawn.
Use the delete vector "intersection" function in the tool properties,
to delete erroneous lines,
Please refer to the demonstration process (GIF animation).
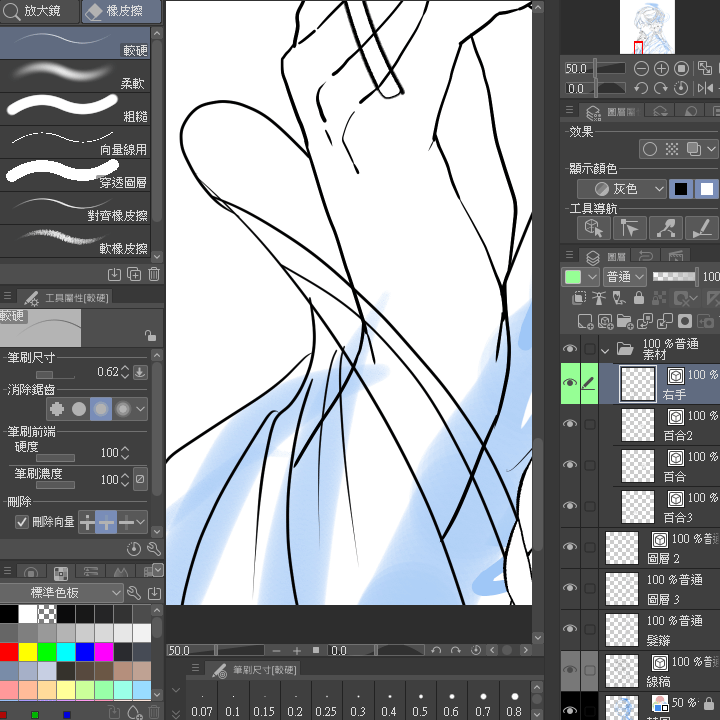
The lines of the vector layer can use Correction Line Width,
to adjust the thickness effect of the line.
Partially thickened lines,
You can use the Border Effect in Effect.
▲Use of dot matrix layer
Lattice Layers and Skew
The details of the decoration will depend on the characteristics of the brush.
For example: there is a background color or the pattern is more complex,
It will be smoother to switch to the dot matrix layer to modify.
When developing concepts,
Various material configurations.
The distribution status of brush materials when drawing line art.
The self-made material brush (ID: 2086454) is also shared.
(The materials used in this article are
It will be placed at the end of the article. )
Material processing for drawing hair and ribbons
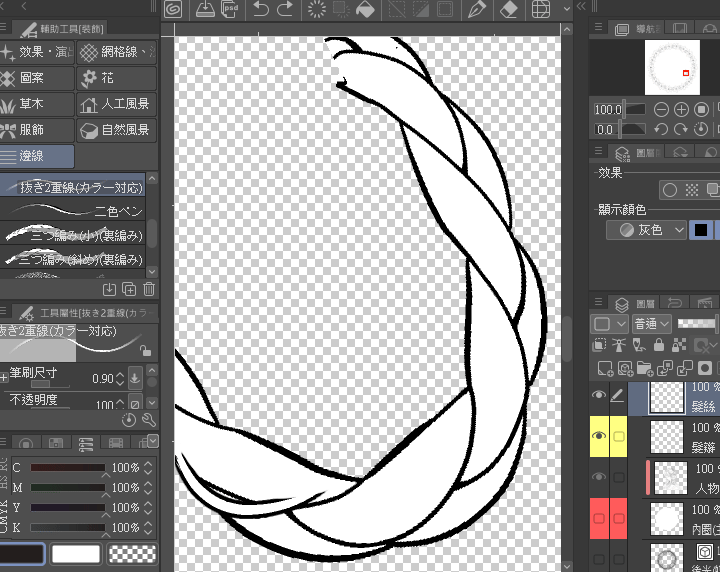
Use a two-color pen on the hair (the edges need to be thickened),
Open another blank layer (merge layers--CTRL+E),
Then use the eraser and white G pen to add pen,
The talent can be combined with the braid brush material.
The ribbon material brush is also drawn using a similar principle.
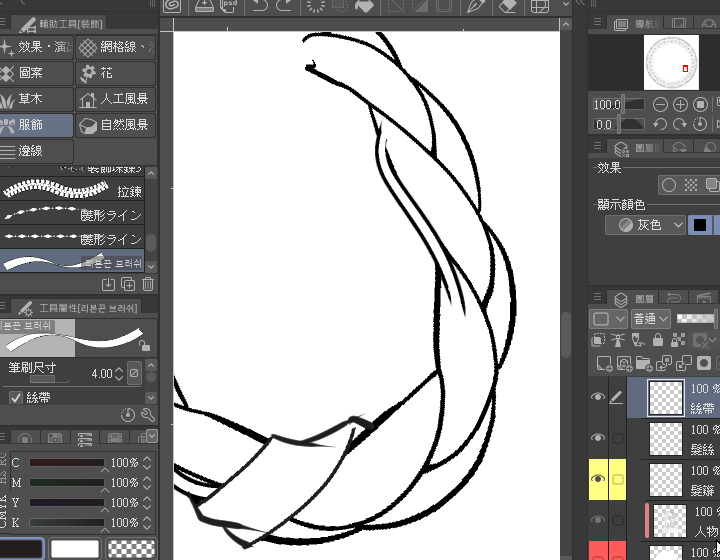
line retouching
▲Final touches on line drawing
You can choose Edit--->Select Range Border,
Or Effect-->Border Effect (bold lines).
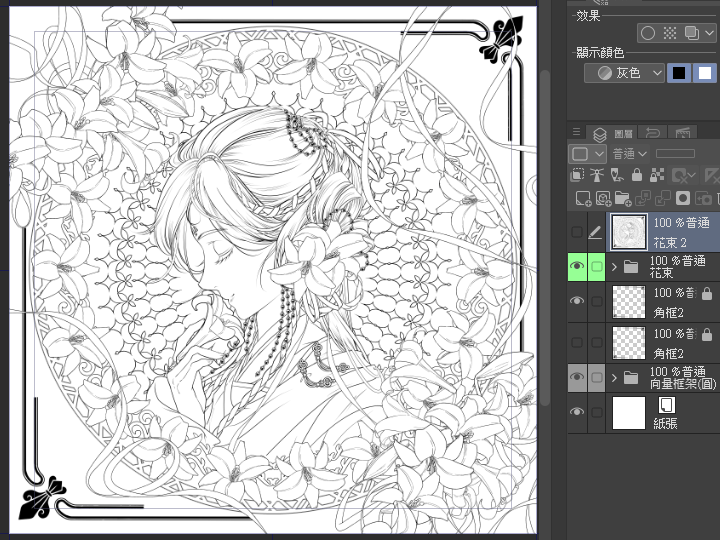
The effect of thickening lines,
It will make the pattern more decorative,
Or reinforce the importance of the topic.
This is also the interesting thing about lines.
The content shared this time,
Hope it helps all users,
See you next time!
Materials List
Materials used in this article:
Thanks to the following creators who provided materials.


Comment