How to make animated wolf emote [compatible with PRO/EX]
In this tutorial I will show you how to make a wolf emote from one image and use the transform tool to create various expressions and smooth animations. (Also compatible to both Clip studio PRO and EX version)
check the video to follow up the step in action. ;)
Also check the bonus section for saving animations as transparent gif animations format, free with Gimp

The video tutorial
Some basic knowledge about designing an emote
Before you make designs for the emote, you must start with making a scope of your design and the specs of the emote which are
1. What is the size of emote you have to make?
2. What is the expression you're going to show?
3. What is the platform background color for it?
-Size : the size of the emote limits the detail of it. If you put too much detail on a small emote, you will not be able to see the details, as shown here.
-Expression : the expression of basic emote starts from the eyes and mouth. The emotion will be more complex if eyebrows and detail effects are added, which you often see in comic/manga.
-Background color of platform : some social chat platforms have various modes for backgrounds, some stand in single mode, make sure your emote design is suitable to the background of the platform the emote is being used for.
Tips : Some platforms that allow users to customize the background; you can easily fix it by applying some strokes with the border effect tool.
When you are able to scope your emote, you’re now ready for the design
Step 1 : design the emote
I created a scope for my emote by using the emote scope questions I made.
1. What is the size of emote you have to make?
- 5050, 2525
2. What is the expression you're going to show?
-’sad’ ‘happy’ ‘sweat’ ‘no’
3. What is the platform background color for it?
- dark grey (Discord)
The emote I’m going to make in this tutorial is small in size so I decided to draw only the face of the character
Tips : Searching some wolf reference helps getting some clear images about the shape of the animal’s head and its features.
define the shape of head (skull) eyes + nose position and fur

When you’ve got the shape, it is easy to add some details to the sketch. Vary the detail until you are satisfied with it.
Next step is to add the emotions to it. If you’re not used to drawing expressions, draw simple emotes, then apply it to the design.
Animals also have other ways to show expressions, such as ear position or fur. Here are some examples of it.
Tips : If you have no idea on how the creature you draw can make its own signature face, try searching some reference photos from the internet
Step 2 : Draw emote parts
First of all, we need to design the layer parts for making the animation with layer transforms. When arranging the design together we can plan for some movable parts such as ear, nose, eyes , cheeks etc.
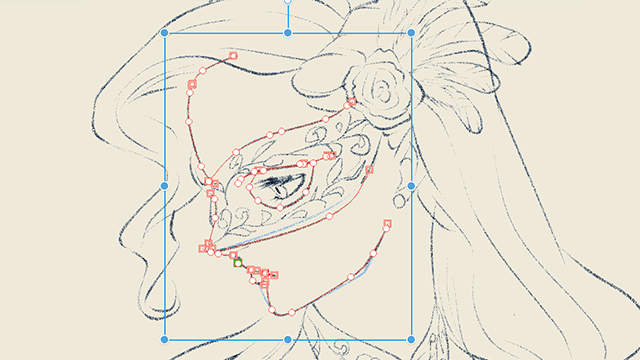
The wolf’s face is symmetrical, we can use the symmetric ruler tool to help with drawing;
Create a new vector layer for the ink
Then use the symmetric ruler to create the center line, with the setting ‘Number of lines’ 2 and check on ‘Line symmetry’
(hold shift to make it align with the vertical line)
Draw the ink with preferred tool, here I use my newest favorite ink tool: ‘Bezier curve’
(if you not yet find the tool, update your Clip studio to newest version ;) )
Create new vector layer for other parts, if the symmetric ruler is missing when switch the layer, set it to ‘Show in all layer’ (the menu is on layer panel)
Draw only half of the image, except face and nose.
Color it separately with plain color. I use the tool setting from Clip studio asset :
On the ink layer, set it as a reference layer, then set the tool property to ‘refer multiple’ to reference layer
Drag cover the ink (must have no ink gap)
Use the lock transparent mode to paint on the shapes.
Put the ink layer and the color in a folder and repeat the step for all parts
Tip: if the part is not a closed shape, paint to close the gap before using the fill tool.
Make sure you name all the folders then convert the folder to file objects by right clicking on the layer> File object and Convert layer to file object.
‘File object’ will make it easier to edit the parts in the future.
Nose part will be a different technique, create 2 circles to overlap to make it look like ink.
This technique is useful to create dimension in movement that you will able to see in next step.
Copy the object layer and use object tool to flip it, repeat to all parts
[ Important!! ] Rename all layers to avoid confusion when animating
When selecting the object layer with object tool, you can open the file of the parts
Edit the parts and save, the edit will appear everywhere the object appears.
Now your image is ready for animation.
Step 3 : prepare the file
Prepare the workspace for your emote, back to our design from the beginning, we going to make emotes for Discord which has a dark grey background
[Quote on Wikipedia]
Discord is a proprietary freeware VoIP application and digital distribution platform designed for video gaming communities.
Print screen the application and paste on the canvas, then pick the color and apply on the paper layer
Group the parts we've made in a folder, select it and press key CTRL+C then CTRL+V on the new canvas
Hold CTRL and click on the folder icon to make the selection, then go to menu Edit> Crop
Then with menu Edit>Change canvas size, set the dimension equally to the square.
also add some more pixel for animation area
The file is ready now. Save it as a template for the animation later.
Step 4 : animate the emote
Start the animation, create new timeline.
(if you don't have timeline panel, go to menu Window>Timeline)
If you have Clip Studio EX you can create playback time more than 24 frames, but don’t worry if you have Pro version, for the emote, 24 frames is enough!
Set the timeline frame rate at 8 or more. The animation will not look as smooth if it is under 8 frames.
Draw the animatic first,
Animatic is the way you plot for how the animation will be look like at the point of time

to make animatic, We will use the classic frame by frame animation.
Create animation folder
Select the frame you want and ‘create new animation cel’
Create 2 cel, cel 1 for main emotion and cel 2 for the state before reaching the emotion.
also put cel 2 at the end, right click on the frame and select cel 2
to draw the animatic, just click on the frame and draw
We will use this animatic we made for the reference position for parts movement.
Make sure the animatic is the top layer. Lock the layer to avoid misclicks on it
To make blinking eyes, we have to use the frame by frame technique. So we draw it in the animation folder
make sure the frame is the same to animatic

for the other parts that is just moving (no change like the eyes), select it with ‘Object tool’ and ‘Enable keyframes on this layer’
Then add the keyframe at frame 1
There is also options for keyframes, for easy to handle I recommend the Linear one. But if you get used to animation graph tools, you can also use the smooth one.
Also create the keyframe for the last frame, by just creating it, it will just copy the position of the first frame.
Click on the green diamond and drag it to the end of the timeline to make the final frame.
We do this to make it a loop animation.
Note : check my old tutorial for loop animation :
If the parts move together, animate it together at the same time.
select frame at the position of cel 1 of the animatic then use the object tool to adjust position of the image, the keyframe will be created automatically on the timeline.
Copy the diamond and put it where cel 1 of animatic ends
Right click on the green diamond on the timeline then select copy.
Right click on the keyframe where cel 1 ends and select paste
this will make delay for emotion show on emote
You will start to see some smooth moves on the eyebrows ^ ^

Repeat the step to the other parts too, use the animatic layer as reference

Note : I also added some additional keyframes for more movements, such as ears and also apply layer keyframe to transform the eyes position
Final result:

Step 4 : animate the emote in more advanced level

This is a more advanced sample for the transform method in Clip Studio using the object tool.
By default, when you enable the keyframe for animation, the mode for adjusting the image will be by default at the scale mode, which isn’t as flexible for animations.
But if you set the mode to transform, then move one node and enable the keyframe, you will get the free transform mode that allows you to move the nodes freely
(sakura asset belongs to Clip studio)
use free transform mode to adjust our object before enable layer keyframe. then you can adjust your keyframe in free transform mode
Repeating the same step of timeline create that we made in the previous part of tutorial with the free transform method will give you more advanced looks on the result.


You can also apply some transparent effect with the layer keyframe as well.
At the timeline layer, click on [+] icon
Click on the Opacity and you can add keyframe to control the opacity of the layer at any frame

Bonus : save transparent emote with The Gimp
There are still some missing functions while exporting gif animations a with transparent background. the result will contain the white background that is disturbing as an emote.
A good solution is exporting it to an apng (png animation format) and convert it if you want a gif animation format
However, I have my own solution to export the transparent background emotes with the opensource software that’s trustable and free : The Gimp
you can download it from its official site :
First, export image sequence from Clip studio, go to menu : File>Export animation>Image sequence
Note : don’t forget to hide the paper layer to make the transparent background.
In the setting, select folder and preferred size [Important!!]
You will get an image sequence for your emote at the preferred size.
(I always work with large file size for various usage in future and use the export option for various export spec)
Now on The Gimp side :
open The Gimp, go to File > Open as layers
Go to the folder for image sequence, select all, then open it
The files will be arranged into layers.
Then export it to gif, file > export as
Set the file name, select file type ‘gif’ and export
You will get a pop-up menu, check the ‘as animation’ box and set frame disposal to one frame per layer.
Delay between frame is 1000/framerate of the gif you made
example : framerate = 10 fps; it will be 1000/10=100 milliseconds delay between each frame
hope you having fun create your own emotes <3
Done!!








Comment