
1. Introduction to Tone Compensation Layer
The tone compensation layer is a layer that performs color adjustment on the layers below the tone compensation layer.
It has the same effect as selecting [Tone Compensation] in the [Edit] menu.
[Layer] menu→[New Tone Compensation Layer], select the correction function you want to adjust. There are nine different effects of tone compensation layer function.
Although the tone compensation layer adds a correction effect to the layer below, you can also use a layer mask to apply the effect to a part.
In addition, if it is stored in the layer folder, the layer to which the effect is applied can be limited.
2. How is it different from tonal compensation in editing?
The biggest difference from the [Tone Compensation] command in the [Edit] menu is that the state of the "original" image can be retained.
Since the [Tone Compensation] of the [Edit] menu will change the original color of the image, for example, if you reduce the number of colors in [Tone Separation], it will be difficult to restore the original image.
However, in the case of the tone compensation layer, the layer is only set to non-display. When you want to restore it to the original state, you can simply cancel or re-adjust the compensation.
If you want to change to a variety of different tones on a single illustration, you can use [Color Tone Compensation Layer].
Double-click the function icon of the tone compensation layer to call up the adjustment panel to make adjustments.
(Organized from official teaching content)
Simply put, it is to turn the effect you want to apply into a layer. You don't have to test and compare the differences with the step-by-step response method in the past, but you can also adjust the effect to the desired look more accurately without affecting the original.
Three, use the layer folder to limit the application effect
Make good use of the actual case of the layer folder to apply the tone compensation layer to a specific layer-I want to change the color and brightness of the pink frame in the figure below to make the whole more coordinated.
In the folder of the character, add hue, chroma, lightness, brightness and contrast tonal compensation layers above the layer to be changed.
As shown in the figure above, the part to which the effect is applied is the part of the layer in the folder.
4. Nine functions of tone compensation layer
The following will introduce the options and functions of the tone compensation layer separately——
1. Brightness and contrast: brightness adjusts the overall brightness; contrast is to make the overall difference between brightness and darkness more obvious or more gray. The two complement each other.
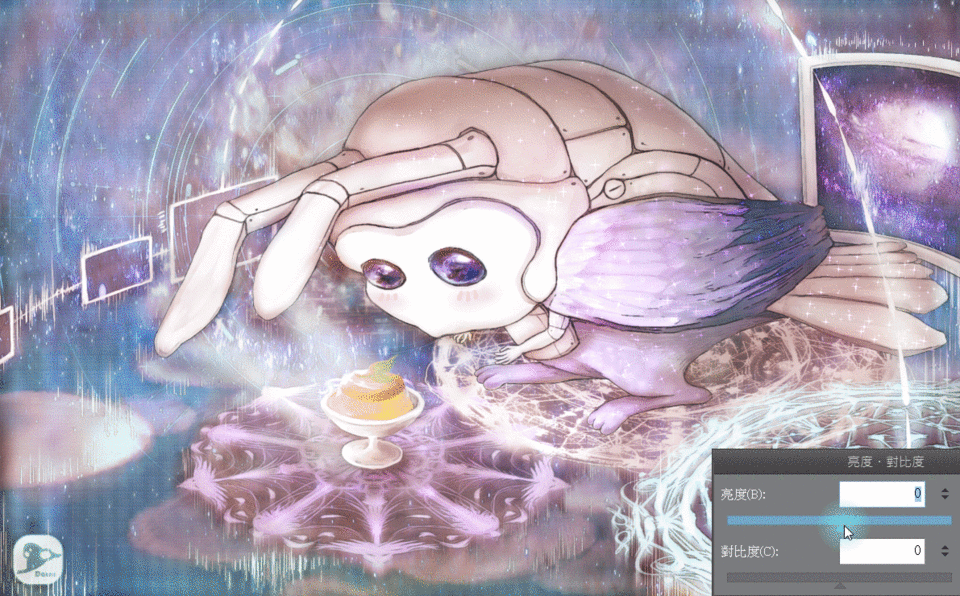
2. Hue, chroma, lightness: Hue adjusts the overall color in the order of the color and light ratio; chroma adjusts the vividness of the color; lightness is white or black-the difference from the brightness function is that the lightness does not match the light and dark colors of the layer itself. Like a layer of white or black with adjustable transparency.

3. Tone separation: like the poster filter of Photoshop; Illustrator's vector depiction, so that the overall color block, gradation, and the style is as vivid as comics and posters, the higher the color gradation, the closer to the original image; the less the color gradation, the more the color block And distinct.
4. Hue inversion: Turn all colors into opposite colors.
5. Color gradation: the width of the bright and dark parts can be adjusted, and the color distribution can be adjusted separately for the three primary colors (RGB) (close to the color balance).
6. Tone curve: Make more detailed light and dark adjustments for the bright, dark and mid-tone intervals. You can also adjust the color from the RGB color plate alone.
7. Color balance: you can easily adjust the color for light, dark and midtones.
8. Binarization: Change the image to only black and white, and adjust the threshold to change the black and white distribution area.
You can change the blending mode of this layer (color increment or similar effect) on the original to enhance the details of the dark parts and make it into a comic effect.
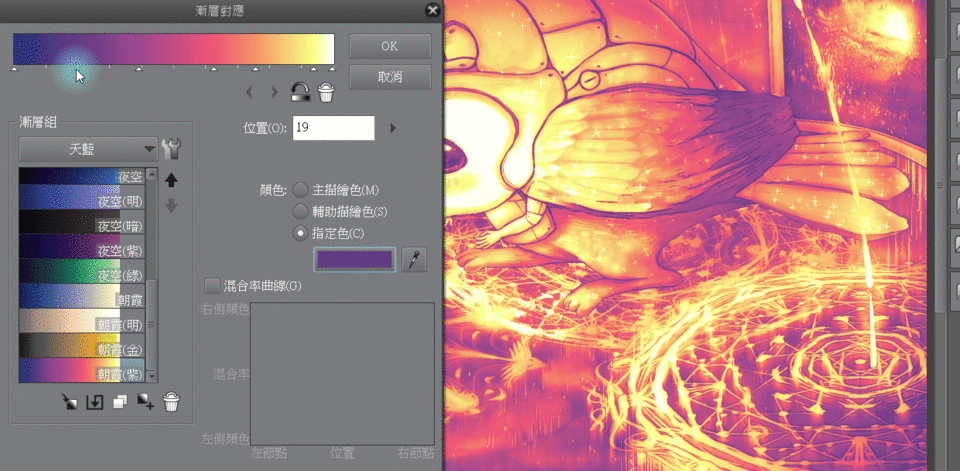
9. Gradient correspondence: change all colors from light to dark, and there are some built-in gradient colors for weather scenes to choose from. You can also change the color distribution in the gradient yourself.
Five, the use of layer mask
Next, give an example to illustrate the use of layer mask (mask)——
On the one hand, you can use the selection tool or eraser to remove the areas that you don't want to apply the effect on the mask, just like the mask. On the other hand, use the tone compensation layer to achieve the effect of lighting and shadow, or the effect of theme emphasis.
Take the gradient corresponding tone compensation layer as an example, after applying the gradient tone of a night.
Use a soft eraser to wipe out the areas to be polished.
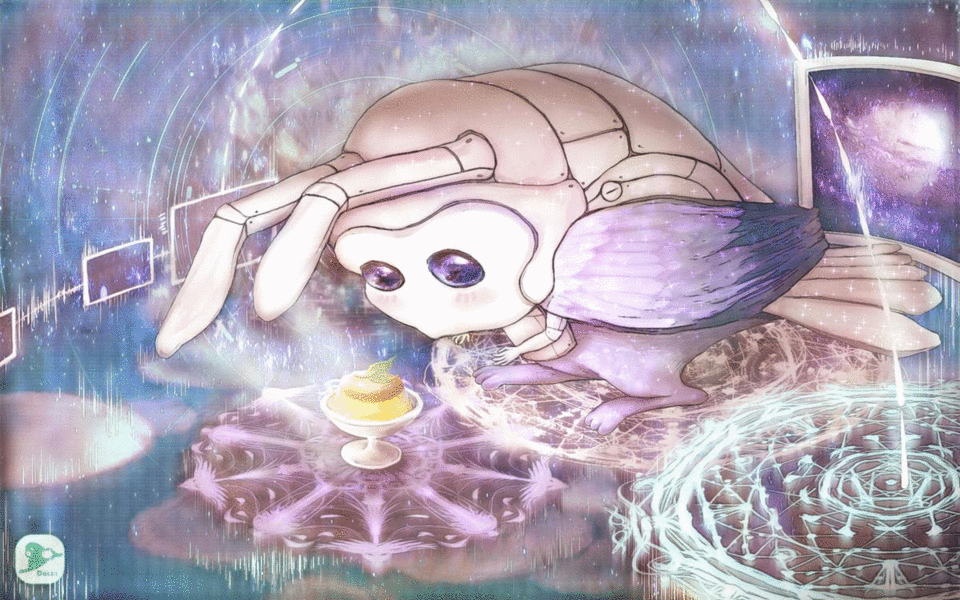
At this time, the tone compensation layer mask of the gradation looks like the white is the applied effect, and the black is the erased part without the effect.
In this way, the overall light is focused on the subject, presenting a different atmosphere.
Conversely, this method can also be used to draw shadows and give a three-dimensional effect. What's even better is that you can make adjustments after drawing, which is very convenient.
Thanks at the end and attach the complete video tutorial (Traditional Chinese)
Finally attached-the same complete related video teaching (additional layer mask shadow demonstration content)
Audiences who can read the introduction in the traditional Chinese can refer to it~(*´д`)~ ♥
Finally, thank you all for seeing here!
If you find it helpful ♥ ♥ ♥ ~please give a little like and love you~ ♥ ♥ ♥
(*´∀`)~ ♥
Users who liked this post


Comment