
(or: How to Not be Intimidated by Clip Studio Paint)
I recently came across a viral tweet that was joking about how Clip Studio Paint is confusing to use. Although I feel like the learning curve isn’t really any different than with other software, I do agree that starting out with a ton of buttons and menu options that you’re unfamiliar with can quickly make you feel overwhelmed.
Fortunately, Clip Studio Paint’s interface is highly customizable! This means we are able to strip the interface down to the essentials. By hiding features we might not need for now, it can be easier to parse things and reduce that overwhelming feeling. This tutorial will try to give you some general information on how to do that, and also how to slowly build the workspace back up in a way that supports your personal process for creating art.
Just to clarify before going in: My goal is NOT to explain what every single tool or menu option does, but to help you gain an understanding of how your workspace in Clip Studio Paint is set up, and how to customize it for your own needs.
If you'd like to watch a video version of this tutorial, you can find it here:
The Starting Point
This is the default Clip Studio Paint workspace. It’s what you’ll see when you first open the program.
Let’s go over the different types of windows and toolbars.
(A) This is the “Tool Bar”. It contains all the basic tools available to you. It can be moved and resized. You can only add or remove tools.
(B) Selecting one of the tools will open up a further selection of “Sub Tools”. Some of these can have multiple categories/groups. Compare the “Selection Area” and “Pen” tool for example.
(C) Selecting one of the sub tools will open up specific “Tool Properties”.
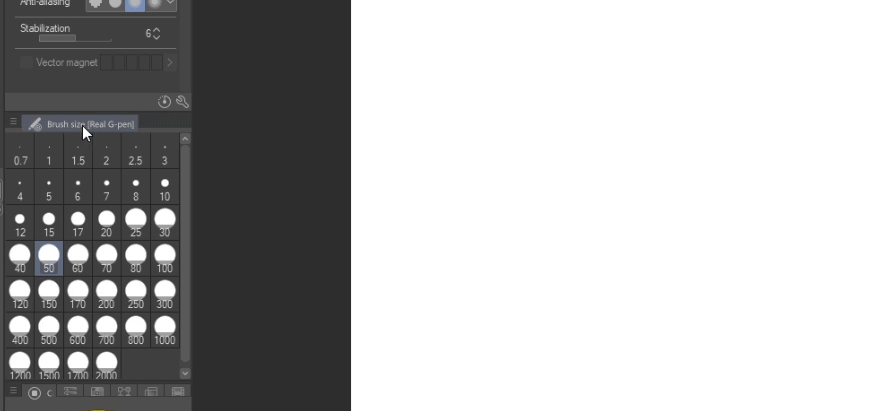
(D) Right below that, we have some “Brush size” presets available.
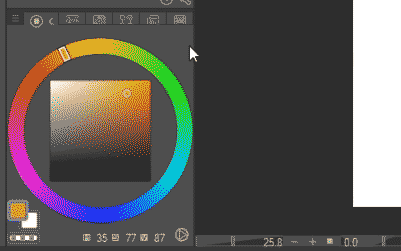
(E) Down here there’s a wealth of options related to color, all collected in multiple tabs within the same window.
(F) This is the “Command Bar”. It contains icons that are shortcuts to some of the most commonly used menu options. It can also contain shortcuts to specific tools or sub-tools. Unlike everything else here, this is the only window or bar that cannot be changed in position. It can only be hidden by going to “Window” and unchecking “Command Bar”.
(G) This thin strip of icons contains two different window types.
(G1) This is “Quick Access”. It’s essentially the same thing as the “Command Bar” with three key differences: One, you can have different sets available. Two, the name of each tool or shortcut is also displayed, not just the icon. Three, its position and size can be changed.
(G2) All of the icons below “Quick Access” are shortcuts to different materials that are available in Clip Studio Paint.
(H) On the top right, we have some informational tools, once again collected together in multiple tabs.
(I) Below it, we have “Layer Properties”, “Layers” and a variety of other options collected in tabs.
(J) Finally, at the very bottom, we have the “Animation timeline”, though you can only see the shortcut icon for it right now.
Collapsing and unfolding windows
Maybe in looking at all of these options, you’ve already noticed some that you might not need. For example, let’s imagine we’re only just trying to get used to Clip Studio Paint and familiarize ourselves with its tools. In this case, we might want to start by simply learning to draw in the program. We’re not gonna start with jumping straight into animation, which in itself is way more complex! So this is already one element that we might be able to remove!
Let’s look at the window in detail. As I’ve mentioned before, we only see the icon for the timeline right now. Let’s click on that to actually open the timeline and look at it. This is also how the “Quick Access” and “Material” shortcuts work.
Okay, yeah, this is just a whole new set of icons and options. We really don’t want to get into that right now. Did you notice the little arrow change when we clicked the shortcut icon?
You can click this arrow again to collapse the panel back to the shortcut icon. There is also a second icon that features two arrows. Let’s give it a try.
You will be able to see that this collapses the window entirely. No more shortcut icon. Not even any text hinting at what’s contained here. You’ll notice that these arrows exist all over the program - for every window. This way, you can quickly hide whole entire sets of icons and options and free up more of your actual canvas or workspace.
There is actually a shortcut that lets you hide all currently active windows. Just press Tab, or go to “Window > Hide All Palettes”. Simply press it again to bring them back up.
But we wanted to fully remove the “Animation Timeline” window. How do we do that? Let’s open it back up again. Notice the little menu bar icon.
These also are present all over the program. Click it, and you will find a variety of options (which is different for each window). The one we want is simply called “Hide timeline palette”.
And it’s gone. If we ever want the window back, we can go to “Window” and put a checkmark next to “Timeline” again.
Rearranging windows
Let’s look at an alternative way of how to remove a window. When selecting the pen tool, you might have noticed that the “Tool Property” window already displays a slider for selecting a brush size, as well as a field where you can input specific numbers. For this reason, I personally feel like the “Brush size” preset window is completely unnecessary. Let’s remove this window as an example.
Simply click and drag the tab and move it towards the middle of the program. You’ll notice the window turning red, which is a useful way that Clip Studio Paint helps you focus on the window you are currently rearranging.
Of course, you can use this technique not just to close windows, but also to rearrange them. For example, I like having the “Tool Property” window display as many options as possible without me having to scroll through them. So, what we could do to free up more room for it is to change the position of the window containing all the color options.
Currently, there are so many tabs in the color window that it’s practically impossible for me to actually grab the window itself, rather than a specific tab. So, let’s first extend the width of this panel, by simply placing my cursor above the outline, which changes the cursor to an arrow and then clicking and dragging the outline to widen the panel.
Now let’s grab the window like we did before. This time, let’s move it slowly and see what happens as we drag it towards the middle of the screen.
A large red line appeared. This shows that you would be able to create a new row or panel for the window you are currently dragging around. Let’s do that.
Voila! We moved the whole color window. Using the same methods as before, we can now also rearrange the tabs, hide ones we don’t need or pull certain tabs into their own windows so we can have multiple tabs visible at once.
In my case, I mostly work in comics. So it’s useful for me personally to have the “Color Set” window visible alongside the actual “Color Wheel”. I use the “Color Wheel” to select new colors, and I use the “Color Set” to pick specific, pre-defined colors for my characters.
Let’s also drag over the “Sub View” menu, which lets you load up different reference images. I often pick colors from existing comic pages, which this tool lets me do easily. So to me, it makes sense to have this window located below the color options. I’ll leave the “Navigator” tab available in the same window if I ever need it, but I’ll get rid of the “Information” and “Item Bank” tabs, since I don’t need them.
You can find out more about the “Color Set” and “Sub View” tools and how to use them in my other tutorial:
I’m further cleaning up the interface and making sure I have a lot of layers visible at once. This is because especially in creating comics, I end up with a lot of layers and I don’t want to constantly scroll to find the specific one I need to work with.
Rearranging tools and option shortcuts
We’ve now learned how to rearrange windows and tabs. We can do the same for tools and menu options in the “Tool Bar”, the “Command Bar” and the “Quick Access” windows.
The process works the same. You drag and drop icons representing the tools and shortcuts. However, to keep this from happening accidentally, the “Command Bar” and “Quick Access” windows by default have an option selected that requires you to first hold down Ctrl before you can drag and drop the icons. You can change this by right-clicking into any of these windows and selecting “Change Order” and then choosing “Drag” or “Ctrl and Drag”.
Similarly, you can delete a tool or shortcut by right-clicking it and choosing the “Delete” option.
For adding new tools or shortcuts, the process is slightly different between the “Tool Bar” and the “Command Bar” or ”Quick Access”.
For the “Tool Bar”, simply select the menu bar icon, and select “Add from default”. You now get a list of tools that you can add new ones from. You can also select a tool from the “Tool Bar”, and then drag a “Sub Tool” of this tool into the “Tool Bar”, if you so desire.
Keep in mind that if, for example, you drag a specific brush into the “Tool Bar” and want to later remove it from the “Tool Bar”, you cannot use “Delete” or it will actually delete this brush. If you want to only remove it from the “Tool Bar” and return it to its status as a “Sub Tool”, you will need to select the tool, drag the tab into the other Tool icon, and then drag it to one of the existing tabs (unless you want it to be its own tab, of course).
For the “Command Bar” or ”Quick Access” windows, simply right-click into either and select the respective settings option. This will open a window where you can now select all possible tools, as well as menu options and add them as shortcuts. You can also keep this menu open, and then click items in “Command Bar” or ”Quick Access” to now delete them, or even “Add Separators” to create subtle visual groupings.
There’s one more window that you can customize! But it’s actually hidden a bit. To find it, let’s use one of the “Selection” tools, like the “Lasso”. Make a selection. Now a new window will pop up below the selection. This works just like the “Command Bar” and “Quick Access” windows. I recommend leaving this the way it is, as it’s already geared to offer some of the most relevant options when using selection tools, but it’s still nice to know that you have the option of customizing things if you need to!
Saving and downloading workspaces
Once you have your workspace set up in a way that works for you, it’s a good idea to save it! Whether you’ll accidentally change things, or maybe want to set up different workspaces for different uses, it’s always great being able to return to something that already worked easily.
To do so, go to “Window > Workspace > Register Workspace“. Then simply put in a name and you will be able to go to the same menu to select this workspace in the future.
You might have noticed the option to “Register Workspace as material…” This is relevant if you want to share your workspace layout with other people through the Clip Studio Assets platform.
Likewise, this also means that you can browse that platform to look for existing workspaces! Simply go to the same menu and select “Search for Workspace materials”. It will open up Clip Studio. Make sure to log in to your account. Now you can search for specific keywords or maybe even the most popular workspaces. There’s a lot on offer - some workspaces are geared towards left-handed users, some are geared towards specific tasks or devices, and some even mimic layouts found in other software like Photoshop or SAI.
To apply a downloaded workspace, go to “Window > Material > Material [Material]”. This will open up a window with your recent Asset downloads under that specific category. Now drag this workspace into your Clip Studio Paint window to apply it. You will now also find it listed under “Window > Workspace”, just like your own presets.
Learning the program at your own pace
When you saw me rearranging the default workspace earlier, you might have been able to tell that I did so while keeping my work process in mind. Obviously, if you’re just starting out with Clip Studio Paint or digital art in general, you might not know what exactly your work process looks like yet!
In that case, I would recommend to still simplify everything at the start. Download a Workspace Asset geared towards beginners or manually remove everything from the default Workspace that you don’t need. If you don’t know what a certain tool is or what it does, you can either research it by looking for relevant tutorials on the Clip Studio Tips website (you are already here!) or even just name searching that tool in the online Clip Studio Manuals:
It’s perfectly viable to just work your way up in complexity slowly!
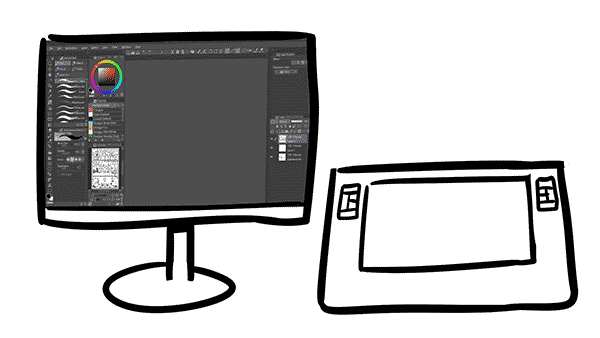
Optimizing your workspace for specific devices
Before ending this tutorial, I want to offer a few more small tips and tricks that can help you with optimizing your workflow in regards to specific devices.
I mostly work on my desktop computer with my Cintiq. But sometimes, I also use my Surface Pro 2. My window layouts are different on each one.
Since the Surface Pro 2 has a smaller screen than my Cintiq, I tried to focus on creating a workspace that does not clutter up my canvas too much. I often collapse entire panels while drawing, and only open them temporarily.
In addition to that, I’ve also set up specific Pen Shortcuts with Wacom’s Radial Menu option. To set this up, simply go to your “Tablet settings” in Windows. Select the tool “Pen”, and set one of your pen buttons to open the “Radial Menu”.
To customize that menu, go to the tool “Functions” and select the “Radial Menu”.
You can now set up specific functions. Personally, I mostly utilize the “key stroke” option. Here, I can input specific keys. So, for example, I might input Ctrl+Z and Ctrl+Y to undo and redo things. Or, I might input the shortcut keys I have applied in Clip Studio Paint to frequently used tools like the Brush or the Eraser.
Keep in mind that the appearance of these menus might vary based on your specific device or driver. If things end up being too different to this tutorial, simply googling “Radial menu + [your device]” should bring up useful information.
One final tip that’s not about customizing things, but is still related to the topic of workspaces as an integral part of my workflow: Did you know that on Microsoft Windows, you can quickly move windows between different screens by holding down the “Windows” key and pressing the arrow keys?
I tend to draw on my Cintiq, but I color my drawings on my normal monitor, using a Bamboo tablet. The reason for that is because the monitor’s colors are more accurate than those of my old Cintiq. So, I frequently have to switch Clip Studio Paint between the two screens. Instead of dragging it from one screen to another, the aforementioned shortcut helps. If I want to move Clip Studio Paint from my main monitor to the Cintiq, I press “Windows” + “Arrow Right” (if your monitors are arranged differently, this might be a different arrow key). At first, this only resizes the window to fit the right half of the current screen. But if I press it two more times, it now moves the window to my other screen. It’s still only covering up half the screen though. So now, I press “Windows” + “Arrow Up” twice. This maximizes the window to fill out the screen.
Thank You!
That’s it! I hope this tutorial was helpful and showed you some of the ways you can ease your way into Clip Studio Paint by rearranging the windows, tools and options. If you have any questions, feel free to leave them in the comments!
Users who liked this post


Comment