

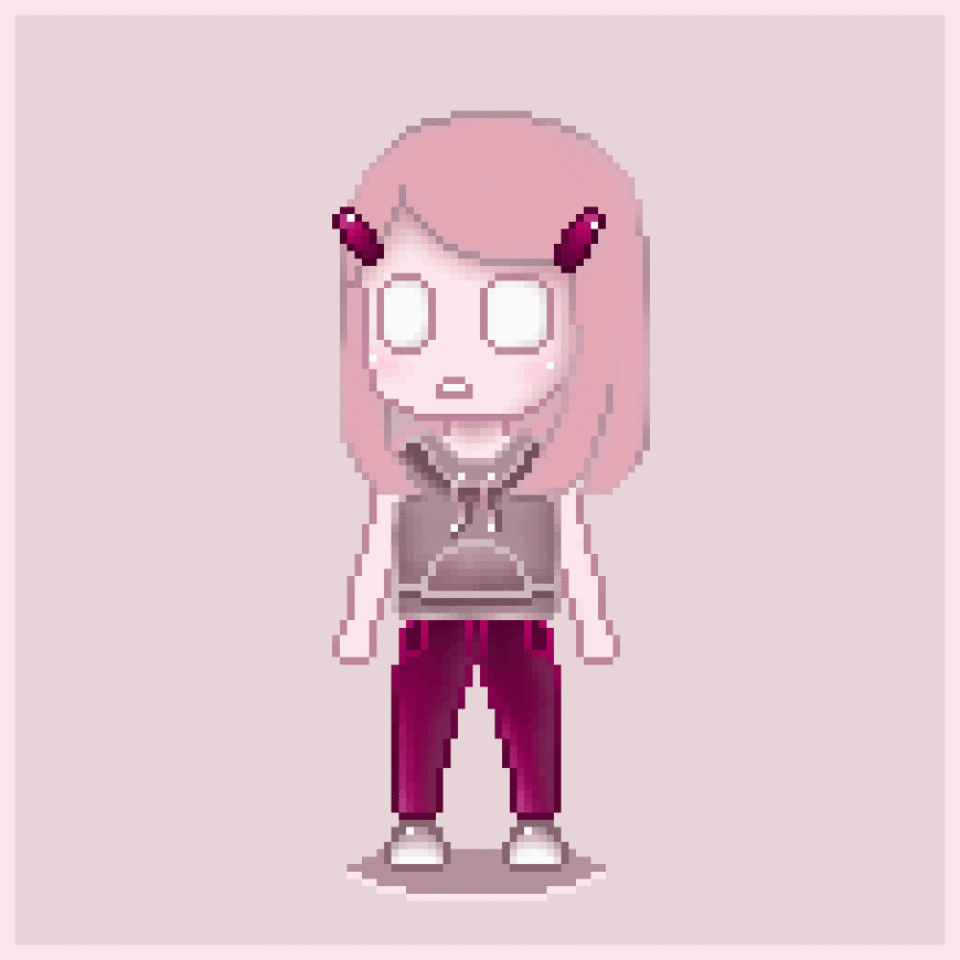
Hello, I will show you via this little tutorial how to draw a Chibi in pixel and animate it in a loop with clip studio paint.
Draw the Chibi character
First of all open a new page with the following settings.
The brush I will use is the software point pen, it is already configured to draw in pixels.
I then delimit a frame of 130 pixels by 130 pixels in which I will place my character. I purposely have a little margin, to do tests, to put my color palettes etc, I would decrease the final size of the frame at the time of the export.
Then on another layer I will color my background, so as not to leave it white.
In general, to draw a Chibi character you need the body size to be twice the size of the head, but this is not a strict rule, everyone can do as they want as long as the character remains cute.
For my part, my character will be about 2 heads and 2 thirds.
On different layers, I draw the lines of the head, body, sweatshirt, pants, hair and shoes. I separate all the parts of the drawing well to make it easier for me in case of changes.
Then on new separate layers, I add my first colors for each of the parts.
I then add the eyes on a new layer, the mouth on the head layer, then the bars on a new layer.
I add a little more details and nuances to the colorization, then a shadow at the level of my character's feet on a new layer.
The Chibi character is finished !!
Loop your illustration
Since my character is finished, I am going to remove the margins I made by changing the canvas size from 200px / 200px to 130px / 130px. Go to "Edit" => "Change the size of the canvas".
To Animate the character, I'll start by merging the lines and color layers of the head, hair and barrettes together, then the layers of the lines and colors of the sweatshirt, pants, shoes and body together. .
Normally there should be 4 main layers:
-the head
-the eyes
-the shade on the ground
-the body
I will then create a new animation timeline. Just click on this icon.
I set up my timeline in this way.
NB: These parameters are easily subject to modification if necessary, it is not worth spending too much time on them.
I will first animate the eyes of the character. I create a new animation folder.
Then I decompose in this way on 5 different layers the stages of the blinking of the eyes.
Eyes 0 representing the open until Eyes 4 where the eyes are completely closed. All 5 layers must be in the animation folder.
You then have to link the different animation cells on the timeline using this icon.
NB: When we do pixel art animation and play its animation, it is blurry. Don't panic, it's normal because the resolution is too low to have a clear image. You just need to change the resolution of the image (and at best to export the animation) to get a preview.
Once the eye animation is ready, I'll turn my character's head. Nothing could be simpler, just create a new animation folder, copy / paste the head once ...
... to add it to the timeline, here in frame 24.
I will then select head # 2, with the scrolling text tool.
Then flip it horizontally.
It will be a little too far to the right, no problem, just reposition it correctly.
The eyes are no longer in their places! It's normal! To align them correctly, you must first duplicate the eye animation folder.
On the timeline, we therefore have the same animation twice.
Shift the copy to the right. You just have to grab the frame and slide it.
It is then necessary to ensure that the 2 animations do not overlap by reducing the size of the animation frames.
In the eyes animation copy folder, select all layers as in the image.
Then select the eyes, then flip horizontally as for the head.
They will be slightly shifted to the right, just reposition them with this tool.
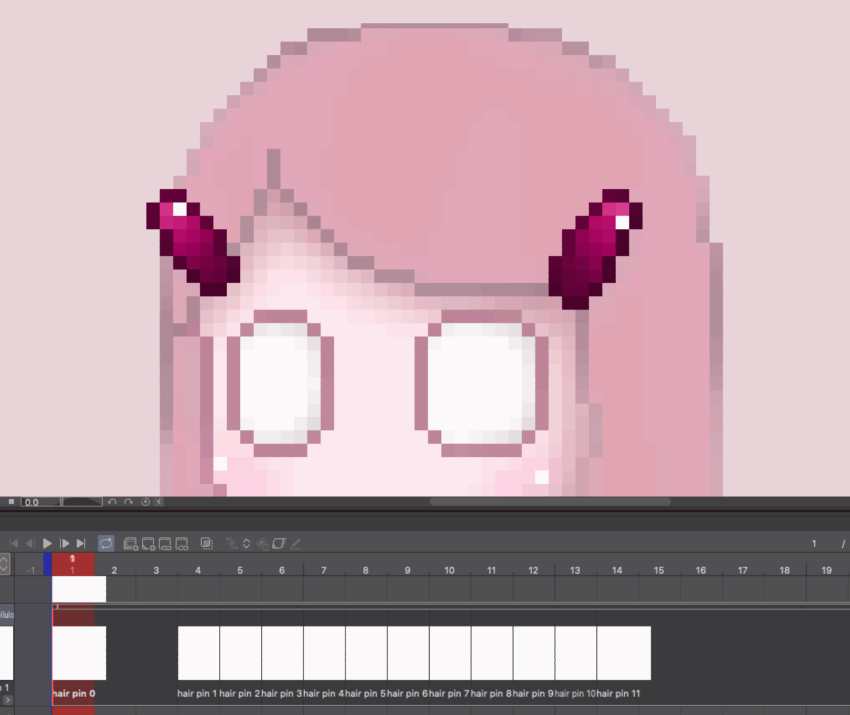
Finally, I am going to animate a shine effect on the hair barrettes. I am creating a 3rd animation file.
I add 11 layers to the total by coloring the bars little by little in white, like this:
Export pixel animation to GIF
I check my animations one last time by correcting their timings to finally choose to make a 5 second loop.
Then in "Edit" I click on "Change the resolution of the image".
Starting resolution:
I go to 2000 px in height and width.
I then go to "File" => "Export animation" => "Animated GIF".
I change the width and height to 1000 px, I check that my animation is in unlimited loop then I click on OK.
The animated chibi is done!
Users who liked this post


Comment