
Introduction
Introduce the CLIP official release and built-in brushes, and the method of drawing watercolor style,
If there is something incomprehensible about the pre-settings and brush demonstration, please refer to the video above (・∀・)
Prefix setting
The front setting is divided into two parts, the brush setting and the paper texture setting.
Two brushes will be used this time.
One is the built-in light ink, and the other is the official oil crayon (オイルパステル)
Those who do not have these two brushes can download from the link below.
1. Oil crayon (オイルパステル)
https://assets.clip-studio.com/zh-tw/detail?id=1702961
2. Light ink
https://assets.clip-studio.com/zh-tw/detail?id=1842037
As for the brush part, it’s ok if you have these two (・∀・)
Brush settings
Next, you need to slightly change the settings of the oil crayon (オイルパステル)
The way to change is difficult to understand just by looking at the text (the name is too complicated),
It is recommended to directly refer to the 00:05-00:40 part of the movie, just follow the operation.
Paper application method: subtract> normal
Set the parameters to change according to the pen pressure and speed of the drawing board>Brush size affects the source setting
Input that affects brush size
Pen pressure> minimum value 0
Tilt>Minimum 100, Maximum 1000
(This function allows the brush to have obvious thickness changes according to the strength) (・∀・)
Turn on watercolor border
Adjust the value of brightness influence/transparency influence
(This feature allows the brush to have watercolor edges)
The brush setting is now complete, and then the paper texture setting.
Paper texture settings
For the production and setting of paper texture, please refer to the part of 00:44-01:41 in the video.
First create a new layer, use the paint bucket tool, and fill the canvas directly with black.
Filter>Draw>Berlin Noise
Zoom ratio>3.5
Next, change the blending mode to overwrite
In this way, the painting will have the texture of paper
Demonstration of brush use
After the setting is complete, then demonstrate how to use the brush to draw the effect of the apple candy on the left.
(Canvas size A4 4093x2894px, 350dpi)
There may still be some unclear parts just by using text descriptions and screenshots.
If you want to know more specific operations, you can refer to 01:44-09:54 of the movie
In principle, it is always overlapping and blending. When drawing, it can be painted as thick paint in watercolor style.
In fact, only two brushes are used, so the operation should not be too complicated.
First, paint the base color with the modified oil crayon (オイルパステル)
Since the brush settings have been adjusted, you can paint along the edges without painting,
It simulates the effect of a sharp-pointed watercolor pen in the feel, and it is very convenient to draw details and color large areas.
This is the effect after randomly applying a layer of base color,
Since the body is an oil paint brush, it can create natural color shades.
When the edge is too thick or obvious, use light ink to blur the color to simulate the effect of watercolor blur.
When you want to add white highlights, just open a new layer, use a crayon (オイルパステル) to select white and paint directly on it.
When drawing, as long as you draw on different layers, you can draw the background and the subject separately without affecting the colors of each other.
When there are too many layers, it is more convenient to deal with as long as they are combined.
The three pictures below are
No coverage/60% coverage/100% coverage
You can compare, adjust the degree of coverage according to the needs of the screen, and try out the effects you like.
*Supplementary note: Use <Cut with the next layer layer> to apply the desired color to the line draft, which is very convenient when you want to change the color of the line.
Drawing process
The brush instructions are here first, and then use a more complicated figure with a foreground and a background to demonstrate.
When recording, the built-in time-lapse photography was used.
Draft>Line Draft
The purpose of the draft is mainly to determine the concept, as well as the lighting and color matching after the establishment.
Sometimes when you are not sure about the painting method of light and shadow, you can first convert the layer to grayscale to test the effect.
For the line draft, I directly reduced the size of the brush of the oil crayon (オイルパステル). I personally think the effect is quite good.
Of course, you can also choose your favorite or favorite brush.
Differentiate the layers
Some people may divide the layers very finely (hair/tops/skirts/skin/eyes, etc.). I personally follow the principle of easy handling (easy operation). This picture is in watercolor style, so I tend to be simple. Of course, I think it’s okay to paint on the same layer. After all, it depends on personal habits.
Because watercolors usually start with light colors, in order to facilitate the processing, I only divide the part of the figure into the bottom of the figure + hair.
The rest are the background color of the ginkgo in the foreground and the background, and the plants on the hand.
Layering is helpful for the convenience of subsequent coloring. In this way, when using <Crop with the next layer>, you can paint on the selected shape.
Coloring
The coloring part is mainly layer-by-layer and blending. Strictly speaking, there is no special skill.
Since it is a computer drawing, it is OK to modify it repeatedly during the process.
(Those who are interested can refer to the part of the movie 09:58-10:58,
You can see that the process of my painting has been changed, very unprofessional)
As usual, when drawing, you can use <Crop with the next layer> to paint in the desired range.
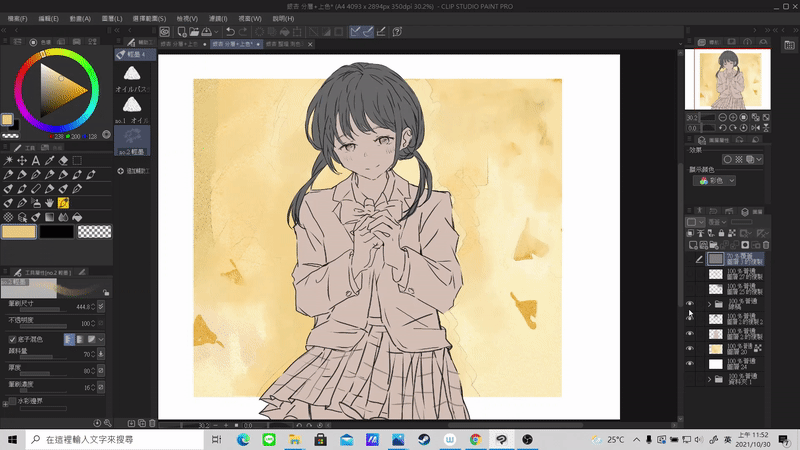
(When the picture below is colored, the paper texture coverage is 70%)
When coloring, create a new layer and use it as a watercolor, paint slowly from light to dark, and slowly add light and shadow after painting the background color.
The follow-up is the addition and modification of details. Since it is a computer drawing, you can create new layers at will, and add colors to the places you want to modify.
Finishing effect
The above picture is the effect of not covering the texture, you can compare it,
The effect of not covering the paper texture will resemble an oil painting with watercolor edges.
add
Finally, add a built-in function of CLIP
<Adjust pen pressure detection level>
Taking into account the differences in the skill of each person, the same brush may have different effects.
This function can change the overall settings of the brush, so that the pressure sensitivity of all brushes is more in line with the user’s brushstroke ability.
On the whole, it should be able to make the brush more convenient and more in line with the usage habits. You can try it.
Since the official instructions are already very detailed, I won't give more explanations here.
Detailed function description can refer to the following
https://tips.clip-studio.com/zh-tw/articles/514
Thank you for watching (・∀・), I hope this is a useful TIP. See you if you have a chance.
Users who liked this post


Comment