
foreword
Hi, my name is Khunix.
Today I will share with you what layer blending modes are and how to use them.
I have also compiled a comparison table of different languages for the blending mode, and the corresponding display text and video explanation will be displayed when I switch to the Photoshop blending mode with Clip Studio Paint. Welcome to the end~
As of Clip Studio Paint version 1.11.6, there are a total of 28 blending modes.
The effect of a blend mode layer affects the layers below it.
Normal
The initial state of the new layer is normal mode with 100% transparency
The new layer will overlap the color of the layer below and the layer in the setting.
Layer Mode Classification 1: Increase Darkness
Suitable for tinting in shadows.
Paint white on this blend mode layer:
Effect: none
Darken darken
Compare the color of the layer below and the layer in the settings, show the darker color and mix it.
Multiply Color Value Added
The color of the layer below and the layer in the setting are overlapped and increased, and after mixing, it will become a darker color than the original. Usually used for shadow tinting.
Color Burn darkens the color
After darkening the color of the lower layer and enhancing the contrast, it is mixed with the color of the layer in the settings.
Liner Burn Linear Burn
After darkening the color of the layer below, blend it with the color of the layer in the settings. The resulting effect is darker than Darken, but less saturated.
Darken Color darken color
Compare the brightness of the current layer and the layers below, and show relatively low brightness colors.
Use the "Multiply" blending mode to shade the skin:
Layer mode classification 2: Increase highlights
Ideal for tinting highlights.
Paint black on this blend mode layer:
Effect: none
lighten
Compares the color of the layer below and the layer in the settings, and displays the brighter color.
Screen filter
Multiply the reciprocal color of the layer below and the layer in the setting, and after mixing, it will become a brighter color than the original
Color Dodge highlight color
Brighten the image color of the lower layer and reduce the contrast. The contrast of the colors will be reduced.
Glow Dodge highlight color (glow)
The effect is stronger than [Highlight Color].
Add
Adds the colors of the layer below and the layer in the settings. When digitally added, it becomes a brighter color. Usually used for highlighting.
Add(Glow) Add (glow)
The effect is stronger than [Addition].
Lighter Color
Compare the brightness of the current layer and the layers below, and display relatively high-brightness colors. Opposite of the effect of color darkening mode.
Use the "Screen" blending mode to give the skin a rosy effect:
Use the "Glow Dodge" blending mode to paint the bright side of the face:
Use the "Add(Glow)" blending mode to paint the highlights of the hair:
Layer Mode Classification 3: Increase Contrast
It is suitable for enhancing the light and dark relationship of the picture.
Paint gray on such blend mode layers:
Effects: None (except Solid Overprint Blend)
overlay
The brighter part will be applied with the [Filter] effect, and the darker part will be applied with the [Color enhancement] effect. After blending, the bright parts will become brighter and the dark parts will become darker.
Soft Light
The results vary depending on the density of the overlapping colors. Lighter colors are superimposed to lighten like [Highlight Color], and darker colors are superimposed to darken like [Dark Color].
If the underlying layer has no color, it will appear white
Hard Light
The result will vary depending on the density of the overlapping colors. Lighter colors are superimposed to lighten like [Screen Color], and darker colors are superimposed to darken like [Color Enhancement].
Vivid Light
Contrast is enhanced for blending, brightening the highlights and darkening the shadows.
Linear Light Linear light
The result adjusts the highlights of the underlying layers according to the grayscale of the overlapping colors. The color of the linear light layer is less likely to mix with the color of the underlying layer than the strong light
Pin Light
The result replaces the color of the underlying layer with the grayscale of the overlapping color. Ideal for adding special effects to images
Hard Mix Solid Overprint Mix
Add the RGB values of this layer to the layers below. This mode will change all pixels to primary RGB (red, green, blue, white or black)
Use the "Vivid Light" blend mode to brighten the hair:
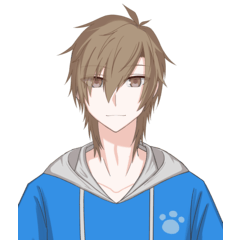
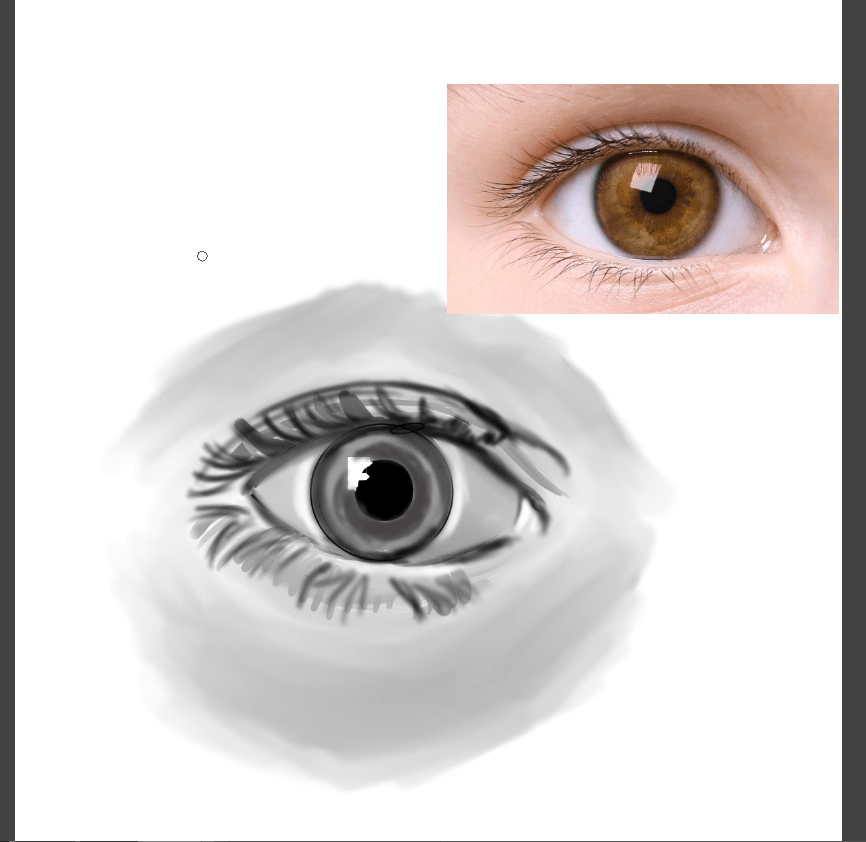
Color the eyes using the Linear Light blending mode:
Layer Mode Classification 4: Color Adjustment
Suitable for adjusting the color of the picture.
Hue
Adjust the hue, and preserve the lightness and chroma of the following layers
Saturation
Adjust the saturation, and keep the lightness and hue of the following layers.
Color
Replace the color, and keep the brightness of the following layers.
Brightness
Increase the brightness and preserve the hue and saturation of the following layers
Modify the hair color using the Hue blending mode:
Use the "Saturation" blending mode to increase the saturation of the hair color:
Use the "Color" blending mode to modify the hair color:
Layer Mode Classification 5: Negative Film Effect
Subtract
Mix the color of the layer below minus the color of the layer in the settings. When blended, it becomes a darker color than it originally was.
Paint white on this blend mode layer | Effect: None
difference
Subtracts the color of the layer in the setting from the layer below, and blends the absolute value of the difference with the painted color.
Paint black on this blend mode layer | Effect: None
Exclusion
This blending mode is less contrasty than the differentiated mode. The closer the white layer is, the more obvious the difference color will be displayed, and the closer the black layer is, the less obvious the difference color will be.
Paint black on this blend mode layer | Effect: None
Divide by
Divide each RGB value of the following layers by the brightness of the set layer
Finish the coloring with the layer blend mode trick:
Layer Blend Modes - Language Comparison Table
The 28 layer blending modes are written here~
For a more detailed explanation and how to use the blend mode technique to color characters watch the video:
video link
Thank you for taking the time to read, and I hope this video helps you~
If you like my work, welcome to find me on various social platforms~
My id is Khunix See you next time!
Users who liked this post


Comment